background image

Trying the Camera Out

19

X

Black bars displayed on the top and bottom 
edges of the screen indicate image areas not 
recorded.

X

Frames displayed around any faces that are 
detected indicate that they are in focus.

z

Once recording begins, you can take your 
finger off the movie button.

Finish shooting.

z

Press the movie button again to stop 
shooting. The camera beeps twice as 
recording stops.

X

Recording will stop automatically when the 
memory card becomes full.

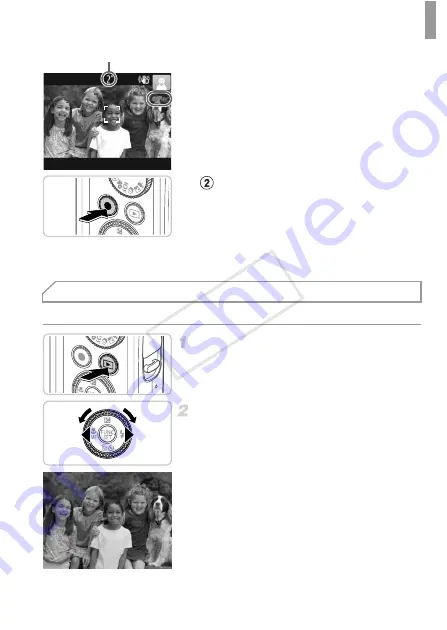
After shooting images or movies, you can view them on the screen as follows.

Enter Playback mode.

z

Press the 

1

 button.

X

Your last shot is displayed.

Browse through your images.

z

To view the previous image, press the 

q


button or turn the 

5

 dial counterclockwise. 

To view the next image, press the 

r

 button or 

turn the 

5

 dial clockwise.

z

Press and hold the 

qr

 buttons to browse 

through images quickly. Images appear 
grainy at this time.

Elapsed Time

Viewing

COP

Y

Содержание PowerShot SX260 HS

Страница 1: ...his guide including the safety precautions This guide will familiarize you with how to use the camera correctly Keep the guide handy for future reference Please refer to the complete user guide includ...

Страница 2: ...ardless of capacity SD memory cards SDHC memory cards SDXC memory cards Eye Fi cards Conforms to SD specifications However not all memory cards have been verified to work with the camera Package Conte...

Страница 3: ...ng that infringes on copyright law and note that even for personal use photography may contravene copyright or other legal rights at some performances or exhibitions or in some commercial settings The...

Страница 4: ...Important information you should know Notes and tips for expert camera use p xx Pages with related information in this example xx represents a page number Instructions in this guide apply to the came...

Страница 5: ...by icons o Up button on back q Left button on back r Right button on back p Down button on back 5 Control dial on back m FUNC SET button on back Screen LCD monitor Mode dial AV OUT Audio video output...

Страница 6: ...meter 39 inches away from infants when using the flash Store this equipment out of the reach of children and infants Strap Putting the strap around a child s neck could result in asphyxiation Use only...

Страница 7: ...era in places where use of electronic devices is restricted such as inside airplanes and medical facilities Do not play the supplied CD ROM s in any CD player that does not support data CD ROMs It is...

Страница 8: ...use a cotton swab to remove dirt dust or other foreign matter from the flash to prevent heat build up and damage to the unit Remove and store the battery when you are not using the camera If the batte...

Страница 9: ...tions 9 When putting the camera in your bag ensure that hard objects do not come into contact with the screen Do not attach any hard objects to the camera Doing so may cause malfunctions or damage the...

Страница 10: ...amera securely to prevent it from moving If the flash is up do not rest your fingers on it Before use charge the battery with the included charger Be sure to charge the battery initially because the c...

Страница 11: ...ther device you should format the memory card with this camera see Camera User Guide Check the card s write protect tab z Recording is not possible on memory cards with a write protect tab when the ta...

Страница 12: ...locked into the correct position Always confirm that the battery is facing the right way and locks when inserted Insert the memory card z Insert the memory card facing as shown until it clicks into t...

Страница 13: ...the date and time is displayed the first time you turn the camera on Be sure to specify the date and time which is the basis for dates and times added to your images Turn the camera on z Press the po...

Страница 14: ...splayed z To turn off the camera press the power button Adjust the date and time as follows Access the camera menu z Press the n button Unless you set the date time and local time zone the Date Time s...

Страница 15: ...3 weeks by the camera s built in date time battery backup battery after the battery pack is removed The date time battery will be charged in about 4 hours once you insert a charged battery or connect...

Страница 16: ...urn the 5 dial to choose a language and then press the m button X Once the display language has been set the setting screen is no longer displayed Display Language A clock icon is displayed if you wai...

Страница 17: ...he mode dial to A z Aim the camera at the subject As the camera determines the scene it will make a slight clicking noise X Icons representing the scene and image stabilization mode are displayed in t...

Страница 18: ...ll the way down X As the camera shoots a shutter sound is played and in low light conditions the flash fires automatically z Keep the camera still until the shutter sound ends X Your shot remains disp...

Страница 19: ...beeps twice as recording stops X Recording will stop automatically when the memory card becomes full After shooting images or movies you can view them on the screen as follows Enter Playback mode z P...

Страница 20: ...3 Play movies z Press the m button choose either press the op buttons or turn the 5 dial and then press the m button again X Playback now begins and after the movie is finished is displayed z To adjus...

Страница 21: ...o the following things on your computer ImageBrowser EX z Import images and change camera settings z Manage images view search and organize z Print and edit images z Update to the latest software vers...

Страница 22: ...ImageBrowser EX Help function Depending on the country or region where you purchased your camera the ImageBrowser EX User Guide may not be accessible from the Help function In such cases it will eithe...

Страница 23: ...ouble click the desktop disc icon to open it and then double click the icon displayed Begin the installation z Click Easy Installation and follow the on screen instructions to complete the installatio...

Страница 24: ...B port For details about USB connections on the computer refer to the computer user manual Install the files z Turn the camera on and follow the on screen instructions to complete the installation pro...

Страница 25: ...k the link to modify the program When not connected to the Internet there are the following limitations The screen in step 3 will not be displayed Some functions may not be installed The first time yo...

Страница 26: ...ort Images from Camera and then click Import Untransferred Images X Images are now saved to the Pictures folder on the computer in separate folders named by date z After images are saved close CameraW...

Страница 27: ...ges to a computer simply by connecting your camera to the computer without using the included software the following limitations apply It may take a few minutes after you connect the camera to the com...

Страница 28: ...indows Macintosh Computer Interface Cable IFC 400PCU 1 Wrist Strap WS DC11 DIGITAL CAMERA Solution Disk Battery Pack NB 6L 1 with terminal cover HDMI Cable HTC 100 Battery Charger CB 2LY CB 2LYE 1 Pow...

Страница 29: ...accidents such as fire etc caused by the malfunction of non genuine Canon accessories e g a leakage and or explosion of a battery pack Please note that this warranty does not apply to repairs arising...

Страница 30: ...461 000 pixels File Formats Design rule for Camera File system DPOF version 1 1 compliant Data Types Still Images Exif 2 3 JPEG Movies MOV H 264 video data Linear PCM stereo audio data GPS Log File NM...

Страница 31: ...ording will automatically stop when the file size of an individual clip being recorded reaches 4 GB or when the recording time reaches approximately 29 minutes and 59 seconds for or movies or approxim...

Страница 32: ...5 cm 2 0 in infinity 1 m 3 3 ft infinity Continuous Shooting Speed Shooting Mode Continuous Shooting Mode Speed Approx 10 3 shots sec G W Approx 2 4 shots sec Approx 0 8 shots sec Approx 0 9 shots sec...

Страница 33: ...x 300 Operating Temperature 0 40 C 32 104 F Dimensions 34 4 x 41 8 x 6 9 mm 1 35 x 1 65 x 0 27 in Weight Approx 21 g approx 0 74 oz Battery Charger CB 2LY CB 2LYE Rated Input 100 240 V AC 50 60 Hz 0 0...

Страница 34: ...harmful interference to radio communications However there is no guarantee that interference will not occur in a particular installation If this equipment does cause harmful interference to radio or t...

Страница 35: ...rence that may cause undesired operation of the device Battery Charger CB 2LY IMPORTANT SAFETY INSTRUCTIONS SAVE THESE INSTRUCTIONS DANGER TO REDUCE THE RISK OF FIRE OR ELECTRIC SHOCK CAREFULLY FOLLOW...

Страница 36: ...liant video that was encoded only 1 for a personal and non commercial purpose or 2 by a video provider licensed under the AT T patents to provide MPEG 4 compliant video No license is granted or implie...

Отзывы: