background image

2 2

Once the camera is attached to the compu-
ter, follow the procedures below to load
images and save them to the computer.

1) Turn the computer on.

2) Start your TWAIN-compliant application

program.

3) Turn the camera’s Mode Dial

to the PC position.

4) Select [Canon PowerShot] from your

application’s input device selection menu.

5) Start the TWAIN Driver from within your

application.

6) Use the TWAIN Driver to load the images

from the camera.

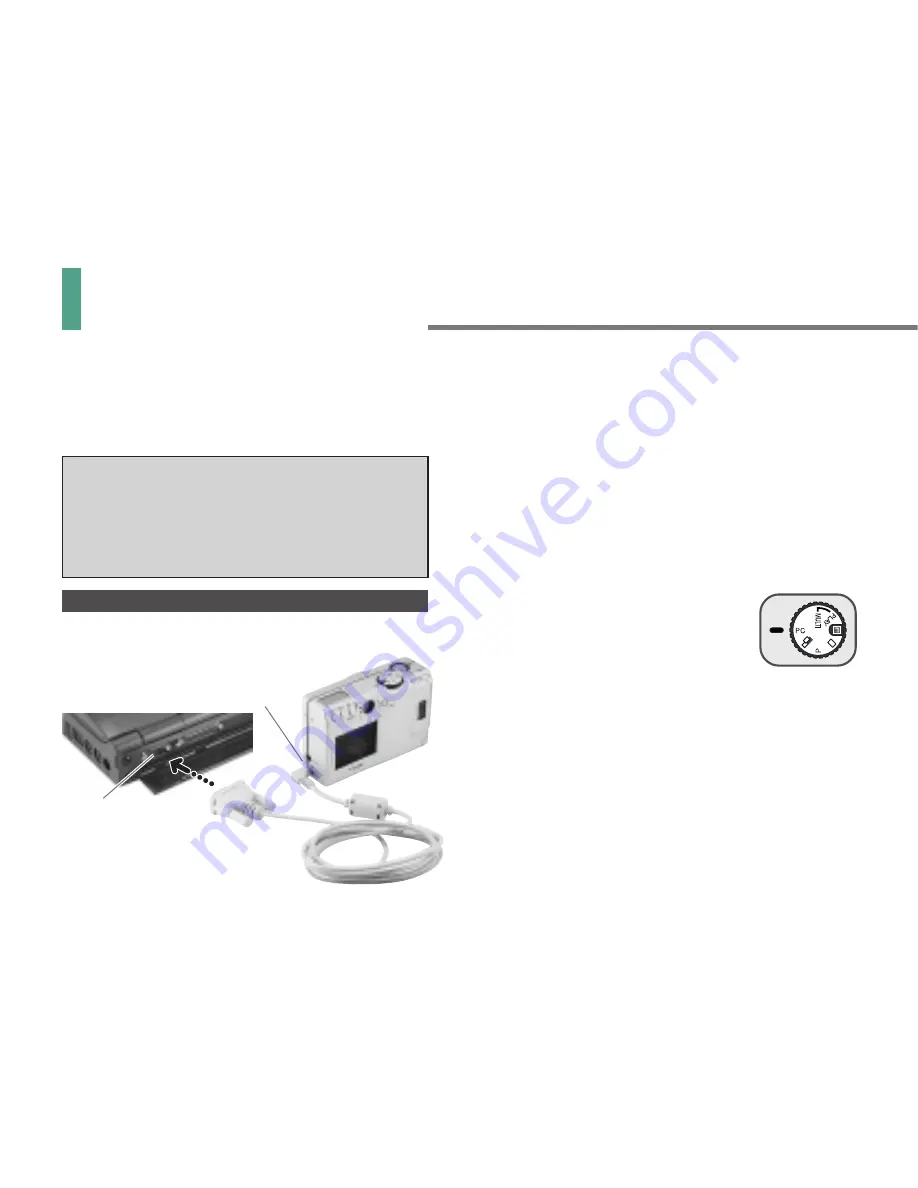
2.  Connecting to a Computer and Retrieving Images

PC Interface Cable

Serial Port

Follow the procedures below to retrieve
camera images.

• Before you connect the camera to a

computer, always off the computer
and turn the camera’s Mode Dial to
the L (Lock) position.

• Windows •

Connect the camera to the PC’s serial port
with the PC interface cable.

DIGITAL Terminal

Retrieving Images continued... 4/8

Содержание PowerShot A5

Страница 1: ...Please read this guide before using of the PowerShot A5 You will find instructions on how to use basic camera functions...

Страница 2: ...ced transmit ted transcribed stored in a retrieval system or translated into any language in any form by any means without prior written permission of Canon Inc Canon Inc makes no warranties for damag...

Страница 3: ...Adapter CA PS100E AC Power Cord DC Coupler DR 100 Battery Pack NB 5H Battery Case Button sized CR2016 Lithium Battery fitted CompactFlashTM Card PowerShot Solution CD ROM PowerShot Solution Users Manu...

Страница 4: ...CA PS100E and plug it into a wall socket Battery Pack NB 5H Compact Power Adapter CA PS100E Charging Indicator To AC Power Outlet While charging the indicator on the charger will flash green Once the...

Страница 5: ...nto the camera 3 Install Battery Pack NB 5H into the battery chamber with the terminals oriented in the direction shown below 4 Close the battery cover and slide the battery cover lock into the closed...

Страница 6: ...period Do not remove the button sized lithium battery because it is used as the reserve power source for the date time settings You can also use a 2CR5 Lithium Battery sold separately instead of Batt...

Страница 7: ...with the other end of the DC coupler Please note that the compact power adapter will not charge a battery pack while in use as a DC power source for the camera The DC output indicator on the compact...

Страница 8: ...rd Follow the procedures below to insert a CF card into the camera 1 Slide the lock for the CF card slot cover to the open position and open the cover 2 As shown below orient the card with its label s...

Страница 9: ...l totals may vary according to the characteris tics of the photographic subject A wrist strap is shipped with the camera Attach the strap to the camera as illustrated 5 Fitting the Wrist Strap 1 Inser...

Страница 10: ...sages are displayed 1 Turn the Mode Dial to the PLAY position 2 Press and hold the SET Button then press MACRO JUMP Button to display the Language Menu 3 Use the Buttons to move between language selec...

Страница 11: ...utton MENU Button Buttons LCD Panel 1 Turn the Mode Dial to the Auto position Auto mode 2 Press the MENU Button to display the Rec Menu Set the correct date and time with the following procedures Mode...

Страница 12: ...ss the SET Button The Date Time Menu will be displayed 5 Press the SET Button to move between fields and the Buttons to advance values 6 Once the settings are adjusted to your satisfaction press the M...

Страница 13: ...the shutter button halfway and wait until the beep sounds twice 4 After the beeps press the shutter button all the way A single beep will sound the picture will be taken and the indicator beside the...

Страница 14: ...CD panel Press the button once again to turn off the panel Reviewing an Image After Shooting You can review an image after taking the picture without turning on the LCD panel Turn the Review function...

Страница 15: ...se and the camera will automatically power down if left for 3 minutes Pressing any button will switch the power back on Please refer to the Power Save section of the Reference Guide for further detail...

Страница 16: ...2 Scroll through images by pressing the Buttons 3 To quit turn the Mode Dial to the L Lock position 1 Replaying Images in Play Mode LCD Panel Buttons MACRO JUMP Button To view single images on the LCD...

Страница 17: ...the next or previous images press the Macro Jump Button and Buttons To return to normal selection menu press the MACRO JUMP Button again 3 To quit turn the Mode Dial to the L Lock position 2 Replayin...

Страница 18: ...and select the video channel 4 Turn the camera s Mode Dial to the PLAY or MULTI position 5 If an image appears in the camera s LCD panel press the LCD button Pressing the LCD button switches the disp...

Страница 19: ...o use Adobe Photoshop software with a camera you must copy the Plug In Module into Photoshop s Import Export folder in the Plug Ins folder 3 Reboot the computer after the installation completes Instal...

Страница 20: ...mages from a PowerShot digital camera PhotoStitch Windows Macintosh A software program that makes it easy to merge sequential pictures taken with the PowerShot A5 s Stitch Assist mode into large high...

Страница 21: ...s 1024 x 768 or more 24 bit color display recommended Operating System Windows 95 or Windows NT 4 0 Ports Serial port RS232 C Macintosh Computers CPU 68LC040 or higher Power Macintosh RAM 24 MB or mor...

Страница 22: ...ection menu 5 Start the TWAIN Driver from within your application 6 Use the TWAIN Driver to load the images from the camera 2 Connecting to a Computer and Retrieving Images PC Interface Cable Serial P...

Страница 23: ...r TWAIN Driver refer to their respective Help files or other on line guides Macintosh Connect the camera to the Macintosh modem or printer port with the Macintosh interface cable Modem Port Printer Po...

Страница 24: ...rn the camera s Mode Dial to the PC position 4 Select Canon PowerShot PPC or Canon PowerShot 68K from your application s input device selection menu 5 Start the Plug In Module from within your applica...

Страница 25: ...CMCIA slot also called a PC card slot you can insert a CF card directly into the slot with an optional PCMCIA adapter Before you eject the CF card always off the computer and turn the camera s Mode Di...

Страница 26: ...he Mode Dial to the PLAY or MULTI position 4 Insert the adapter into the PCMCIA slot 5 Start the application software 6 Select the PCMCIA slot as the image source and acquire the images Please read th...

Страница 27: ...the Buttons to display the image you want to erase Press the SET Button to erase If you chose All all images will delete 5 A confirmation message will be displayed Press the Buttons to select OK and...

Страница 28: ...2 8 ZZP SC1VA210 CANON INC 1998 Printed in the EU...

Отзывы: