background image

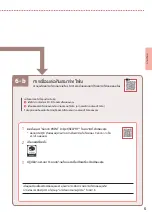
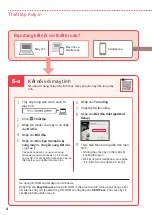
6-a

4

Mengeset Pencetak

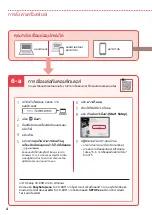
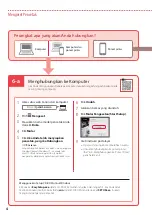
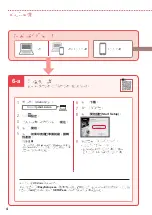
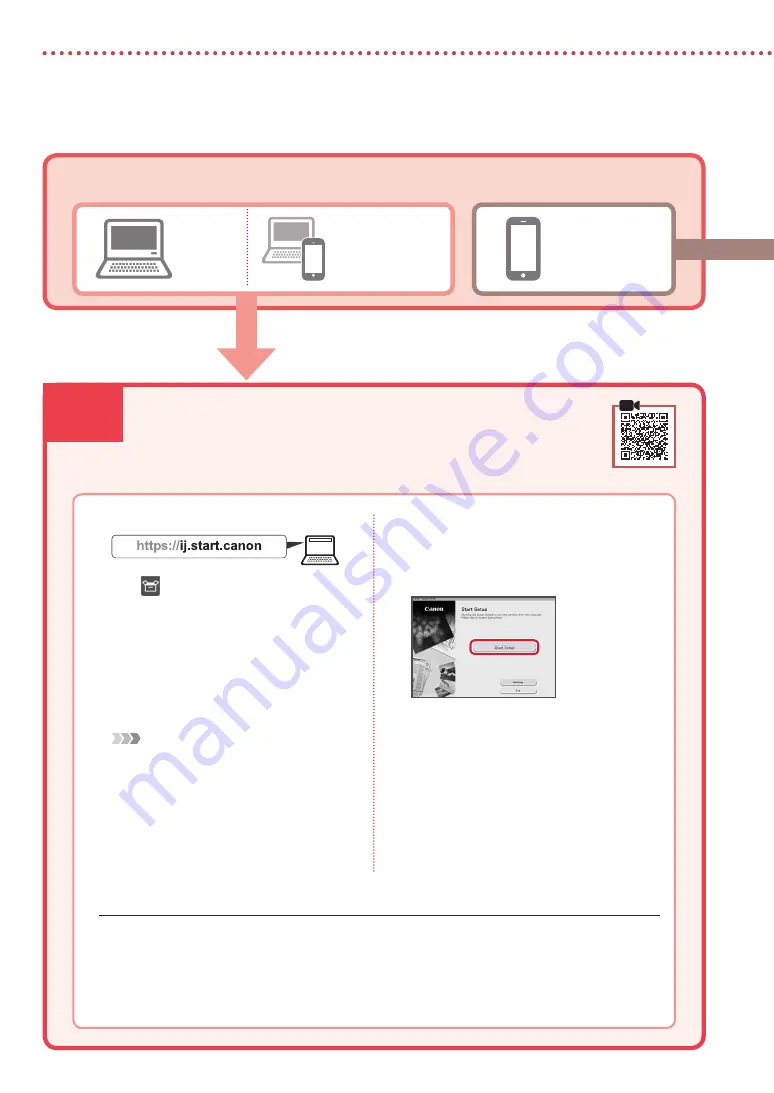
6-a. Menghubungkan ke Komputer

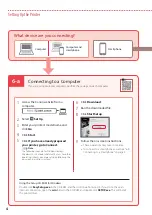
Komputer

Ponsel pintar

Komputer dan 

ponsel pintar

Menghubungkan ke Komputer

Jika Anda menggunakan beberapa komputer, lakukan langkah-langkah berikut pada 
masing-masing komputer.

Akses situs web Canon dari komputer.

Pilih   

Mengeset

.

Masukkan nama model pencetak Anda 

dan klik 

Buka

.

Klik 

Mulai

.

Klik 

Jika Anda telah menyiapkan 

pencetak, pergi ke Hubungkan

.

 Catatan

Langkah-langkah berikut ini adalah untuk pengguna 

Windows (kecuali Windows 10 in S mode) dan 

macOS. Untuk sistem operasi lain, lanjutkan 

pengesetan dengan mengikuti instruksi pada layar.

Klik 

Unduh

.

Jalankan berkas yang diunduh.

Klik 

Mulai Pengesetan(Start Setup)

.

Ikuti instruksi pada layar.

• 

Operasi ini mungkin membutuhkan waktu.

• 

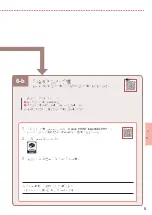
Untuk menghubungkan ke ponsel pintar, 
lihat "6-b. Menghubungkan ke Ponsel Pintar" 
pada halaman 5.

Menggunakan Setup CD-ROM untuk Windows

Klik dua kali 

EasySetup.exe

 dalam CD-ROM, kemudian lanjutkan dari langkah 3. Jika Anda tidak 

memiliki koneksi internet, buka folder 

win

 dalam CD-ROM dan klik dua kali 

SETUP.exe

. Ini akan 

menginstal pengandar pencetak.

Perangkat apa yang akan Anda hubungkan?

Содержание PIXMA TS6370

Страница 1: ...n b t u Tr c ti n o c Th ng tin an toa n va quan tro ng phu lu c Mari Memulai Baca Keamanan dan Informasi Penting lampiran terlebih dahulu Getting Started Read Safety and Important Information addendu...

Страница 2: ...g trang 4 Video h ng d n Gi ma y in Memasang Pencetak halaman 1 Menghubungkan ke Komputer Ponsel Pintar atau Tablet halaman 4 Video Instruksi Memegang Pencetak 1 4 Installing the Printer page 1 Connec...

Страница 3: ...aterials and orange tape 2 Open the scanning unit cover and remove the orange tape b a 3 Close the scanning unit cover Open the scanning unit cover fully and then close it Caution Watch your fingers a...

Страница 4: ...nd press down until it clicks 5 Check that the mark appears on the screen Important If the mark is not displayed on the screen even though you have installed the ink tank the color of the ink tank may...

Страница 5: ...r more sheets of Letter or A4 sized plain paper with the print side facing down Place the paper against the front paper guide and align the right paper guide to the width of the paper a b 5 Attach the...

Страница 6: ...xcept Windows 10 in S mode and macOS users For other operating systems continue setup by following the on screen instructions instead 6 Click Download 7 Run the downloaded file 8 Click Start Setup 9 F...

Страница 7: ...add your printer Connecting to a Smartphone If you are using multiple smartphones perform these steps on each smartphone Prepare the following before starting a Enable the Wi Fi setting on your smart...

Страница 8: ...Close the feed slot cover Follow the on screen instructions to set information for the loaded paper Copying Photo paper can only be loaded in the rear tray 1 Turn on the printer 2 Load Letter or A4 si...

Страница 9: ...1 1 Setup CD ROM Windows 2 1 2 b a 3 a b 3 1 2 3 OK 4 OK QR 5 OK...

Страница 10: ...2 4 1 2 b a 3 Y 4 5 6 2 5 7 b a...

Страница 11: ...3 5 1 OK 2 a b 3 Letter A4 4 Letter A4 2 a b 5 a b 6 OK 7 OK QR 8...

Страница 12: ...6 a 4 6 a 1 Canon 2 3 4 5 Windows Windows 10 in S mode macOS 6 7 8 Start Setup 9 6 b 5 Setup CD ROM Windows EasySetup exe CD ROM 3 win CD ROM SETUP exe...

Страница 13: ...6 b 5 6 b 1 Canon PRINT Inkjet SELPHY QR Canon 2 3 a Wi Fi b 6...

Страница 14: ...6 1 2 a b 3 a b 4 1 2 Letter A4 3 4 5 OK 6 Copy settings OK 7 OK 8...

Страница 15: ...al kemasan dan pita oranye 2 Buka unit pemindaian penutup dan lepaskan pita oranye b a 3 Tutup unit pemindaian penutup Buka unit pemindaian penutup sepenuhnya kemudian tutup Perhatian Hati hati agar j...

Страница 16: ...k dan tekan ke bawah sampai berbunyi klik 5 Periksa apakah tanda muncul pada layar Penting Jika tanda tidak ditampilkan pada layar meskipun Anda telah memasang kotak tinta warna kotak tinta mungkin sa...

Страница 17: ...ar atau lebih kertas biasa ukuran Letter atau A4 dengan sisi cetak menghadap ke bawah Letakkan kertas merapat ke pemandu kertas bagian depan dan paskan pemandu kertas sebelah kanan dengan lebar kertas...

Страница 18: ...na Windows kecuali Windows 10 in S mode dan macOS Untuk sistem operasi lain lanjutkan pengesetan dengan mengikuti instruksi pada layar 6 Klik Unduh 7 Jalankan berkas yang diunduh 8 Klik Mulai Pengeset...

Страница 19: ...da Menghubungkan ke Ponsel Pintar Jika Anda menggunakan beberapa ponsel pintar lakukan langkah langkah berikut pada masing masing ponsel pintar Persiapkan hal hal berikut sebelum memulai a Aktifkan se...

Страница 20: ...b 4 Tutup penutup slot penyaluran Ikuti instruksi pada layar untuk mengeset informasi kertas yang dimuatkan Menyalin Kertas foto hanya dapat dimuatkan dalam tatakan belakang 1 Nyalakan pencetak 2 Muat...

Страница 21: ...va v t bo t t ca v t li u o ng go i va b ng di nh ma u cam 2 M b que t n p va tha o b ng di nh ma u cam ra b a 3 o ng b que t n p M b que t n p ra h t c r i o ng la i Chu y C n th n ke t ngo n tay a...

Страница 22: ...m c L p bi nh m c va o u in r i nh n xu ng cho n khi co ti ng ta ch 5 Xa c nh n d u xu t hi n tr n ma n hi nh Quan tro ng N u d u kh ng hi n thi tr n ma n hi nh ngay ca khi ba n a l p bi nh m c co th...

Страница 23: ...t 2 t gi y th ng c Letter ho c A4 tr l n v i m t in u p xu ng t gi y theo ca nh thanh d n gi y phi a tr c va i u chi nh thanh d n gi y b n pha i sa t v i chi u r ng cu a gi y a b 5 L p n p ca t xe t...

Страница 24: ...goa i tr Windows 10 in S mode va macOS V i ca c h i u ha nh kha c ti p tu c thi t l p theo h ng d n tr n ma n hi nh 6 Nh p va o Ta i xu ng 7 Cha y t p a ta i xu ng 8 Nh p va o B t u thi t l p Start Se...

Страница 25: ...g ng du ng th m ma y in K t n i v i smartphone N u ba n s du ng nhi u smartphone th c hi n ca c b c na y tr n t ng smartphone Chu n bi nh sau tr c khi b t u a B t ca i t Wi Fi tr n smartphone b K t n...

Страница 26: ...gi y a b 4 o ng n p khe na p Th c hi n theo h ng d n tr n ma n hi nh ca i t th ng tin cho gi y a na p Sao chu p Chi co th na p gi y a nh trong khay sau 1 B t ma y in 2 Na p gi y th ng c Letter ho c A...

Страница 27: ...1 1 Windows 2 1 2 b a 3 a b 3 1 2 3 OK 4 OK QR 5 OK...

Страница 28: ...2 4 1 2 b a 3 Y 4 5 6 2 5 7 b a...

Страница 29: ...3 5 1 OK 2 a b 3 Letter A4 4 2 Letter A4 a b 5 a b 6 OK 7 OK QR 8...

Страница 30: ...6 a 4 6 a 1 Canon 2 3 4 5 Windows Windows 10 S macOS 6 7 8 Start Setup 9 5 6 b Windows EasySetup exe 3 win SETUP exe...

Страница 31: ...6 b 5 6 b 1 Canon PRINT Inkjet SELPHY QR Canon 2 3 a Wi Fi b 6...

Страница 32: ...6 1 2 a b 3 a b 4 1 2 Letter A4 3 4 5 OK 6 Copy settings OK 7 OK 8...

Страница 33: ...1 1 Windows Setup CD ROM 2 1 2 b a 3 a b 3 1 2 ON 3 OK 4 OK QR 5 OK...

Страница 34: ...2 4 1 2 b a 3 Y 4 5 6 2 5 7 b a...

Страница 35: ...3 5 1 OK 2 a b 3 Letter A4 4 2 Letter A4 a b 5 a b 6 OK 7 OK QR 8...

Страница 36: ...6 a 4 6 a 1 Canon 2 3 4 5 Windows Windows 10 in S mode macOS 6 7 8 Start Setup 9 5 6 b Windows Setup CD ROM CD ROM EasySetup exe 3 CD ROM win SETUP exe...

Страница 37: ...6 b 5 6 b 1 Canon PRINT Inkjet SELPHY QR Canon 2 3 a Wi Fi b 6...

Страница 38: ...6 1 2 a b 3 a b 4 1 2 Letter A4 3 4 5 OK 6 Copy settings OK 7 OK 8 Start...

Страница 39: ...RMC Regulatory Model Code K10499...

Страница 40: ...T tri nh duy t cu a ba n Truy c p H ng d n s du ng tr c tuy n Akses Petunjuk Daring Dari browser Anda Access Online Manual From your browser PRINTED IN XXXXXXXX QT6 3189 V01 CANON INC 2019 XXXXXXXX...

Отзывы: