


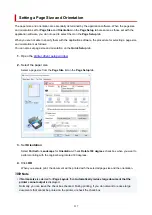


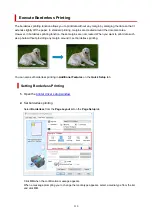
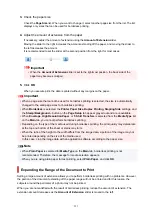

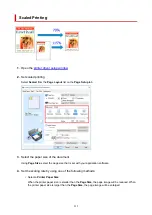


Setting a Page Size and Orientation
The paper size and orientation are essentially determined by the application software. When the page size
and orientation set for
Page Size
and
Orientation
on the
Page Setup
tab are same as those set with the
application software, you do not need to select them on the
Page Setup
tab.
When you are not able to specify them with the application software, the procedure for selecting a page size
and orientation is as follows:
You can also set page size and orientation on the
Quick Setup
tab.
1.
2.
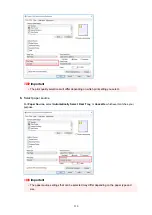
Select the paper size
Select a page size from the
Page Size
list on the
Page Setup
tab.
3.
Set
Orientation
Select
Portrait
or
Landscape
for
Orientation
. Check
Rotate 180 degrees
check box when you want to
perform printing with the original being rotated 180 degrees.
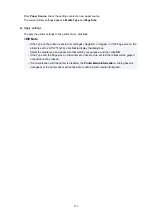
4.
Click
OK
When you execute print, the document will be printed with the selected page size and the orientation.
Note
• If
Normal-size
is selected for
Page Layout
, then
Automatically reduce large document that the
printer cannot output
is displayed.
Normally, you can leave the check box checked. During printing, if you do not want to reduce large
documents that cannot be printed on the printer, uncheck the check box.
227
Содержание PIXMA TS6200 Series
Страница 1: ...TS6200 series Online Manual English ...
Страница 9: ...4103 457 5011 458 5012 459 5100 460 5200 461 5B00 462 6000 463 C000 464 ...
Страница 27: ...Basic Operation Printing Photos from a Computer Printing Photos from a Smartphone Tablet Copying 27 ...
Страница 40: ...Copying 40 ...
Страница 73: ...Note This setting item is not available depending on the printer you are using 8 Click Set 73 ...
Страница 76: ...Handling Paper Originals Ink Tanks etc Loading Paper Loading Originals Replacing Ink Tanks 76 ...
Страница 102: ...102 ...
Страница 103: ...Replacing Ink Tanks Replacing Ink Tanks Checking Ink Status on the Touch Screen Ink Tips 103 ...
Страница 114: ...Adjusting Print Head Position 114 ...
Страница 133: ...Safety Safety Precautions Regulatory Information WEEE EU EEA 133 ...
Страница 154: ...8 Attach the protective material to the printer when packing the printer in the box 154 ...
Страница 157: ...Main Components and Their Use Main Components Power Supply Using the Operation Panel 157 ...
Страница 158: ...Main Components Front View Rear View Inside View Operation Panel 158 ...
Страница 186: ...For more on setting items on the operation panel Setting Items on Operation Panel 186 ...
Страница 195: ...Language selection Changes the language for the messages and menus on the touch screen 195 ...
Страница 208: ...Information about Paper Supported Media Types Paper Load Limit Unsupported Media Types Handling Paper Print Area 208 ...
Страница 235: ...Note Selecting Scaled changes the printable area of the document 235 ...
Страница 253: ...In such cases take the appropriate action as described 253 ...
Страница 289: ...Printing Using Canon Application Software Easy PhotoPrint Editor Guide 289 ...
Страница 290: ...Printing Using a Web Service Using PIXMA MAXIFY Cloud Link Printing with Google Cloud Print 290 ...
Страница 312: ...Note To set the applications to integrate with see Settings Dialog Box 312 ...
Страница 325: ...ScanGear Scanner Driver Screens Basic Mode Tab Advanced Mode Tab 325 ...
Страница 349: ...Scanning Using Smartphone Tablet Using PIXMA MAXIFY Cloud Link Printing Scanning with Wireless Direct 349 ...
Страница 354: ...Network Communication Problems Cannot Find Printer on Network Network Connection Problems Other Network Problems 354 ...
Страница 380: ...Other Network Problems Checking Network Information Restoring to Factory Defaults 380 ...
Страница 385: ...Problems while Printing Scanning from Smartphone Tablet Cannot Print Scan from Smartphone Tablet 385 ...
Страница 407: ...Scanning Problems Windows Scanning Problems 407 ...
Страница 408: ...Scanning Problems Scanner Does Not Work ScanGear Scanner Driver Does Not Start 408 ...
Страница 422: ...Errors and Messages An Error Occurs Message Support Code Appears 422 ...