background image

6

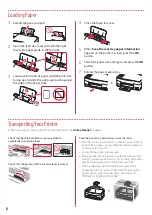
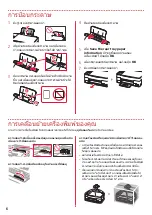
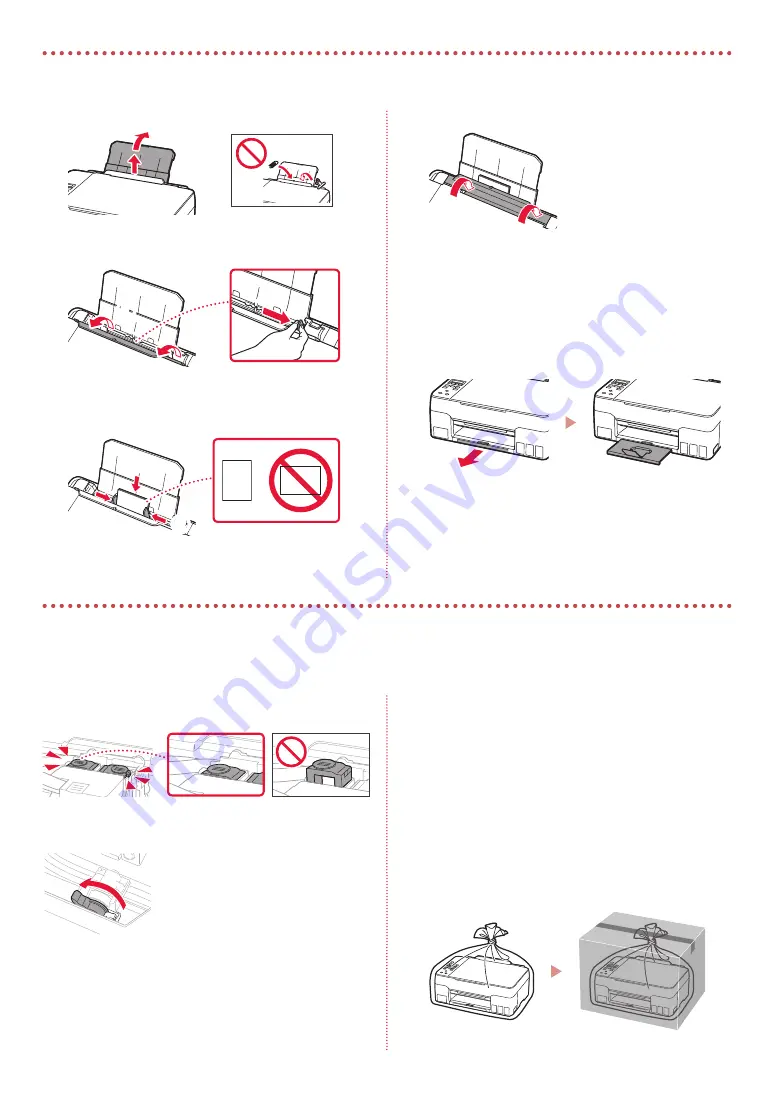
Extend the paper support.

Open the feed slot cover and slide the right-

hand side paper guide to the far right.

a

b

Load several sheets of paper with the print side 

facing up and slide the side paper guide against 

the edge of the paper stack.

a

b

Close the feed slot cover.

When 

Save the rear tray paper information


appears on the printer's screen, press the 

OK


button.

Select the paper size and type, and press the 

OK


button.

Extend the paper output tray.

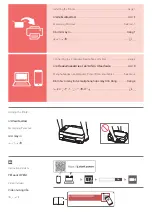
Transporting Your Printer

When relocating the printer, check the following. Refer to the 

Online Manual

 for details.

Check that both joint buttons are pressed down 

completely to avoid ink leaks.

Check that the position of the ink valve lever is closed.

Pack the printer in a plastic bag in case ink leaks.

• 

Pack the printer in a sturdy box so that it is placed with its 
bottom facing down, using sufficient protective material 
to ensure safe transport.

• 

Do not tilt the printer. Ink may leak.

• 

Please handle with care and ensure the box remains flat 
and NOT turned upside down or on its side, as the printer 
may be damaged and ink in the printer may leak.

• 

When a shipping agent is handling transport of the 
printer, have its box marked "THIS SIDE UP" to keep the 
printer with its bottom facing down. Mark also with 
"FRAGILE" or "HANDLE WITH CARE".

Loading Paper

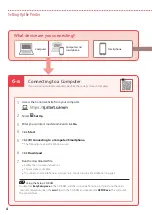
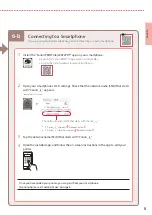
Содержание Pixma G3020 Series

Страница 1: ...g d n b t u Tr c ti n c Th ng tin an to n v quan tr ng ph l c Mari Memulai Baca Keamanan dan Informasi Penting lampiran terlebih dahulu Getting Started Read Safety and Important Information addendum f...

Страница 2: ...ng 4 Video h ng d n Gi m y in Memasang Pencetak halaman 1 Menghubungkan ke Komputer Ponsel Pintar atau Tablet halaman 4 Video Instruksi Memegang Pencetak 1 4 Installing the Printer page 1 Connecting t...

Страница 3: ...rotective material inside a b 3 Installing the Print Heads 1 Open the print head locking cover 2 Take out each print head from the package and remove the label 3 Remove the protective tape 4 Insert th...

Страница 4: ...quires careful handling of ink Ink may splatter when the ink tanks are filled with ink If ink gets on your clothes or belongings it may not come off 1 Open the scanning unit cover 2 Open the tank cap...

Страница 5: ...that best matches how you will use the printer To use the printer without connecting to any other devices Setup is now complete To use the printer connecting to a computer or smartphone Proceed to th...

Страница 6: ...Smartphone The following steps are for Windows users 6 Click Download 7 Run the downloaded file Follow the on screen instructions This may take some time To connect to a smartphone as well see 6 b Co...

Страница 7: ...me SSID that starts with Canon_ij_ If Canon_ij_ appears Proceed to step 3 If Canon_ij_ does not appear Proceed to step 4 3 Tap the network name SSID that starts with Canon_ij_ 4 Open the installed app...

Страница 8: ...Online Manual for details Check that both joint buttons are pressed down completely to avoid ink leaks Check that the position of the ink valve lever is closed Pack the printer in a plastic bag in cas...

Страница 9: ...1 1 Setup CD ROM 2 1 2 a b 3 1 2 3 4 C B 5 6 7 b a...

Страница 10: ...2 4 1 2 3 OK 3 5 1 2 3 PGBK 4 5 a b 6 a b...

Страница 11: ...3 7 8 2 7 C M Y 9 b a 10 Yes OK OK 1890 2 1 1470 3 1 1471 3 1 5200 5 2...

Страница 12: ...6 a 4 1 Canon 2 3 4 5 B Windows 6 7 6 b 5 6 a Setup CD ROM EasySetup exe CD ROM 3 win CD ROM SETUP exe...

Страница 13: ...6 b 5 1 Canon PRINT Inkjet SELPHY Canon PRINT App Store Google Play Canon 2 Wi Fi SSID Canon_ij_ iOS SSID Canon_ij_ Canon_ij_ 3 Canon_ij_ 4 3 SSID Canon_ij_ 4 6 b 6...

Страница 14: ...6 1 2 a b 3 a b 4 5 Save the rear tray paper information OK 6 OK 7...

Страница 15: ...a b 3 Memasang Kepala Cetak 1 Buka penutup pengunci kepala cetak 2 Keluarkan setiap kepala cetak dari dalam kemasan dan lepaskan labelnya 3 Lepaskan pita pelindung 4 Masukkan kepala cetak C warna pad...

Страница 16: ...terpercik ketika kotak tinta diisi Jika tinta menodai pakaian Anda atau benda lain mungkin tidak akan dapat dibersihkan 1 Buka unit pemindaian penutup 2 Buka penutup kotak pada bagian kiri pencetak 3...

Страница 17: ...ra Anda menggunakan pencetak Untuk menggunakan pencetak tanpa menghubungkan ke perangkat lain apa pun Pengesetan kini telah selesai Untuk menggunakan pencetak dengan menghubungkannya ke komputer atau...

Страница 18: ...Langkah langkah berikut ini adalah untuk pengguna Windows 6 Klik Unduh 7 Jalankan berkas yang diunduh Ikuti instruksi pada layar Ini mungkin membutuhkan waktu beberapa saat Untuk menghubungkan ke pons...

Страница 19: ..._ Jika Canon_ij_ muncul Lanjutkan ke langkah 3 Jika Canon_ij_ tidak muncul Lanjutkan ke langkah 4 3 Ketuk nama jaringan SSID yang dimulai dengan Canon_ij_ 4 Buka aplikasi yang telah diinstal dan ikuti...

Страница 20: ...apakah semua tombol sambungan telah ditekan ke bawah sepenuhnya untuk menghindari kebocoran tinta Periksa apakah posisi tuas katup tinta tertutup Kemas pencetak dalam kantong plastik untuk mengantisi...

Страница 21: ...m u cam 2 M b qu t n p th o v v t b b ng d nh m u cam v v t li u b o v b n trong a b 3 L p u in 1 M n p kh a u in 2 L y t ng u in ra kh i bao b v b c nh n ra 3 G b ng b o v ra 4 L p u in C m u b n tr...

Страница 22: ...ng Y u c u thao t c v i m c c n th n i v i s n ph m n y M c c th v ng ra khi n p m c v o c c b nh m c M c c th kh ng t y c khi d nh v o qu n o ho c c c nh n 1 M b qu t n p 2 M n p b nh b n tr i m y in...

Страница 23: ...ph ng th c k t n i ph h p v i c ch s d ng m y in nh t s d ng m y in m kh ng k t n i v i b t k thi t b n o kh c Thi t l p ho n t t s d ng m y in b ng c ch k t n i v i m y t nh ho c smartphone Chuy n sa...

Страница 24: ...nh smartphone C c b c sau d nh cho ng i d ng Windows 6 Nh p v o T i xu ng 7 Ch y t p t i xu ng Th c hi n theo h ng d n tr n m n h nh Thao t c n y c th m t m t kho ng th i gian k t n i v i smartphone...

Страница 25: ...h nh iOS T n m ng SSID b t u v i Canon_ij_ N u Canon_ij_ xu t hi n Chuy n sang b c 3 N u Canon_ij_ kh ng xu t hi n Chuy n sang b c 4 3 G nh v o t n m ng SSID b t u v i Canon_ij_ 4 M ng d ng c i t v th...

Страница 26: ...u sau Tham kh o H ng d n s d ng tr c tuy n t m hi u chi ti t X c nh n c hai n t kh p n i c nh n xu ng ho n to n tr nh r r m c X c nh n r ng v tr c a c n g t van m c ng l i ng g i m y in v o t i nh a t...

Страница 27: ...1 1 2 1 2 a b 3 1 2 3 4 C B 5 6 7 b a...

Страница 28: ...2 4 1 2 3 OK 3 5 1 2 3 PGBK 4 5 a b 6 a b...

Страница 29: ...3 7 8 2 7 C M Y 9 b a 10 Yes OK OK 1890 1 2 1470 1 3 1471 1 3 5200 2 5...

Страница 30: ...6 a 4 1 Canon 2 3 4 5 B Windows 6 7 5 6 b 6 a EasySetup exe 3 win SETUP exe...

Страница 31: ...6 b 5 1 Canon PRINT Inkjet SELPHY App Store Google Play Canon PRINT Canon 2 Wi Fi Canon_ij_ SSID iOS Canon_ij_ SSID Canon_ij_ 3 Canon_ij_ 4 3 Canon_ij_ SSID 4 6 b 6...

Страница 32: ...6 1 2 a b 3 a b 4 5 Save the rear tray paper information OK 6 OK 7...

Страница 33: ...erdaftar Microsoft Corporation di U S dan atau negara negara lainnya App Store adalah merek dagang dari Apple Inc yang terdaftar di U S dan negara negara lainnya Google Play adalah merek dagang dari G...

Страница 34: ...T tr nh duy t c a b n Truy c p H ng d n s d ng tr c tuy n Akses Petunjuk Daring Dari browser Anda Access Online Manual From your browser PRINTED IN XXXXXXXX QT6 3670 V01 CANON INC 2020 XXXXXXXX...

Отзывы: