


07YL-091
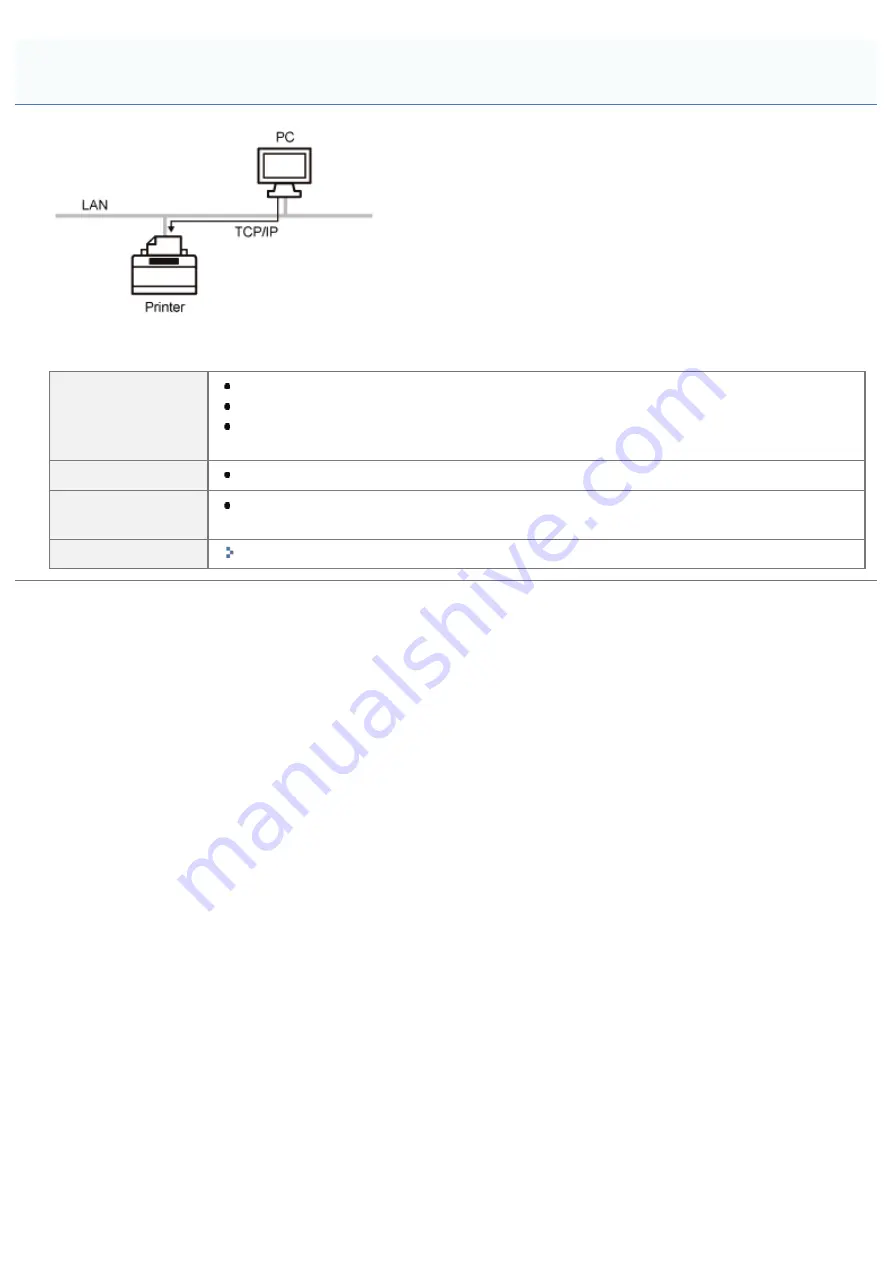
This is a print application that can be used on Windows Vista, 7, and Server 2008. By using WSD, you can search for the
printer automatically as well as obtain information about jobs and the printer, using the WSD protocol.
Advantages
You can search printers on a network automatically.
Installation of the printer driver is easy.
WSD can notify the computer of job completion and obtain the printer's configuration
information automatically.
Disadvantage
Windows Vista, 7, and Server 2008 are only operating systems that support WSD.
Usage Example
If you are using Windows Vista, 7 or Server 2008 and want to use the printer immediately
after installing it
Setting Method
"Connecting the Printer (WSD)"
Features of WSD
㻠㻤㻟㻌㻛㻌㻝㻜㻜㻠
Содержание LBP7780CX
Страница 1: ...㻝㻌㻛㻌㻝㻜㻜㻠 ...
Страница 25: ...Inquiries for this printer are displayed 㻞㻡㻌㻛㻌㻝㻜㻜㻠 ...
Страница 88: ...㻤㻤㻌㻛㻌㻝㻜㻜㻠 ...
Страница 155: ...㻝㻡㻡㻌㻛㻌㻝㻜㻜㻠 ...
Страница 185: ...You cannot cancel the job whose pages are in the process of printing 㻝㻤㻡㻌㻛㻌㻝㻜㻜㻠 ...
Страница 202: ...For details on Paper Feed Method see Setup Menu User Maintenance Options 㻞㻜㻞㻌㻛㻌㻝㻜㻜㻠 ...
Страница 252: ...1 2 3 4 㻞㻡㻞㻌㻛㻌㻝㻜㻜㻠 ...
Страница 291: ...㻞㻥㻝㻌㻛㻌㻝㻜㻜㻠 ...
Страница 295: ...Press To Job List to check the print job that was sent 㻞㻥㻡㻌㻛㻌㻝㻜㻜㻠 ...
Страница 326: ...4 Click Edit on the right side of E Mail Print Settings 5 Specify the settings for the e mail print function 㻟㻞㻢㻌㻛㻌㻝㻜㻜㻠 ...
Страница 328: ...Click OK 㻟㻞㻤㻌㻛㻌㻝㻜㻜㻠 ...
Страница 332: ...㻟㻟㻞㻌㻛㻌㻝㻜㻜㻠 ...
Страница 334: ...3 Select E Mail RX History List and then click Execute The e mail receive log list is printed 㻟㻟㻠㻌㻛㻌㻝㻜㻜㻠 ...
Страница 350: ...6 The detailed information of the stored jobs is displayed 㻟㻡㻜㻌㻛㻌㻝㻜㻜㻠 ...
Страница 352: ...4 Click Edit 5 Set a length of time to pass before deletion of stored jobs 㻟㻡㻞㻌㻛㻌㻝㻜㻜㻠 ...
Страница 353: ...The default setting is 3 days To not delete automatically select Off 6 Click OK 㻟㻡㻟㻌㻛㻌㻝㻜㻜㻠 ...
Страница 355: ...4 Click Settings 5 Enter the box name in Box Name Up to 32 characters can be entered 㻟㻡㻡㻌㻛㻌㻝㻜㻜㻠 ...
Страница 360: ...Macintosh Network Settings Configuring the Protocol Settings Configuring a Computer that Performs Printing 㻟㻢㻜㻌㻛㻌㻝㻜㻜㻠 ...
Страница 372: ...4 Click Ethernet Driver Settings 5 Click Edit 㻟㻣㻞㻌㻛㻌㻝㻜㻜㻠 ...
Страница 379: ...4 Click Spooler 5 Click Edit 㻟㻣㻥㻌㻛㻌㻝㻜㻜㻠 ...
Страница 386: ...4 Click Startup Time Settings 5 Click Edit 㻟㻤㻢㻌㻛㻌㻝㻜㻜㻠 ...
Страница 390: ...4 Click SNMP Settings 5 Click Edit 㻟㻥㻜㻌㻛㻌㻝㻜㻜㻠 ...
Страница 403: ...4 Click IEEE802 1X Settings 5 Click Edit 㻠㻜㻟㻌㻛㻌㻝㻜㻜㻠 ...
Страница 404: ...6 Enter the login name Up to 24 alphanumeric characters can be entered 7 Select the Use TLS check box 㻠㻜㻠㻌㻛㻌㻝㻜㻜㻠 ...
Страница 405: ...8 Click Key and Certificate 9 Select the key to use and then click Default Key Settings 㻠㻜㻡㻌㻛㻌㻝㻜㻜㻠 ...
Страница 409: ...4 Click IEEE802 1X Settings 5 Click Edit 㻠㻜㻥㻌㻛㻌㻝㻜㻜㻠 ...
Страница 430: ...4 Click Ethernet Driver Settings 5 Click Edit 㻠㻟㻜㻌㻛㻌㻝㻜㻜㻠 ...
Страница 472: ...3 Select Network from the Preferences menu 4 Click TCP IP Settings 㻠㻣㻞㻌㻛㻌㻝㻜㻜㻠 ...
Страница 473: ...5 Click Edit under IPv6 Settings 6 Select the Use IPv6 check box 㻠㻣㻟㻌㻛㻌㻝㻜㻜㻠 ...
Страница 508: ...3 Select Network from the Preferences menu 4 Click NetWare Settings 5 Click Edit 㻡㻜㻤㻌㻛㻌㻝㻜㻜㻠 ...
Страница 515: ...3 Select Network from the Preferences menu 4 Click SMB Settings 㻡㻝㻡㻌㻛㻌㻝㻜㻜㻠 ...
Страница 516: ...5 Click Edit 6 Select the Use SMB Server check box 㻡㻝㻢㻌㻛㻌㻝㻜㻜㻠 ...
Страница 531: ...3 Select Network from the Preferences menu 4 Click AppleTalk Settings 㻡㻟㻝㻌㻛㻌㻝㻜㻜㻠 ...
Страница 532: ...5 Click Edit 6 Select the Use AppleTalk check box 㻡㻟㻞㻌㻛㻌㻝㻜㻜㻠 ...
Страница 535: ...㻡㻟㻡㻌㻛㻌㻝㻜㻜㻠 ...
Страница 561: ... 1 Basic Settings It displays the settings related to printing resolution and toner 2 Adjust Toner Density 㻡㻢㻝㻌㻛㻌㻝㻜㻜㻠 ...
Страница 573: ...ĺ Command Prompt closes 㻡㻣㻟㻌㻛㻌㻝㻜㻜㻠 ...
Страница 637: ...㻢㻟㻣㻌㻛㻌㻝㻜㻜㻠 ...
Страница 639: ...㻢㻟㻥㻌㻛㻌㻝㻜㻜㻠 ...
Страница 641: ...4 Click Edit under Management Settings 5 Enter the current password in Current System Manager Password 㻢㻠㻝㻌㻛㻌㻝㻜㻜㻠 ...
Страница 644: ...4 Click Edit under Management Settings 5 Enter the current password in Current System Manager Password 㻢㻠㻠㻌㻛㻌㻝㻜㻜㻠 ...
Страница 646: ...Comment Device Name Enter the name of the printer Location Enter the location of the printer 㻢㻠㻢㻌㻛㻌㻝㻜㻜㻠 ...
Страница 653: ...7 Click OK 㻢㻡㻟㻌㻛㻌㻝㻜㻜㻠 ...
Страница 663: ... Z Register Update Software 3 Click Manual Installation 4 㻢㻢㻟㻌㻛㻌㻝㻜㻜㻠 ...
Страница 665: ...3 Click Manual Installation 4 File extensions 㻢㻢㻡㻌㻛㻌㻝㻜㻜㻠 ...
Страница 673: ...4 Click Apply Firmware 5 㻢㻣㻟㻌㻛㻌㻝㻜㻜㻠 ...
Страница 675: ...3 Click Delivered Update 4 Click Delete Firmware 5 㻢㻣㻡㻌㻛㻌㻝㻜㻜㻠 ...
Страница 677: ...3 Click Delivered Update 4 Click Delete Scheduled Delivery 5 㻢㻣㻣㻌㻛㻌㻝㻜㻜㻠 ...
Страница 678: ...The scheduled delivery is deleted 㻢㻣㻤㻌㻛㻌㻝㻜㻜㻠 ...
Страница 684: ...4 Click IP Address Filter 5 Click Edit under IPv4 Address TX Filter or IPv4 Address RX Filter 㻢㻤㻠㻌㻛㻌㻝㻜㻜㻠 ...
Страница 689: ...2 Click Settings Registration 3 Select Security from the Management Settings menu 4 Click IP Address Filter 㻢㻤㻥㻌㻛㻌㻝㻜㻜㻠 ...
Страница 695: ...4 Click MAC Address Filter 5 Click Edit under TX Filter or RX Filter 㻢㻥㻡㻌㻛㻌㻝㻜㻜㻠 ...
Страница 700: ...Select Security from the Management Settings menu 4 Click Management Settings 5 Click Edit 㻣㻜㻜㻌㻛㻌㻝㻜㻜㻠 ...
Страница 702: ...㻣㻜㻞㻌㻛㻌㻝㻜㻜㻠 ...
Страница 704: ...4 Click Management Settings 5 Click Edit 㻣㻜㻠㻌㻛㻌㻝㻜㻜㻠 ...
Страница 706: ...㻣㻜㻢㻌㻛㻌㻝㻜㻜㻠 ...
Страница 708: ...4 Click Management Settings 5 Click Edit 㻣㻜㻤㻌㻛㻌㻝㻜㻜㻠 ...
Страница 710: ...㻣㻝㻜㻌㻛㻌㻝㻜㻜㻠 ...
Страница 712: ...4 Click Management Settings 5 Click Edit 㻣㻝㻞㻌㻛㻌㻝㻜㻜㻠 ...
Страница 714: ...㻣㻝㻠㻌㻛㻌㻝㻜㻜㻠 ...
Страница 717: ...4 Click Key and Certificate Settings 㻣㻝㻣㻌㻛㻌㻝㻜㻜㻠 ...
Страница 727: ...㻣㻞㻣㻌㻛㻌㻝㻜㻜㻠 ...
Страница 733: ...4 Click CA Certificate Settings 㻣㻟㻟㻌㻛㻌㻝㻜㻜㻠 ...
Страница 739: ...07YL 0EU 1 Click Delete 2 Click OK ĺ The CA certificate is deleted Deleting CA Certificates 㻣㻟㻥㻌㻛㻌㻝㻜㻜㻠 ...
Страница 742: ...4 Click TCP IP Settings 5 Click Key and Certificate under SSL Settings 㻣㻠㻞㻌㻛㻌㻝㻜㻜㻠 ...
Страница 743: ...6 Select the key to use and then click Default Key Settings 㻣㻠㻟㻌㻛㻌㻝㻜㻜㻠 ...
Страница 745: ...4 Click Remote UI Settings 5 Click Edit 㻣㻠㻡㻌㻛㻌㻝㻜㻜㻠 ...
Страница 750: ...4 Click IPSec Settings 㻣㻡㻜㻌㻛㻌㻝㻜㻜㻠 ...
Страница 764: ...4 Click Display Job History 5 Click Edit 㻣㻢㻠㻌㻛㻌㻝㻜㻜㻠 ...
Страница 774: ...NOTE Details about Hard Resets See Canceling All the Jobs Hard Reset 㻣㻣㻠㻌㻛㻌㻝㻜㻜㻠 ...
Страница 778: ... Initialize Contact your local authorized Canon dealer or sales representatives 㻣㻣㻤㻌㻛㻌㻝㻜㻜㻠 ...
Страница 790: ...07YL 0FR Starting MEAP Applications Stopping MEAP Applications Starting Stopping MEAP Applications 㻣㻥㻜㻌㻛㻌㻝㻜㻜㻠 ...
Страница 793: ...When the restart prompt message is displayed Follow the onscreen instructions to restart the printer 㻣㻥㻟㻌㻛㻌㻝㻜㻜㻠 ...
Страница 798: ...4 Click License Management 5 Specify the license file 㻣㻥㻤㻌㻛㻌㻝㻜㻜㻠 ...
Страница 801: ...4 Click License Management 5 Click Disable 㻤㻜㻝㻌㻛㻌㻝㻜㻜㻠 ...
Страница 802: ...6 Click Yes ĺ The license file is disabled 㻤㻜㻞㻌㻛㻌㻝㻜㻜㻠 ...
Страница 804: ...4 Click License Management 5 Click Download 㻤㻜㻠㻌㻛㻌㻝㻜㻜㻠 ...
Страница 805: ...6 Follow the on screen instructions and specify a file storage directory ĺ The license file is saved 㻤㻜㻡㻌㻛㻌㻝㻜㻜㻠 ...
Страница 807: ...4 Click License Management 5 Click Delete 㻤㻜㻣㻌㻛㻌㻝㻜㻜㻠 ...
Страница 808: ...6 Click Yes ĺ The license file is deleted 㻤㻜㻤㻌㻛㻌㻝㻜㻜㻠 ...
Страница 810: ...4 Click Authentication Information Settings 5 Enter the authentication information 㻤㻝㻜㻌㻛㻌㻝㻜㻜㻠 ...
Страница 814: ...4 The display order changes 1 Move the applets up and down by clicking Up and Down 2 Click Update 㻤㻝㻠㻌㻛㻌㻝㻜㻜㻠 ...
Страница 816: ...㻤㻝㻢㻌㻛㻌㻝㻜㻜㻠 ...
Страница 827: ...㻤㻞㻣㻌㻛㻌㻝㻜㻜㻠 ...
Страница 831: ... Confirm Enter the same password again in New Password 㻤㻟㻝㻌㻛㻌㻝㻜㻜㻠 ...
Страница 833: ...4 Click Yes ĺ The setting information of the application is deleted 㻤㻟㻟㻌㻛㻌㻝㻜㻜㻠 ...
Страница 836: ...4 Follow the on screen instructions and specify a file storage directory ĺ The log file is saved 㻤㻟㻢㻌㻛㻌㻝㻜㻜㻠 ...
Страница 838: ...4 Click Yes ĺ The log data is deleted 㻤㻟㻤㻌㻛㻌㻝㻜㻜㻠 ...
Страница 868: ...If printing does not work contact your local authorized Canon dealer 㻤㻢㻤㻌㻛㻌㻝㻜㻜㻠 ...
Страница 899: ...5 Remove the jammed paper by pulling it gently in the direction of the arrow 6 Close the transfer guide 㻤㻥㻥㻌㻛㻌㻝㻜㻜㻠 ...
Страница 992: ...㻥㻥㻞㻌㻛㻌㻝㻜㻜㻠 ...
Страница 999: ...㻥㻥㻥㻌㻛㻌㻝㻜㻜㻠 ...
Страница 1000: ...㻝㻜㻜㻜㻌㻛㻌㻝㻜㻜㻠 ...
Страница 1001: ...OCR Code Scalable Fonts PCL Bitmapped Fonts PCL PCL Fonts for Windows 㻝㻜㻜㻝㻌㻛㻌㻝㻜㻜㻠 ...
Страница 1002: ...NOTE 66 PCL fonts for Windows are included in the User Manual CD ROM supplied with this printer 㻝㻜㻜㻞㻌㻛㻌㻝㻜㻜㻠 ...
Страница 1003: ...㻝㻜㻜㻟㻌㻛㻌㻝㻜㻜㻠 ...


