background image


C. 

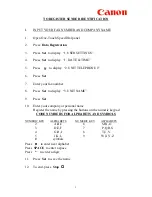
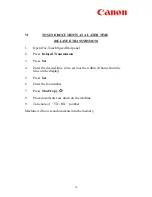
TO PROGRAM GROUP DIAL


1. 

Open One-Touch Speed Dial panel 

 
2. Press 


Data Registration


3. 

Press    

∨∨∨∨


to display  “

2. TEL REGISTRATION

” 

 
4. Press 


Set 


5. 

Press    

∨∨∨∨


to display  “3

. GROUP DIAL

” 

 
6. Press 


Set 

 
7. 

Press    

∨∨∨∨


(if necessary) until an empty space appears 

 
8. Press 


Set

  twice 

 
9. 

Close panel cover & press desired one-touch keys 


& / or the coded speed dial numbers 

 
10. Press 


Set

  twice 

 
11.  Enter name for the above group dialer  (refer to


A.9.

 on III : TO 

STORE FAX NUMBERS) 


12. Press 


Set 


13.  To continue, press  

Data Registration


14. Repeat 

steps 

 No. 7

  to  

No. 12


15.  To end, press  

Stop  

Содержание L360

Страница 1: ...CANON FAX L360 SIMPLIFIED GUIDE...

Страница 2: ...9 Sequential Broadcasting VI Sending At A Preset Time 10 Delayed Transmission VII To Print Documents Received In The Memory 11 VIII To Re send Documents Received In Memory 12 To A Different Destinatio...

Страница 3: ...nter your fax number 8 Press Set to display 3 UNIT NAME 9 Press Set 10 Enter your company or personal name Register the name by pressing the buttons on the numeric keypad CODE NUMBERS FOR ALPHABETS AN...

Страница 4: ...down on the feeder 2 Enter fax number 4 Press Start Copy 5 Take note of TX RX number C ONE TOUCH CODED DIAL SENDING 1 Place documents face down on the feeder 2 Press the appropriate one touch key OR...

Страница 5: ...nter fax number 8 Press Set twice 9 Enter name Register the name by pressing the buttons on the numeric keypad CODE NUMBERS FOR ALPHABETS AND SYMBOLS NUMERIC KEY ALPHABETS NUMERIC KEY ALPHABETS 2 A B...

Страница 6: ...N 4 Press Set 5 Press to display 2 CODED SPD DIAL 6 Press Set 7 Press if necessary until an empty space appears 8 Press Set twice 9 Enter fax number 10 Press Set twice 11 Enter name refer to A 9 on II...

Страница 7: ...L 6 Press Set 7 Press if necessary until an empty space appears 8 Press Set twice 9 Close panel cover press desired one touch keys or the coded speed dial numbers 10 Press Set twice 11 Enter name for...

Страница 8: ...TORE FAX NUMBERS CODED SPEED DIAL 2 Press CODED DIAL followed by the relevant two digit code 3 Press Set twice 4 Press Clear 5 Press Set 6 Press Stop C TO CANCEL A GROUP DIALER 1 Follow steps C 1 to C...

Страница 9: ...ant one touch coded dial numbers one right after another 3 If there is one more destination to be dialed manually enter the number using the numeric 10 key pad 4 Press Start Copy 5 Take note of TX RX...

Страница 10: ...ress Delayed Transmission 3 Press Set 4 Enter the desired time time set must be within 24 hours from the time on the display 5 Press Set 6 Enter the fax number 7 Press Start Copy 8 Place documents fac...

Страница 11: ...IN MEMORY repeatedly and keeps prompting the following LOAD PAPER Action Refill paper supply OR REPLACE CARTRIDGE Action Put in a new toner cartridge OR REC PAPER JAM Action Remove jammed paper carefu...

Страница 12: ...ER DESTINATION FOR PRINTING 1 Open One Touch Speed Dial panel 2 Press Memory Reference 3 Press to display 3 RESEND DOCUMENT 4 Press Set 5 Press if necessary to select a new TX RX No must be greater th...

Страница 13: ...d list i e 1 1 TOUCH LIST 2 CODED DIAL LIST or 3 GROUP DIAL LIST 6 Press Set twice B TO PRINT A LIST OF PREVIOUS 20 TRANSACTIONS 1 Open One Touch Speed Dial panel 2 Press Report 3 Press Set C TO PRINT...

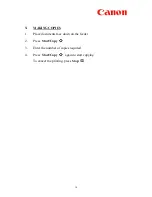
Страница 14: ...14 X MAKING COPIES 1 Place documents face down on the feeder 2 Press Start Copy 3 Enter the number of copies required 4 Press Start Copy again to start copying To cancel the printing press Stop...

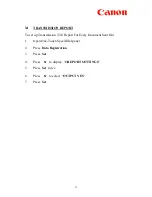
Страница 15: ...o set up Transmission TX Report For Every Document Sent Out 1 Open One Touch Speed Dial panel 2 Press Data Registration 3 Press Set 4 Press to display 2 REPORT SETTINGS 5 Press Set twice 6 Press to se...

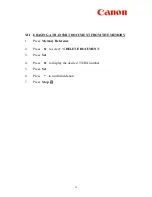
Страница 16: ...SING A TRANSMIT DOCUMENT FROM THE MEMORY 1 Press Memory Reference 2 Press to select 4 DELETE DOCUMENT 3 Press Set 4 Press to display the desired TX RX number 5 Press Set 6 Press to confirm deletion 7...

Отзывы: