Canon K10266 Скачать руководство пользователя страница 162

160

Chapter 12

Troubleshooting

„

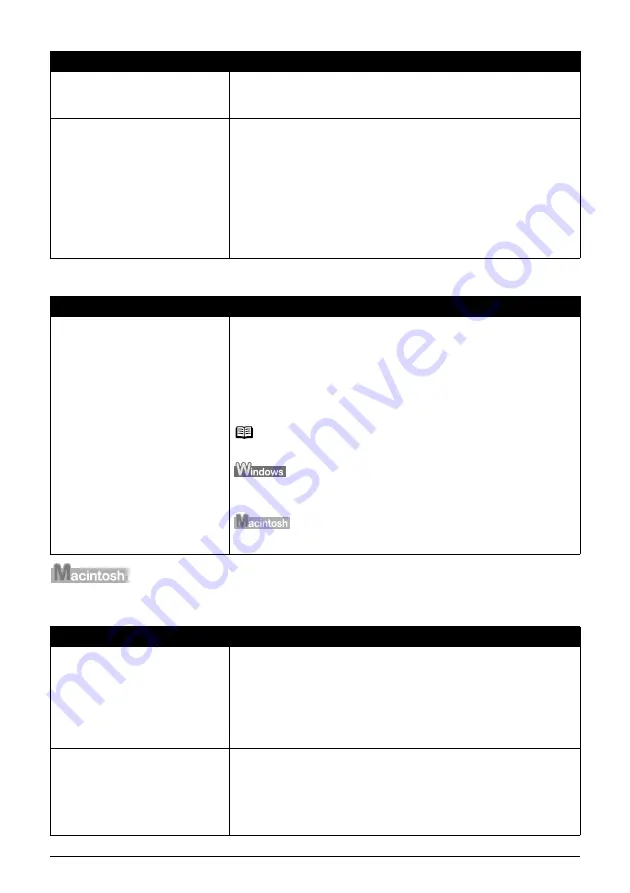
When an Error is Displayed Regarding Automatic Duplex Printing

„

Error No.: 300 is Displayed

The MAC address filtering or the IP 
address filtering is configured on 
the access point.

On the access point, additionally register the IP address or MAC address 
of the machine and the computer, or disable the MAC address filtering or 
the IP address filtering.

The access control is set to the 
machine.

Print out the network setting information and verify if the access control 
with IP address or MAC address is enabled on the machine. For details on 
printing the network setting information, see “Printing Out Network 
Setting Information” of “Changing and Confirming Network Settings” in 
the

Network Guide

.

If the machine is configured to use the access control, register the IP 
address or the MAC address of your computer to the machine. For details 
on settings, see “Changing the Settings in the [Access Control] Tab 
(Windows)” or “Changing the Settings in the [Access Control] Tab 
(Macintosh)” of “Changing and Confirming Network Settings” in the 

Network Guide

.

Cause

Action

The correct media size is not 
selected in the printer driver.

Check the Page Size setting from within your application software to 
ensure that it matches the size of the paper loaded.

Check [Page Size] on the [Page Setup] tab in the printer properties dialog 
box (Windows) or the [Page Setup] dialog box (Macintosh) to ensure that it 
matches the size of the paper loaded.

The page sizes that can be used for Automatic Duplex Printing are Letter, 
A4, B5, A5, and 5" x 7" / 127.0 x 177.8 mm. Check that the page size of the 
loaded paper is correct.

Note

To print on both sides of the page manually, follow the procedure below.

On the [Page Setup] tab, clear the [Automatic] check box. Then try printing 
again.

The manual duplex printing function cannot be used.

Cause

Action

The machine is not ready.

Ensure that the lamp on the Operation Panel lights.

If the lamp on the Operation Panel is off, turn the machine on.

While [COPY] is flashing, the machine is initializing. Wait until [COPY] 
stops flashing and stays lit.

When the Alarm Lamp lights orange, an error may occur in the machine. 
For details on how to resolve the error, see 

“An Error Message is 

Displayed on the LCD” on page 127

.

Machine is not properly connected.

Ensure that the printer cable is securely connected to the computer.

z

If using a switching hub or other device, disconnect the machine and 
reconnect it directly to the computer and try printing again. If 
successful, the problem may have been with the device.

z

There could also be a problem with the cable(s). Replace the cable(s) 
and try printing again.

Cause

Action

Содержание K10266

Страница 1: ...ON INC 2006 PRINTED IN THAILAND User s Guide User s Guide QT5 0266 V03 ENG The following ink tanks are compatible with this machine For details on ink tank replacement refer to Replacing Ink Tanks in this guide Photo All in One ...

Страница 2: ...duct s war ranty period For more information and updated program specifics please visit our web site at www canontechsupport com Support program specifics are subject to change without notice Ordering Information For additional supplies use the following descriptions and order numbers Description Order Ink Tanks PGI 5 Black 0628B002 CLI 8 Black 0620B002 CLI 8 Cyan 0621B002 CLI 8 Magenta 0622B002 C...

Страница 3: ...oth Communication 87 7 Printing from Your Computer 90 Printing with Windows 90 Printing with Macintosh 93 8 Scanning Images 96 About Scanning Images 96 Scanning Methods 97 9 Reading from and Writing to a Memory Card 101 Setting up the Card Slot as the Memory Card Drive of the Computer 101 10 Changing the Machine Settings 103 The Print Settings 104 Wireless Print Settings Infrared Bluetooth Communi...

Страница 4: ...ndix 164 Printing Area 164 How to Read the On screen Manuals 166 Uninstalling the Canon IJ Network Scan Utility 167 Uninstalling the On screen Manuals 168 Transporting Machine 168 Specifications 169 Users in the U S A 174 Regulatory Information 174 Mercury Legislation 175 CANON U S A INC LIMITED WARRANTY USA Only 176 Users in Canada 178 Customer Technical Supports 178 Index 179 ...

Страница 5: ... they are not intended to be nor should they be understood to be representation or warranties concerning the products described Specifications are subject to change without notice Model Name K10266 PIXMA MP800R As an ENERGY STAR partner Canon Inc has determined that this product meets the ENERGY STAR guidelines for energy efficiency All information regarding non Canon products was compiled from pu...

Страница 6: ...Sony Corporation z xD Picture Card is a trademark of Fuji Photo Film Co Ltd z MultiMediaCard is a trademark of Infineon Technologies AG z SD Secure Digital memory card and miniSD Card are trademarks of SD Association z IrDA Feature Trademark is owned by the Infrared Data Association and used under license therefrom z Bluetooth is a trademark of Bluetooth SIG Inc U S A and are licensed to Canon Inc...

Страница 7: ...o these guides as needed for full instructions on some of the more advanced features Printer Driver Guide Refer to this guide for full instructions on setting the printer driver Scan Guide Refer to this guide for full instructions on scanning operation and settings Photo Application Guide Refer to this guide for instructions on using various application software included on the Setup CD ROM Networ...

Страница 8: ...re of the type of power available consult your local power company The shape of the plug and outlet may vary depending on the country of purchase Do not allow the power cord to be near objects that emit heat The outer cover of the power cord may melt resulting in fire or electrical shock Never use the machine if the power cord is bundled or knotted Knots in the cord may result in fire or electrica...

Страница 9: ...cm from electric products equipped with fluorescent lighting If you place it near to them the machine may malfunction as a result of the noise emitted by the fluorescent lighting When turning OFF the power be sure to press ON OFF and confirm that the Alarm Lamp has shut off If you pull the power plug out of the wall outlet while the Alarm Lamp is lit or flashing the Print Head is not protected and...

Страница 10: ...C 50 60 Hz depending on local electrical requirements Do not plug the machine into the same circuit as appliances such as an air conditioner television or copier These devices generate electrical noise which may interfere with your machine s operation Whenever you turn OFF the power and unplug the machine wait at least five seconds before you plug it in again Use only the power cord that came with...

Страница 11: ...not to get ink on your hands or clothing If ink gets on your hands or clothing wash them soon in running water If you use hot water the ink may adhere and become difficult to remove After printing do not touch the electrical contacts of the Print Head They will be hot and may result in burns or electrical shock Do not subject the machine to strong physical shock or vibration This can damage the ma...

Страница 12: ...ds or ink tanks Ink may leak out and stain clothing or the surrounding area Never touch the Print Head Radio wave interference Since the microwave oven and the wireless LAN system use the same frequency bandwidth the microwave oven can be the potential source of interference when the microwave oven is on Placing this product close to microwave oven may result in the poor status of radio ...

Страница 13: ...e warnings Caution Indicates a caution concerning operations that may lead to injury to persons or damage to property if not performed correctly In order to use the machine safely always pay attention to these cautions Important Indicates operational warnings and restrictions Be certain to read these items to operate the machine correctly and to avoid damage to the machine Note Indicates notes for...

Страница 14: ... z Certificates of deposit z Postage stamps canceled or uncanceled z Identifying badges or insignias z Selective service or draft papers z Checks or drafts issued by governmental agencies z Motor vehicle licenses and certificates of title z Traveler s checks z Food stamps z Passports z Immigration papers z Internal revenue stamps canceled or uncanceled z Bonds or other certificates of indebtedness...

Страница 15: ...eds automatically one sheet at a time 5 Cover Guide Align the right side of the paper to this guide 6 Card Slot Cover Open to insert a memory card For details see Inserting the Memory Card on page 49 7 IrDA Port Receives photo data sent from the mobile phone through infrared communication See Performing Infrared Communication on page 86 8 Direct Print Port Used when printing directly from a digita...

Страница 16: ...uments or photographs 11 FAU Lamp Lights up the film original when scanning films 12 Cassette Load paper to be used regularly here Paper feeds automatically one sheet at a time Legal sized paper and 2 13 x 3 39 54 0 x 86 0 mm size paper are not loadable in the Cassette 13 Open Button Press this button to open the Paper Output Tray 14 Operation Panel Used to change the settings or operate the machi...

Страница 17: ...over This is the unit used to scan documents Open when replacing the ink tanks or clearing jammed paper 21 Inner Cover Open this cover when replacing the ink tanks 22 Card Slot Set the memory card here For details see Inserting the Memory Card on page 49 23 Access Lamp Lights when a memory card is inserted into the Card Slot This lamp flashes while the machine is reading or writing data from to th...

Страница 18: ...en the machine is connected to a computer Refer to the Scan Guide Important While the machine is printing from or scanning images to the computer or the computer is in the sleep mode or standby mode do not disconnect and connect the USB cable Note z For information on how to install the Print Head and ink tanks refer to the Setup Guide Ink Tank Lamps z You can check the status of each ink tank acc...

Страница 19: ...s or flashes orange when an error occurs or when paper or ink has run out 14 Search Looks up target photos in the memory card using the shooting date as the search key See Searching for Photos with the Shooting Date Search on page 54 15 Photo Index Sheet Switches to Photo Index Sheet mode See Printing by Using the Photo Index Sheet on page 61 16 Back Allows you to return to the previous screen 17 ...

Страница 20: ...he interval that the machine waits before entering Power save mode See Power save setting on page 106 When you try to copy or scan the machine will exit from Power save mode If you use the machine frequently we recommend that you set the Power save transfer time to 1 hour or 8 hours Note If preparatory operations above are not yet finished follow the Setup Guide to complete them Note If the Alarm ...

Страница 21: ... Glass For how to load a photo see Scanning a Photo on page 65 For how to load a film see Scanning a Film on page 67 1 Lift the Document Cover 2 Load your document on the Platen Glass z Place your document face down on the Platen Glass z Align the upper left corner of your document with the alignment mark on the upper left corner of the Platen Glass Document type z Documents z Photographs z Book F...

Страница 22: ...Setting for Media Type Auto Sheet Feeder Cassette Plain Paper 0 52 13 mm 0 52 13 mm Plain Paper High Resolution Paper HR 101N 80 sheets A4 Letter 80 sheets A4 Letter High Resolution Paper Super White Paper SW 201 0 52 13 mm A4 Letter 0 52 13 mm A4 Letter Plain Paper Glossy Photo Paper GP 401 10 sheets A4 Letter 20 sheets 4 x 6 101 6 x 152 4 mm Credit Card 10 sheets A4 Letter 20 sheets 4 x 6 101 6 ...

Страница 23: ...3 SG 101 10 sheets A4 Letter 20 sheets 4 x 6 101 6 x 152 4 mm 10 sheets A4 Letter 20 sheets 4 x 6 101 6 x 152 4 mm Photo Paper Plus Glossy Photo Paper Pro 3 PR 101 10 sheets A4 Letter 20 sheets 4 x 6 101 6 x 152 4 mm 10 sheets A4 Letter 20 sheets 4 x 6 101 6 x 152 4 mm Photo Paper Pro Photo Stickers 4 PS 101 1 sheet Not loadable 5 Photo Paper Plus Glossy Transparencies CF 102 30 sheets 30 sheets T...

Страница 24: ...ain graphics on paper that curls easily Remove this kind of paper for printing text only documents z If the paper is curled uncurl it before printing To uncurl the paper see Paper is curled on page 138 z Put unused paper back into the package and store them out of direct sunlight in a place where the temperature and humidity are low Keep them on a level surface to avoid curling and wrinkling z If ...

Страница 25: ...o feed different types sizes of paper If you load plain paper in the Cassette and photo paper in the Auto Sheet Feeder changing the paper source allows you to print on both types of paper without removing and reloading paper To change the paper source use Feed Switch on the machine or printer driver You can also specify the type size of paper to be fed from the Cassette for regular use with the pr...

Страница 26: ...e Cassette Changing the Paper Source Before printing confirm that the location where you have loaded paper is selected as a paper source Press Feed Switch to change the paper source A Auto Sheet Feeder Lamp B Feed Switch C Cassette Lamp Important z This feature can be used only when printing from a computer z This feature can be used only when paper of the same size and media type are loaded in th...

Страница 27: ... feeding paper from the Cassette z You can also select the paper source with the printer driver when printing from the computer For details refer to the Printer Driver Guide Note For detailed information on the specialty media Canon provides for use with its various printers see Recommended Paper and Requirements on page 20 Note z Align the edges of paper neatly before loading Loading paper withou...

Страница 28: ... 2 Align the paper stack against the Cover Guide on the right side of the Paper Support 3 Pinch the Paper Guide and slide it against the left side of the paper stack Note You can also select the paper source with the printer driver For details refer to the Printer Driver Guide Important Ensure that the Cover Guide stands when you load paper in the Auto Sheet Feeder 2 1 3 4 A 3 2 A 1 ...

Страница 29: ...ironment where the temperature and humidity are high or low In that case reduce the amount of paper to half approx 0 2 5 mm in height z Remove the printed sheets from the Paper Output Tray before the count reaches 50 z Do not touch the printed surfaces until the ink dries For specific drying times refer to the instructions packaged with your media Important z Envelopes can be used only when printi...

Страница 30: ...ide it against the left side of the paper stack 3 Press Feed Switch so that the Auto Sheet Feeder Lamp lights Note z Fold the envelope flap shut A z Printing direction B Important Loading plain paper cut to 4 x 6 101 6 mm x 152 4 mm 5 x 7 127 0 x 177 8 mm or 2 13 x 3 39 54 0 x 86 0 mm Credit Card size for a trial printing can cause paper jams Important Ensure that the Cover Guide stands when you l...

Страница 31: ...age Size in the printer driver For a detailed description of the printer driver settings see Printing with Windows on page 90 or Printing with Macintosh on page 93 Important Always load paper in portrait orientation A Loading paper in landscape orientation B can cause the paper to be jammed Note We recommend using genuine Canon photo media when printing photographs See Recommended Paper and Requir...

Страница 32: ... loading it 2 Prepare to load paper 1 Pull out the Cassette from the machine 2 Remove the Cover on the Cassette Note For detailed information on the specialty media Canon provides for use with its various printers see Recommended Paper and Requirements on page 20 Note z Align the edges of paper neatly before loading Loading paper without aligning the edges may cause paper jams z When paper is curl...

Страница 33: ...k Important Do not load the paper beyond this Load Limit Mark A Note z You can use general copy paper or Canon s Super White Paper SW 201 z You can load up to 150 sheets of plain paper 64 gsm or 17 lb 13 mm or 0 52 inches in height in the Cassette However do not stack more than 50 sheets in the Paper Output Tray z Do not touch the printed surfaces until the ink dries For specific drying times refe...

Страница 34: ...per Output Tray 1 Press the Open Button to open the Paper Output Tray 2 Pull out the Paper Output Tray Extension completely 3 Press Feed Switch so that the Cassette Lamp A lights Note After printing to put back the Paper Output Tray Extension push it back while raising it a little Note You can also select the paper source with the printer driver For details refer to the Printer Driver Guide 1 1 2 ...

Страница 35: ...Lamp lights Important z Envelopes can be used only when printing from a computer z Do not use envelopes with embossed or treated surfaces a double flap pressure seals or sticker flaps z Select either DL Env or Comm Env 10 according to the envelope size you are using z The printed image will be upside down depending on the application If this occurs open the printer properties dialog box then selec...

Страница 36: ...hts Note Printing direction B Important z Do not leave photo paper such as Photo Paper Pro in the Cassette for a long time This may cause paper discoloration due to natural aging z If you are using photo paper such as Photo Paper Pro and have loaded them in the Cassette the printout may have roller traces on the print surface To avoid this load paper in the Auto Sheet Feeder z Loading plain paper ...

Страница 37: ... or printing from memory card photos or films To Change Print Settings You can change the print settings such as page size media type bordered or borderless print etc z How to change the Settings screen This section describes the steps to specify the page size for Memory card mode to 4 x 6 101 6 x 152 4 as an example For information on each item see Print Setting Items on page 37 1 Display the Set...

Страница 38: ...elect the Setting tab Select tab 1 here 3 Select the setting item 1 Use or to select the setting item Select A4 here 4 Change the setting 1 Use or to change the setting Change to 4 x 6 101 6 x 152 4 here 5 Complete setting 1 Press Settings Return to the Settings screen ...

Страница 39: ...e magnification Preset ratio Zoom 25 400 Fit to page Tab 2 You can specify auto intensity 5 This function automatically adjusts the intensity of the document on the Platen Glass Auto intensity ON Auto intensity OFF Note Depending on the functions specified in the Copy Memory card or Photo film mode some setting items cannot be specified in combination Important Some page sizes cannot be loaded in ...

Страница 40: ... print quality Standard High 4 Select bordered or borderless print Bordered Borderless 5 Select whether to print the shooting date file no or not 1 No date file no Print date only Print file no only Print date file no 1 Can be selected only in Memory card mode Note You can change the print settings on this screen when a PictBridge compliant device is connected to this machine Important Some page s...

Страница 41: ... the light Face brightener ON Face brightener OFF 6 Choosing Image optimizer ON enables you to correct and smooth the jagged contours for printing 1 Image optimizer ON Image optimizer OFF 7 Adjust brightness 1 Brightness 2 Brightness 1 Brightness standard Brightness 1 Brightness 2 8 Adjust contrast 1 Contrast 2 Contrast 1 Contrast standard Contrast 1 Contrast 2 9 Adjust color hue 1 Color hue red 2...

Страница 42: ...e or to specify the number of copies The following information is displayed as well Note Specify Feed Switch so that the Auto Sheet Feeder Lamp is lit when feeding paper from the Auto Sheet Feeder and the Cassette Lamp is lit when feeding paper from the Cassette Note For information on the types and conditions of documents which you can copy see Loading Documents on page 19 Note Press Settings to ...

Страница 43: ...ess to move the cursor down and use or to select the setting value Holding down or steps through the values faster 3 Finalize your selection 1 Press Settings Return to the Copy standby screen 4 Start copying See Start copying on page 40 Note To cancel copying press Stop Reset Same magnification Copies in the same size as an original Preset ratio Preset ratios are convenient when changing between s...

Страница 44: ... 3 You can adjust print quality for the document to be copied 4 You can specify the reduction enlargement method See Reducing or Enlarging a Copy on page 41 5 You can specify if auto intensity is performed Specifying Auto intensity ON automatically changes the icon above the intensity slide bar on the LCD to AUTO Important Even while Auto intensity ON is selected you can change the intensity by pr...

Страница 45: ...ecial copy screen See Special Copy on page 43 2 Use or to select Two sided copy then press OK 3 Use or to select the orientation of the document then press OK 4 Use or to select the binding margin then press OK 5 Follow the on screen instructions to load the document to be printed on the front face on the Platen Glass then press OK 6 Specify the necessary items See To Change Print Settings on page...

Страница 46: ...he right side on the Platen Glass If you have only one document to scan press OK 7 Press Color or Black Be sure to press the same button as you pressed in step 5 Important If you do not press the same button in step 7 and step 9 the machine does not start copying Note z This function cannot be used in conjunction with Fit to page under Magnification or other copy functions z If you perform black w...

Страница 47: ... until you finish loading the fourth document then press the same button as you pressed in step 6 If you have only one two or three documents to scan press OK after loading the last document Note z This function cannot be used in conjunction with other functions z If Device memory is full appears on the LCD when scanning set the print quality to Standard and try copying again z You can use this fe...

Страница 48: ...copy screen See Special Copy on page 43 2 Use or to select Image repeat then press OK 3 Use or to select Auto layout or Manual layout If you selected Auto layout and pressed OK go to step 7 If you selected Manual layout and pressed OK go to step 4 4 Use or to set the vertical repeats Note z The copied image may need to be enlarged to fit onto the selected page size when making borderless copies So...

Страница 49: ...ck for black white copying Important z The area read from the documents depends on the enlargement reduction ratio z The size of the documents to copy should be no larger than one division of the paper For example if you copy four documents at the same size their sizes must be one fourth of the page size or smaller Note z Credit card cannot be selected for the page size z Fit to page cannot be sel...

Страница 50: ... compatible with this machine Memory cards that can be directly inserted into the Card Slot z Compact Flash CF Card Supports Type I II 3 3V z Microdrive z SmartMedia Supports 3 3V card only 1MB and 2MB cards are not supported z MEMORY STICK z MEMORY STICK PRO z SD Secure Digital memory card z MultiMedia Card Memory cards that can be inserted in the Card Slot using the adapter xD Picture Card 1 z M...

Страница 51: ... the digital camera refer to the manuals supplied with your digital camera z Format the memory card with a digital camera The memory card might not be usable with the machine if formatted on a computer z Images edited on a computer may not be printed correctly z Insert only one kind of memory card at a time Note z When USB enabled is selected in Read write attribute under Other settings by using t...

Страница 52: ...STICK Duo z MEMORY STICK PRO Duo z SD Secure Digital memory card z miniSD Card z MultiMedia card Insert into the center part of the Card Slot on the right side The Access Lamp A lights up Caution z The memory card sticks out of the Card Slot but do not force it into the slot any further Doing so damages the machine and the memory card z Check if the right side of the memory card is facing to the r...

Страница 53: ... card into the Card Slot See Inserting the Memory Card on page 49 Note When using the Card Slot as the memory card drive of the computer the removal operation from the computer is needed before removing the memory card from the machine Over a USB connection Right click the removable disk icon and click Eject If Eject is not displayed on the screen ensure that the Access Lamp is not flashing and re...

Страница 54: ...ed on the LCD while reading the photo Note Displaying Photos Automatically on the LCD Slide Show You can automatically display photos in sequence when selecting Single photo print z To start the slide show press OK when checking photos in Single photo print z To stop the slide show press Stop Reset during the slide show You can do z To search for photos with the shooting date Search see Searching ...

Страница 55: ...1 2 Select the print menu 1 Press MEMORY CARD 2 Use or to select Multi photo print then press OK The photo selection screen is displayed 3 Specify the number of prints for each photo 1 Use or to select the image you want to print 2 Use or to specify the number of prints 3 Repeat from step 1 to step 2 to specify the number of prints for each photo Note Press Settings to check or change the page siz...

Страница 56: ...ing date Search see Searching for Photos with the Shooting Date Search on page 54 z To print a specified area Trimming see Printing a Specified Area Trimming on page 55 Note z To cancel printing press Stop Reset z The printing is not started if you press Black Note z By pressing Search to specify a date or date range you can display and print the photos shot on the specified date or within the spe...

Страница 57: ...r to select the photo you want to crop 2 Display the trimming edit screen 1 Press Trimming The trimming edit screen is displayed 3 Choose the area you want to print 1 Use to position the cropping frame then press Trimming If you do not rotate or resize the cropping frame go to main step 4 Note z The date to be specified is displayed according to the settings of Date display See Date display on pag...

Страница 58: ...or printing on page 51 2 Select the print menu 1 Press MEMORY CARD 2 Use or to select Special photo print then press OK 3 Use or to select Layout print then press OK Note z The cropped image cannot be newly saved on the memory card z The trimming area is displayed only for photos which have been trimmed z To change the trimming area once it has been set press Trimming again z To cancel trimming wh...

Страница 59: ...op Reset to cancel all pasted photos 3 Press Color after pasting all photos The print confirmation screen is displayed 6 Start printing See Start printing on page 53 Bordered x2 x4 x8 Half Half w line Borderless x2 x4 x8 Half Half w line Album Album 4 right Album 4 left Mixed Mixed 1 Mixed 2 Mixed 3 Note z When you select Borderless the media type cannot be set to Plain paper z You can select Mixe...

Страница 60: ...me then press OK The print confirmation screen is displayed 6 Start printing See Start printing on page 53 Note z When you use this function load paper in the Auto Sheet Feeder z You can only load one sheet of stickers at a time in the Auto Sheet Feeder Note You can do z To search for photos with the shooting date Search see Searching for Photos with the Shooting Date Search on page 54 z To print ...

Страница 61: ...s are printed in its negative size as in contact print Note z The machine supports the following DPOF functions Supported image formats CIFF Exif and JFIF Print Style Standard Print Prints photos that were specified as Standard Print with DPOF Print Style Index Print Prints an index of photos that were specified as Index Print with DPOF using the machine s index printing layout Standard Print Phot...

Страница 62: ...method selection screen is displayed Use or to select the print method then press OK z If you selected Single photo for Captured info the photo selection screen is displayed Use or to select the photos to print then press OK You can do z To search for photos with the shooting date Search see Searching for Photos with the Shooting Date Search on page 54 z To print a specified area Trimming see Prin...

Страница 63: ... the Photo Index Sheet menu 1 Press Photo Index Sheet The Photo Index Sheet menu is displayed 2 Use or to select Photo Index Sheet print then press OK 3 Select a range of image data to print 1 Use or to select a range of images you want to include in the Photo Index Sheet then press OK z If you selected Print all photos 2 Go to step 4 z If you selected Set no of copies 2 Use or to specify the numb...

Страница 64: ... as necessary See Print Setting Items on page 37 C Mark this to print all photographs one copy each When you mark this even if you mark the number of copies you want to print for each photograph those marks will be disregarded and one copy each of all photographs will be printed D Select the number of copies fill in a circle under each photograph you want to print E Follow the procedure as describ...

Страница 65: ...lace the Photo Index Sheet on the Platen Glass then press OK When placing the Photo Index Sheet place the front side down and align the upper left corner of the sheet precisely with the arrow mark alignment mark at the upper left corner of the Platen Glass The Photo Index Sheet is scanned and the specified photos will be printed Important z Be sure to fill a circle for every setting item except op...

Страница 66: ... read the settings z Do not remove the memory card while the machine is printing z If the Platen Glass is dirty the machine may not read the settings See Cleaning the Platen Glass and Document Cover on page 122 z If the Photo Index Sheet is dirty the machine may not read the settings Note z To cancel printing press Stop Reset z To continue to print photographs using subsequent Photo Index Sheets r...

Страница 67: ...he Platen Glass 1 Press ON OFF to turn on the machine See Turning the Machine ON and OFF on page 18 2 Select the type of original to scan 1 Press PHOTO FILM 2 Use or to select Print from photo then press OK The photo placement guidance screen is displayed 3 Load the photos on the Platen Glass 1 Lift the Document Cover 2 Load the photos on the Platen Glass Place the photos face down on the Platen G...

Страница 68: ...aced closer they may be scanned as a single image z Slanted photographs with a long edge of 7 1 180 mm or more cannot be corrected z Photographs smaller than approx 1 25 mm square will not be scanned properly z The types of photographs listed below may not be scanned properly Non rectangular or irregular shaped such as cut out photos Photographs that are entirely white z The borders of bordered ph...

Страница 69: ...n page 18 2 Select the type of original to scan 1 Press PHOTO FILM 2 Use or to select Print from film then press OK The film placement guidance screen is displayed 3 Select the type of film to scan 1 Use or to select the type of film to scan The following type of film can be selected Color negative film Black white negative film Color positive film and Mount for slides 2 Press OK The procedure to ...

Страница 70: ... Document Cover 2 Remove both the film guides for film strip or slides from the rear of the FAU Protective Sheet 5 Mount film in the appropriate film guide as described below z Mounting a 35 mm Film Strip 1 On the film guide open the film holder Gently squeeze in the edges A of the film holder to release it B A B ...

Страница 71: ...the film guide with the indentations on the right and left sides of the Platen Glass Note z Ensure that all the tabs on its outer edges fit into the slots in the film guide when closing the film holder If the film holder is floating press the whole downward z If the film holder will not close properly reposition the film so that its perforations are set properly in the film guide slots and try aga...

Страница 72: ...s in the film guide with the front side the side showing the correct image face down and with the image upside down Load the slides in the landscape orientation making sure they are not loose in the film guide Important The images may be unsatisfactory if the film is set beyond the reference position A indicated by the white line Do not set the film beyond the reference position A ...

Страница 73: ...graph towards you to prevent the scanned photographs from being displayed upside down on the LCD Depending on the model or brand of your camera the scanning order may differ from the frame order of the film Note z The photo or film is rescanned before printing starts Do not open the Document Cover or remove the photo or film from the Platen Glass until printing is complete z If the film was not sc...

Страница 74: ... the photo you want to print 2 Press Color or Black The print confirmation screen is displayed 4 Start printing 1 Check the page size and media type 2 Use or to specify the number of prints Note You can do z To print a specified area Trimming see Printing a Specified Area Trimming on page 73 Note Press Settings to check or change the page size media type or other settings See To Change Print Setti...

Страница 75: ... to print 2 Use or to specify the number of prints 3 Repeat from step 1 to step 2 to specify the number of prints for each photo 4 Press OK The print confirmation screen is displayed 4 Start printing 1 Confirm the settings To change any of the settings press Settings See Changing the Print Settings on page 35 2 Press Color or Black The specified number of copies of each photo will be printed Other...

Страница 76: ...hoto to print then press OK The print confirmation screen is displayed 5 Start printing See Start printing on page 72 Printing All Photos Print all photos You can print all scanned photos 1 Prepare for printing See Prepare for printing on page 71 2 Select the print menu 1 Use or to select Special photo print then press OK 2 Use or to select Print all photos then press OK 3 Start printing See Start...

Страница 77: ... photo solutions including the direct printing of photos from a digital still camera camcorder or mobile phone without the need to use a computer z It is possible to specify which images to print and various print settings from the operation panel of your camera or mobile phone z Canon Bubble Jet Direct allows you to print photos from a Canon Bubble Jet Direct compatible PictBridge incompatible di...

Страница 78: ...0 to the Direct Print Port of the machine If you do so electric shock fire or damage to the device could result Note When printing photos with the digital device connected to the machine it is advisable to use the AC adapter supplied with the device If you use the device battery be sure to charge it fully Note The Print Head cannot be aligned using the controls of the digital device If the Print H...

Страница 79: ...ng icons will display on the LCD display of the device when the machine is correctly connected A PictBridge compliant device A Canon Bubble Jet Direct compatible digital camera Note Some types of the PictBridge compliant devices do not turn on automatically when connected to the machine If the device does not turn on automatically turn it on manually Note If neither of these icons appear see Canno...

Страница 80: ... setting items selections based on the machine setting using the controls of the device About the Settings Explained below The settings explained on the following pages cannot be made on some PictBridge compliant devices If any setting cannot be made the machine setting is used Names of settings that are displayed on Canon PictBridge compliant device are used in the description given below Differe...

Страница 81: ...evices note that it cannot be selected for some models 3 Plain Paper can be selected for Paper type when A4 or 8 5 x 11 Letter is selected for Paper size When Plain Paper is selected for Paper type bordered printing will be performed even when Borderless is selected for Layout 4 When A4 or 8 5 x 11 Letter is selected for Paper size you can print in 4 up layout Paper size setting Paper type setting...

Страница 82: ... with the print mode select Off for this function If you select Date File No or Both the date and or file number will be printed over the embedded date Note z When printing onto Photo Stickers PS 101 16 up use the following settings 1 Select the Auto Sheet Feeder as the paper source For details see Loading the Print Media in the Auto Sheet Feeder on page 25 Always load Photo Stickers PS 101 in the...

Страница 83: ...cified photos Select Layout then select the item displayed with the i icon z 35mm Film Style Layout Contact Printing Layout You can print selected photos or index specified photos in 35 mm film style layout contact printing layout Select Layout then select the item displayed with the film icon Note z Never disconnect the USB cable during printing z When disconnecting the USB cable between the Pict...

Страница 84: ...tible digital camera to this machine use the USB cable for the computer connection supplied with the camera For details on connection see Connecting to a PictBridge Compliant Device on page 76 Digital Camera Setting Media Type Card 1 Photo Paper Pro 4 x 6 101 6 x 152 4 mm Card 2 Photo Paper Plus Glossy 4 x 6 101 6 x 152 4 mm Photo Paper Plus Semi gloss 4 x 6 101 6 x 152 4 mm Glossy Photo Paper 4 x...

Страница 85: ...Properly from the Digital Camera on page 143 Note z By operating the digital camera you can make the following prints You can make a standard print from the image displayed in the single display mode or in the index display mode You can print specified numbers of images or make an index print by editing the DPOF Images other than Exif may not be index printed For the images taken with an ExifPrint...

Страница 86: ... on the Wireless print settings screen when printing from a mobile phone through Infrared communication or Bluetooth communication For how to print from a computer through Bluetooth communication refer to the Bluetooth User s Guide The initial setting is borderless printing on 4 x 6 Photo Paper Plus Glossy Displaying the Wireless Print Screen and Specifying the Settings 1 Press ON OFF to turn on t...

Страница 87: ...ow Sticker print Stickers x 16 Printing on paper other than sticker Bordered x 1 x 2 x 4 x 8 Borderless x 1 x 2 x 4 x 8 Mixed 1 2 3 Note For information on wireless print compatible page size and type see Recommended Paper and Requirements on page 20 Note z Mixed 1 Mixed 2 or Mixed 3 can be selected only when the page size setting is 8 5 x 11 215 9 x 279 4 or A4 z When printing on Canon Photo Stic...

Страница 88: ...ource is selected See Changing the Paper Source on page 24 2 Set the print setting See Setting the Page Size Media Type and Layout When Printing from a Mobile Phone on page 84 3 Start Infrared Communication 1 Oppose the infrared port of the mobile phone D to that of the machine B at a distance of less than 7 87 20 cm C Note z The effective angle of the IrDA port of the machine is about 10 from the...

Страница 89: ...g image with the camera of the mobile phone z For the procedure to print from your mobile phone refer to your mobile phone manual z Do not place any obstacle between the infrared ports of the machine and mobile phone Data cannot be transmitted between them z During printing be careful not to interrupt infrared communication with the machine If it is interrupted send the data from the mobile phone ...

Страница 90: ...You can change the device name of the machine passkey and so on in Bluetooth settings on the machine See Changing the Bluetooth Settings Bluetooth settings on page 89 Note z Communication is possible up to about 32 8 ft 10 m depending on the conditions below The printing speed may change depending on the following conditions Presence of obstacles between the communication equipment and radio wave ...

Страница 91: ...to select the item 3 Press OK after finishing all settings you need Setting Items Device name Select the device name of this machine displayed on the screen of the Bluetooth devices When you set MP800R 2 the machine name on the Bluetooth device is Canon MP800R 2 The initial value is set to MP800R 1 Access refusal Selecting ON will disable search this machine from Bluetooth devices Security Selecti...

Страница 92: ...d from the Auto Sheet Feeder When the Cassette Lamp B is lit paper is fed from the Cassette 4 Create a document or open a file to print from the application software Note z Menu and command names may differ between application softwares and more steps may be required For details refer to the documentation for each application software you use z The steps described in this section are for printing ...

Страница 93: ...in tab of the Printing Preferences screen is displayed 6 Specify the required settings 1 Click Media Type to select the type of media loaded in the machine 2 Ensure that Paper Feed Switch is selected from Paper Source 3 Specify the print quality and other settings in Print Quality or Color Intensity Note If another name of the machine is selected click the name of the machine to use Note For print...

Страница 94: ...ource For a detailed description of the Paper Source settings refer to the Printer Driver Guide z For details about other printer driver functions click Instructions or Help to view the Printer Driver Guide Instructions is only displayed when the Printer Driver Guide is installed z Selecting the Preview before printing check box displays a preview screen that allows you to confirm the selected pri...

Страница 95: ...an cancel a print job in progress by simply pressing Stop Reset on the machine z Click Cancel Printing on Canon IJ Status Monitor to stop printing To show Canon IJ Status Monitor click Canon MP800R Series Printer on the taskbar Note z Menu and command names may differ between application softwares and more steps may be required For details refer to the documentation for each application software y...

Страница 96: ...The Page Setup dialog box opens 2 Confirm that MP800R is selected in Format for 3 Select the desired page size from Paper Size 4 Click OK 6 Specify the required settings 1 Select Print from the application software s File menu The Print dialog box opens 2 Select Quality Media from the pop up menu 3 Select the desired media type from Media Type 4 Ensure that Paper Feed Switch is selected from Paper...

Страница 97: ...finition Printing a composite document Select when printing documents consisting mainly of text Detailed Setting Select to fine tune the Print Quality and Halftoning settings z For details about other printer driver functions click to view the Printer Driver Guide If the Printer Driver Guide is not installed the Printer Driver Guide is not displayed even if is clicked z Clicking Preview displays a...

Страница 98: ... scanned meet the requirements for an original to be set on the Platen Glass For details see Loading Documents on page 19 For details on setting film originals see Scanning a Film on page 67 z Is the machine connected to a computer correctly Confirm that the connection between the machine and the computer is physically secure When you use a computer connected over a wireless or wired LAN confirm t...

Страница 99: ... may not be supplied with this machine in some country For detailed operations of the MP Navigator refer to the Scan Guide Scanning Using the Operation Panel of the Machine You can scan documents to a computer connected over a USB connection or a wireless or wired LAN by using the Operation Panel on the machine z If you are using Windows XP The program selection screen is displayed the first time ...

Страница 100: ... open select MP Navigator 2 1 from Applications then click Open Select Quit Image Capture from the Image Capture menu to exit Image Capture 1 Press ON OFF to turn on the machine See Turning on the Machine on page 18 2 Load the document on the Platen Glass For details on how to load documents see Loading Documents on page 19 For details on setting film originals see Scanning a Film on page 67 3 Sel...

Страница 101: ...ed to a wireless or wired LAN it can be shared by multiple computers Theoretically there is no limit to the number of computers that can be connected to the machine However the maximum number of computers that can be displayed on the LCD of the machine is six One computer connected over a USB connection and five computers connected over a wireless or wired LAN z Only USB is displayed on the screen...

Страница 102: ...in correctly please refer to Selecting the Behavior of the Operation Panel with MP Navigator in the Scan Guide On screen Manual and change the MP Navigator Document Type and Document Size to match those of the original being scanned Note z The operation to be performed after scanning the document depends on the scan operation setting you have selected in step 4 For details on how to modify the ope...

Страница 103: ...Troubles in the network setup of the Card Slot in the Network Guide Cannot access the Card Slot after the network setup of the Card Slot is complete Can read the memory card in the Card Slot but cannot write to it The Card Slot is disconnected z When Read write attribute under Device settings is set to USB enabled using the Operation Panel of the machine card direct printing cannot be done After u...

Страница 104: ...ed The Card Slot is used as the memory card drive of a USB connected computer only You can read from or write to the memory card Read only mode The Card Slot is used only for reading from both USB connections and LAN connections Be sure to select this mode when printing photos from a memory card Note When using the Card Slot as the memory card drive of the computer the removal operation from the c...

Страница 105: ...urn on the machine See Turning the Machine ON and OFF on page 18 2 Press Menu 3 Display the Device settings screen 1 Use or to select Maintenance settings then press OK The Maintenance settings screen is displayed 2 Use or to select Device settings then press OK The Device settings screen is displayed 4 Select the menu 1 Use or to select the setting item then press OK Example select Print settings...

Страница 106: ...nt Selects the amount of image that extends off the paper when printing in Borderless full Important z The printing speed may be reduced compared to when this setting is set to OFF z This function may not be so effective depending on the print quality setting z Furthermore certain noise such as when the machine is preparing for printing is not reduced Important Be sure to revert this setting to OF...

Страница 107: ... for printing photos saved on a mobile phone Image optimizer Choosing Image optimizer ON enables you to correct and smooth the jagged contours for printing Layout print Specifies the layout for the paper when printing photos saved on a mobile phone Bluetooth Settings For details see Changing the Bluetooth Settings Bluetooth settings on page 89 Device name Specifies the name of this machine that is...

Страница 108: ...select from USB enabled or Read only mode Power save setting Specifies the time until Power saving is enabled You can select from 5 minutes 15 minutes 1 hour or 8 hours The initial value is set to 1 hour Adjust contrast Use this to adjust the contrast of the LCD if it is too low or too high Important This printout contains valuable information about your computer Handle it with care Note z When Pr...

Страница 109: ...he default except for the language for LCD messages the position of the Print Head and LAN settings Save settings Saves the settings for the Settings screen Load settings Loads the settings for the Settings screen that were saved Note When Image quality Std is selected images are displayed at 5 second intervals When Image quality High is selected images are displayed at different time intervals ac...

Страница 110: ...mp flashes slowly about three seconds Prepare a new ink tank Repeats When ink has run out The ink tank lamp flashes fast about one second Replace it with a new ink tank Repeats If an error message is displayed on the LCD an ink tank error has occurred and the machine cannot continue to print See An Error Message is Displayed on the LCD on page 127 Black CLI 8BK Magenta CLI 8M Black PGI 5BK Cyan CL...

Страница 111: ...e Printing does not resume if any of the ink tanks are left uninstalled Be sure to press OK with all the ink tanks installed z Press Stop Reset to cancel printing Replace with a new ink tank Replacing Ink Tanks When an ink tank runs out of ink replace it using the following steps Note z To maintain optimal print quality use an ink tank within six months of its first use z Once an ink tank has been...

Страница 112: ... to the center A Press the Open Button to open the Paper Output Tray if it does not open automatically 2 Open the Inner Cover Caution Do not hold the LCD Important If the Scanning Unit Printer Cover is left open for more than 10 minutes the Print Head Holder moves to the right Close and reopen the Scanning Unit Printer Cover to return the Print Head Holder to the center Caution z Do not try to man...

Страница 113: ...rotective cap D from the bottom of the ink tank and discard it Carefully hold the protective cap when removing it to prevent the ink from staining your fingers Discard the cap once it is removed Caution Do not touch the Print Head Lock Lever B Remove only the ink tank Important z Handle ink tanks carefully to avoid staining clothing or the surrounding area z Discard empty ink tanks according to th...

Страница 114: ...to print z Do not squeeze the side of ink tanks F as this may cause the ink to leak out and stain your clothes and hands z Do not re attach the protective cap D once you have removed it z Do not touch the open ink port E once the protective cap is removed as this may prevent the ink from being ejected properly z Ink on the removed protective cap may stain your clothes and hands z Ensure that all t...

Страница 115: ...long period of time the Print Head nozzles become blocked by dried ink Periodically printing or cleaning the Print Head can prevent this blockage Note Ensure that the Inner Cover is closed Printing will not occur if the Inner Cover is open Caution z Be sure to hold the Scanning Unit Printer Cover firmly using both hands and be careful not to get your fingers caught z Do not hold the LCD Note z If ...

Страница 116: ... lamp is flashing even though ink remains in that ink tank it is inserted in the wrong position Make sure that the correct ink tank color is inserted in each position Open the Scanning Unit Printer Cover and make sure all the ink tank lamps are lit See Replacing an Ink Tank on page 108 If the ink tank lamp is unlit press the mark on the ink tank firmly until it clicks to fully insert it Make sure ...

Страница 117: ... 18 2 Press Menu 3 Display the Maintenance screen 1 Use or to select Maintenance settings then press OK The Maintenance settings screen is displayed 2 Use or to select Maintenance then press OK The Maintenance screen is displayed 3 Use or to select the setting item then press OK The setting screen for the selected item is displayed 1 2 3 ...

Страница 118: ...der or the Cassette See Turning on the Machine on page 18 and Loading Paper on page 20 2 Use Feed Switch to select the paper source where you have loaded paper 3 Printing the nozzle check pattern 1 Display the Maintenance screen See Performing Maintenance on page 115 2 Use or to select Nozzle check and then press OK The pattern print confirmation screen is displayed 3 Use or to select Yes and then...

Страница 119: ...exist on this pattern The two different pattern sets will be displayed by turns for the pattern confirmation screen on the LCD z There are no white stripes All the patterns are printed normally 1 Select All A and press OK The screen returns to the Maintenance screen Note If the ink level is low the nozzle check pattern is not printed correctly Replace the relevant ink tank See Replacing an Ink Tan...

Страница 120: ...e check pattern This unclogs the nozzles to restore the Print Head condition Note that cleaning the Print Head causes waste ink to be absorbed in the waste ink absorber Cleaning the Print Head consumes ink so perform Print Head cleaning only when necessary 1 Press ON OFF to turn on the machine See Turning on the Machine on page 18 2 Clean the Print Head 1 Display the Maintenance screen See Perform...

Страница 121: ...ocess Print Head deep cleaning consumes more ink than standard print head cleaning so perform this procedure only when necessary 1 Press ON OFF to turn on the machine See Turning on the Machine on page 18 2 Perform deep cleaning of the Print Head 1 Display the Maintenance screen See Performing Maintenance on page 115 2 Use or to select Deep cleaning and then press OK The confirmation screen is dis...

Страница 122: ...d automatically If the ruled lines are shifted after running the Print Head maintenance align the Print Head There are two ways to align the Print Head automatic or manual First try adjusting the Print Head automatically If the automatic Print Head alignment does not work or if you wish you can adjust the Print Head manually See Adjusting the Print Head Manually on page 130 1 Press ON OFF to turn ...

Страница 123: ...e When Automatic Print Head Alignment Cannot Be Executed Correctly z When automatic Print Head alignment cannot be executed correctly the message Auto head align has failed is displayed on the LCD See An Error Message is Displayed on the LCD on page 127 Caution z Be sure to turn OFF the power and disconnect the power cord before cleaning the machine z Do not use tissue paper paper towels or simila...

Страница 124: ... Roller Cleaning Clean the paper feed rollers if paper is not fed properly Cleaning the paper feed rollers will wear the rollers so perform this only when necessary 1 Press ON OFF to turn on the machine then remove any paper from the Auto Sheet Feeder and Cassette See Turning on the Machine on page 18 2 Use Feed Switch to select the paper source to clean 3 Clean the paper feed rollers 1 Display th...

Страница 125: ...Center Cleaning the Interior of the Machine Bottom Plate Cleaning This section describes how to clean the interior of the machine If the interior of the machine becomes dirty paper printed onto by the machine may get dirty so we recommend performing cleaning regularly 1 Press ON OFF to turn on the machine then remove any paper from the Auto Sheet Feeder See Turning on the Machine on page 18 2 Prep...

Страница 126: ...clean the inside of the machine again If the problem remains after performing cleaning again the protrusions inside the machine may be stained Clean them up See Cleaning the Protrusions inside the Machine on page 124 Cleaning the Protrusions inside the Machine If protrusions inside the machine are stained wipe ink off the protrusions using a swab or the like Important z Even if the Cassette is sel...

Страница 127: ...ge 146 z Cannot Install the MP Drivers on page 147 z Cannot Connect to the Computer Properly on page 148 z Printing Speed is Slow USB 2 0 Hi Speed Connection Does Not Work on page 148 z When You Connect to a Computer Running Windows XP the Screen Shows the Warning Message This device can perform faster or High SPEED USB Device Plugged into non High SPEED USB Hub on page 149 z Problems Scanning on ...

Страница 128: ...page 156 z Image becomes too dark or too bright when cropping frame is moved expanded or contracted on page 157 z Trouble scanning with MP Navigator on page 157 z Frames are not detected correctly on page 157 z An Error Message Appears on the Screen on page 158 z Service Error 5100 is Displayed on page 158 z Writing Error Output Error Communication Error in USBnnn or MPUSBPRNnn n represents a numb...

Страница 129: ...ver U041 The ink has run out The lamp on the ink tank flashes Replace the ink tank and close the Scanning Unit Printer Cover If printing is in progress and you want to continue printing press OK with the ink tank installed Then printing can continue under the ink out condition Replace the empty ink tank immediately after the printing The machine may be damaged if printing is continued under the in...

Страница 130: ...e appropriate ink tank See Replacing an Ink Tank on page 108 The following ink tank cannot be recognized U150 z Ink tank errors have occurred The lamp on the ink tank is off Replace the ink tank See Replacing an Ink Tank on page 108 z The ink tank that is not supported by this machine is installed The lamp on the ink tank is off Install the appropriate ink tank See Replacing an Ink Tank on page 10...

Страница 131: ... the Print Head again press OK to resolve the error and then perform manual Print Head alignment For details on manual Print Head alignment see Adjusting the Print Head Manually on page 130 Error code An error requiring servicing might have occurred Turn off the machine and unplug the power cord of the machine from the power supply After a while plug the power cord of the machine back in turn on t...

Страница 132: ...or to select Yes and then press OK The input screen for the head position adjustment value is displayed 7 Check the printed patterns and use or to input the number of the pattern in column A that has the least noticeable streaks 8 Press to move the cursor to column B and then use or to input the number of the pattern that has the least noticeable streaks 9 Repeat the procedure until you finish inp...

Страница 133: ...p See Cleaning Your Machine on page 121 Dirt is stuck to the film Wipe the film with a cloth then set it again Film condition is poor due to faded colors Scan using Fade restoration See Memory card and Photo film modes on page 38 Note If a print out of an image does not appear satisfactory or the same as what you see on the monitor you may need to change the print settings or the machine itself ma...

Страница 134: ...Ink Level Information on page 108 Ink tank is not fully inserted When the ink tank lamp is unlit press the mark on the ink tank clicks into place The ink tank lamp lights red when the ink tank is fully inserted Make sure all of the orange tape is peeled off the ink tank as illustrated in A If any orange parts are left like in B remove all of the orange parts A Correct An L shaped notch appears on ...

Страница 135: ...ity bar for higher print quality 1 Open the Print dialog box 2 Select Quality Media from the pop up menu and then click Detailed Setting 3 Drag the Print Quality slide bar to the Fine end The media is loaded with the wrong side facing upwards Load the media with the correct side facing upwards The paper stack exceeds the capacity of the Auto Sheet Feeder or Cassette If the paper stack exceeds the ...

Страница 136: ... machine has been printing continuously over a long period If so the Print Head will overheat To protect the Print Head printing will stop temporarily and resume after a period of time Interrupt printing when appropriate turn OFF the machine and wait at least 15 minutes Caution The area around the Print Head may become extremely hot Do not under any circumstances touch it You are printing high res...

Страница 137: ...from the pop up menu 2 Select Automatic Duplex Printing and select Use reduced printing in Print Area Cause Action The document is not loaded correctly Check that the document is loaded correctly on the Platen Glass See Loading Documents on page 19 The quality print quality displayed on the LCD is not suitable for the document Set the image quality suitable for the document See Copying on page 40 ...

Страница 138: ...chine on page 18 2 Place the only one sheet of A4 Letter size plain paper in landscape horizontally fold it in half 3 Unfold the paper and load the paper in the Auto Sheet Feeder with the inverted V edge down 4 Use or to select Bottom plate cleaning from the Maintenance and press OK 5 Use or to select Yes on the Bottom plate cleaning confirmation screen and then press OK The paper that is loaded i...

Страница 139: ... will rotate as it cleans 5 Repeat steps 3 and through 4 two times 6 Load three or more sheets of A4 Letter sized plain paper lengthways in the paper source you selected in step 2 7 Repeat steps 3 and through 4 three times The paper that is loaded in the machine will feed through the machine and be ejected If there are no signs of improvement after performing three times contact the Canon Customer...

Страница 140: ... click Send 4 Click OK when the confirmation message appears 1 Open the Canon IJ Printer Utility dialog box 2 Select Custom Settings from the pop up menu 3 Select Prevent paper abrasion Note Clear the Prevent paper abrasion check box once printing is complete When Prevent paper abrasion is selected in the printer properties dialog box Windows or selected from Custom Settings in the Canon IJ Printe...

Страница 141: ...heck in Prevent paper abrasion Paper is loaded incorrectly Load in the portrait orientation regardless of the print direction of the Auto Sheet Feeder or Cassette Ensure that paper is loaded correctly Slide the Paper Guides against the paper stack The paper stack exceeds the capacity of the Auto Sheet Feeder The paper cannot be fed normally depending on its media type or your environment where the...

Страница 142: ...Paper Output Slot whichever is easier z If the paper tears and a piece remains inside the machine open the Scanning Unit Printer Cover and remove it Be careful not to touch the components inside the machine at this time After removing all paper close the Scanning Unit Printer Cover turn the machine off and turn it back on z If you cannot pull the paper out turn the machine off and turn it back on ...

Страница 143: ...the Rear Cover 4 If you could not extract the paper in step 2 remove the Cassette 5 Slowly pull the jammed paper out 6 If any paper is sticking out of the Cassette reload the paper in the Cassette 7 Insert the Cassette into the machine again and press OK on the machine If you have turned off and on the machine in step 2 you will need to retry printing because this operation cancels any print jobs ...

Страница 144: ...annot load Credit Card sized paper in the landscape orientation Remove the paper according to the following procedure 1 Load Credit Card sized paper in the Auto Sheet Feeder one sheet at a time Do not load it in the landscape orientation 2 Press ON OFF on the machine to turn off the power 3 Press ON OFF again on the machine to turn on the power The paper is fed and the jammed paper is ejected acco...

Страница 145: ...e message displayed on the LCD of the machine and clear the error For clearing an error from the machine see An Error Message is Displayed on the LCD on page 127 z A communication time out occurs if printing takes a long time or if it takes too much time to send data This may stop printing In such cases disconnect the cable between the machine and the camera and reconnect the cable between the mac...

Страница 146: ...ning Unit Printer Cover on the machine No print head The Print Head is defective or not installed Install a Print Head according to the Setup Guide If the Print Head has already been installed remove the Print Head and reinstall it If the error still remains the Print Head may be defective Contact the Canon Customer Care Center Waste tank ink absorber full This error message indicates that the was...

Страница 147: ... flashing about three seconds indicates ink is low For details on different flashing speeds see Knowing When to Replace Ink Tank on page 109 z Some ink tanks are not installed in place or more than one ink tanks of the same color are installed Confirm that the ink tanks are installed in the appropriate positions See Replacing an Ink Tank on page 108 Ink error No ink The ink tank that was once empt...

Страница 148: ...Place the machine within 7 87 20 cm from the mobile phone for proper communication During infrared communication infrared rays were interrupted or another infrared communication device is operating nearby If infrared communication between the infrared ports of the machine and the mobile phone is interrupted by any obstacle for ten and several seconds or longer during printing the paper on which da...

Страница 149: ... procedures described in the Setup Guide and reinstall the MP Drivers Installation does not start automatically when the Setup CD ROM is inserted into the drive Click Start select My Computer and then double click the CD ROM icon For non Windows XP users open the My Computer window and then double click the CD ROM icon Double click the CD ROM icon on your desktop to start installation If the CD RO...

Страница 150: ... Hi Speed If your environment is not fully compatible with USB 2 0 Hi Speed the printer will operate at a lower speed provided under USB 1 1 In this case the machine operates properly but printing speed may slow down due to communication speed Check the following to ensure that your computer environment supports USB 2 0 Hi Speed connection z The USB port on your computer supports USB 2 0 Hi Speed ...

Страница 151: ... won t start Cause Action You connect to a computer that does not support USB 2 0 Hi Speed Your environment is not fully compatible with USB 2 0 See Printing Speed is Slow USB 2 0 Hi Speed Connection Does Not Work on page 148 Cause Action The machine is not recognized by the computer Restart the computer This may enable the computer to recognize the machine Cause Action Scanner driver ScanGear MP ...

Страница 152: ...ge appears and the ScanGear MP window fails to appear when using over a USB connection z Reattaching the USB cable Be sure to use a certified USB 2 0 Hi Speed cable You are recommended to use the cable no longer than 9 8 feet 3 meters z If a USB hub is used for the connection do not use it Attach the cable to a USB port on the computer itself not the hub z Attach the USB cable to a different USB p...

Страница 153: ... is low If the image looks grainy increase the scan resolution For details refer to the Scan Guide Specification of the application software Some application software does not display the image clearly if the image is too small Set the view mode to 100 Moiré appears Set Descreen to ON in the Image Settings section of the Advanced Mode of ScanGear MP Note Moiré may appear when you scan digital phot...

Страница 154: ...als z A maximum of 10 originals can be scanned at once z If an original is slightly crooked on the Platen Glass within 10 degrees of true the image is automatically straightened z The Multi Scan function only works with rectangular originals such as photos z Originals that are not rectangular irregularly shaped close cropped photos cannot be detected correctly z Originals must be at least as large...

Страница 155: ... and rescan The higher the resolution the larger the resulting image will be z Some application software do not display clear images at small image display settings Set the scale to 100 Scanned image won t open The file name extension is not supported by the application software Rescan the image using an application software such as ArcSoft PhotoStudio and change the file name extension when savin...

Страница 156: ...l For information on how to set a WEP WPA WPA2 key refer to How to set a WEP WPA WPA2 of Troubleshooting in the Network Guide The network setting of the computer is not correct Make sure that the computer can communicate with the access point The radio status is poor Adjust the installation positions and the antenna direction while monitoring the radio status with Canon IJ Network Tool The distanc...

Страница 157: ...f Changing and Confirming Network Settings in the Network Guide Cause Action The computer s network setup to use the machine over a wireless or wired LAN is not completed The MP driver is not installed Complete the computer s network setup If the MP driver is not installed install it For details on these operations refer to the Setup Guide The machine is not selected in the Canon IJ Network Scan U...

Страница 158: ...Film Monochrome Positive Film in the Select Source category z When scanning on the MP Navigator scan using Scan Film Resolution setting is too high and scanning is slow If the Output Resolution is set to too high scanning takes a long time or the computer seems to be freezing If this happens lower the Output Resolution and rescan Cause Action You are attempting to scan film with extremely dark or ...

Страница 159: ...f click Thumbnail to change to Thumbnail Display On 3 In the Apply the tone value to all frames section click Apply 4 Adjust the cropping frame 5 Click Scan Cause Action The film may not be scanned correctly when Film Type is set to Auto Click Specify in Scan settings in MP Navigator and set the Film Type to match the type of the film to scan and scan it again For more information refer to the Sca...

Страница 160: ...the printer driver to change the paper source If this error Paper is not loaded is ignored for a certain period of time an additional message may be displayed Printer port setting does not match the interface connected to the machine Check the printer port settings 1 Click Start and select Control Panel Printers and Other Hardware and then Printers and Faxes For non Windows XP click Start select S...

Страница 161: ... from Your Computer on page 90 2 Click the Ports tab or the Details tab and select CNBJNPnnnnnn n represents a number as the printer port to be used The settings of both the access point and the machine are not identical Check the settings of the access point and modify the settings of machine as same as those of the access point For information on the access point settings refer to the access poi...

Страница 162: ...nsure that it matches the size of the paper loaded Check Page Size on the Page Setup tab in the printer properties dialog box Windows or the Page Setup dialog box Macintosh to ensure that it matches the size of the paper loaded The page sizes that can be used for Automatic Duplex Printing are Letter A4 B5 A5 and 5 x 7 127 0 x 177 8 mm Check that the page size of the loaded paper is correct Note To...

Страница 163: ...layed in the Printer List and select the check box 3 If MP800R is not displayed click to add a printer If MP800R is not displayed install the MP Drivers again referring to the Setup Guide for the operation Cause Action Cannot print over the wireless LAN Make sure that the machine is turned on The machine cannot communicate through the network refer to Troubleshooting in the Network Guide Cause Act...

Страница 164: ...m necessary operations for connection referring to the instruction manual supplied with the PictBridge compliant device and then connect the cable again If the error is still unresolved there is a possibility that you are using a digital camera or digital video camcorder that is not supported by this machine Use a digital camera or digital video camcorder compatible with this machine Cause Action ...

Страница 165: ...rm the following z Product name PIXMA MP800R z Serial number written on label inside machine z Details of the problem z What you tried to solve the problem and what happened Caution Attempts by customers to repair or take apart the machine will invalidate any warranty regardless of whether the warranty has expired Note If the machine emits any unusual sound smoke or odor turn it off immediately Un...

Страница 166: ...f the recommended printing area print quality or paper feeding accuracy may go down Size Printable Area width x height A5 141 2 x 202 0 mm 5 6 x 7 9 inches A4 203 2 x 289 0 mm 8 0 x 11 4 inches B5 175 2 x 249 0 mm 6 9 x 9 8 inches 5 x 7 127 0 x 177 8 mm 120 2 x 169 8 mm 4 7 x 6 7 inches 4 x 6 101 6 x 152 4 mm 94 8 x 144 4 mm 3 7 x 5 7 inches 4 x 8 101 6 x 203 2 mm 94 8 x 195 2 mm 3 7 x 7 8 inches ...

Страница 167: ... SG 101 and Matte Photo Paper MP 101 selection of Borderless Printing enables you to make prints with no margins However Borderless Printing may reduce the print quality on the top and bottom edges of the paper or cause it to become smudged Printable area Recommended printing area Size Printable Area width x height European DL 190 5 x 10³ 2 mm 7 5 x 4 1 inches US Com 10 211 8 x 98 0 mm 8 3 x 3 9 i...

Страница 168: ...h the MP driver and application softwares z Select On screen Manual from Custom Install to install the on screen manuals If you have not installed or have deleted the on screen manuals use either method above to install them Browser Windows HTML Help Viewer Browser Help Viewer Note z Microsoft Internet Explorer 5 0 or later must be installed z The on screen manual may not be displayed properly dep...

Страница 169: ... Canon IJ Network Scan Utility is installed then double click Library Printers Canon BJPrinter Utilities and move Canon IJ Network Scan Utility to the trash z If you are using Mac OS X v 10 2 1 Select Applications from the Go menu then double click System Preferences 2 Click Login Items from Personal 3 Select the Hide check box of the Canon IJ Network Scan Utility then click Remove 4 Restart the c...

Страница 170: ...uble click the Canon Utilities folder and then the IJ Manual folder 3 Drag the MP800R folder into the trash 4 Drag the MP800R On screen Manual on your desktop into the trash Transporting Machine When relocating the machine or storing the machine for a long period of time pack the machine using the original packing materials If you do not have the original packing materials pack the machine careful...

Страница 171: ... with a USB 2 0 Hi Speed interface Since the USB 2 0 Hi Speed interface is fully upwardly compatible with USB Full Speed USB 1 1 it can be used at USB Full Speed USB 1 1 Direct Print Port IrDA Image data only Bluetooth optional Wireless LAN Interface IEEE802 11g IEEE802 11b Wired LAN Interface RJ 45 Acoustic noise level Approx 34 7 dB A in the highest print quality mode Operating environment Tempe...

Страница 172: ...Mac OS X v 10 2 4 to 10 4 x Wireless LAN Specifications Supported Networks IEEE802 11g IEEE802 11b Interface IEEE802 11g IEEE802 11b Network Interface Transfer Standard IEEE802 11g IEEE802 11b Access Mode CSMA CA Transmission Method OFDM DS SS Frequency Bandwidth 2 412 GHz 2 462 GHz Wireless Channel 1 to 11 Network Type Infrastructure Communication Distance Indoors 50 m Effective range differs dep...

Страница 173: ...of print media Effect ExifPrint DPOF functions Ver 1 00 compatible Index print number of copies select images print special characters date Camera Direct Print PictBridge Paper size Default Selections based on the machine setting 10 x 15 cm 4 x 6 Photo Paper Plus Glossy Photo Paper Pro Photo Paper Plus Semi gloss Glossy Photo Paper Glossy Photo Paper Everyday Use Photo Stickers 1 13 x 18 cm 5 x 7 ...

Страница 174: ... i icon Note that this print setting cannot be used for some models See Recommended Paper and Requirements on page 20 Trimming Default Off No trimming On follow camera s setting Off Image optimize Default Selections based on the machine setting On Off VIVID NR Noise Reduction VIVID NR Face If using a Canon PictBridge compatible camera you can select it Print date file no Default Off No printing Da...

Страница 175: ...tion Windows 98 4 98 Second Edition PentiumII 300 MHz 3 128 MB 450 MB Interface Operating System Processor RAM Hard Disk Space USB 2 0 Hi Speed Mac OS X v 10 4 PowerPC G4 G5 256 MB 500 MB Mac OS X v 10 2 7 v 10 3 PowerPC G4 G5 128 MB 500 MB USB Mac OS X v 10 4 PowerPC G3 G4 G5 256 MB 500 MB Mac OS X v 10 2 4 v 10 3 PowerPC G3 G4 G5 128 MB 500 MB Additional Systems Requirements for On screen Manual...

Страница 176: ...nce by one or more of the following measures z Reorient or relocate the receiving antenna z Increase the separation between the equipment and receiver z Connect the equipment into an outlet on a circuit different from that to which the receiver is connected z Consult the dealer or an experienced radio TV technician for help Use of a shielded cable is required to comply with Class B limits in Subpa...

Страница 177: ...he Industry Canada Cet appareil numerique respecte les limites de bruits radioelectriques applicables aux appareils numeriques de Classe B prescrites dans la norme sur le materiel brouilleur NMB 003 d Industrie Canada intitulee Appareils numeriques Mercury Legislation LAMP S INSIDE THIS PRODUCT CONTAIN MERCURY AND MUST BE RECYCLED OR DISPOSED OF ACCORDING TO LOCAL STATE OR FEDERAL LAWS Canon U S A...

Страница 178: ...tability or fitness for a particular purpose and all such warranties are disclaimed The sole warranty if any with respect to such non Canon brand items is given by the manufacturer or producer thereof This limited warranty covers all defects encountered in normal use of the Product and does not apply in the following cases a Loss of or damage to the Product due to abuse neglect mishandling imprope...

Страница 179: ...support options Authorized Service Facility Carry In Mail In Service Canon USA s Carry In Mail In Service provides repair or exchange at Canon USA s option through Canon USA s Authorized Service Facility ASF network The name and telephone number of the ASF s near you may be obtained from Canon USA s Web site at www canontechsupport com or by calling the Canon USA Customer Care Center at 1 800 828 ...

Страница 180: ...c One Canon Plaza Lake Success NY 11042 USA Canon is a registered trademark of Canon Inc 2006 Canon U S A Inc Canon is a registered trademark of Canon Inc in the United States and may also be a registered trademark in other countries Users in Canada Customer Technical Supports Canon Canada Inc offers a full range of customer technical support options z For interactive troubleshooting e mail techni...

Страница 181: ...oller 122 CLI 8BK Black 108 CLI 8C Cyan 108 CLI 8M Magenta 108 CLI 8Y Yellow 108 Color button 17 Components 13 COPY button 16 Copying 40 2 on 1 copy 44 4 on 1 copy 45 auto intensity 42 borderless copy 46 fit to page 41 image repeat 46 Intensity 40 preset ratio 41 reducing or enlarging 41 two sided copy 43 zoom 41 Cover Guide 13 D Device settings 103 Direct Print Port 13 Document Cover 13 Duplexing...

Страница 182: ...54 single photo print 51 sticker print 58 trimming 55 Printing from Your Computer 90 Macintosh 93 Windows 90 Printing Photographs Directly from a Compliant Device 75 Canon Bubble Jet Direct 82 Connecting 76 PictBridge 78 Printing Photographs from a Wireless Communication Device 84 bluetooth 87 infrared 86 R Reading from and Writing to a Memory Card 101 Rear Cover 16 Replacing Ink Tanks 109 Routine...

Страница 183: ...Chapter 14 181 ...

Страница 184: ...182 Chapter 14 ...

Страница 185: ...Chapter 14 183 ...

Страница 186: ...terials related to such distribution and use acknowledge that the software was developed at Cygnus Support Inc Cygnus Support Inc may not be used to endorse or promote products derived from this software without specific prior written permission THIS SOFTWARE IS PROVIDED AS IS AND WITHOUT ANY EXPRESS OR IMPLIED WARRANTIES INCLUDING WITHOUT LIMITATION THE IMPLIED WARRANTIES OF MERCHANTABILITY AND F...

Страница 187: ...duct s war ranty period For more information and updated program specifics please visit our web site at www canontechsupport com Support program specifics are subject to change without notice Ordering Information For additional supplies use the following descriptions and order numbers Description Order Ink Tanks PGI 5 Black 0628B002 CLI 8 Black 0620B002 CLI 8 Cyan 0621B002 CLI 8 Magenta 0622B002 C...

Страница 188: ...ON INC 2006 PRINTED IN THAILAND User s Guide User s Guide QT5 0266 V03 ENG The following ink tanks are compatible with this machine For details on ink tank replacement refer to Replacing Ink Tanks in this guide Photo All in One ...

Отзывы: