Canon iP5200R - PIXMA Color Inkjet Printer Скачать руководство пользователя страница 43

*1:  When 24 to 60 hours have elapsed since the previous Black cleaning, timer cleaning - 0 is 

performed. However, this cleaning will be conducted up to 5 times from the printer installation, 
and no further timer cleaning - 0 will be performed.


*2:  The period of time since the previous cleaning is counted by Black and Color separately. For 

this reason, the cleaning mode may differ according to Black or Color.


*3:  When only the black ink tank is replaced, Black cleaning is performed. One of the color ink 
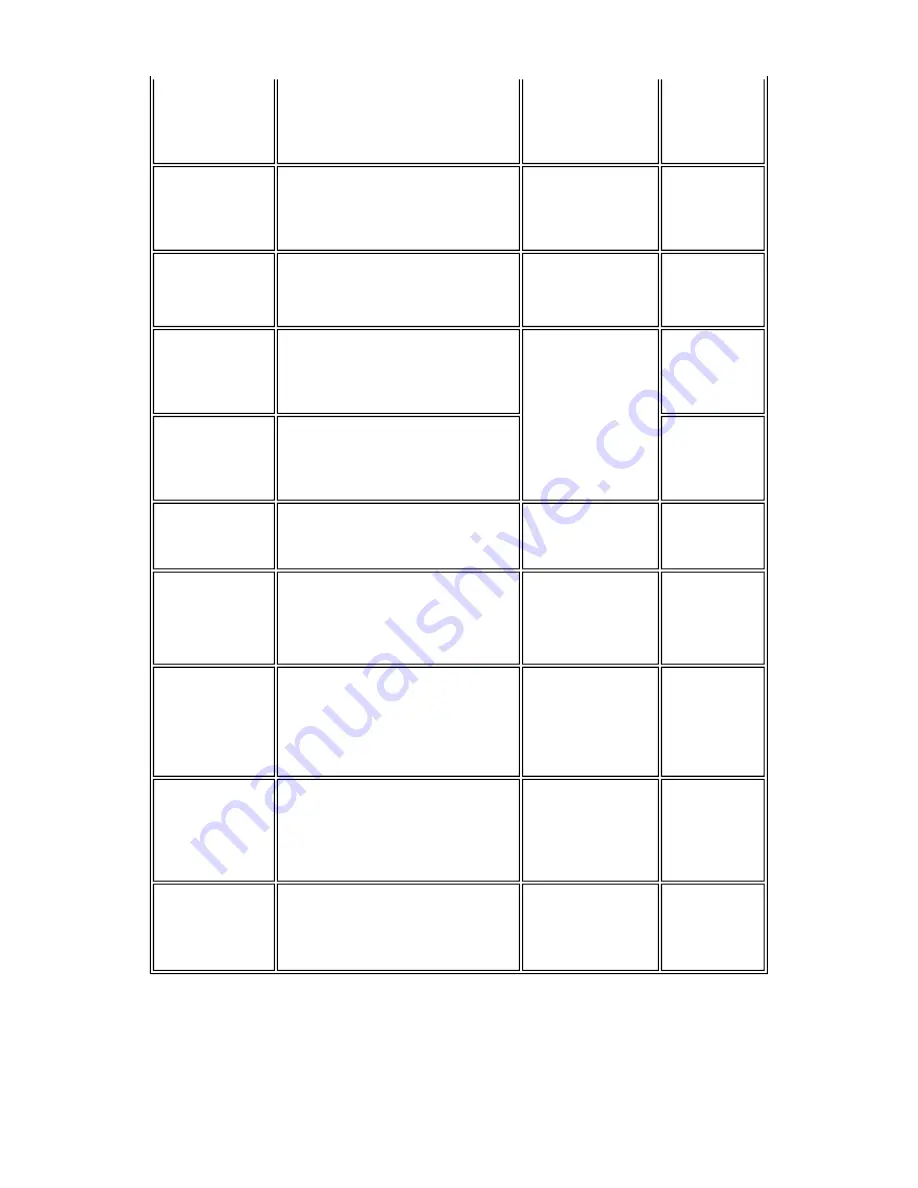
Timer cleaning - 6


(All in sequence)


If 720 to 1,080 hours have elapsed 

since the previous Black/Color 

cleaning till the start of the next 

printing.


80


Timer cleaning - 7


(All in sequence)


If 1,080 to 2,160 hours have elapsed 

since the previous Black/Color 

cleaning till the start of the next 

printing.


1.27 (Black)


1.06 (Color)


85


Timer cleaning - 8


(All in sequence)


If 2,160 to 4,320 hours have elapsed 
since the previous Black/Color 
cleaning till the start of the next 
printing.

1.95 (Black)


1.06 (Color)


 90

Timer cleaning - 9


(All in sequence)


If 4,320 to 8,640 hours have elapsed 

since the previous Black/Color 

cleaning till the start of the next 

printing.


1.95 (Black)


1.06 (Color)


90


Timer cleaning - 
10


(All in sequence)


If 8,640 or longer hours have elapsed 

since the previous Black/Color 

cleaning till the start of the next 

printing.


90


At print head 
replacement


(All in sequence)


When the print head is removed and 

installed.


0.57 (Black)


2.25 (Color)


100


At ink tank 

replacement

*3


(Black/Color/All in 

sequence)


When an ink tank is replaced (without 

the print head removal or re-

installation)


0.38 (Black)


1.06 (Color)


80 (All in 
sequence)


40 (Black)


65 (Color)


Manual cleaning


(Black/Color/All at 

the same time)


- Via the operation panel (All at the 

same time only)


- Via the printer driver (Selectable 

from Black, Color, or All at the 

same time)


0.20 (Black)


0.65 (Color)


45 (All at the 
same time)


35 (Black)


40 (Color)


Deep cleaning


(Black/Color/All at 

the same time)


Via the printer driver (Selectable from 

Black, Color, or All at the same time)


1.95 (Black)


1.06 (Color)


90 (All at the 
same time)


45 (Black)


65 (Color)


If the print head 
has not been 
capped before 
power-on


(All in sequence)


0.38 (Black)


1.06 (Color)


80 (All in 

sequence)


2-3

Содержание iP5200R - PIXMA Color Inkjet Printer

Страница 1: ...n Copyright 2005 Canon U S A This technical publication is the proprietary and confidential information of Canon U S A which shall be retained for reference purposes by Authorized Service Facilities of Canon U S A Its unauthorized use is prohibited ...

Страница 2: ...red trademarks or trademarks of the respective holders Copyright All rights reserved No parts of this manual may be reproduced in any form or by any means or translated into another language without the written permission of Canon Inc except in the case of internal business use Copyright 2005 by Canon Inc CANON INC Inkjet Device Quality Assurance Div 2 451 Tsukagoshi 3 chome Saiwai ku Kawasaki shi...

Страница 3: ...bleshooting of the PIXMA iP5200 Part 2 Technical Reference New technology and technical information such as FAQ s Frequently Asked Questions of the PIXMA iP5200 Part 3 Appendix Block diagrams and pin layouts of the PIXMA iP5200 Reference This manual does not provide sufficient information for disassembly and reassembly procedures Refer to the graphics in the separate Parts Catalog ...

Страница 4: ...embling Reassembling 3 2 Special Notes on Repair Servicing 3 3 Adjustment Settings 1 Paper feed motor adjustment 2 Grease application 3 Waste ink counter setting 4 User mode 5 Service mode Destination settings LF correction 3 4 Verification Items 1 Service test print 2 EEPROM information print 4 PRINTER TRANSPORTATION Part 2 TECHNICAL REFERENCE 1 NEW TECHNOLOGIES 2 CLEANING MODE AND AMOUNT OF INK ...

Страница 5: ...Part 1 MAINTENANCE ...

Страница 6: ...lacement At CL base gear replacement To maintain sliding properties of the carriage shaft and the lift cam shaft To protect the printer s sliding portions gears FLOIL KG 107A 1 min Ink system function check At logic board replacement At platen unit replacement At carriage unit replacement To maintain detection functionality for presence of the ink tanks and each ink tank position None Perform in t...

Страница 7: ...s via the printer driver 2 min Ink tank replacement When an ink tank becomes empty No ink error via the computer or ink tank LED flashing fast in red 1 min Paper feed roller cleaning When necessary To clean the paper feed rollers Printer buttons 2 min CD DVD print position adjustment At CD DVD printing when necessary To correct CD DVD print position Computer application software 5 min Bottom plate...

Страница 8: ...480 pages CLI 8M Approx 500 pages CLI 8C Approx 710 pages Photo chart CLI 8BK Approx 1 100 pages CLI 8Y Approx 280 pages CLI 8M Approx 250 pages CLI 8C Approx 390 pages Black text When printing the Canon standard pattern 1 500 characters per page on A4 size plain paper with the default settings in the Windows XP driver using Word 2003 Color chart When printing the ISO JIS SCID N5 pattern on A4 siz...

Страница 9: ...mber Location On the carriage flexible cable holder visible on the right of the carriage after the printer is turned on the access cover is opened and the carriage moves to the center To the top Name Tool No Application Remarks Grease FLOIL KG 107A QY9 0057 000 To be applied to the sliding portions of the carriage shaft and lift cam shaft In common with the S500 and S520 Part 1 1 MAINTENANCE 1 4 ...

Страница 10: ...Then press the Resume Cancel button 3 times Paper jam 1300 Remove the jammed paper and press the Resume Cancel button Error in paper feeding from the ASF Paper jam in the rear guide 1303 Error in the duplex printing unit Paper jam in the under guide 1304 Error in paper feeding from the cassette Front door close error 1250 Open the paper output tray The error is indicated if the paper output tray i...

Страница 11: ...he CD DVD tray feeder set the CD DVD tray in the feeder and press the Resume Cancel button Inner cover closed during CD DVD printing print NOT continuable 1855 1 Open the inner cover and press the Resume Cancel button to clear the error The CD or DVD being printed at error occurrence will be ejected without printing the remaining data for the ejected CD or DVD then the next print job will be done ...

Страница 12: ...non ejection of ink or when the sensor s AD value is incorrect 13 times The remaining ink amount unknown 1683 An ink tank which has once been empty is installed Replace the applicable ink tank with a new one Printing with a once empty or refilled ink tank can damage the print head If printing is continued without replacing the no good ink tank press the Resume Cancel button for 5 sec or longer to ...

Страница 13: ...M2 2733 1 9 times EEPROM error 6800 Logic board ass y QM2 2733 1 11 times Carriage lift mechanism error 5110 PR lift shaft ass y QL2 0936 Sheet feed unit QM2 2278 Logic board ass y QM2 2733 1 Carriage lift sensor unit QM2 2678 12 times AP position error 6A00 Sheet feed unit QM2 2278 Logic board ass y QM2 2733 1 Purge unit QM2 2252 13 times Paper feed position error 6B00 Sheet feed unit QM2 2278 Lo...

Страница 14: ...ly at about a second interval Print head temperature rise If the print head temperature is high when the access cover is opened the warning is displayed 1 When the print head temperature falls the warning is released Protection of excess rise of the print head temperature If the print head temperature exceeds the specified limit a Wait is inserted during printing Symptom Solution Remarks Faulty op...

Страница 15: ...he paper path with cotton swab or cloth or clean the ASF sub rollers A part of a line is missing on printouts Replace the ink tank or print head 2 Color hue is incorrect Replace the ink tank or print head 2 or perform print head alignment Printing is incorrect Replace the logic board ass y 1 No ejection of black ink Replace the ink tank or print head 2 or remove foreign material from the purge uni...

Страница 16: ...when replacing the logic board ass y See Section 3 3 Adjustment Settings 5 Service mode for details 2 Replace the print head only after the print head deep cleaning is performed 2 times and when the problem persists To the top timing slit disk film timing sensor unit or logic board ass y 1 Uneven printing due to line feeding Perform LF correction adjustment Part 1 2 LIST OF ERROR DISPLAY INDICATIO...

Страница 17: ...Adjustment Settings 5 Service mode for details of 1 to 5 6 Perform the print head alignment in the user mode EEPROM information print Service test print Printing via USB connection Direct printing from a digital camera Ink absorber kit QY5 0152 After replacement 1 Reset the waste ink counter See 3 3 Adjustment Settings 5 Service mode Service test print EEPROM information print Carriage unit QM2 22...

Страница 18: ...C1 6213 At replacement 1 Apply grease to the sliding portions See 3 3 Adjustment Settings 2 Grease application Service test print Timing slit strip film QC1 6526 Upon contact with the film wipe the film with ethanol Confirm no grease is on the film Wipe off any grease thoroughly with ethanol Do not bend the film After replacement 1 Perform the print head alignment in the user mode Service test pri...

Страница 19: ...it strip film and timing slit disk film No grease or abrasion is allowed Protect the units from soiled with ink Protect the housing from scratches Exercise caution with the red screws as follows i The red screws of the paper feed motor may be loosened only at replacement of the paper feed motor unit DO NOT loosen them in other cases ii DO NOT loosen the red screws on both sides of the main chassis...

Страница 20: ...l I With your fingers at the points indicated by the blue circle raise and slide the left and right side covers to remove them II Release the 2 hooks on the rear side of the printer indicated by the blue circles III Slide the left and right panel cover units 1 15 ...

Страница 21: ... assembling the upper case make sure not to damage the ink tank sensor and ink tank sensor cover Left side Right side 2 Flexible cable and harness wiring connection Be careful of wiring of the flexible cables and harness Improper wiring or connection may cause breakage of a line leading to ignition or emission of smoke 1 16 ...

Страница 22: ...Top view Rear view I Logic board ass y wiring 1 of 2 Logic board ass y wiring 2 of 2 Viewed from a different angle 1 17 ...

Страница 23: ...the platen unit QM2 2248 purge unit QM2 2252 waste ink tube QC1 6458 or waste ink tube holder QC1 6460 fix the waste ink tube to the printer chassis and waste ink tube holder with tape at 2 locations If the tube is pinched and blocked proper purging is prevented resulting in ink leakage or strange noise No specific tape is specified In the sample photo below 1 is the orange tape and 2 is a clear a...

Страница 24: ...printer unit chassis in the bottom case unit With the units assembled the tube conditions are not visible To confirm the tube is free from damage perform the manual purging 3 or 4 times and confirm that no strange noise is heard Example The tube is pinched and blocked as it is not fixed with tape 1 19 ...

Страница 25: ...To the top Part 1 3 REPAIR 3 2 1 20 ...

Страница 26: ... indicated by the blue arrow in the figure below 2 After replacement be sure to perform the service test print and confirm that no strange noise or faulty print operation due to dislocation of the belt or gear or out of phase motor etc occurs Note The red screws securing the paper feed motor may be loosened only at replacement of the paper feed motor unit DO NOT loosen them in other cases 2 Grease...

Страница 27: ...2 CL base CL gear 1 22 ...

Страница 28: ...3 PR shaft LF roller bushing To the top Part 1 3 REPAIR 3 3 1 to 2 1 23 ...

Страница 29: ...enance tab Print head deep cleaning Cleaning black or color separately or both black and color Perform from the printer driver Maintenance tab Paper feed roller cleaning See Standalone printer operation below Nozzle check pattern printing See Standalone printer operation below Perform from the printer driver Maintenance tab Print head alignment See Standalone printer operation below Perform from t...

Страница 30: ...ified 7 times The widest head to paper distance setting 8 times or more Unspecified Function Procedures Remarks Service test print Model name Destination ROM version USB serial number Waste ink amount CD DVD sensor correction value Ink system function check result CD DVD sensor correction result See Service mode operation procedures below Set a sheet of A4 or letter size paper For print sample see...

Страница 31: ...rm in orange and Power in green starting with Alarm LED Time s LED indication Function Remarks 0 times Green Power Power off When the print head is not installed the carriage returns and locks in the home position capped 1 time Orange Alarm Service test print See 3 4 Verification Items 1 Service test print 2 times Green Power EEPROM information print See 3 4 Verification Items 2 EEPROM information...

Страница 32: ...l button the same number of times as the selected Pattern No and press the Power button The LF correction will be done Procedures 1 In the LF correction mode press the Resume Cancel button the specified number of times according to the paper to be used in LF correction listed in the table below then press the Power button 15 times Orange Alarm Return to the menu selection Time s LED indication Des...

Страница 33: ... green If the Resume Cancel button is NOT pressed and only the Power button is pressed the printer remains in the LF correction mode If the Resume Cancel button is pressed 5 times or more then the Power button is pressed the printer returns to the service mode menu selection 2 The LF correction pattern for the selected paper is printed LF correction pattern print sample 3 In the printout select th...

Страница 34: ... alarm in orange and Power in green If the Resume Cancel button is pressed 3 times or more then the Power button is pressed the printer returns to the service mode menu selection NG streaks or lines white or black 4 The LF correction value is written to the EEPROM and the printer returns to the service mode menu selection Note The LF correction value 0 1 or 2 can be confirmed in service test print...

Страница 35: ...the following items Check 1 top of form accuracy The lines shall not extend off the paper Check 2 EEPROM information Check 3 nozzle check pattern Ink shall be ejected from all nozzles Check 4 check pattern for uneven printing due to line feeding There shall be no remarkable streaks or unevenness Check 5 LF correction pattern There should be no white line and black line Check 6 check pattern for un...

Страница 36: ... iP5200 US V1 01 IF USB2 1 D 004 5 ST 2005 05 27 18 30 ER ER0 1000 ER1 5100 LPT 2005 07 07 09 09 PC M 002 R 000 T 001 D 009 C 008 CLT BK 2005 07 02 18 30 CL 2005 07 01 18 30 CH 00002 CT PBK 001 BK 010 Y 009 M 001 C 003 IS PBK 0 BK 0 Y 0 M 0 C 0 P_ON S 00009 A_REG 1 M_REG 1 1 31 ...

Страница 37: ... 10 Cleaning time BK CL 11 Print head replacement count 12 Ink tank replacement count PBK BK Y M C 13 Ink status PBK BK Y M C 14 Power on count soft 15 Automatic print head alignment by user 16 Manual print head alignment by user 17 User print head alignment values BKoe Coe Moe SCoe SMoe PBKoe CLbi SCLbi C SC M SM BK CL BKbiPP CLbiPP SCLbiPP NZctr NZedge 18 Wiping count 19 Camera Direct Print supp...

Страница 38: ...1 33 Print head temperature BK CL 34 Inside temperature 35 Line inspection information 1 not used for servicing HDEEPROM 36 Version 37 Serial number 38 Lot number 39 Print head ID 40 Ink ejection level PBK BK Y M M2 C C2 To the top Part 1 3 REPAIR 3 4 1 33 ...

Страница 39: ...aution 2 below Caution 1 If the print head is removed from the printer and left alone by itself ink especially the pigment black ink is likely to dry For this reason keep the print head installed in the printer even during transportation 2 Securely lock the carriage in the home position to prevent the carriage from moving and applying stress to the carriage flexible cable or causing ink leakage du...

Страница 40: ...Part 2 TECHNICAL REFERENCE ...

Страница 41: ...d mode For reference High speed printing at 30 ppm in monochrome printing and 24 ppm in color printing have been achieved 4 New functionality in Direct Printing Plain paper is now usable in Camera Direct Printing from a digital camera or digital video camera if both support PictBridge Other main features Data File numbers can be printed on the images Face brightener Shooting info Exif data 35mm fi...

Страница 42: ...inted since the previous Black cleaning 0 20 Black 35 Black Timer cleaning 0 1 Black only If 24 to 60 hours have elapsed since the previous Black cleaning till the start of the next printing 0 20 Black 35 Black Timer cleaning 1 Black only If 60 to 96 hours have elapsed since the previous Black cleaning till the start of the next printing Timer cleaning 2 Black only If 96 to 120 hours have elapsed ...

Страница 43: ...lor 90 Timer cleaning 9 All in sequence If 4 320 to 8 640 hours have elapsed since the previous Black Color cleaning till the start of the next printing 1 95 Black 1 06 Color 90 Timer cleaning 10 All in sequence If 8 640 or longer hours have elapsed since the previous Black Color cleaning till the start of the next printing 90 At print head replacement All in sequence When the print head is remove...

Страница 44: ...tanks is replaced Color cleaning is performed Both the black and color ink tanks are replaced All at the same time cleaning is performed To the top Part 2 2 CLEANING MODE AND AMOUNT OF INK PURGED 2 4 ...

Страница 45: ...3 PRINT MODE 3 1 Resolution 1 Normal color printing 2 Grayscale printing 3 Borderless printing 2 5 ...

Страница 46: ... 4 Duplex printing 5 Camera Direct printing To the top Part 2 3 PRINT MODE 2 6 ...

Страница 47: ...e high temperature and high humidity environment paper becomes wavy in the low temperature and low humidity environment paper curls significantly When the maximum amount of paper is set in the ASF and if the paper return tab fits in a wave or curl of the paper the tab slips and does not catch paper properly causing paper feed problems Reduce the amount of paper set in the ASF to half approx 5 mm h...

Страница 48: ...wipe the platen rib s and their surroundings with a cotton swab Paper gets smeared The back side of paper gets smeared 5 B Print results Soiling on paper in automatic duplex printing lines or streaks perpendicular to the paper feed direction Automatic duplex printing Photo Paper Plus Double Sided postcards plain paper On the rib s inside the sheet feed unit used for duplex printing ink mist may ac...

Страница 49: ...t side of paper beneath especially where the paper feed rollers contact when picking up the paper Set only a single sheet of paper in the auto sheet feeder 7 C Print results Soiling on paper The printer has been used for a long period of time with the ASF cover closed before printing is performed using the ASF Due to ink mist attached to the ASF sub pick up rollers If printing is done from the cas...

Страница 50: ...backward as shown below 8 B Print results 10 sheets max set in the ASF they warp significantly the warping portions of paper get over the cover guide not being aligned along the guide properly sheets of paper in the ASF appears on printouts 9 B Print results Uneven printing at the trailing edge of paper In the low temperature and low humidity environment Due to decrease of the friction coefficient...

Страница 51: ...he ASF cover edge to hook the paper to the ASF cover as shown below 4 Press and hold the Resume Cancel button until the Power LED blinks 3 times then release the button to perform the paper feed roller cleaning See Stand alone printer operation for details Occurrence level A The symptom is likely to occur frequently Caution required B The symptom may occur under certain conditions but likeliness i...

Страница 52: ...usage C The symptom is unlikely to be recognized by the user and no practical issues are assumed To the top Part 2 4 FAQ 2 12 ...

Страница 53: ...Part 3 APPENDIX ...

Страница 54: ...nting device Presence of CD DVD Acoustic noise Highest print quality Highest print quality settings Approx 34 7dB Quiet mode Approx 34 3dB Environmental requirements During operation Temperature 5C to 35C 41F to 95F Humidity 10 RH to 90 RH no condensation Non operation Temperature 0C to 40C 32F to 104F Humidity 5 RH to 95 RH no condensation Power supply Power supply voltage frequency Power consump...

Страница 55: ...er utilities or the Resume Cancel button in Camera Direct Printing automatic alignment at default Type Single head with 5 removable ink tanks each color Print head Black 512 nozzles 600dpi 30pl pigment based black Color 512 nozzles x 6 1 200dpi 1pl 5pl cyan magenta 5pl black yellow Ink color Pigment based black Dye based black cyan magenta yellow Ink tank PGI 5BK pigment based CLI 8BK C M Y dye ba...

Страница 56: ...scribes differences from the base model PIXMA iP5200 When referring to the PIXMA iP5200 Service Manual Service Parts Number in it may be different from PIXMA iP5200 model Please refer to the PIXUS iP5200R PIXMA iP5200R Parts Catalog QY8 9083 D0C QY8 13AJ 000 ...

Страница 57: ...SPLAY LIST OF TROUBLESHOOTING 3 2 2 Service Call Errors by LED Blinking in Orange and Green Alternately or Lit in Orange 3 2 4 Troubleshooting by Symptom 3 3 REPAIR 3 3 1 Notes on Service Part Replacement 4 3 2 Special Notes on Repair Servicing 5 3 4 Verification Items 3 Network setting information NIC EEPROM information Print Part 3 APPENDIX 8 1 BLOCK DIAGRAM 8 2 PIXMA iP5200R SPECIFICATION ...

Страница 58: ...K1 1973 000 2 4 Troubleshooting by Symptom Symptom Solution Remarks Faulty operation Printing is not possible with wireless LAN 1 Perform network setting information print When printing is not possible Replace the NIC BOARD When printing is possible Proceed to 2 2 Perform printing with the wireless LAN I F When printing is not possible Replace the NIC BOARD Wireless reception component failure on ...

Страница 59: ... 1 Turn on the printer and the Reset button 2 After the Power LED green blinks the specified number of times listed in the table below release it The operation starts LED blinking Operation Remarks 6 times Network setting information printing Set a sheet of A4 LTR sized plain paper in the sheet feeder or cassette The Paper Feed switch controls the paper feeding location 10 times Initialization of ...

Страница 60: ...ructure SSID xxxxx Channel 10 Encription OFF Authentication Open System Attached Information Link Status Active Signal Strength 63 Link Quality 56 Transmission Rate 36Mbps TCP IP Mode Auto IP Address xxx xxx x xxx Subnet Mask xxx xxx xxx x Default Gateway x x x x Wired LAN Disable MAC Address xx xx xx xx xx xx Link Status Inactive Transmission Rate TCP IP Mode IP Address Subnet Mask Default Gatewa...

Страница 61: ...F O Authentication Current authentication method Auto Open System Shared Key WPA PSK WPA2 PSK Open System O Attached Information Attached information regarding encryption and authentication WEP setting 64 128bit ASCII Hex Key Key set by user is displayed WPA PSK setting Character Password 64 Hex digits Blank O Link Status Status of wireless LAN When wireless LAN is invalid if nonexistent SSID is s...

Страница 62: ...eft blank Auto Manual Auto O IP Address Current IP address When disabled left blank 0 0 0 0 255 255 255 255 192 168 2 123 O Subnet Mask Current Subnet mask When disabled left blank 0 0 0 0 255 255 255 255 255 255 255 0 O TCP IP wired Default Gateway Current default Gateway When disabled left blank 0 0 0 0 255 255 255 255 0 0 0 0 O MAC Address MAC address filtering setting ON OFF OFF O Security IP ...

Страница 63: ...Report CE Mark GS FT SPRING Wireless FCC IC CE Mark R TTE ACA RSM Telecommunication Act SPL Environmental regulations RoHS EU WEEE EU Energy Star Eco Mark Law on Promoting Green Purchasing Chemical Substances Control Law Battery Recycle Law Container and Packaging Law Blue Angel Text printing speed and printing speed when connected with the USB cable are the same as the PIXMA iP5200 Printing speed...

Страница 64: ... STD T66 Used frequency band 2 412GHz 2 462GHz Channel 1 11 Transmission system OFDM DS SS system Transmission speed 54 48 36 24 18 12 9 6Mbps IEEE802 11g automatic changing 11 5 5 2 1Mbps IEEE802 11b automatic switching Communication distance 50 m varies depending on communication speed and environmental conditions Security WEP 64 128 bit WPA PSK TKIP AES WPA2 PSK TKIP AES Other Wi Fi logo acquir...

Отзывы: