


43
Star
ting t
o U
se the
V
arious F
unc
tions of the M
achine
2
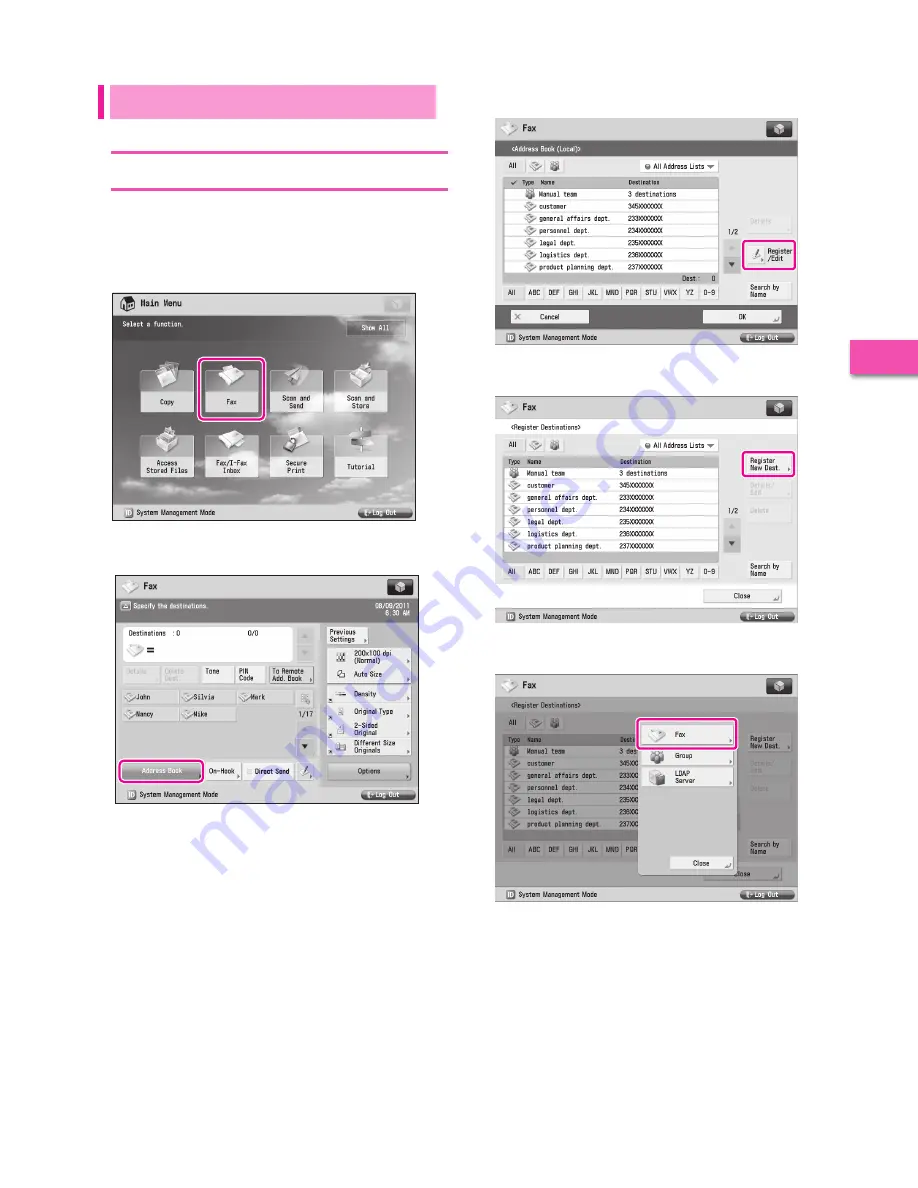
3
Press
[Register/Edit].
4
Press [Register New Dest.].
5
Press
[Fax].
Sending Faxes
Register the destination in the Address Book to send faxes to.
Storing New Addresses
Register the information for the destination in the Address
Book. In this example, information for the “central sales dept.” is
registered in the Address Book.
1
Press
[Fax].
2
Press [Address Book].


