Canon imageRUNNER 2545 Скачать руководство пользователя страница 1

User’s Guide

User’s Guide

User’s Guide

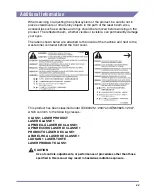
Read this guide first.

Please read this guide before operating this product.
After you finish reading this guide, store it in a safe place for future reference.


Guide de I’utilisateur

Veuillez d’abord lire ce guide.

Lire ce guide avant d’utiliser ce produit.
Après avoir pris connaissance de son contenu, le garder à portée de main à titre de référence.


Anwenderhandbuch

Bitte lesen Sie dieses Handbuch zuerst.

Bitte lesen Sie dieses Handbuch, bevor Sie mit dem Produkt arbeiten. 
Nachdem Sie die Anleitung gelesen haben, bewahren Sie sie zum Nachschlagen an einem sicheren Ort auf.


Guida per l’utente

Leggere questa guida.

Leggere questa guida prima di iniziare ad utilizzare il prodotto. 
Terminata la lettura, conservare la guida in un luogo sicuro per eventuali consultazioni.


Guía de usuario

Lea esta guía primero.

Por favor, lea esta guía antes de usar este producto. 
Después de leer esta guía, guárdela en un lugar seguro para posteriores consultas.

Содержание imageRUNNER 2545

Страница 1: ...enderhandbuch Bitte lesen Sie dieses Handbuch zuerst Bitte lesen Sie dieses Handbuch bevor Sie mit dem Produkt arbeiten Nachdem Sie die Anleitung gelesen haben bewahren Sie sie zum Nachschlagen an ein...

Страница 2: ...imageRUNNER 2545i 2545 2535i 2535 2530i 2530 2525i 2525 2520i 2520 User s Guide...

Страница 3: ...structions Copying Guide CD ROM Sending and Fax Instructions Sending and Facsimile Guide CD ROM Remote User Interface Instructions Remote UI Guide CD ROM Network Connectivity Security Management Syste...

Страница 4: ...leshooting Appendix Includes the descriptions of available paper stock and Index Chapter 1 Chapter 2 Chapter 3 Chapter 4 Chapter 5 Chapter 6 Chapter 7 Considerable effort has been made to ensure that...

Страница 5: ...egal Notices xiv Product Name xiv EMC requirements of EC Directive xiv R TTE Directive xiv Laser Safety xiv Additional Information xv International ENERGY STAR Program xvi IPv6 Ready Logo xvi WEEE Dir...

Страница 6: ...ice 1 12 Chapter 2 Before You Start Using the Machine Main Power and Control Panel Power 2 2 How to Turn ON the Main Power 2 2 Using the Control Panel Power Switch Sleep Mode 2 4 Turning OFF the Main...

Страница 7: ...Paper Drawers 5 2 Loading Paper 5 3 Adjusting a Paper Drawer to Hold a Different Paper Size 5 5 Replacing the Toner 5 8 Routine Cleaning 5 12 Platen Glass and Cover 5 12 Feeder Scanning Area and Roll...

Страница 8: ...vii Chapter 7 Appendix Available Paper Stock 7 2 Index 7 4...

Страница 9: ...rning operations that may lead to death or injury to persons if not performed correctly To use the machine safely always pay attention to these warnings CAUTION Indicates a caution concerning operatio...

Страница 10: ...l Illustrations used in this manual are those displayed when the imageRUNNER 2545i has the following optional equipment attached to it the Inner Finisher B1 Inner Finisher Additional Tray B1 and CST F...

Страница 11: ...ttons best suited to your needs Abbreviations Used in This Manual In this manual product names and model names are abbreviated as follows Microsoft Windows 2000 operating system Windows 2000 Microsoft...

Страница 12: ...machine has scanned the original that you want to copy it can immediately scan the next person s original You can also print from this machine using a function other than the Copy function In this mac...

Страница 13: ...xii Printing Outputting documents such as a copy fax or data sent from a client computer to the machine Copying Printing data scanned from an original followed by finishing options such as stapling...

Страница 14: ...ter 4 Optional Equipment in the Reference Guide Model Copy Remote Scan Remote UI Send Fax Print Feeder Drawer Searchable PDF USB UFRII LT PCL PS Barcode 2 3 4 imageRUNNER 2545i opt opt opt opt opt ima...

Страница 15: ...of shielded cable is necessary to comply with the technical EMC requirements of EC Directive R TTE Directive Laser Safety This product is certificated as a Class 1 laser product under IEC60825 1 2007...

Страница 16: ...n below are attached to the inside of the machine and next to the waste toner container behind the front cover This product has been classified under IEC60825 1 2007 and EN60825 1 2007 which conform t...

Страница 17: ...omputers and other office equipment The program backs the development and dissemination of products with functions that effectively reduce energy consumption It is an open system in which business pro...

Страница 18: ...nded over to a designated collection point e g on an authorized one for one basis when you buy a new similar product or to an authorized collection site for recycling waste electrical and electronic e...

Страница 19: ...vided herein no license or right expressed or implied is hereby conveyed or granted by rights holders of the SOFTWARE to you for any intellectual property of rights holders of the SOFTWARE 3 You may u...

Страница 20: ...duct may be prohibited by law and may result in criminal and or civil liability A non exhaustive list of these documents is set forth below This list is intended to be a guide only If you are uncertai...

Страница 21: ...transmission times of approximately 3 seconds per page which results in reduced telephone line charges Approximately 3 seconds per page fax transmission time based on CCITT ITU T No 1 Chart JBIG Stan...

Страница 22: ...your Limited Warranty Installation WARNING Never block the ventilation slots and louvers on the machine These openings are provided for proper ventilation of working parts inside the machine Blocking...

Страница 23: ...inclined floors or in locations subject to excessive vibrations as this may cause the machine to fall or tip over resulting in personal injury Do not remove the machine s leveling feet after the mach...

Страница 24: ...esulting in a fire or electrical shock IMPORTANT Leave sufficient space around the power plug so that it can be unplugged easily If objects are placed around the power plug you will be unable to unplu...

Страница 25: ...the feeder platen cover gently to avoid catching your hands as this may result in personal injury Do not press down hard on the feeder platen cover when using the platen glass to make copies of thick...

Страница 26: ...e from the machine during any phase of user operation Read the following remarks and instructions for safety Never open covers other than those instructed in this manual Do not remove the following ca...

Страница 27: ...ne it may result in a fire or electrical shock There are some areas inside the machine which are subject to high voltages When removing jammed paper or when inspecting the inside of the machine do not...

Страница 28: ...r to come into contact with your hands or clothing as this will dirty your hands or clothing If they become dirty wash them immediately with cold water Washing them with warm water will set the toner...

Страница 29: ...fire CAUTION Keep toner and other consumables out of the reach of small children If these items are ingested consult a physician immediately Do not dismantle the toner cartridge as doing so may cause...

Страница 30: ...and describes how to connect the cables Installation Location and Handling 1 2 Installation Precautions 1 2 Handling Precautions 1 7 Cable Connection 1 9 Using the Machine as a Local Printer USB Conn...

Страница 31: ...g the Machine in the Following Locations Avoid locations subject to temperature and humidity extremes whether low or high For example avoid installing the machine near water faucets hot water heaters...

Страница 32: ...opriately ventilated sufficient to maintain a comfortable working environment in areas of machine operation Avoid locations where ammonia gas is emitted Avoid locations that are subject to vibration F...

Страница 33: ...lug into a dedicated power outlet and maintain as much space as possible between the machine and other electronic equipment Do not remove the machine s leveling feet Do not remove the machine s leveli...

Страница 34: ...ection and cause overheating which could result in a fire If excessive stress is applied to the connection part of the power cord it may damage the power cord or the wires inside the machine may disco...

Страница 35: ...for unrestricted operation View from Above When the optional Inner Finisher B1 is attached Moving the Machine If you intend to move the machine even to a location on the same floor of your building co...

Страница 36: ...y turn the main power switch OFF disconnect the power cord from the power outlet and then call your local authorized Canon dealer Using the machine in this state may cause a fire or electrical shock A...

Страница 37: ...ill not be used for an extended period of time such as during consecutive holidays This machine generates a slight amount of ozone or other odors during normal use Although sensitivity to ozone or oth...

Страница 38: ...r computer or network Using the Machine as a Local Printer USB Connection If you want to use the machine as a local printer connect the machine and a computer using a USB cable The machine is USB 2 0...

Страница 39: ...cable may cause your machine or computer to operate poorly Some utilities may not be functional if the machine is connected to a computer via the USB cable Make sure that the Use USB Device setting i...

Страница 40: ...nd disconnect the power cord from the power outlet IMPORTANT You cannot use the machine as a repeater bridge or gateway NOTE The machine can automatically detect the Ethernet speed 10Base T or 100Base...

Страница 41: ...le to the machine as shown below For more information on the telephone line contact your local telephone company IMPORTANT Before using the fax function you must set the machine configuration Fore mor...

Страница 42: ...the machine describes the setup procedures and guides you to the appropriate manuals for the required setup instructions Main Power and Control Panel Power 2 2 How to Turn ON the Main Power 2 2 Using...

Страница 43: ...the main power see Turning OFF the Main Power on p 2 4 1 Make sure that the power plug is firmly inserted into the power outlet WARNING Do not connect or disconnect the power cord with wet hands as t...

Страница 44: ...assword See Chapter 2 Basic Operations in the Reference Guide You can select the top screen of the desired function that appears when the machine is turned ON See Chapter 3 Configuring the Machine s B...

Страница 45: ...the Sleep mode when it is in operation The machine can receive forward or print documents when it is in the Sleep mode Control Panel Power Switch Machine Status ON Ready OFF Sleep mode To safely turn...

Страница 46: ...re included on the User Manual CD ROM See User Manual CD ROM on p 3 2 NOTE For available functions on a product basis see Available Features on p xiii Required Other functions include Send to USB memo...

Страница 47: ...r To receive I faxes a POP3 server is required After activating the Color Send Kit Y1 optional for the imageRUNNER 2545 2535 2530 2525 2520 you must specify the following The machine s e mail address...

Страница 48: ...RII LT User Software 3 4 Contents of CD ROM 3 4 System Requirements 3 5 Installation 3 6 PCL User Software 3 7 Contents of CD ROM 3 7 System Requirements 3 8 Installation 3 8 PS User Software Optional...

Страница 49: ...ORTANT Depending on the configuration of your computer some functions may not operate correctly If the PDF manuals do not open from the CD ROM Menu open the PDF files directly from the ENGLISH folder...

Страница 50: ...ng on the operating system used For Macintosh users double click the START icon to start the CD ROM Menu a BROWSE MANUAL You can read any of the listed guides by clicking on the desired guide After cl...

Страница 51: ...the printer to greatly reduce the overall printing time The workload can be delegated to match the output data thus realizing a significant increase in speed through optimization Color Network ScanGe...

Страница 52: ...pending on the version of the printer driver used Hardware Computer Any computer that runs the above systems Memory The amount of memory required to run the above systems correctly Color Network ScanG...

Страница 53: ...e amounts of image data an insufficient memory error or significant loss of scanning speed may occur If this happens the following procedures should prove useful Increase the amount of hard disk space...

Страница 54: ...s the PCL5e printer driver is for black and white printers and the PCL6 printer driver is for both color and black and white printers PCL6 is an advanced version of PCL5c and PCL5e and offers superior...

Страница 55: ...ary depending on the version of the printer driver used Hardware Computer Any computer that runs the above systems Memory The amount of memory required to run the above systems correctly Installation...

Страница 56: ...verts print data from applications into data for use with PS printers and sends it to the printer As well as converting print data it can also enable you to configure settings relating to finishing an...

Страница 57: ...s Server 2008 Hardware Computer Any computer that runs the above systems Memory The amount of memory required to run the above systems correctly Installation From the menu screen of the CD ROM you can...

Страница 58: ...talled from the Fax Driver Software CD ROM IMPORTANT The Fax Driver Software CD ROM is included with the optional Super G3 Fax Board AG1 Contents of CD ROM Fax Driver With the fax driver installed on...

Страница 59: ...indows Server 2008 Hardware Computer Any computer that runs the above systems Memory The amount of memory required to run the above systems correctly Installation From the menu screen of the CD ROM yo...

Страница 60: ...unctions Making a Copy 4 2 Printing from a Computer 4 4 Printing from a USB Memory Media Device Media Print 4 6 Sending a Document E Mail I Fax File Server and USB Memory Media Device 4 8 Sending a Fa...

Страница 61: ...r Close the feeder platen cover after placing your originals on the platen glass Enter your department ID and password if the screen prompts you to do so press Log In Out Enter your user ID and passwo...

Страница 62: ...of copies you specify is displayed on the upper right side of the touch panel display When the screen below appears select the original size press OK Start To cancel copying press Stop You can also c...

Страница 63: ...printing 1 The name of the button to display the printer setting sheet shown on step 3 may vary depending on the application you are using 2 The name of the button to start printing may vary dependin...

Страница 64: ...yed on your computer depending on the machine and optional equipment type and version of printer driver or operating system you are using To cancel printing on your computer click Cancel in the dialog...

Страница 65: ...the USB memory media device has been inserted appears press Done and proceed to the next step If the machine is in the Sleep mode press Power Enter your ID and password or insert the control card if...

Страница 66: ...he file in a folder select the folder press Down to display the files select the file To cancel printing press Stop You can also cancel the current print job by pressing Cancel on the screen indicatin...

Страница 67: ...2525 2520 is activated Display the Send Screen Place Your Originals Press SEND to display the top screen of the Send and Fax functions Place your originals in the feeder or on the platen glass If the...

Страница 68: ...nations see Chapter 4 Specifying Destinations Easily and Quickly in the Sending and Facsimile Guide Some USB memory media devices are not compatible with the machine For more information see Chapter 2...

Страница 69: ...ing Settings in the Remote UI Guide Display the Send Screen Place Your Originals Press SEND to display the top screen of the Send and Fax functions Place your originals in the feeder or on the platen...

Страница 70: ...send documents For information on specifying destinations see Chapter 4 Specifying Destinations Easily and Quickly in the Sending and Facsimile Guide When the screen below appears select the original...

Страница 71: ...shown in this section may differ from the actual displays depending on the application or operating system used Switch the Machine Online Place Your Originals Press SCAN OPTIONS if the Scan Options s...

Страница 72: ...information see the documentation that comes with your TWAIN compliant application Command names include Scan New Acquire and others depending on the application you are using On the Color Network Sca...

Страница 73: ...the Remote UI press ENTER key on your computer keyboard On the Remote UI top page displayed in step 1 enter your department ID or user ID and password click OK After successfully logging in the Devic...

Страница 74: ...toner stamp ink and staple cartridges Paper Drawers 5 2 Loading Paper 5 3 Adjusting a Paper Drawer to Hold a Different Paper Size 5 5 Replacing the Toner 5 8 Routine Cleaning 5 12 Platen Glass and Co...

Страница 75: ...as follows Size A4 A4R A3 or A5R Type Plain Recycled Color and 3 hole punch See Available Paper Stock on p 7 2 With the optional Envelope Feeder Attachment D1 the following envelopes can be loaded in...

Страница 76: ...Transparencies Labels Paper on which color images have been copied or the reverse side of such paper Paper which has been printed on using a thermal transfer printer or the reverse side of such paper...

Страница 77: ...p is the one printed on If problems occur such as poor print quality or paper jams try turning the paper stack over and reloading it For more information on the print direction of preprinted paper pap...

Страница 78: ...aper Drawer to Hold a Different Paper Size If you want to change the size of paper in the paper drawer adjust the slide guides for the new paper size as described below 5 Gently push the paper drawer...

Страница 79: ...re to do so may cause paper jams or dirty prints or make the inside of the machine dirty IMPORTANT Rolled or curled paper must be straightened out prior to use Make sure that the height of the paper s...

Страница 80: ...include sizes that the machine is unable to use 6 Gently push the paper drawer back into the machine until it clicks into place CAUTION When returning the paper drawer to its original position be care...

Страница 81: ...pletely and prints can no longer be made the message Replace the toner appears on the touch panel display Pressing Recover Later enables you to continue operations However you have to replace the tone...

Страница 82: ...e the cartridges from scattering and dispose of them in a location away from open flames IMPORTANT Use only toner cartridges intended for use with the machine See Consumables on p 5 17 Do not replace...

Страница 83: ...rn or throw used toner cartridges into open flames as this may ignite the toner remaining inside the cartridge and result in burns or a fire 4 Take the new toner cartridge out of the package and uncap...

Страница 84: ...tridge with one hand from underneath while pushing it into the machine with the other hand 6 Return the locking lever to its original position IMPORTANT Make sure that the down arrow on the locking le...

Страница 85: ...he power outlet regularly and clean the area around the base of the power plug s metal pins and the power outlet with a dry cloth to ensure that all dust and grime is removed If the power cord is conn...

Страница 86: ...Scanning Area and Rollers Clean the feeder scanning area and rollers regularly as described below IMPORTANT Do not dampen the cloth too much as excess water may damage the machine NOTE The Feeder DADF...

Страница 87: ...moistened cloth Then wipe the area with a soft dry cloth Spin the rollers with your hand while cleaning them 5 Clean the transparent plastic part of the inner cover with a water moistened cloth Then...

Страница 88: ...dial to turn the resin roller wipe the resin roller and its surroundings with a water moistened cloth Then wipe the area with a soft dry cloth NOTE If the feed dial cannot be reached while the feeder...

Страница 89: ...Close the feeder CAUTION When closing the feeder be careful not to get your fingers caught as this may result in personal injury Be aware that the light emitted from the platen glass may be very brigh...

Страница 90: ...plain paper A4 A3 and A5 recycled paper color paper transparencies recommended for the machine labels and other types of paper stock are available For more information contact your local authorized Ca...

Страница 91: ...osed to open flames as this may cause the toner to ignite and result in burns or a fire CAUTION Keep toner and other consumables out of the reach of small children If these items are ingested consult...

Страница 92: ...new staples appears on the touch panel display replace the staple cartridge with a new one Use only staple cartridges intended for use with the machine Staple J1 IMPORTANT The Staple mode is available...

Страница 93: ...Consumables 5 20 Routine Maintenance 5...

Страница 94: ...erating the machine Clearing Paper Jams 6 2 Fixing Unit 6 3 Paper Drawers 1 and 2 6 5 Feeder 6 8 Service Call Message 6 11 Restarting the Machine 6 11 Using the Machine with Limited Functions 6 12 Req...

Страница 95: ...If you cannot remove the paper please contact your local authorized Canon dealer When removing paper which has become jammed inside the machine take care not to allow the toner on the jammed paper to...

Страница 96: ...sitions Once you have removed all of the jammed paper printing resumes NOTE When all the paper jams are cleared the machine automatically recalculates the number of copies or prints to make You do not...

Страница 97: ...the upper cover of the fixing unit by the tab and remove any jammed paper CAUTION The fixing unit and its surroundings are subject to high temperatures When removing jammed paper do not touch anything...

Страница 98: ...e jammed paper as described below IMPORTANT The procedure described in this section assumes that the machine is equipped with four paper drawers The number of available paper drawers may vary dependin...

Страница 99: ...s the button on Paper Drawer 1 and pull out the drawer until it stops 5 Remove any jammed paper 6 Gently push the drawer back into the machine until it clicks into place CAUTION When returning the pap...

Страница 100: ...ently push the drawer back into the machine until it clicks into place CAUTION When returning the paper drawer to its original position be careful not to get your fingers caught as this may result in...

Страница 101: ...is jammed in the feeder remove the jammed paper as described below IMPORTANT The Feeder DADF AA1 AB1 is optional for the imageRUNNER 2545 2535 2530 2525 2520 11 Place your hand where the hand symbol...

Страница 102: ...he front tab 3 Turn the feed dial and remove any jammed originals Do not pull the original forcibly because it may tear 4 Close the inner cover and then the feeder cover CAUTION When closing the cover...

Страница 103: ...y tear IMPORTANT After you have cleared all the paper jams make sure to return all the levers and covers to their original positions Once you have removed all of the jammed paper printing resumes 6 Cl...

Страница 104: ...reen If the screen similar to the one shown below is displayed follow the procedures described below Restarting the Machine If a service call message is displayed restart the machine IMPORTANT If the...

Страница 105: ...n the machine s memory will be erased NOTE Setting the machine to the Limited Functions Mode from the Service Call Message screen enables the Limited Functions Mode in Common Settings See Chapter 3 Co...

Страница 106: ...or snap the core wire or otherwise damage the power cord If the power cord is damaged this could cause current to leak resulting in a fire or electrical shock IMPORTANT To make repair requests from th...

Страница 107: ...ou can cancel the request by pressing Cancel Yes 4 Press Corrupt Image Paper Jams or Other Problems to select the type of the problem you want to fix press Request The screen on the left appears when...

Страница 108: ...ay expose or snap the core wire or otherwise damage the power cord If the power cord is damaged this could cause current to leak resulting in a fire or electrical shock IMPORTANT Even if a blackout oc...

Страница 109: ...Service Call Message 6 16 Troubleshooting 6...

Страница 110: ...CHAPTER 7 1 7 Appendix This chapter describes the types of paper that can be used with the machine and includes the index Available Paper Stock 7 2 Index 7 4...

Страница 111: ...the Machine s Basic Settings in the Reference Guide Available N A Not Available 1 From 64 to 90 g m2 2 From 75 to 90 g m2 3 From 81 to 90 g m2 4 From 91 to 105 g m2 5 From 106 to 128 g m2 6 Use only...

Страница 112: ...urce Paper Drawers 1 3 4 Paper Drawer 2 Stack Bypass A4 297 mm 210 mm A4R 210 mm 297 mm A3 297 mm 420 mm A5R 148 mm 210 mm Irregular Size 99 mm to 297 mm 148 mm to 432 mm N A N A Envelope No 10 COM10...

Страница 113: ...Feeder scanning area and rollers 5 13 Platen glass and cover 5 12 Routine cleaning 5 12 Color Network ScanGear 3 4 Color paper 7 2 Consumables Paper stock 5 17 Stamp ink cartridge 5 19 Staple cartridg...

Страница 114: ...r stock 5 17 Paper size 7 3 Paper type 7 2 PCL Printer Driver 3 7 PCL User Software 3 7 Plain paper 7 2 Printer Driver Installation Guide 3 4 3 7 3 9 Printing from a computer 4 4 from USB memory media...

Страница 115: ...onnection 1 12 Toner cartridge 5 8 5 18 Transparency 7 2 Troubleshooting Limited functions 6 12 Service call message 6 11 TWAIN 3 4 U UFRII LT Printer Driver 3 4 UFRII LT User Software 3 4 USB connect...

Страница 116: ...imageRUNNER 2545i 2545 2535i 2535 2530i 2530 2525i 2525 2520i 2520 Guide de l utilisateur...

Страница 117: ...structions d utilisation des fonctions envoi et t l copie Guide des fonctions envoi et t l copie CD ROM Instructions d utilisation du logiciel d administration interface utilisateur distante Guide du...

Страница 118: ...D crit les types de papier disponibles et l index Chapitre 1 Chapitre 2 Chapitre 3 Chapitre 4 Chapitre 5 Chapitre 6 Chapitre 7 Un soin particulier a t apport la r daction de ce guide afin d viter les...

Страница 119: ...entions l gales xiv Nom du produit xiv Exigences CEM de la directive europ enne xiv Directive R TTE xiv Faisceau laser xv Informations compl mentaires xv Programme international ENERGY STAR xvi IPv6 R...

Страница 120: ...copieur 1 12 Chapitre 2 Avant de commencer utiliser la machine Interrupteur principal et interrupteur du panneau de commande 2 2 Mise sous tension de la machine 2 2 Utilisation de l interrupteur du p...

Страница 121: ...et p riph rique m moire USB 4 8 Envoi d une t l copie 4 10 Lecture partir d un ordinateur Lecture distance 4 12 Op ration de la machine partir d un ordinateur Interface utilisateur distante 4 14 Chapi...

Страница 122: ...2 6 5 Chargeur 6 9 Message d entretien 6 12 Red marrage de la machine 6 12 Utilisation de la machine avec des fonctions limit es 6 13 Demande de maintenance partir du panneau de commande 6 14 Contacte...

Страница 123: ...nt concernant les op rations susceptibles de repr senter un danger de mort ou de provoquer des blessures si les instructions ne sont pas respect es Ces recommandations sont respecter rigoureusement AT...

Страница 124: ...propos es dans ce guide correspondent au mod le imageRUNNER 2545i avec l quipement en option suivant le module de finition interne B1 le bac s parateur pour module de finition interne B1 et du socle d...

Страница 125: ...boutons qui conviennent le mieux vos besoins Abr viations utilis es dans ce guide Dans ce manuel les noms des produits et des mod les sont abr g s de la fa on suivante Syst me d exploitation Microsof...

Страница 126: ...iginal copier elle est en mesure de lire l original d un autre utilisateur pour en faire une copie sans qu il soit n cessaire de patienter Il est possible galement d effectuer des impressions l aide d...

Страница 127: ...Tirage de documents tels qu une copie une t l copie ou des donn es envoy es la machine par un ordinateur client Copie Impression de donn es lues partir d un original suivie d options de finition notam...

Страница 128: ...oir le Chapitre 4 Equipement optionnel du Guide de r f rence Mod le Copie Lecture distance Interface utilisateur distante Envoi T l copieur Impression Chargeur Cassette Fonction OCR PDF USB UFRII LT P...

Страница 129: ...orme aux principales exigences CEM de la directive europ enne Ce produit est conforme aux sp cifications CEM de la directive europ enne pour une alimentation secteur nominale de 230 V 50 Hz avec une t...

Страница 130: ...etirez pas les capots de protection et les portes externes sauf indication expresse du Guide de r f rence de la machine Informations compl mentaires Lors de l entretien ou du r glage du syst me optiqu...

Страница 131: ...machine satisfait le programme international ENERGY STAR en mati re de rendement nerg tique Le programme international ENERGY STAR pour l quipement bureautique est destin promouvoir les conomies d ner...

Страница 132: ...s lectriques ou lectroniques EEE et des piles et accumulateurs Le traitement inappropri de ce type de d chet risque d avoir des r percussions sur l environnement et la sant humaine du fait de la pr se...

Страница 133: ...3 Vous utilisez exclusivement le LOGICIEL avec le produit Canon que vous avez achet le PRODUIT 4 Vous ne devez pas transf rer accorder en sous licence vendre diffuser ou c der le LOGICIEL un tiers san...

Страница 134: ...abilit civile et ou p nale Vous trouverez ci dessous une liste non exhaustive des documents dont la reproduction peut tre interdite Cette liste est uniquement destin e vous servir de guide Si vous ave...

Страница 135: ...G3 atteignent des dur es de transmission d environ 3 secondes par page ce qui r duit la facture de t l phone Temps de transmission d environ 3 secondes par page avec un modem 33 6 Kbps bas sur la mire...

Страница 136: ...NT Ne jamais bloquer les ouvertures d a ration de la machine Elles permettent de ventiler correctement ses composants internes Si elles sont obstru es cela risquerait d entra ner une surchauffe de la...

Страница 137: ...sur un support instable estrade par exemple sur une surface inclin e ou un endroit soumis de fortes vibrations car elle pourrait tomber ou se renverser avec un risque de blessure pour l utilisateur Ne...

Страница 138: ...allonge L emploi d une rallonge risque en effet de provoquer un incendie ou une lectrocution Si toutefois cela est in vitable utiliser une rallonge pr vue pour des tensions sup rieures ou gales 220 24...

Страница 139: ...n lectrique et de provoquer un incendie toujours mettre l interrupteur principal sur Arr t et d brancher le c ble d interface avant de d placer la machine On risquerait sinon d endommager le cordon ou...

Страница 140: ...r Ne pas toucher le module de finition lorsque la machine imprime afin d viter tout risque de blessure Ne pas approcher les mains les cheveux les v tements etc de la sortie et des rouleaux du chargeur...

Страница 141: ...rayonner hors de la machine Lire les remarques et instructions qui suivent concernant la s curit Ne jamais ouvrir un capot si cette ouverture n est pas demand e dans ce guide Ne retirez pas les tique...

Страница 142: ...nsion de la machine pourrait provoquer un incendie ou une lectrocution De hautes tensions sont pr sentes dans certaines zones l int rieur de la machine Lors de l limination d un bourrage l int rieur d...

Страница 143: ...ficheur tactile pour retirer tout papier coinc dans la machine N ins rez pas vos doigts dans toute partie non indiqu e sur l afficheur tactile pour viter une blessure ou des br lures Lors de l liminat...

Страница 144: ...opie des emplacements expos s des flammes car ils pourraient alors s enflammer et occasionner des br lures ou provoquer un incendie ATTENTION Conserver le toner et les autres consommables hors de port...

Страница 145: ...xxx...

Страница 146: ...ma de raccordement des c bles Emplacement d installation et manipulation 1 2 Pr cautions d installation 1 2 Pr cautions d emploi 1 7 Branchement des c bles 1 9 Utilisation de la machine comme imprima...

Страница 147: ...tallation Evitez les conditions suivantes Les emplacements soumis une temp rature et une humidit extr mes qu elles soient faibles ou lev es Evitez par exemple la proximit imm diate de robinets radiate...

Страница 148: ...ommand d ouvrir r guli rement portes et fen tres du local pour travailler dans des conditions plus agr ables Les endroits o des vapeurs d ammoniac se d gagent Les endroits soumis des vibrations Par ex...

Страница 149: ...ecteur qui lui est propre et pr voyez le plus d espace possible entre la machine et les autres appareils lectroniques Ne retirez pas les pieds de mise au niveau de la machine Ne retirez pas les pieds...

Страница 150: ...rrait r sulter en un incendie Si une contrainte excessive est appliqu e sur la partie de connexion du cordon d alimentation elle risque d endommager ce dernier ou des fils l int rieur de la machine ri...

Страница 151: ...trave Vue de dessus Lorsque le module de finition interne B1 en option est install Avant de d placer la machine Si vous envisagez de d placer la machine m me sans changer d tage contactez au pr alable...

Страница 152: ...terrupteur principal d branchez le cordon d alimentation de la prise secteur et appelez votre revendeur Canon agr local L utilisation de la machine dans cet tat risque de provoquer un incendie ou l le...

Страница 153: ...e par exemple pendant les vacances mettez l interrupteur principal sur Arr t et d branchez la prise d alimentation Lors du fonctionnement la machine g n re de l ozone ou d autres odeurs en faible quan...

Страница 154: ...ent votre ordinateur ou votre r seau Utilisation de la machine comme imprimante locale connexion USB Si vous voulez utiliser la machine comme imprimante locale reliez la un ordinateur par un c ble USB...

Страница 155: ...utilitaires peuvent ne pas tre op rationnels si la machine est reli e un ordinateur par le biais d un c ble USB Assurez vous que le r glage Utiliser p riph rique USB est activ Voir le Chapitre 7 Autr...

Страница 156: ...ion et d branchez le cordon d alimentation IMPORTANT Il est impossible d utiliser la machine comme r p teur pont ou passerelle REMARQUE La machine d tecte automatiquement la vitesse Ethernet 10Base T...

Страница 157: ...machine comme indiqu ci dessous Pour plus d informations sur la ligne t l phonique contactez votre compagnie de t l phone locale IMPORTANT Avant d utiliser la fonction de t l copie vous devez configur...

Страница 158: ...et vous renvoie aux guides contenant des instructions d installation sp cifiques dont vous aurez ventuellement besoin Interrupteur principal et interrupteur du panneau de commande 2 2 Mise sous tensio...

Страница 159: ...mentation principale Mise sous tension de la machine Cette section explique comment mettre la machine sous tension REMARQUE Pour plus d informations sur la mise hors tension voir Mettez la machine hor...

Страница 160: ...s attribu s aux utilisateurs l cran de connexion s affiche Dans ce cas tapez votre num ro de service ou votre code utilisateur et le mot de passe correspondant Voir le Chapitre 2 Op rations de base du...

Страница 161: ...orsque elle est en cours de fonctionnement La machine peut recevoir transmettre ou imprimer des documents en mode Veille Interrupteur du panneau de commande Etat de la machine Marche Pr t Arr t Mode V...

Страница 162: ...ion figurent sur le CD ROM de documentation utilisateur Reportez vous la section CD ROM de documentation utilisateur p 3 2 REMARQUE Pour acc der aux fonctions disponibles partir d un produit donn voir...

Страница 163: ...sse r seau de la machine et tablissez une connexion entre la machine et un ordinateur du r seau Apr s avoir reli la machine au r seau configurez la pour l environnement r seau 4 R glages E mail I Fax...

Страница 164: ...rimante Windows T l copie pilote de t l copie Voir le Guide du pilote de t l copie Windows Lecture distance Color Network ScanGear Voir le Guide de Network ScanGear 7 Configuration du serveur de fichi...

Страница 165: ...Marche suivre de l installation 2 8 Avant de commencer utiliser la machine 2...

Страница 166: ...l utilisateur UFRII LT 3 4 Contenu du CD ROM 3 4 Configuration syst me 3 5 Installation 3 6 Logiciel utilisateur PCL 3 7 Contenu du CD ROM 3 7 Configuration syst me 3 8 Installation 3 8 Logiciel utili...

Страница 167: ...ivants IMPORTANT Selon la configuration de la machine certaines fonctions risquent de ne pas s ex cuter correctement Si le guide au format PDF ne s ouvre pas partir du menu du CD ROM ouvrez les fichie...

Страница 168: ...dinateur selon le syst me d exploitation utilis Pour les utilisateurs Macintosh double cliquez sur l ic ne START pour lancer le menu du CD ROM a PARCOURIR GUIDE Pour lire un des guides r pertori s dan...

Страница 169: ...d rablement la dur e totale de l impression La charge de travail peut tre d l gu e afin de s adapter aux donn es en sortie ce qui contribue un accroissement notable de la vitesse Color Network ScanGea...

Страница 170: ...nte utilis e Mat riel Ordinateur Tout ordinateur capable d ex cuter les syst mes d exploitation ci dessus M moire Quantit de m moire n cessaire l ex cution des syst mes d exploitation mentionn s ci de...

Страница 171: ...r signalant une quantit de m moire insuffisante ou une diminution importante de la vitesse de lecture se produise En pareil cas appliquez une des proc dures suivantes Augmentez la quantit d espace dis...

Страница 172: ...CL5e pour les imprimantes noir et blanc et le pilote d impression PCL6 pour les deux types d imprimante PCL6 est une version avanc e des pilotes PCL5c et PCL5e et offre une qualit et une vitesse d imp...

Страница 173: ...te utilis e Mat riel Ordinateur Tout ordinateur capable d ex cuter les syst mes d exploitation ci dessus M moire Quantit de m moire n cessaire l ex cution des syst mes d exploitation mentionn s ci des...

Страница 174: ...donn es d impression issues des applications en donn es utilisables par les imprimantes PS et les envoie l imprimante Outre la conversion des donn es d impression le pilote permet galement de configur...

Страница 175: ...pable d ex cuter les syst mes d exploitation ci dessus M moire Quantit de m moire n cessaire l ex cution des syst mes d exploitation mentionn s ci dessus Installation A partir de l cran du menu du CD...

Страница 176: ...tall partir du CD ROM Fax Driver Software IMPORTANT Le CD ROM Fax Driver Software est livr avec la carte FAX Super G3 AG1 en option Contenu du CD ROM Pilote de t l copie Si le pilote de t l copie est...

Страница 177: ...r capable d ex cuter les syst mes d exploitation ci dessus M moire Quantit de m moire n cessaire l ex cution des syst mes d exploitation mentionn s ci dessus Installation A partir de l cran du menu du...

Страница 178: ...ssion partir d un ordinateur 4 4 Impression partir d un p riph rique m moire USB Impression support 4 6 Envoi d un document E mail I fax serveur de fichiers et p riph rique m moire USB 4 8 Envoi d une...

Страница 179: ...rrupteur Fermez le chargeur la vitre d exposition apr s avoir plac vos originaux sur la vitre d exposition Saisissez votre n de service et votre mot de passe si l cran vous demande de le faire appuyez...

Страница 180: ...vous sp cifiez s affiche dans le coin sup rieur droit de l afficheur tactile Lorsque l cran ci dessous appara t s lectionnez le format de l original appuyez sur OK D but Pour annuler la copie appuyez...

Страница 181: ...OK 2 pour lancer l impression 1 Le nom du bouton qui affiche la feuille des r glages d impression indiqu l tape 3 peut varier en fonction de l application que vous utilisez 2 Le nom du bouton qui lan...

Страница 182: ...tre ordinateur en fonction de la machine et de l quipement en option du type et de la version du pilote d imprimante ou du syst me d exploitation que vous utilisez Pour annuler l impression sur votre...

Страница 183: ...B a t ins r appuyez sur Fin et passez l tape suivante Si la machine est en mode Veille appuyez sur Interrupteur Saisissez votre code utilisateur et votre mot de passe ou ins rez la carte compteur si l...

Страница 184: ...le dossier appuyez sur Bas pour afficher les fichiers s lectionnez le fichier Pour annuler l impression appuyez sur Arr t Vous pouvez aussi annuler la t che d impression en cours en appuyant sur Annu...

Страница 185: ...Envoi Placer vos originaux Appuyez sur SEND Envoi pour afficher l cran sup rieur des fonctions envoi et t l copie Si la machine est en mode Veille appuyez sur Interrupteur Saisissez votre code utilisa...

Страница 186: ...nvoi Pour plus d informations sur l annulation de l envoi d un document pendant la transmission reportez vous au Chapitre 2 Envoi de documents dans le Guide des fonctions envoi et t l copie Les m thod...

Страница 187: ...n Ouvrez l cran de la fonction Envoi Placer originaux Appuyez sur SEND Envoi pour afficher l cran sup rieur des fonctions envoi et t l copie Si la machine est en mode Veille appuyez sur Interrupteur S...

Страница 188: ...cification des destinataires voir le Chapitre 4 Sp cification facile et rapide des destinataires dans le Guide des fonctions envoi et t l copie Appuyez sur D but Lorsque l cran ci dessous appara t s l...

Страница 189: ...qui s affiche en r alit sur votre ordinateur selon le programme ou le syst me d exploitation utilis Mettez la machine en ligne Placez vos originaux Appuyez sur SCAN OPTIONS Lecture Options si l cran...

Страница 190: ...ion fournie avec votre application compatible TWAIN Les commandes disponibles notamment Nouvelle lecture Obtenir etc varient en fonction de l application que vous utilisez Dans la bo te de dialogue du...

Страница 191: ...touche ENTR E du clavier de votre ordinateur Dans la page sup rieure de l interface utilisateur distante affich e l tape 1 saisissez votre n de service ou votre code utilisateur et votre mot de passe...

Страница 192: ...rodatage Cassettes 5 2 Chargement de papier 5 3 Modification du format de papier d une cassette 5 5 Remplacement de la cartouche de toner 5 8 Entretien courant 5 12 Vitre d exposition et cache d expos...

Страница 193: ...t A4 A4R A3 ou A5R Type Ordinaire Recycl Couleur et 3 perforations Voir Types de papier disponibles p 7 2 Si vous avez install le module enveloppes D1 en option vous pouvez charger les enveloppes suiv...

Страница 194: ...ou verso d une feuille de papier sur laquelle des images couleur ont t reproduites recto ou verso d une feuille de papier imprim e avec une imprimante transfert thermique Avant de charger le papier d...

Страница 195: ...impression ou bourrage papier par exemple retournez la pile de papier et rechargez la Pour plus d informations sur le sens d impression du papier pr imprim papier sur lequel des logos ou des motifs s...

Страница 196: ...pier d une cassette Pour modifier le format de papier d une cassette r ajustez les guides coulissants en fonction du nouveau format comme d crit ci apr s 5 Repoussez doucement la cassette dans son log...

Страница 197: ...ion des guides Un mauvais r glage peut entra ner des bourrages papier nuire la qualit d impression ou provoquer un encrassement l int rieur de la machine IMPORTANT Le papier d form ou recourb doit tre...

Страница 198: ...ur le disque ne soient pas compatibles avec la machine utilis e 6 Repoussez doucement la cassette dans son logement jusqu ce qu elle soit bien en place ATTENTION En remettant la cassette dans sa posit...

Страница 199: ...est plus suffisante pour imprimer le message Remplacer le toner appara t sur l afficheur tactile Appuyez sur Plus tard pour poursuivre vos op rations Vous devrez cependant remplacer la cartouche de t...

Страница 200: ...mettez les au rebut dans un endroit l abri des flammes IMPORTANT Utilisez exclusivement des cartouches de toner pr vues pour la machine Voir Consommables p 5 17 Ne remplacez pas les cartouches de tone...

Страница 201: ...ien droite AVERTISSEMENT Ne jetez pas les cartouches de toner usag es au feu car les r sidus de toner restant dans la cartouche pourraient s enflammer et occasionner des br lures ou provoquer un incen...

Страница 202: ...he d une main en la prenant par dessous de l autre main 6 Remettez le levier de verrouillage dans sa position initiale IMPORTANT Avant de continuer assurez vous que la fl che vers le bas sur le levier...

Страница 203: ...he de la prise secteur et nettoyer la zone situ e autour des broches m talliques de la fiche ainsi que la prise secteur avec un chiffon sec pour enlever toute la poussi re et la salet Si la machine de...

Страница 204: ...e de lecture du chargeur et les rouleaux d entra nement de fa on r guli re comme indiqu ci apr s IMPORTANT N utilisez pas de chiffon trop humide car l exc s d eau pourrait d t riorer la machine REMARQ...

Страница 205: ...umect d eau Essuyez ensuite la surface l aide d un chiffon doux et sec Faites tourner les rouleaux avec vos doigts pendant que vous les nettoyez 5 Nettoyez la partie en plastique transparent du capot...

Страница 206: ...e rouleau en r sine et les parties environnantes l aide d un chiffon humect d eau Essuyez ensuite la surface l aide d un chiffon doux et sec REMARQUE Si la molette d alimentation ne peut tre atteinte...

Страница 207: ...face l aide d un chiffon doux et sec 10 Fermez le chargeur ATTENTION En refermant le chargeur veillez ne pas vous blesser en vous pin ant les doigts Rappelez vous que la lumi re mise par la vitre d ex...

Страница 208: ...de commander du papier recycl du papier en couleur des transparents sp cifiques la machine des tiquettes et d autres types de consommables papier Pour plus d informations contactez le revendeur agr Ca...

Страница 209: ...urrait alors s enflammer et provoquer des br lures ou un incendie ATTENTION Conserver le toner et les autres consommables hors de port e des enfants En cas d ingestion consulter imm diatement un m dec...

Страница 210: ...ra t sur l afficheur tactile pour vous demander de mettre des agrafes remplacez la cartouche d agrafes par une cartouche neuve Utilisez exclusivement des cartouches d agrafes pr vues pour la machine A...

Страница 211: ...Consommables 5 20 Entretien p riodique 5...

Страница 212: ...Elimination des bourrages papier 6 2 Unit de fixation 6 3 Cassettes 1 et 2 6 5 Chargeur 6 9 Message d entretien 6 12 Red marrage de la machine 6 12 Utilisation de la machine avec des fonctions limit...

Страница 213: ...ution car vous risquez de vous couper les mains ou de vous blesser avec les pi ces Si le papier reste bloqu contactez votre revendeur Canon local agr Lors de l limination d un bourrage l int rieur de...

Страница 214: ...s et portes dans leur position initiale L impression peut alors reprendre REMARQUE Une fois tous les bourrages papier r solus la machine recalcule automatiquement le nombre de copies ou d impressions...

Страница 215: ...la partie inf rieure de l unit de fixation 3 Abaissez le capot sup rieur de l unit de fixation en agissant sur son loquet puis d gagez le papier coinc ATTENTION L unit de fixation et la zone adjacente...

Страница 216: ...s 1 et 2 retirez le papier bloqu comme indiqu ci apr s IMPORTANT La proc dure d crite dans cette section suppose que la machine est quip e de quatre cassettes Le nombre de cassettes disponibles peut v...

Страница 217: ...ur le bouton de la porte droite de la machine et ouvrez la porte droite 3 Ouvrez la porte droite de la cassette et d gagez le papier coinc 4 Appuyez sur le bouton de la cassette 1 puis sortez la casse...

Страница 218: ...z la cassette jusqu ce qu elle s immobilise 5 Retirez le papier coinc 6 Repoussez doucement la cassette dans son logement jusqu ce qu elle soit bien en place ATTENTION En remettant la cassette dans sa...

Страница 219: ...soit bien en place ATTENTION En remettant la cassette dans sa position initiale veillez ne pas vous blesser en vous pin ant les doigts 10 Refermez la porte droite de la cassette ATTENTION Prenez gard...

Страница 220: ...roduit au niveau du chargeur retirez le papier bloqu comme indiqu ci apr s IMPORTANT Le chargeur CRV AA1 AB1 est disponible en option sur l imageRUNNER 2545 2535 2530 2525 2520 2 Ouvrez le capot inter...

Страница 221: ...Fermez le capot interne puis le capot du chargeur ATTENTION Prenez garde ne pas vous coincer les doigts lors de la fermeture des capots 5 Soulevez le chargeur et assurez vous qu aucun original n est r...

Страница 222: ...de remettre tous les leviers capots et portes dans leur position initiale L impression peut alors reprendre 6 Fermez le chargeur ATTENTION En refermant le chargeur veillez ne pas vous blesser en vous...

Страница 223: ...repris ci dessous s affiche suivez les proc dures d crites ci apr s Red marrage de la machine Si un Message d entretien s affiche red marrez la machine IMPORTANT La mise hors tension de la machine a p...

Страница 224: ...la machine REMARQUE Si vous s lectionnez le mode Fonctions limit es partir de l cran Message d entretien vous acc dez aux r glages communs pour ce mode Voir le Chapitre 3 Configuration des r glages d...

Страница 225: ...on risque d endommager celui ci notamment en exposant les fils internes ou en les arrachant Un cordon endommag peut provoquer une fuite de courant avec risque d incendie ou d lectrocution IMPORTANT Po...

Страница 226: ...il suffit alors d appuyer sur Annuler Oui 4 Appuyez sur Image alt r e Bourrages papier ou Autre probl me pour s lectionner le type de probl me r soudre appuyez sur Requ te L cran ci contre s affiche...

Страница 227: ...ant les fils internes ou en les arrachant Un cordon endommag peut provoquer une fuite de courant avec risque d incendie ou d lectrocution IMPORTANT En cas de coupure de courant ou de mise hors tension...

Страница 228: ...CHAPITRE 7 1 7 Annexe Ce chapitre d crit les types de papier compatibles avec la machine et comprend un index Types de papier disponibles 7 2 Index 7 4...

Страница 229: ...ration des r glages de base de la machine du Guide de r f rence Disponible N D Non disponible 1 De 64 90 g m2 2 De 75 90 g m2 3 De 81 90 g m2 4 De 91 105 g m2 5 De 106 128 g m2 6 Utilisez exclusivemen...

Страница 230: ...ueur Source de papier Cassettes 1 3 4 Cassette 2 Plateau d alimentation A4 297 mm 210 mm A4R 210 mm 297 mm A3 297 mm 420 mm A5R 148 mm 210 mm Format irr gulier 99 mm 297 mm 148 mm 432 mm N D N D Envel...

Страница 231: ...ork ScanGear 3 4 Connexion r seau 1 10 Connexion t l phonique 1 12 Connexion USB 1 9 Consignes de s curit Alimentation lectrique xxii Autres points importants xxix Consommables xxix Entretien et inspe...

Страница 232: ...p riph rique m moire USB 4 6 Impression du p riph rique m moire USB 4 6 Impression support 4 6 Impression d finition xii Installation Alimentation lectrique 1 4 Consignes de s curit xxi D placement d...

Страница 233: ...cl 7 2 Pilote d imprimante PCL 3 7 Pilote d imprimante PS 3 9 Pilote d imprimante UFRII LT 3 4 Pilote de t l copie 3 11 Pr cautions d emploi 1 7 R Red marrage 6 12 Revendeur Canon 6 16 S Surface suffi...

Страница 234: ...imageRUNNER 2545i 2545 2535i 2535 2530i 2530 2525i 2525 2520i 2520 Anwenderhandbuch...

Страница 235: ...sungen zum Senden und Faxen Handbuch Sendefunktionen und Faxfunktionen CD ROM Anleitungen zum Arbeiten mit dem Remote User Interface Anwenderschnittstelle Handbuch Remote UI CD ROM Netzwerverbindung S...

Страница 236: ...der geeigneten Papiertypen und den Index Kapitel 1 Kapitel 2 Kapitel 3 Kapitel 4 Kapitel 5 Kapitel 6 Kapitel 7 Bei der Erstellung dieser Handb cher und Anleitungen wurden gr te Anstrengungen unternomm...

Страница 237: ...derungen der EU Richtlinie xiv R TTE Richtlinie xiv Hinweise zur Sicherheit des Lasers xv Zus tzliche Informationen xv Internationales ENERGY STAR Programm xvi IPv6 Ready Logo xvi Richtlinie ber Elekt...

Страница 238: ...apitel 2 Vor Inbetriebnahme des Systems Hauptschalter und Bedienfeldschalter 2 2 Einschalten des Systems ber den Hauptschalter 2 2 Verwenden des Bedienfeldschalters Schlafmodus 2 4 Ausschalten des Hau...

Страница 239: ...legen von Papier 5 3 Einrichten einer Kassette f r ein anderes Papierformat 5 5 Austauschen der Tonerpatrone 5 8 Regelm ige Reinigung 5 12 Vorlagenglas und Abdeckung 5 12 Scanbereich und Walzen des Ei...

Страница 240: ...vii Kapitel 7 Anhang Geeignetes Druck Kopiermaterial 7 2 Index 7 4...

Страница 241: ...ernsthafte Verletzungen oder Tod die Folge sein Bitte beachten Sie diese Warnungen unbedingt um den sicheren Betrieb zu gew hrleisten VORSICHT VORSICHT So wird eine Vorsichtsma nahme bez glich Vorg n...

Страница 242: ...in diesem Handbuch Die Abbildungen in diesem Handbuch zeigen das System imageRUNNER 2545i mit den folgenden Zusatzausstattungen Finisher intern B1 Zus tzliches Finisherfach B1 und Kassetteneinheit AE1...

Страница 243: ...le markiert W hlen Sie die Taste oder Schaltfl che die am besten f r Ihre Anforderungen geeignet ist Abk rzungen in diesem Handbuch Produktbezeichnungen und Modellnamen sind in diesem Handbuch folgend...

Страница 244: ...r optimal aus Sobald das System z B das Original zum Kopieren gescannt hat k nnen Sie ohne Verz gerung das n chste scannen Auch Drucken mit einer anderen Funktion als der Kopierfunktion ist m glich Zu...

Страница 245: ...entenausgabe wie eine Kopie ein Fax oder die von einem Client Computer an das System gesendeten Druckdaten Kopieren Ausdrucken von Daten eines gescannten Originals mit anschlie enden Finishing Optione...

Страница 246: ...Informationen zur Zusatzausstattung finden Sie in Kapitel 4 Zusatzausstattung im Referenzhandbuch Modell Kopie Remote Scan Remote UI Sen den Fax Druck Einzug Kassette Durch such bare PDF USB UFRII LT...

Страница 247: ...ve Ausstattung erf llt die wesentlichen EMC Anforderungen der EU Richtlinie Wir erkl ren hiermit dass dieses Produkt mit den EMC Anforderungen der EU Richtlinie zu Stromversorgungsnetzen von 230V 50 H...

Страница 248: ...rn Sie im Ger tehandbuch nicht dazu aufgefordert werden d rfen Sie Schutzgeh use oder u ere Abdeckungen nicht entfernen Zus tzliche Informationen Wenn das System gewartet oder justiert werden muss leg...

Страница 249: ...Inc ermittelt dass dieses Produkt das ENERGY STAR Programm f r die Ernergieeinsparung erf llt Das internationale ENERGY STAR Programm f r B roger te ist ein internationales Programm zur F rderung eine...

Страница 250: ...e abgegeben werden Dies kann z B durch R ckgabe beim Kauf eines neuen hnlichen Produkts oder durch Abgabe bei einer autorisierten Sammelstelle f r die Wiederaufbereitung von Elektround Elektronik Altg...

Страница 251: ...WARE verbleiben beim LIZENZGEBER Der Lizenzgeber von Canon bertr gt Ihnen keinerlei Lizenzen oder Rechte an dem geistigen Eigentum der LIZENZGEBER weder ausdr cklich noch stillschweigend sofern dies n...

Страница 252: ...INC GIBT KEINERLEI GARANTIE IN BEZUG AUF DIESES MATERIAL WEDER EINGESCHLOSSEN NOCH AUSGESPROCHEN AUSSER DEN HIER GEGEBENEN ES GIBT AUCH KEINE UNBEGRENZTEN GARANTIEN F R DIE MARKTF HIGKEIT DES MATERIA...

Страница 253: ...ssensmarken Einzahlungsbelege Personalausweise und Reisep sse Briefmarken mit oder ohne Poststempel Einwanderungspapiere Dienstmarken oder ausweise Steuermarken mit oder ohne Stempel Wertpapiere und S...

Страница 254: ...as System so auf dass die Bel ftungsschlitze nicht durch eine Wand oder andere Objekte verdeckt sind Lassen Sie immer Abstand zur Wand Wenn die Bel ftungsschlitze blockiert werden baut sich im Systemi...

Страница 255: ...fstellen Ein geneigter Boden oder eine instabile Stellfl che auf der das System Ersch tterungen ausgesetzt ist kann ein Umkippen mit daraus resultierender Verletzung zur Folge haben Entfernen Sie nich...

Страница 256: ...ind W hlen Sie eine Stromverbindung die den hier genannten Spezifikationen entspricht es kann sonst zu Feuer oder elektrischem Schlag kommen Bitte fassen Sie beim Herausziehen des Kabels immer den Ste...

Страница 257: ...Sie keine schweren Gegenst nde auf das System da sie umfallen oder herunterkippen und Sie verletzen k nnen Schlie en Sie den Einzug die Originalabdeckung vorsichtig damit Sie sich nicht die Finger ei...

Страница 258: ...ten die am System angebracht sind Wenn die Plaketten entfernt wurden wenden Sie sich an Ihren Canon Servicepartner Wenn Laserlicht aus dem System austritt und in Kontakt mit Ihren Augen kommt k nnen e...

Страница 259: ...n Armb nder oder andere Metallgegenst nde nicht mit dem Systeminneren in Ber hrung kommen da andernfalls Verbrennungs oder Stromschlaggefahr besteht Bitte werfen Sie verbrauchte Tonerpatronen nie in o...

Страница 260: ...s darauf dass der noch nicht fixierte Toner auf dem Papier nicht in Kontakt mit Ihren H nden oder Ihrer Kleidung kommt da er schnell haftet Sollten Sie Toner an H nden oder Kleidung haben waschen Sie...

Страница 261: ...ewahren Sie Toner au erhalb der Reichweite von kleinen Kindern auf Sollten Verbrauchsmaterialien verschluckt oder eingeatmet worden sein ziehen Sie bitte sofort einen Arzt zu Rate Bauen Sie die Tonerp...

Страница 262: ...se beschrieben Aufstellungsort und Handhabung 1 2 Vorsichtsma nahmen f r die Installation 1 2 Vorsichtsma nahmen f r die Handhabung 1 7 Kabelanschluss 1 9 Verwenden des Systems als lokalen Drucker USB...

Страница 263: ...des Aufstellungsorts Orte vermeiden an denen das System extremen Temperaturen und extremer Feuchtigkeit oder Trockenheit ausgesetzt ist Orte in der N he von Wasseranschl ssen Hei wasserbereitern Luft...

Страница 264: ...r eine ausreichende Bel ftung zu sorgen um ein angenehmes Arbeitsklima im Bereich des Systems zu schaffen Orte meiden an denen sich Ammoniakgas entwickelt Orte vermeiden an denen das System starken Er...

Страница 265: ...eckdose an und lassen Sie so viel Abstand wie m glich zu anderen elektronischen Systemen Entfernen Sie nicht die Ausgleichsf e des Systems Entfernen Sie nicht die Ausgleichsf e des Systems nachdem das...

Страница 266: ...e wiederum einen Brand verursachen kann Wenn auf den Verbindungsteil des Netzkabels berm ige Belastung ausge bt wird kann das Netzkabel besch digt werden oder die Adern im Inneren des Systems k nnen s...

Страница 267: ...rn B1 installiert ist Transport des Systems Wenn Sie das System an einem anderen Ort aufstellen m chten selbst wenn es sich dabei um einen Ort auf der gleichen Etage des Geb udes handelt sollten Sie s...

Страница 268: ...System sofort ber den Hauptschalter ausschalten den Netzstecker ziehen und den Canon Servicepartner kontaktieren Eine Weiterbenutzung des Systems in einem solchen Zustand kann zu Feuer oder elektrisch...

Страница 269: ...Sie zus tzlich den Netzstecker Das System erzeugt w hrend des Betriebs in geringen Mengen Ozon oder andere Ger che Obwohl die Empfindlichkeit gegen Ozon oder andere Ger che unterschiedlich sein kann s...

Страница 270: ...en Besorgen Sie sich bitte ein geeignetes Kabel f r Ihren Computer oder Ihr Netzwerk Verwenden des Systems als lokalen Drucker USB Anschluss Wenn Sie das System als lokalen Drucker verwenden m chten s...

Страница 271: ...n Umst nden nicht anschlie en oder trennen Die Treiber werden gerade installiert Der Computer f hrt gerade hoch Das System druckt gerade Wenn Sie das USB Kabel vom System oder Computer trennen der ein...

Страница 272: ...Systems mit anderen Netzwerkbenutzern Da das System TCP IP unterst tzt kann es von Windows Computern verwendet werden Das System unterst tzt sowohl 10BASE T als auch 100BASE TX Verbindungen die in den...

Страница 273: ...tzstecker aus der Steckdose WICHTIG Sie k nnen das System nicht als Repeater Br cke oder Gateway verwenden HINWEIS Das System kann die Ethernet Geschwindigkeit 10Base T oder 100Base TX automatisch erk...

Страница 274: ...stehend abgebildet F r weitere Informationen zur Telefonleitung wenden Sie sich bitte an Ihre rtliche Telefongesellschaft WICHTIG Bevor Sie die Faxfunktion nutzen k nnen m ssen Sie die Systemkonfigura...

Страница 275: ...Kabelanschluss 1 14 Systeminstallation 1...

Страница 276: ...hten Au erdem enth lt es Hinweise zu den entsprechenden Handb chern f r die notwendigen Anweisungen f r die Einrichtung Hauptschalter und Bedienfeldschalter 2 2 Einschalten des Systems ber den Hauptsc...

Страница 277: ...erl utert wie Sie den Hauptschalter einschalten HINWEIS N here Anweisungen zum Ausschalten ber den Hauptschalter finden Sie unter Ausschalten des Hauptschalters auf S 2 4 1 Vergewissern Sie sich ob de...

Страница 278: ...t wird erscheint die Login Anzeige f r die Anmeldung Geben Sie in diesem Fall Ihre Abteilungs ID oder Anwender ID und Ihr Passwort ein Siehe Kapitel 2 Grundlegende Operationen im Referenzhandbuch Sie...

Страница 279: ...in Betrieb ist Im Schlafmodus kann das System Dokumente empfangen weiterleiten oder drucken Bedienfeldschalter Systemstatus EIN Bereit AUS Schlafmodus Bet tigen Sie den Hauptschalter der sich auf der...

Страница 280: ...nd auf der CD ROM Anwenderhandbuch enthalten Siehe CD ROM Anwenderhandbuch auf S 3 2 HINWEIS N here Informationen zu den verf gbaren Funktionen auf Produktbasis finden Sie unter Verf gbare Funktionen...

Страница 281: ...ber den SMTP Server gesendet F r den Empfang von I Faxen ist ein POP3 Server erforderlich Nach dem Aktivieren des Color Send Kit Y1 optional f r den imageRUNNER 2545 2535 2530 2525 2520 m ssen Sie Fo...

Страница 282: ...ROM Men s 3 3 UFRII LT Anwendersoftware 3 4 Inhalt der CD ROM 3 4 Systemanforderungen 3 5 Installation 3 6 Anwendersoftware PCL 3 7 Inhalt der CD ROM 3 7 Systemanforderungen 3 8 Installation 3 8 Anwe...

Страница 283: ...ch Konfiguration Ihres Computers arbeiten einige Funktionen u U nicht einwandfrei Wenn sich die PDF Handb cher nicht aus dem CD ROM Men ffnen lassen ffnen Sie die PDF Dateien direkt aus dem Ordner Deu...

Страница 284: ...lklicken auf das Symbol START um das CD ROM Men zu starten a HANDBUCH DURCHSUCHEN Sie k nnen sich jedes hier aufgef hrte Handbuch durchlesen indem Sie auf den Namen des gew nschten Handbuchs klicken N...

Страница 285: ...gern Da sich die Arbeitsbelastung entsprechend der Ausgabedaten delegieren l sst wird die Geschwindigkeit durch die Optimierung enorm erh ht Color Network ScanGear Mit Color Network ScanGear lassen si...

Страница 286: ...wendeten Druckertreibers ab Hardware Computer Jeder beliebige Computer auf dem die o g Systeme ausgef hrt werden Speicher Der f r die einwandfreie Ausf hrung der o g Systeme erforderliche Arbeits Spei...

Страница 287: ...oder ein Verlust der Scangeschwindigkeit auftreten In diesem Fall k nnen die folgenden Arbeitsschritte n tzlich sein Vergr ern Sie den verf gbaren Festplattenspeicher indem Sie nicht mehr ben tigte Da...

Страница 288: ...nd der PCL6 Druckertreiber f r Farb und Schwarzwei drucker gedacht PCL6 ist eine erweiterte Version von PCL5c und PCL5e und bietet eine hervorragende Druckqualit t und geschwindigkeit Der PCL5e Drucke...

Страница 289: ...eliebige Computer auf dem die o g Systeme ausgef hrt werden Speicher Der f r die einwandfreie Ausf hrung der o g Systeme erforderliche Arbeits Speicher Installation Im Men Bildschirm der CD ROM k nnen...

Страница 290: ...konvertiert Druckdaten aus Anwendungen in Daten zur Verwendung mit PS Druckern und leitet diese an den Drucker weiter Neben der Konvertierung von Druckdaten k nnen Sie auch Einstellungen in Bezug auf...

Страница 291: ...f hrt werden Speicher Der f r die einwandfreie Ausf hrung der o g Systeme erforderliche Arbeits Speicher Installation Im Men Bildschirm der CD ROM k nnen Sie mit der Installation der Software beginnen...

Страница 292: ...ftware installiert WICHTIG Die CD ROM Faxtreiber Software geh rt zum Lieferumfang der optionalen Super G3 Faxkarte AG1 Inhalt der CD ROM Faxtreiber Wenn der Faxtreiber auf Ihrem Computer installiert w...

Страница 293: ...usgef hrt werden Speicher Der f r die einwandfreie Ausf hrung der o g Systeme erforderliche Arbeits Speicher Installation Im Men Bildschirm der CD ROM k nnen Sie mit der Installation der Software begi...

Страница 294: ...n Erstellen einer Kopie 4 2 Drucken von einem Computer 4 4 Drucken von einem USB Speicherger t Mediendruck 4 6 Versenden eines Dokuments E Mail I Fax Dateiserver und USB Speicherger t 4 8 Versenden ei...

Страница 295: ...Sie den Einzug bzw die Originalabdeckung nachdem Sie Ihre Originale auf das Vorlagenglas gelegt haben Geben Sie Ihre Abteilungs ID und Ihr Passwort ein wenn Sie ber die Anzeige dazu aufgefordert werde...

Страница 296: ...Anzahl der von Ihnen angegebenen Kopien wird oben rechts auf dem Touchscreen Display angezeigt Wenn die folgende Anzeige erscheint w hlen Sie das Originalformat bet tigen Sie OK Start Bet tigen Sie St...

Страница 297: ...licken Sie auf OK 2 um den Druckvorgang zu starten 1 Der Name der Taste ber welche die in Schritt 3 dargestellte Seite mit den Druckereinstellungen angezeigt werden kann kann je nach verwendeter Anwen...

Страница 298: ...nn optionalen Ger ten dem Typ und der Version des Druckertreibers sowie des verwendeten Betriebssystems von den auf Ihrem Computer dargestellten abweichen Klicken Sie im Dialogfeld das bei der Verarbe...

Страница 299: ...wurde bet tigen Sie Fertig und fahren Sie mit dem n chsten Schritt fort Wenn sich das System im Schlafmodus befindet bet tigen Sie Einschalten Geben Sie Ihre ID und Ihr Passwort ein oder setzen Sie di...

Страница 300: ...en entsprechenden Ordner bet tigen Sie Abw um die Dateien anzuzeigen w hlen Sie die Datei Bet tigen Sie Stopp um den Druckvorgang abzubrechen Sie k nnen den aktuellen Druckauftrag auch abbrechen indem...

Страница 301: ...ginale auf Bet tigen Sie SEND Senden um die Hauptanzeige der Sende und Faxfunktionen anzuzeigen Wenn sich das System im Schlafmodus befindet bet tigen Sie Einschalten Geben Sie Ihre ID und Ihr Passwor...

Страница 302: ...s und schnelles Festlegen der Empf nger im Handbuch Sendefunktionen und Faxfunktionen Einige USB Speicherger te sind nicht mit dem System kompatibel Weitere Informationen finden Sie in Kapitel 2 Dokum...

Страница 303: ...ie Sendeanzeige auf Legen Sie die Originale auf Bet tigen Sie SEND Senden um die Hauptanzeige der Sende und Faxfunktionen anzuzeigen Wenn sich das System im Schlafmodus befindet bet tigen Sie Einschal...

Страница 304: ...Informationen zum Angeben von Empf ngern finden Sie in Kapitel 4 Einfaches und schnelles Festlegen der Empf nger im Handbuch Sendefunktionen und Faxfunktionen Wenn die folgende Anzeige erscheint w hle...

Страница 305: ...bschnitt abgebildeten Screenshots von den tats chlichen Anzeigen abweichen Schalten Sie das System online Legen Sie die Originale auf Bet tigen Sie SCAN OPTIONS Scan Optionen wenn die Anzeige Scan Opt...

Страница 306: ...Sie in der Dokumentation die Sie zusammen mit der TWAIN kompatiblen Anwendung erhalten haben Befehlsnamen umfassen Neu scannen Erfassen und weitere je nach verwendeter Anwendung Geben Sie im Dialogfel...

Страница 307: ...en bet tigen Sie die EINGABETASTE auf Ihrer Tastatur Geben Sie auf der in Schritt 1 angezeigten oberen Seite Remote UI Ihre Abteilungs ID oder Ihre Anwender ID und Ihr Passwort ein klicken Sie auf OK...

Страница 308: ...arbe und Heftklammermagazinen Papierkassetten 5 2 Einlegen von Papier 5 3 Einrichten einer Kassette f r ein anderes Papierformat 5 5 Austauschen der Tonerpatrone 5 8 Regelm ige Reinigung 5 12 Vorlagen...

Страница 309: ...A5R Typ Normalpapier Recyclingpapier farbiges Papier und Papier mit 3er Lochung Siehe Geeignetes Druck Kopiermaterial auf S 7 2 Mit der optionalen Briefumschlagzuf hrung D1 k nnen die folgenden Briefu...

Страница 310: ...2 Folien Etiketten Papier auf das farbige Bilder kopiert wurden oder die R ckseite von solchem Papier Papier das mit einem Thermotransferdrucker bedruckt wurde oder die R ckseite von solchem Papier F...

Страница 311: ...lemen wie schlechter Druckqualit t oder Papierstaus sollten Sie den Papierstapel umdrehen und neu einlegen Weitere Informationen zur Ausrichtung von vorgedrucktem Papier Papier mit aufgedruckten Logos...

Страница 312: ...Papierformat Wenn Sie das Papierformat in der Papierkassette ndern m chten justieren Sie die F hrungsschienen wie nachstehend beschrieben 5 Schieben Sie die Papierkassette vorsichtig wieder in das Sy...

Страница 313: ...stieren Andernfalls k nnen Papierstaus oder verschmutzte Ausdrucke entstehen oder die Innenfl chen des Systems verschmutzen WICHTIG Vor der Verwendung muss gerolltes oder welliges Papier gegl ttet wer...

Страница 314: ...as System nicht verwenden kann 6 Schieben Sie die Papierkassette vorsichtig wieder in das System bis sie h rbar einrastet VORSICHT Schieben Sie die Papierkassette vorsichtig in ihre urspr ngliche Posi...

Страница 315: ...mehr erstellt werden k nnen wird die Meldung Wechseln Sie den Toner auf dem Touchscreen Display angezeigt Durch Bet tigen der Taste Sp ter beheben k nnen Sie den Betrieb fortsetzen F r weitere Ausdru...

Страница 316: ...die Tonerpatronen nicht in der N he offener Flammen WICHTIG Bitte verwenden Sie nur speziell f r dieses System gedachte Tonerpatronen Siehe Verbrauchsmaterial auf S 5 17 Tauschen Sie Tonerpatronen er...

Страница 317: ...n nie in offenes Feuer oder verbrennen diese da sich der restliche Toner in den Patronen entz nden und Feuer oder Verbrennungen verursachen kann 4 Nehmen Sie die neue Tonerpatrone aus der Verpackung u...

Страница 318: ...das System hineinschieben 6 Drehen Sie den Verriegelungshebel wieder in seine urspr ngliche Position WICHTIG Achten Sie darauf dass der Pfeil nach unten auf dem Verriegelungshebel auf den Pfeil nach...

Страница 319: ...etzstecker aus der Netzsteckdose und entfernen Sie den Staub aus dem Bereich um die Metallstifte und in der Netzsteckdose mit einem trockenen Tuch Wenn das System lange Zeit in einer feuchten staubige...

Страница 320: ...nzugs Reinigen Sie den Scanbereich und die Walzen des Einzugs regelm ig wie nachstehend beschrieben WICHTIG Feuchten Sie das Tuch nicht zu stark an da das System durch zu viel Wasser besch digt werden...

Страница 321: ...uchteten Tuch Wischen Sie den Bereich dann mit einem weichen trockenen Tuch ab Drehen Sie die Walzen beim Reinigen mit der Hand 5 Reinigen Sie die Plastikteile an der inneren Abdeckung mit einem mit W...

Страница 322: ...it Wasser angefeuchteten Tuch und drehen Sie die Walze dabei mit dem Einzugsrad Wischen Sie den Bereich dann mit einem weichen trockenen Tuch ab HINWEIS Wenn Sie das Einzugsrad bei ge ffnetem Einzug n...

Страница 323: ...Sie den Einzug VORSICHT Achten Sie beim Schlie en des Einzugs darauf dass Sie sich nicht die Finger einklemmen und dadurch verletzen Seien Sie sich beim Schlie en des Einzugs dar ber im Klaren dass da...

Страница 324: ...on Normalpapier A4 A3 und A5 stehen Recyclingpapier farbiges Papier Folien f r das System empfohlen Etiketten und andere Papiertypen zur Verf gung F r weitere Informationen setzen Sie sich bitte mit I...

Страница 325: ...z nden und Verbrennungen oder Feuer verursachen k nnen VORSICHT Bitte bewahren Sie Toner und anderes Verbrauchsmaterial au erhalb der Reichweite von Kleinkindern auf Bei Verschlucken oder Einatmen von...

Страница 326: ...gen neuer Heftklammern aufgefordert werden setzen Sie ein neues Heftklammermagazin ein Bitte verwenden Sie nur speziell f r dieses System gedachte Heftklammermagazine Heftklammern J1 WICHTIG Der Heftm...

Страница 327: ...Verbrauchsmaterial 5 20 Regelm ige Wartung 5...

Страница 328: ...auftretenden Probleme l sen Beseitigen von Papierstaus 6 2 Fixiereinheit 6 3 Papierkassetten 1 und 2 6 5 Einzug 6 9 Die Servicemeldung 6 12 Neustarten des Systems 6 12 Verwenden des Systems mit besch...

Страница 329: ...ht an den Bauteilen im Systeminneren verletzen Wenn Sie das Papier nicht entfernen k nnen wenden Sie sich bitte an Ihren Canon Servicepartner Achten Sie beim Beseitigen eines Papierstaus im System dar...

Страница 330: ...hre urspr ngliche Position ein Nach dem Beseitigen aller Papierstaus wird der Druckvorgang fortgesetzt HINWEIS Nach dem Beseitigen aller Papierstaus wird die Anzahl der zu erstellenden Kopien oder Aus...

Страница 331: ...tfernen Sie das gestaute Papier aus dem unteren Teil der Fixiereinheit 3 Ziehen Sie die obere Abdeckung der Fixiereinheit an der Lasche nach oben und entfernen Sie u U gestautes Papier VORSICHT Die Fi...

Страница 332: ...e das gestaute Papier wie nachstehend beschrieben WICHTIG Bei den in diesem Abschnitt beschriebenen Schritten wird vorausgesetzt dass das System mit vier Papierkassetten ausgestattet ist Die Anzahl de...

Страница 333: ...Abdeckung der Haupteinheit und ffnen Sie die rechte Abdeckung 3 ffnen Sie die rechte Abdeckung der Kassette und entfernen Sie gestautes Papier 4 Bet tigen Sie die Taste an Papierkassette 1 und ziehen...

Страница 334: ...5 Entfernen Sie s mtliches gestautes Papier 6 Schieben Sie die Kassette vorsichtig wieder in das System bis sie h rbar einrastet VORSICHT Schieben Sie die Papierkassette vorsichtig in ihre urspr nglic...

Страница 335: ...g in ihre urspr ngliche Position zur ck und achten Sie dabei darauf dass Sie sich nicht die Finger einklemmen Sie k nnten sich verletzen 10 Schlie en Sie die rechte Abdeckung der Kassette VORSICHT Ach...

Страница 336: ...ug entfernen Sie das gestaute Papier wie nachstehend beschrieben WICHTIG Der Einzug D ADF AA1 AB1 ist f r den imageRUNNER 2545 2535 2530 2525 2520 optional 2 ffnen Sie die innere Abdeckung und halten...

Страница 337: ...die Abdeckung des Einzugs VORSICHT Achten Sie beim Schlie en der Abdeckungen darauf dass Sie sich nicht die Finger einklemmen und dadurch verletzen 5 Heben Sie den Einzug an und pr fen Sie ob noch ges...

Страница 338: ...urspr ngliche Position ein Nach dem Beseitigen aller Papierstaus wird der Druckvorgang fortgesetzt 6 Schlie en Sie den Einzug VORSICHT Achten Sie beim Schlie en des Einzugs darauf dass Sie sich nicht...

Страница 339: ...ge wie die unten abgebildete erscheint gehen Sie wie unten beschrieben vor Neustarten des Systems Wenn eine Servicerufmeldung angezeigt wird starten Sie das System neu WICHTIG Beim Ausschalten des Sys...

Страница 340: ...NWEIS Wenn Sie das System in der Anzeige Serviceruf auf den Beschr nkter Funktionsmodus einstellen wird der Beschr nkter Funktionsmodus in den Allgemeinen Einstellungen aktiviert Siehe Kapitel 3 Konfi...

Страница 341: ...Kabel selbst Wenn Sie am Kabel ziehen k nnen Sie es besch digen Ein besch digtes Kabel kann zu Kriechstrom f hren wodurch Brand oder Stromschlaggefahr besteht WICHTIG Das System muss f r Reparaturanf...

Страница 342: ...urch Bet tigen von Abbruch Ja stornieren 4 Bet tigen Sie Besch digtes Bild Papierstau oder Anderes Problem zur Auswahl des Problemtyps der behoben werden soll bet tigen Sie Anfrage Nach dem erfolgreic...

Страница 343: ...digen Ein besch digtes Kabel kann zu Kriechstrom f hren wodurch Brand oder Stromschlaggefahr besteht WICHTIG Auch wenn es zu einem Stromausfall kommt oder das System ausgeschaltet wird sichert eine i...

Страница 344: ...KAPITEL 7 1 7 Anhang Dieses Kapitel enth lt eine Beschreibung der Papiertypen die mit dem System verwendet werden k nnen sowie den Index Geeignetes Druck Kopiermaterial 7 2 Index 7 4...

Страница 345: ...eren der Grundeinstellungen des Systems im Referenzhandbuch Verf gbar n verf Nicht verf gbar 1 Von 64 bis 90 g m2 2 Von 75 bis 90 g m2 3 Von 81 bis 90 g m2 4 Von 91 bis 105 g m2 5 Von 106 bis 128 g m2...

Страница 346: ...erkassetten 1 3 4 Papierkassette 2 Stapelablage A4 297 mm 210 mm A4R 210 mm 297 mm A3 297 mm 420 mm A5R 148 mm 210 mm W hlbar Format 99 mm bis 297 mm 148 mm bis 432 mm n verf n verf Brief umschlag Nr...

Страница 347: ...2 Color Network ScanGear 3 4 D Darstellung von Schaltfl chen und Tasten in diesem Handbuch ix Druck Kopiermaterial 5 17 Papierformat 7 3 Papiertyp 7 2 Drucken von einem Computer 4 4 von einem USB Spei...

Страница 348: ...dbuch zum Network ScanGear 3 4 K Kabelanschluss Netzwerk 1 11 Telefon 1 13 USB 1 9 Kassetten Heizungseinheit 37 2 3 Kopieren 4 2 Kopieren Definition xii M Markierungen und Symbole in diesem Handbuch v...

Страница 349: ...g xxii Umgang xxiii Verbrauchsmaterial xxviii Wartung und Inspektion xxvi St rungsbeseitigung Beschr nkte Funktionen 6 13 Servicemeldung 6 12 T Telefonanschluss 1 13 Tonerpatrone 5 8 5 18 Transport de...

Страница 350: ...imageRUNNER 2545i 2545 2535i 2535 2530i 2530 2525i 2525 2520i 2520 Guida per l utente...

Страница 351: ...M Istruzioni per la copiatura Guida alla copiatura CD ROM Istruzioni per invio e fax Guida alla funzione di trasmissione e Fax CD ROM Istruzioni relative all interfaccia utente remota Guida Interfacci...

Страница 352: ...e Contiene le descrizioni dei tipi di carta accettati e l indice Capitolo 1 Capitolo 2 Capitolo 3 Capitolo 4 Capitolo 5 Capitolo 6 Capitolo 7 Per la stesura del presente manuale stato fatto uno sforzo...

Страница 353: ...egali xiv Nome del prodotto xiv Requisiti di compatibilit elettromagnetica EMC della Direttiva CE xiv Direttiva R TTE xiv Sicurezza del raggio laser xv Informazioni supplementari xv Programma Internat...

Страница 354: ...lizzare la macchina Interruttore principale e interruttore del pannello di controllo 2 2 Accensione con l interruttore principale 2 2 Utilizzo dell interruttore del pannello di controllo modo Riposo 2...

Страница 355: ...zione del cassetto per un diverso formato carta 5 5 Sostituzione del toner 5 8 Pulizia periodica 5 12 Piano di copiatura e coperchio 5 12 Rulli e area di scansione dell alimentatore 5 13 Consumabili 5...

Страница 356: ...vii Capitolo 7 Appendice Tipi di carta accettati 7 2 Indice analitico 7 4...

Страница 357: ...incidenti anche mortali se non eseguite correttamente Per utilizzare la macchina in condizioni di sicurezza prestare pertanto attenzione a queste avvertenze ATTENZIONE Indica operazioni che potrebber...

Страница 358: ...trazioni utilizzate nel presente manuale corrispondono a quelle utilizzate quando su imageRUNNER 2545i sono installati i seguenti accessori opzionali Inner Finisher B1 Inner Finisher Additional Tray B...

Страница 359: ...sto modo Selezionare i tasti o i pulsanti pi adatti alle proprie esigenze Abbreviazioni utilizzate nel manuale Nel manuale i nomi di prodotto e di modello vengono abbreviati come segue Sistema operati...

Страница 360: ...scansione di un originale da riprodurre possibile acquisire il documento dell utente successivo Questa apparecchiatura inoltre consente di stampare utilizzando una funzione diversa da quella di copia...

Страница 361: ...pa Elaborazione e consegna di documenti quali copie fax o dati inviati da un computer client alla macchina Copiatura Stampa di dati acquisiti da un originale seguita da opzioni di finitura quali la pi...

Страница 362: ...Capitolo 4 Accessori opzionali nella Guida di riferimento Modello Copiatura Scansione remota IU remota Invio Fax Stampa Alimentatore Cassetto PDF ricercabile USB UFRII LT PCL PS Codici a barre 2 3 4...

Страница 363: ...i compatibilit elettromagnetica EMC della direttiva CE Dichiariamo che questo prodotto conforme ai requisiti EMC della direttiva CE per una tensione nominale di ingresso di 230V 50 Hz sebbene la tensi...

Страница 364: ...le coperture o i pannelli esterni a meno che non richiesto espressamente nel manuale della macchina Informazioni supplementari Durante la manutenzione o la regolazione del sistema ottico del prodotto...

Страница 365: ...nergetico richiesti dal programma internazionale ENERGY STAR L International ENERGY STAR Office Equipment Program un programma internazionale che promuove il risparmio energetico nell impiego di compu...

Страница 366: ...sto tipo di rifiuti pu avere conseguenze negative sull ambiente e sulla salute umana a causa delle sostanze potenzialmente nocive solitamente contenute in tali rifiuti La collaborazione dell utente pe...

Страница 367: ...del SOFTWARE 3 L utente pu utilizzare il SOFTWARE esclusivamente con il prodotto Canon acquistato il PRODOTTO 4 L utente non pu assegnare dare in sublicenza commerciare distribuire o trasferire il SOF...

Страница 368: ...ti nonch l uso delle riproduzioni cos ottenute pu essere vietato dalla legge ed essere perseguibile penalmente e o civilmente Di seguito viene riportato un elenco dei documenti che vietato riprodurre...

Страница 369: ...ono tempi di trasmissione di circa 3 secondi per pagina con conseguente riduzione dei costi telefonici Tempo di trasmissione fax di circa 3 secondi per pagina basato sulla tabella CCITT ITU T N 1 JBIG...

Страница 370: ...ventilazione e le aperture della macchina Queste aperture sono necessarie per una corretta ventilazione delle parti interne della macchina Se le aperture vengono ostruite le parti interne della macchi...

Страница 371: ...su un piano instabile o inclinato o in luoghi soggetti a forti vibrazioni In caso contrario la macchina potrebbe cadere o ribaltarsi e causare infortuni Non rimuovere i supporti di stabilizzazione do...

Страница 372: ...i corrente con il rischio di incendi o scosse elettriche IMPORTANTE Lasciare uno spazio sufficiente intorno alla presa in modo da poter scollegare facilmente il cavo in caso di necessit Se si collocan...

Страница 373: ...utorizzato Canon ATTENZIONE Non collocare oggetti pesanti sulla macchina perch potrebbero cadere e causare infortuni alle persone Chiudere con cautela l alimentatore coperchio del piano di copiatura p...

Страница 374: ...rante il funzionamento della macchina Leggere le seguenti note e istruzioni di sicurezza Non aprire pannelli e coperchi diversi da quelli menzionati nel presente manuale Non rimuovere le seguenti etic...

Страница 375: ...abile entra a contatto con un area sotto tensione all interno della macchina possono verificarsi incendi o scosse elettriche Alcune aree all interno della macchina sono percorse da alta tensione Quand...

Страница 376: ...tile per rimuovere eventuali fogli inceppati dall interno della macchina Non inserire le dita nella parti non indicate sul display del pannello tattile per evitare lesioni o ustioni Quando si rimuove...

Страница 377: ...la carta da copia in luoghi esposti a fiamme libere possibile che si infiammino causando incendi o ustioni ATTENZIONE Tenere il toner e gli altri materiali di consumo fuori dalla portata dei bambini I...

Страница 378: ...a e spiega come collegare i cavi Luogo di installazione e utilizzo 1 2 Precauzioni per l installazione 1 2 Precauzioni per l utilizzo 1 7 Collegamento dei cavi 1 9 Uso della macchina come stampante lo...

Страница 379: ...ghi Evitare luoghi soggetti a temperature o umidit estreme sia basse che alte Per esempio non installare la macchina vicino a rubinetti d acqua caldaie umidificatori condizionatori d aria apparecchi d...

Страница 380: ...rare il locale correttamente in modo da garantire un ambiente di lavoro confortevole nell area di funzionamento della macchina Evitare ambienti in cui si hanno esalazioni di ammoniaca Evitare luoghi s...

Страница 381: ...e in una presa elettrica dedicata e mantenere la macchina il pi lontano possibile da altre apparecchiature elettroniche Non rimuovere i supporti di stabilizzazione della macchina Non rimuovere i suppo...

Страница 382: ...e si allenti e provochi surriscaldamento e incendi Se si applica una tensione eccessiva alla parte di connessione del cavo di alimentazione possibile danneggiare il cavo stesso o i fili all interno po...

Страница 383: ...zzo corretto e agevole Vista dall alto con l Inner Finisher B1 collegato Trasporto della macchina Se si deve trasportare l apparecchiatura anche nell ambito dello stesso piano dell edificio contattare...

Страница 384: ...nterruttore principale scollegare il cavo di alimentazione e contattare il rivenditore autorizzato Canon L uso della macchina in queste condizioni pu provocare incendi o scosse elettriche Inoltre non...

Страница 385: ...ttore principale e staccare la spina dalla presa elettrica Durante il normale funzionamento la macchina genera una piccola quantit di ozono e altri odori Anche se la sensibilit all ozono o ad altri od...

Страница 386: ...in dotazione Procurarsi un cavo adatto al computer o alla rete in uso Uso della macchina come stampante locale connessione USB Se si desidera utilizzare la macchina come stampante locale collegarla a...

Страница 387: ...orso di installazione Il computer in fase di avvio La macchina sta stampando Se si scollega il cavo USB dalla macchina o dal computer mentre sono accesi attendere almeno 10 secondi prima di ricollegar...

Страница 388: ...re Per il collegamento a un computer con connettore 10Base T cavo LAN doppino Categoria 3 o superiore ATTENZIONE Durante il collegamento del cavo di interfaccia o di rete osservare le seguenti precauz...

Страница 389: ...te Super G3 FAX Board AG1 collegato la macchina pu essere utilizzata come fax tradizionale Collegare un cavo modulare alla macchina come indicato di seguito Per ulteriori informazioni sulle linee tele...

Страница 390: ...ne e indica i manuali da consultare per le istruzioni di configurazione pertinenti Interruttore principale e interruttore del pannello di controllo 2 2 Accensione con l interruttore principale 2 2 Uti...

Страница 391: ...Accensione con l interruttore principale Questa sezione spiega come accendere la macchina con l interruttore principale NOTA Per informazioni su come spegnere la macchina vedere Spegnimento della macc...

Страница 392: ...ata la schermata di accesso In questo caso immettere l ID divisione o l ID utente e la password vedere il Capitolo 2 Utilizzo di base nella Guida di riferimento possibile selezionare la schermata supe...

Страница 393: ...A La macchina non entra nel modo Riposo mentre in funzione Nel modo Riposo la macchina pu ricevere inoltrare o stampare documenti Interruttore del pannello di controllo Stato della macchina ON Pronta...

Страница 394: ...ale utente vedere CD ROM del manuale utente a p 3 2 NOTA Per le funzioni disponibili per ogni prodotto vedere Funzioni disponibili a p xiii Necessario Tra le altre funzioni figurano l invio a supporti...

Страница 395: ...essario un server POP3 Dopo aver attivato l accessorio Color Send Kit Y1 opzionale per il modello imageRUNNER 2545 2535 2530 2525 2520 specificare quanto segue Indirizzo e mail della macchina Server S...

Страница 396: ...l utente 3 4 Contenuto del CD ROM 3 4 Requisiti di sistema 3 5 Installazione 3 6 PCL Software per l utente 3 7 Contenuto del CD ROM 3 7 Requisiti di sistema 3 8 Installazione 3 8 PS Software per l ute...

Страница 397: ...ella configurazione del computer alcune funzioni potrebbero non operare correttamente Se i manuali PDF elencati nel menu del CD ROM non si aprono aprire il file PDF direttamente dalla cartella ITALIAN...

Страница 398: ...uelle visualizzate effettivamente In Macintosh fare doppio clic sull icona START per avviare il menu del CD ROM a SFOGLIA MANUALE possibile leggere le guide elencate di seguito facendo clic sulla guid...

Страница 399: ...notevolmente i tempi di stampa complessivi possibile delegare il carico di lavoro in base ai dati di stampa favorendo cos una velocit significativamente maggiore grazie a un ottimizzazione Color Netw...

Страница 400: ...sione del driver di stampa utilizzato Hardware Computer Computer con i suddetti sistemi operativi Memoria Memoria necessaria per utilizzare correttamente i suddetti sistemi operativi Color Network Sca...

Страница 401: ...e di memoria insufficiente o una riduzione significativa della velocit di scansione In questo caso le seguenti procedure potrebbero rivelarsi utili Aumentare lo spazio libero sul disco rigido eliminan...

Страница 402: ...stampa PCL5e viene utilizzato per le stampanti in bianco e nero Il driver di stampa PCL6 viene utilizzato sia per le stampanti in bianco e nero che per quelle a colori PCL6 una versione avanzata di P...

Страница 403: ...zzato Hardware Computer Computer con i suddetti sistemi operativi Memoria Memoria necessaria per utilizzare correttamente i suddetti sistemi operativi Installazione Dalla schermata di menu del CD ROM...

Страница 404: ...pante PS Il driver della stampante PS converte i dati di stampa delle applicazioni in dati da utilizzare con le stampanti PS e li invia alla stampante Oltre a convertire i dati di stampa permette di c...

Страница 405: ...tti sistemi operativi Memoria Memoria necessaria per utilizzare correttamente i suddetti sistemi operativi Installazione Dalla schermata di menu del CD ROM possibile avviare l installazione del softwa...

Страница 406: ...MPORTANTE Il CD ROM Software Driver fax allegato all accessorio opzionale Super G3 Fax Board AG1 Contenuto del CD ROM Driver fax Con il driver del fax installato nel computer sar possibile inviare doc...

Страница 407: ...etti sistemi operativi Memoria Memoria necessaria per utilizzare correttamente i suddetti sistemi operativi Installazione Dalla schermata di menu del CD ROM possibile avviare l installazione del softw...

Страница 408: ...na Esecuzione di una copia 4 2 Stampa da un computer 4 4 Stampa da un supporto di memoria USB Stampa supporto 4 6 Invio di un documento E Mail I Fax File Server e supporto di memoria USB 4 8 Invio di...

Страница 409: ...e gli originali nell alimentatore o sul vetro di lettura Chiudere l alimentatore o il coperchio del piano di copiatura dopo aver posizionato gli originali sul piano di copiatura Immettere ID divisione...

Страница 410: ...e visualizzato nell angolo superiore destro del display del pannello tattile Quando viene visualizzata la schermata successiva selezionare il formato originale premere OK Avvio Per annullare la copia...

Страница 411: ...are la stampa 1 Il nome del pulsante per la visualizzazione della pagina di configurazione della stampante indicato al punto 3 pu variare in base all applicazione utilizzata 2 Il nome del pulsante per...

Страница 412: ...visualizzate sul computer in base alla macchina e alle apparecchiature opzionali al tipo e alla versione del driver della stampante o al sistema operativo in uso Per annullare la stampa dal computer f...

Страница 413: ...o di un supporto di memoria USB premere Fine e procedere al punto successivo Se la macchina nel modo Riposo premere Power Immettere ID e password o inserire la control card se richiesto vedere Come ac...

Страница 414: ...ionare la cartella premere Bas per visualizzare i file selezionare il file Per annullare la stampa premere Stop inoltre possibile annullare il lavoro di stampa corrente premendo Annulla nella schermat...

Страница 415: ...are la schermata Invio Posizionare gli originali Premere SEND Invio per visualizzare la schermata superiore delle funzioni Invio e Fax Posizionare gli originali nell alimentatore o sul vetro di lettur...

Страница 416: ...facilit e rapidamente nella Guida alla funzione di trasmissione e Fax Alcune periferiche supporto di memoria USB non sono compatibili con la macchina Per ulteriori informazioni vedere il Capitolo 2 I...

Страница 417: ...nella Guida Interfaccia Utente Remota Visualizzare la schermata Invio Posizionare gli originali Premere SEND Invio per visualizzare la schermata superiore delle funzioni Invio e Fax Se la macchina nel...

Страница 418: ...destinazioni vedere il Capitolo 4 Specificare le destinazioni con facilit e rapidamente nella Guida alla funzione di trasmissione e Fax Quando viene visualizzato la schermata successiva selezionare i...

Страница 419: ...ermate illustrate in questa sezione possono differire da quelle visualizzate effettivamente Commutazione online della macchina Posizionare gli originali Premere SCAN OPTIONS Scansione Opzioni se viene...

Страница 420: ...mentazione fornita con l applicazione compatibile TWAIN I nomi dei comandi comprendono Nuova scansione Acquisisci e altri in base all applicazione utilizzata Nella finestra di dialogo Color Network Sc...

Страница 421: ...tasto INVIO sulla tastiera del computer Nella pagina superiore della IU remota visualizzata al punto 1 immettere l ID divisione o l ID utente e la password fare clic su OK Dopo aver eseguito l accesso...

Страница 422: ...artucce punti Cassetti carta 5 2 Caricamento della carta 5 3 Regolazione del cassetto per un diverso formato carta 5 5 Sostituzione del toner 5 8 Pulizia periodica 5 12 Piano di copiatura e coperchio...

Страница 423: ...o A5R Tipo Comune Riciclata Colorata e 3 fori vedere Tipi di carta accettati a p 7 2 Con il componente opzionale Envelope Feeder Attachment D1 possibile caricare le buste seguenti nel Cassetto carta...

Страница 424: ...Etichette Carta su cui sono state riprodotte immagini a colori o il retro di questi fogli Carta stampata con una stampante a trasferimento termico o il retro di questi fogli Smazzare la risma di carta...

Страница 425: ...caso di problemi come scarsa qualit della stampa o inceppamenti provare a capovolgere la risma e a reinserirla Per ulteriori informazioni sull orientamento dei fogli prestampati ad esempio fogli che...

Страница 426: ...l cassetto per un diverso formato carta Se si desidera cambiare il formato della carta nel cassetto regolare le guide scorrevoli in base al formato della nuova carta inserita come descritto di seguito...

Страница 427: ...questa procedura possibile che la carta si inceppi o che le stampe risultino sporche oppure potrebbe sporcarsi l interno della macchina IMPORTANTE La carta arrotolata o arricciata deve essere appiatti...

Страница 428: ...prendere dimensioni non utilizzabili con la macchina disponibile 6 Richiudere delicatamente il cassetto carta fino a bloccarlo in posizione ATTENZIONE Nel richiudere il cassetto carta fare attenzione...

Страница 429: ...ntinuare a stampare perch il toner si completamente esaurito sul display del pannello tattile viene visualizzato il messaggio Sostituire il toner Premendo Recupero successivo possibile continuare il l...

Страница 430: ...delle cartucce e smaltirle in un luogo lontano da fiamme libere IMPORTANTE Utilizzare solo le cartucce di toner previste per l uso su questa macchina vedere Consumabili a p 5 17 Non sostituire le car...

Страница 431: ...o gettare le cartucce toner usate tra le fiamme il toner residuo nella cartuccia potrebbe prendere fuoco e causare incendi o ustioni 4 Estrarre la nuova cartuccia di toner dalla scatola e rimuovere i...

Страница 432: ...da sotto mentre la si spinge nella macchina con l altra mano 6 Riportare la leva di blocco nella posizione iniziale IMPORTANTE Assicurarsi che la freccia gi sulla leva di blocco sia allineata con la...

Страница 433: ...la base degli spinotti in metallo della spina del cavo di alimentazione e la presa utilizzando un panno asciutto per rimuovere la polvere e lo sporco Se il cavo di alimentazione rimane collegato a lu...

Страница 434: ...one dell alimentatore Pulire regolarmente i rulli e l area di scansione dell alimentatore come descritto di seguito IMPORTANTE Non inumidire eccessivamente il panno in quanto un eccesso di acqua potre...

Страница 435: ...sciugare l area con un panno soffice e asciutto Ruotare i rulli con le mani durante la pulizia 5 Pulire la parte in plastica trasparente del coperchio interno con un panno inumidito con acqua Quindi a...

Страница 436: ...to con acqua mentre si ruota il rullo utilizzando la manopola di alimentazione Quindi asciugare l area con un panno soffice e asciutto NOTA Se la manopola di alimentazione non raggiungibile quando l a...

Страница 437: ...ore ATTENZIONE Quando si chiude l alimentatore fare attenzione a non rimanere incastrati con le dita riportando eventuali lesioni Tenere presente che la luce emessa dal piano di copiatura pu essere mo...

Страница 438: ...re alla carta comune A4 A3 e A5 sono disponibili carta riciclata carta colorata lucidi specifici per questa macchina etichette e altri tipi di carta Per maggiori informazioni contattare un rivenditore...

Страница 439: ...libere il toner potrebbe prendere fuoco e causare incendi o ustioni ATTENZIONE Tenere il toner e gli altri materiali di consumo fuori dalla portata dei bambini In caso di ingestione di questi materia...

Страница 440: ...annello tattile viene visualizzato un messaggio che richiede di caricare nuovi punti sostituire la cartuccia punti con una nuova Utilizzare solo le cartucce punti previste per l uso su questa macchina...

Страница 441: ...Consumabili 5 20 Manutenzione ordinaria 5...

Страница 442: ...della macchina Eliminazione degli inceppamenti carta 6 2 Unit di fissaggio 6 3 Cassetti carta 1 e 2 6 5 Alimentatore 6 9 Messaggio di richiesta di assistenza 6 12 Riavvio della macchina 6 12 Utilizzo...

Страница 443: ...iarsi o a non ferirsi con le parti all interno della macchina Se non si riesce ad estrarre il foglio inceppato rivolgersi a un rivenditore autorizzato Canon Potrebbero causare ustioni o scosse elettri...

Страница 444: ...tte le leve e gli sportelli nelle posizioni originali Dopo aver rimosso tutta la carta inceppata la stampa riprende NOTA Dopo aver eliminato tutti gli inceppamenti della carta la macchina ricalcola au...

Страница 445: ...che sporge dalla parte inferiore del gruppo di fissaggio 3 Spingere in basso lo sportello superiore dell unit di fissaggio tramite la linguetta e rimuovere tutta la carta inceppata ATTENZIONE L unit...

Страница 446: ...re la carta come descritto di seguito IMPORTANTE Nella procedura illustrata in questa sezione si presuppone che la macchina sia provvista di quattro cassetti carta Il numero di cassetti disponibili pe...

Страница 447: ...e il pulsante sullo sportello destro dell unit principale e aprire lo sportello destro 3 Aprire il pannello destro del cassetto carta e rimuovere tutta la carta inceppata 4 Premere il pulsante sul Cas...

Страница 448: ...o carta 2 e aprire completamente il cassetto fino all arresto 5 Rimuovere l inceppamento 6 Richiudere delicatamente il cassetto carta fino a bloccarlo in posizione ATTENZIONE Nel richiudere il cassett...

Страница 449: ...iudere il cassetto carta fare attenzione a non rimanere incastrati con le dita riportando eventuali lesioni 10 Chiudere il coperchio destro del cassetto carta ATTENZIONE Quando si chiude lo sportello...

Страница 450: ...la carta si inceppa nell alimentatore rimuovere la carta come descritto di seguito IMPORTANTE L alimentatore DADF AA1 AB1 opzionale per il modello imageRUNNER 2545 2535 2530 2525 2520 2 Aprire il cope...

Страница 451: ...erchio interno quindi il coperchio dell alimentatore ATTENZIONE Quando si chiudono i coperchi fare attenzione a non rimanere incastrati con le dita riportando eventuali lesioni 5 Sollevare l alimentat...

Страница 452: ...leve e gli sportelli nelle posizioni originali Dopo aver rimosso tutta la carta inceppata la stampa riprende 6 Chiudere l alimentatore ATTENZIONE Quando si chiude l alimentatore fare attenzione a non...

Страница 453: ...vento assistenza Se la schermata visualizzata simile a quella seguente seguire le procedure descritte di seguito Riavvio della macchina Se viene visualizzato un messaggio di intervento assistenza riav...

Страница 454: ...ella memoria della macchina verranno cancellati NOTA Impostando la macchina sul Modo Funzioni limitate dalla schermata con il messaggio di richiesta assistenza si attiva il Modo Funzioni limitate in I...

Страница 455: ...prirsi o spezzarsi rendendo inutilizzabile il cavo Se il cavo danneggiato possono verificarsi dispersioni di corrente con il rischio di incendi o scosse elettriche IMPORTANTE Per effettuare le richies...

Страница 456: ...ne Richiesta NOTA possibile annullare la richiesta premendo Annulla S 4 Premere Immagine danneggiata Inceppamenti carta o Altro problema per selezionare il tipo di problema da risolvere premere Richie...

Страница 457: ...rsi rendendo inutilizzabile il cavo Se il cavo danneggiato possono verificarsi dispersioni di corrente con il rischio di incendi o scosse elettriche IMPORTANTE Anche se si verifica un interruzione del...

Страница 458: ...CAPITOLO 7 1 7 Appendice Questo capitolo descrive i tipi di carta utilizzabili con la macchina e contiene l indice Tipi di carta accettati 7 2 Indice analitico 7 4...

Страница 459: ...itolo 3 Configurazione delle impostazioni di base della macchina nella Guida di riferimento Disponibile N D Non disponibile 1 Da 64 a 90 g m2 2 Da 75 a 90 g m2 3 Da 81 a 90 g m2 4 Da 91 a 105 g m2 5 D...

Страница 460: ...nghezza Origine carta Cassetti carta 1 3 4 Cassetto carta 2 Bypass A4 297 mm 210 mm A4R 210 mm 297 mm A3 297 mm 420 mm A5R 148 mm 210 mm Formato irregol 99 mm 297 mm 148 mm 432 mm N D N D Buste N 10 C...

Страница 461: ...sette Heater Unit 37 2 3 CD ROM del manuale utente 3 2 Collegamento dei cavi Rete 1 11 Telefono 1 12 USB 1 9 Color Network ScanGear 3 4 Connessione di rete 1 11 Connessione telefonica 1 12 Connessione...

Страница 462: ...porti di memoria USB 4 8 e mail 4 8 I fax 4 8 Istruzioni di sicurezza Alimentazione elettrica xxii Altre avvertenze xxviii Installazione xxi Manutenzione e controlli xxvi Materiali di consumo xxviii P...

Страница 463: ...ce analitico 7 6 Appendice 7 T Tasti e pulsanti utilizzati nel manuale ix Tipo di carta 5 17 Formato carta 7 3 Tipo di carta 7 2 Trasporto della macchina 1 6 TWAIN 3 4 U UFRII LT Software per l utente...

Страница 464: ...imageRUNNER 2545i 2545 2535i 2535 2530i 2530 2525i 2525 2520i 2520 Gu a de usuario...

Страница 465: ...piado Gu a de copia CD ROM Instrucciones de env o y facsimil Gu a de env o y facs mil CD ROM Instrucciones de la interfaz de usuario remoto Gu a de IU remoto CD ROM Conectividad de red Gesti n de la s...

Страница 466: ...ci n de problemas Ap ndice Incluye las descripciones del papel disponible y del ndice Cap tulo 1 Cap tulo 2 Cap tulo 3 Cap tulo 4 Cap tulo 5 Cap tulo 6 Cap tulo 7 Se ha hecho un gran esfuerzo para evi...

Страница 467: ...v Nombre del producto xiv Directiva de la CE sobre compatibilidad electromagn tica xiv Directiva R TTE xiv Seguridad l ser xv Informaci n adicional xv Programa internacional ENERGY STAR xvi Logotipo I...

Страница 468: ...aci n principal y alimentaci n del panel de control 2 2 C mo encender la alimentaci n principal 2 2 Utilizaci n del Interruptor de alimentaci n de panel de control modo de reposo 2 4 Apagado de la ali...

Страница 469: ...Casetes 5 2 Cargar papel 5 3 Ajustar un casete para alojar papel de distinto tama o 5 5 Sustituir el t ner 5 8 Limpieza peri dica 5 12 Cristal de copia y tapa 5 12 Rodillos y rea de lectura del alimen...

Страница 470: ...vii Cap tulo 7 Ap ndice Papel disponible 7 2 ndice alfab tico 7 4...

Страница 471: ...ocasionar la muerte o lesiones personales si no se ejecutan correctamente Para utilizar el equipo de forma segura preste atenci n siempre a estas advertencias ATENCI N Indica una precauci n relativa a...

Страница 472: ...aparecen en este manual corresponden a la imageRUNNER 2545i con los siguientes equipos opcionales instalados Unidad de Acabado Interna B1 Bandeja Adicional de Acabado Interna B1 y Unidad de Alimentaci...

Страница 473: ...con dicha marca Seleccione las teclas o los botones que mejor cumplan su funci n Abreviaturas utilizadas en este manual En este manual los nombres de producto y de modelo se abrevian de la forma sigui...

Страница 474: ...forma eficiente Por ejemplo una vez que el equipo ha le do el original que desea copiar puede leer inmediatamente el original del siguiente usuario Tambi n es posible imprimir desde el equipo utilizan...

Страница 475: ...Imprimir Imprimir documentos como copias faxes o datos enviados desde el ordenador de un cliente al equipo Copiar Imprimir los datos le dos de un original y realizar las funciones de acabado como gra...

Страница 476: ...onsulte el Cap tulo 4 Equipos opcionales en la Gu a de referencia Modelo Copia Lectura remota IU remoto En viar Fax Imprimir Alimen tador Casete PDF con b squeda USB UFRII LT PCL PS C digo de barras 2...

Страница 477: ...de la Directiva de la CE sobre compatibilidad electromagn tica Declaramos que este producto cumple con los requisitos de compatibilidad electromagn tica de la Directiva de la CE cuando la tensi n de e...

Страница 478: ...s fases del funcionamiento normal No retire los alojamientos de protecci n o las tapas externas excepto si se indica en el manual del equipo Informaci n adicional Al reparar o ajustar el sistema ptico...

Страница 479: ...con las directrices del Programa ENERGY STAR de ahorro de energ a El Programa Internacional de Equipo de Oficina ENERGY STAR es un programa internacional que tiene por objeto promocionar el ahorro de...

Страница 480: ...paratos el ctricos y electr nicos RAEE bater as y acumuladores La gesti n incorrecta de este tipo de residuos puede afectar al medio ambiente y a la salud humana debido a las sustancias potencialmente...

Страница 481: ...nte lo contrario por el presente los propietarios de los derechos del SOFTWARE no le otorgan licencia ni derecho alguno ni expl citos ni impl citos relativos a los derechos de propiedad intelectual qu...

Страница 482: ...quipo puede estar prohibido por la ley y por tanto incurrir en responsabilidades civiles o penales por ello A continuaci n se ofrece una lista no exhaustiva de estos documentos Se trata nicamente de u...

Страница 483: ...iempo de transmisi n de aproximadamente 3 segundos por p gina lo que redunda en menos gasto de l nea telef nica Tiempo de transmisi n de fax aproximado de 3 segundos por p gina seg n el gr fico n 1 de...

Страница 484: ...VERTENCIA No bloquee nunca las rendijas de ventilaci n del equipo Estas aberturas tienen la finalidad de ventilar las piezas internas del equipo Si bloquea estas aberturas es posible que se recaliente...

Страница 485: ...l ctrica A continuaci n llame a su distribuidor local Canon autorizado Collares y otros objetos met licos Copas vasos flores y otros recipientes que contengan agua o l quidos ATENCI N No instale el eq...

Страница 486: ...al suministrado ya que puede provocar un incendio o descarga el ctrica Como regla general no utilice cables de extensi n El uso de cables de extensi n puede ocasionar un incendio o descarga el ctrica...

Страница 487: ...pague siempre el interruptor de alimentaci n principal y desconecte el cable de interfaz cuando desee trasladar el equipo Si no lo hace es posible que se deteriore el cable de alimentaci n o el cable...

Страница 488: ...lesiones personales Para evitar da os personales no toque la unidad de acabado mientras el equipo est imprimiendo No ponga las manos el pelo la ropa etc cerca de la salida y de los rodillos de aliment...

Страница 489: ...l ser no puede salir al exterior del equipo durante ninguna de las fases del funcionamiento normal Por seguridad lea estas indicaciones e instrucciones No abra nunca otras tapas distintas a las indica...

Страница 490: ...con una zona de alta tensi n del equipo es posible que se produzca un incendio o una descarga el ctrica Algunas zonas del interior del equipo est n sometidas a alta tensi n Al extraer papel atascado o...

Страница 491: ...aer un papel atascado del interior del equipo No introduzca los dedos en ninguna parte si no lo indica la pantalla del panel t ctil puesto que podr a provocar lesiones personales o quemaduras Al extra...

Страница 492: ...e cartuchos de t ner ni papel en lugares expuestos al fuego ya que pueden arder y provocar un incendio o quemaduras ATENCI N Mantenga el t ner y otros consumibles fuera del alcance de los ni os peque...

Страница 493: ...xxx...

Страница 494: ...uipo y c mo deben conectarse los cables Lugar de instalaci n y manipulaci n 1 2 Precauciones de instalaci n 1 2 Precauciones de manipulaci n 1 7 Conexi n de los cables 1 9 Utilizar el equipo como impr...

Страница 495: ...iguientes lugares Evite los lugares sometidos a niveles extremos muy altos o muy bajos de temperatura y humedad Por ejemplo evite instalar el equipo cerca de grifos calderas humidificadores acondicion...

Страница 496: ...po se recomienda ventilar adecuadamente la habitaci n lo suficiente para mantener un ambiente de trabajo agradable Evite los lugares sometidos a vapores de amon aco Evite los lugares sometidos a vibra...

Страница 497: ...de alimentaci n en una toma el ctrica exclusiva y mantenga la m xima separaci n entre el equipo y cualquier otro equipo el ctrico No retire las patas de nivelaci n del equipo No retire las patas de n...

Страница 498: ...calentarse y como consecuencia originar un incendio Si la conexi n del cable de alimentaci n est demasiado tenso se podr a deteriorar dicho cable o se podr an desconectar los cables situados en el int...

Страница 499: ...te Vista desde arriba Cuando est instalada la Unidad de Acabado Interna B1 opcional Trasladar el equipo Si piensa trasladar el equipo aunque s lo sea a otro lugar de la misma planta del edificio llame...

Страница 500: ...ci n principal desenchufe el cable de alimentaci n de la toma el ctrica y llame a su distribuidor local Canon autorizado El empleo del equipo en este estado puede provocar un incendio o descarga el ct...

Страница 501: ...e de alimentaci n cuando no vaya a utilizar el equipo durante varios d as Este equipo genera una peque a cantidad de ozono u otros olores durante su uso normal Aunque la sensibilidad al ozono o a otro...

Страница 502: ...u ordenador o red Utilizar el equipo como impresora local conexi n USB Si desea usar el equipo como impresora local conecte el equipo a un ordenador con un cable USB El equipo es compatible con USB 2...

Страница 503: ...podr a provocar que el equipo o el ordenador no funcione correctamente Si el equipo est conectado a un ordenador a trav s del cable USB es posible que algunas utilidades no sean funcionales Aseg rese...

Страница 504: ...ecte el cable de alimentaci n de la toma el ctrica IMPORTANTE No podr usar el equipo como repetidor puente o puerta de enlace NOTA El equipo puede detectar autom ticamente la velocidad de Ethernet 10B...

Страница 505: ...a continuaci n Para obtener m s informaci n sobre la l nea telef nica p ngase en contacto con la compa a telef nica local IMPORTANTE Antes de usar la funci n de fax es necesario establecer la configur...

Страница 506: ...e gu a a los manuales adecuados para obtener las instrucciones de configuraci n necesarias Alimentaci n principal y alimentaci n del panel de control 2 2 C mo encender la alimentaci n principal 2 2 Ut...

Страница 507: ...rincipal Esta secci n describe c mo encender la alimentaci n principal NOTA Para obtener instrucciones sobre c mo apagar la alimentaci n principal consulte Apagado de la alimentaci n principal en la p...

Страница 508: ...nto o ID de usuario aparecer la pantalla de inicio de sesi n En este caso introduzca su ID de departamento o su ID de usuario y la contrase a Consulte el Cap tulo 2 Funciones b sicas en la Gu a de ref...

Страница 509: ...cionamiento El equipo puede recibir reenviar o imprimir documentos cuando se encuentre en el modo de reposo Interruptor de alimentaci n de panel de control Estado del equipo Activado Preparado Desacti...

Страница 510: ...cionan en esta secci n se incluyen en el CD ROM del Manual del usuario Consulte CD ROM del Manual de usuario en la p g 3 2 NOTA Para conocer las funciones disponibles en funci n del producto consulte...

Страница 511: ...r a dispositivo de memoria USB PDF con b squeda e Impresi n de c digos de barra 7 Configuraci n del servidor de archivos N Elementosde configuraci n Funci n Enviar e mail I fax Enviar a servidor de ar...

Страница 512: ...Y1 opcional para la imageRUNNER 2545 2535 2530 2525 2520 deber especificar lo siguiente La direcci n de e mail del equipo El servidor SMTP El servidor POP3 5 Opciones de fax consulte la Gu a de env o...

Страница 513: ...Flujo de configuraci n 2 8 Antes de utilizar este equipo 2...

Страница 514: ...de usuario UFRII LT 3 4 Contenido del CD ROM 3 4 Requisitos del sistema 3 5 Instalaci n 3 6 Software de usuario PCL 3 7 Contenido del CD ROM 3 7 Requisitos del sistema 3 8 Instalaci n 3 8 Software de...

Страница 515: ...sistema IMPORTANTE En funci n de la configuraci n del ordenador es posible que algunas caracter sticas no funcionen correctamente Si los manuales en PDF no se abren desde el Men CD ROM abra los archi...

Страница 516: ...vea seg n el sistema operativo que est usando Para los usuarios de Macintosh haga doble clic en el icono START para iniciar el Men CD ROM a EXAMINAR MANUAL Puede leer cualquiera de las gu as indicadas...

Страница 517: ...la impresora para as reducir considerablemente el tiempo de impresi n global La carga de trabajo puede delegarse para corresponderse con los datos de impresi n aumentando de forma significativa la vel...

Страница 518: ...la versi n del controlador de impresora que utilice Hardware Ordenador Cualquier ordenador que ejecuta los sistemas anteriores Memoria Cantidad de memoria necesaria para ejecutar los sistemas anterio...

Страница 519: ...s posible que se produzca un error de memoria insuficiente o una p rdida importante de velocidad de lectura Si esto ocurre los siguientes procedimientos podr an resultarle tiles Aumente la cantidad de...

Страница 520: ...or de impresora PCL5e est destinado a las impresoras en blanco y negro y el controlador de impresora PCL6 est destinado a las impresoras a color y en blanco y negro PCL6 es una versi n avanzada de PCL...

Страница 521: ...lador de impresora que utilice Hardware Ordenador Cualquier ordenador que ejecuta los sistemas anteriores Memoria Cantidad de memoria necesaria para ejecutar los sistemas anteriores correctamente Inst...

Страница 522: ...ra PS El controlador de impresora PS convierte los datos de impresi n de aplicaciones en datos para impresoras PS y los env a a la impresora Adem s de convertir datos de impresi n tambi n le permite c...

Страница 523: ...ier ordenador que ejecuta los sistemas anteriores Memoria Cantidad de memoria necesaria para ejecutar los sistemas anteriores correctamente Instalaci n En la pantalla de men del CD ROM puede comenzar...

Страница 524: ...el software de controlador de fax IMPORTANTE El CD ROM del software de controlador de fax se incluye con la Tarjeta de Fax S per G3 AG1 opcional Contenido del CD ROM Controlador de fax Con el controla...

Страница 525: ...dor Cualquier ordenador que ejecuta los sistemas anteriores Memoria Cantidad de memoria necesaria para ejecutar los sistemas anteriores correctamente Instalaci n En la pantalla de men del CD ROM puede...

Страница 526: ...pia 4 2 Impresi n desde un ordenador 4 4 Impresi n desde un dispositivo de memoria USB Impresi n de dispositivos 4 6 Env o de un documento E mail I fax Servidor archivos y dispositivo de memoria USB 4...

Страница 527: ...el alimentador la tapa del cristal de copia despu s de haber colocado los originales en el cristal de copia Introduzca su ID dpto y la contrase a si la pantalla as se lo solicita pulse la tecla Log I...

Страница 528: ...se muestra en el lado superior derecho de la pantalla de panel t ctil Cuando aparezca la pantalla siguiente seleccione el tama o original pulse Aceptar Inicio Para cancelar la copia pulse Detener Tam...

Страница 529: ...l nombre del bot n que muestra la hoja de opciones de impresora mostrada en el paso 3 puede variar dependiendo de la aplicaci n que est usando 2 El nombre del bot n para iniciar la impresi n puede var...

Страница 530: ...n de las que se aparecen en su ordenador en funci n de la m quina y del equipo opcional del tipo y de la versi n del controlador de la impresora o del sistema operativo que utilice Para cancelar la im...

Страница 531: ...e indique que se ha introducido el dispositivo de memoria USB pulse Hecho y contin e con el siguiente paso Si el equipo se encuentra en el modo de reposo pulse Encendido Introduzca su ID y contrase a...

Страница 532: ...carpeta seleccione la carpeta pulse Baj para mostrar los archivos seleccione el archivo Para cancelar la impresi n pulse Detener Tambi n puede cancelar el trabajo de impresi n actual pulsando Cancela...

Страница 533: ...lla de env o Coloque los originales Pulse SEND Enviar para mostrar la pantalla superior de las funciones de env o y fax Si el equipo se encuentra en el modo de reposo pulse Encendido Introduzca su ID...

Страница 534: ...instrucciones sobre c mo cancelar el env o de un documento durante la transmisi n consulte el Cap tulo 2 Env o de documentos en la Gu a de env o y facs mil Es posible que los m todos de env o disponib...

Страница 535: ...oto Mostrar la pantalla de env o Coloque los originales Pulse SEND Enviar para mostrar la pantalla superior de las funciones de env o y fax Si el equipo se encuentra en el modo de reposo pulse Encendi...

Страница 536: ...nformaci n sobre la especificaci n de destinos consulte el Cap tulo 4 Especificaci n sencilla y r pida de destinos en la Gu a de env o y facs mil Pulse Inicio Cuando aparezca la pantalla siguiente sel...

Страница 537: ...as a las que se muestran realmente seg n la aplicaci n o el sistema operativo que est usando Cambie el equipo a Conectado Coloque los originales Pulse SCAN OPTIONS Leer Opciones si aparece la pantalla...

Страница 538: ...umentaci n que acompa a a la aplicaci n compatible con TWAIN Los nombres de comando incluyen Nueva lectura Adquirir y otros dependiendo de la aplicaci n que est utilizando En el cuadro de di logo Colo...

Страница 539: ...el teclado de su ordenador En la p gina superior del IU remoto que se muestra en el paso 1 introduzca su ID dpto o ID de usuario y contrase a haga clic en Aceptar Tras iniciar sesi n correctamente se...

Страница 540: ...s de t ner tinta para sello y los cartuchos de grapas Casetes 5 2 Cargar papel 5 3 Ajustar un casete para alojar papel de distinto tama o 5 5 Sustituir el t ner 5 8 Limpieza peri dica 5 12 Cristal de...

Страница 541: ...R A3 o A5R Tipo Normal Reciclado Color y Taladrado Consulte Papel disponible en la p g 7 2 Con el Alimentador de Sobres D1 opcional podr n cargarse los siguientes sobres en el casete 2 N 10 COM10 ISO...

Страница 542: ...ximadamente Transparencias Etiquetas Papel en donde se hayan copiado im genes en color o el reverso del papel Papel que se haya impreso utilizando una impresora de transferencia t rmica o el reverso d...

Страница 543: ...a hacia arriba Si se producen problemas tales como atascos de papel o una mala calidad de impresi n pruebe colocando el papel hacia abajo y vuelva a cargarlo Para obtener m s informaci n sobre la dire...

Страница 544: ...un casete para alojar papel de distinto tama o Si desea cambiar el tama o del papel en un casete ajuste las gu as deslizantes del nuevo tama o de papel tal y como se describe a continuaci n 5 Introduz...

Страница 545: ...te Si no lo hace podr an producirse atascos de papel impresiones sucias o suciedad en el interior del equipo IMPORTANTE El papel enrollado o curvado se debe alisar antes de usarlo Aseg rese de que la...

Страница 546: ...de papel marcados en las chapas incluyan tama os que el equipo no puede utilizar 6 Introduzca con cuidado el casete en el equipo hasta que encaje ATENCI N Al poner de nuevo el casete en su posici n o...

Страница 547: ...ote el t ner y no se pueda imprimir aparecer el mensaje Cambie el t ner en la pantalla del panel t ctil Si pulsa Hacer luego podr reanudar las operaciones Sin embargo deber cambiar el cartucho de t ne...

Страница 548: ...un lugar alejado del fuego IMPORTANTE Utilice nicamente cartuchos de t ner dise ados para su empleo en el equipo Consulte Consumibles en la p g 5 17 No sustituya los cartuchos de t ner hasta que apar...

Страница 549: ...direcci n ADVERTENCIA No queme ni arroje al fuego los cartuchos de t ner usados ya que pueden arder los restos de t ner del cartucho y producir un incendio 4 Saque el nuevo cartucho de t ner del paqu...

Страница 550: ...o desde abajo e introd zcalo en el equipo con la otra mano 6 Vuelva a colocar la palanca de bloqueo en su posici n original IMPORTANTE Aseg rese de que la flecha hacia abajo de la palanca de bloqueo e...

Страница 551: ...i n de la toma el ctrica y limpie la zona que rodea la base de las clavijas met licas y el enchufe con un pa o seco para eliminar el polvo y la suciedad Si el cable de alimentaci n permanece enchufado...

Страница 552: ...ie el rea de lectura del alimentador y los rodillos peri dicamente tal y como se indica en la siguiente ilustraci n IMPORTANTE No humedezca excesivamente el pa o ya que demasiada agua puede da ar el e...

Страница 553: ...on un pa o humedecido con agua A continuaci n limpie la zona con un pa o suave y seco Gire los rodillos con la mano mientras los limpia 5 Limpie la parte de pl stico transparente de la tapa interior c...

Страница 554: ...limpie el rodillo de resina y los alrededores con un pa o humedecido con agua A continuaci n limpie la zona con un pa o suave y seco NOTA Si no se alcanza el mando de alimentaci n mientras el alimenta...

Страница 555: ...zona con un pa o suave y seco 10 Cierre el alimentador ATENCI N Para evitar accidentes tenga cuidado con los dedos al cerrar el alimentador Tenga en cuenta que la luz que emite el cristal de copia pue...

Страница 556: ...mal A4 A3 y A5 disponemos de papel reciclado papel en color transparencias recomendadas para el equipo etiquetas y otros tipos de papel Para obtener m s informaci n llame a su distribuidor local autor...

Страница 557: ...un incendio ATENCI N Mantenga el t ner y otros consumibles fuera del alcance de los ni os peque os En caso de ingesti n de estos productos consulte inmediatamente a un m dico IMPORTANTE Guarde los ca...

Страница 558: ...vas en la pantalla del panel t ctil cambie el cartucho de grapas por uno nuevo Utilice nicamente cartuchos de grapas dise ados para su empleo en el equipo Grapas J1 IMPORTANTE El modo de grapado est d...

Страница 559: ...Consumibles 5 20 Mantenimiento peri dico 5...

Страница 560: ...liminar atascos de papel 6 2 Unidad de fijaci n 6 3 Casetes 1 y 2 6 5 Alimentador 6 9 Mensajes de aviso al servicio t cnico 6 12 Reiniciar el equipo 6 12 Utilizar el equipo con funciones limitadas 6 1...

Страница 561: ...erior del equipo Si no puede extraer el papel p ngase en contacto con su distribuidor local Canon autorizado Al extraer papel atascado en el interior del equipo s quelo con cuidado para evitar que el...

Страница 562: ...posiciones originales Una vez que haya eliminado todo el papel atascado se reanudar la impresi n NOTA Cuando se eliminen todos los atascos de papel el equipo volver a calcular autom ticamente el n mer...

Страница 563: ...obresalga por la parte inferior de la unidad de fijaci n 3 Tire de la tapa superior de la unidad de fijaci n hacia abajo utilizando la pesta a y elimine el papel atascado ATENCI N La unidad de fijaci...

Страница 564: ...2 extraiga el papel atascado tal y como se indica a continuaci n IMPORTANTE El procedimiento que se describe en esta secci n hace referencia al equipo con cuatro casetes instalados El n mero de casete...

Страница 565: ...6 1 Pulse el bot n de la tapa derecha de la unidad principal y abra la tapa derecha 3 Abra la tapa derecha del casete y elimine los atascos de papel 4 Pulse el bot n del casete 1 y extraiga el casete...

Страница 566: ...te 2 y extraiga el casete hasta que se detenga 5 Extraiga el papel atascado 6 Introduzca con cuidado el casete en el equipo hasta que encaje ATENCI N Al poner de nuevo el casete en su posici n origina...

Страница 567: ...l equipo hasta que encaje ATENCI N Al poner de nuevo el casete en su posici n original tenga cuidado con los dedos para evitar lesiones 10 Cierre la tapa derecha del casete ATENCI N Para evitar accide...

Страница 568: ...ca en el alimentador extraiga el papel atascado tal y como se indica a continuaci n IMPORTANTE El Alimentador DADF AA1 AB1 es opcional para la imageRUNNER 2545 2535 2530 2525 2520 2 Abra la tapa inter...

Страница 569: ...apa interior y la tapa del alimentador ATENCI N Para evitar accidentes tenga cuidado con los dedos al cerrar las tapas 5 Levante el alimentador y compruebe si se han quedado originales atascados dentr...

Страница 570: ...s las palancas y tapas en sus posiciones originales Una vez que haya eliminado todo el papel atascado se reanudar la impresi n 6 Cierre el alimentador ATENCI N Para evitar accidentes tenga cuidado con...

Страница 571: ...cnico en la pantalla Si aparece una pantalla similar a la que se muestra a continuaci n siga los siguientes procedimientos Reiniciar el equipo Si aparece un mensaje de aviso al servicio t cnico reinic...

Страница 572: ...todos los trabajos de la memoria del equipo NOTA Si establece el equipo en el modo de funciones limitadas desde la pantalla de mensajes de aviso al servicio t cnico se activar el modo de funciones li...

Страница 573: ...smo o deteriorar el cable de alimentaci n Si el cable de alimentaci n est deteriorado se pueden producir fugas de corriente y ocasionar un incendio o descarga el ctrica IMPORTANTE Para realizar solici...

Страница 574: ...Podr cancelar la solicitud pulsando Cancelar S 4 Pulse Problema de imagen Atascos de papel u Otros problemas para seleccionar el tipo de problema que desea solucionar pulse Solicitar La pantalla de la...

Страница 575: ...e de alimentaci n Si el cable de alimentaci n est deteriorado se pueden producir fugas de corriente y ocasionar un incendio o descarga el ctrica IMPORTANTE Si se produce una interrupci n del funcionam...

Страница 576: ...CAP TULO 7 1 7 Ap ndice Este cap tulo describe los tipos de papel que pueden utilizarse con el equipo e incluye el ndice Papel disponible 7 2 ndice alfab tico 7 4...

Страница 577: ...ones b sicas del equipo en la Gu a de referencia Disponible N D No disponible 1 De 64 a 90 g m2 2 De 75 a 90 g m2 3 De 81 a 90 g m2 4 De 91 a 105 g m2 5 De 106 a 128 g m2 6 Utilice solo A4 transparenc...

Страница 578: ...e papel Casetes 1 3 4 Casete 2 Bandeja de alimentaci n A4 297 mm 210 mm A4R 210 mm 297 mm A3 297 mm 420 mm A5R 148 mm 210 mm Tam no est ndar De 99 mm a 297 mm De 148 mm a 432 mm N D N D Sobre N 10 COM...

Страница 579: ...Manual de usuario 3 2 Color Network ScanGear 3 4 Conexi n de los cables Red 1 10 Tel fono 1 12 USB 1 9 Conexi n de red 1 10 Conexi n del tel fono 1 12 Conexi n USB 1 9 Consumibles Cartucho de grapas...

Страница 580: ...rica 1 4 Espacio de instalaci n 1 6 Instrucciones de seguridad xxi Precauciones 1 2 Ubicaci n y manipulaci n 1 2 Instrucciones de seguridad Alimentaci n el ctrica xxiii Consumibles xxix Instalaci n xx...

Страница 581: ...e usuario PCL 3 7 Software de usuario PS 3 9 Software de usuario UFRII LT 3 4 Solicitud de reparaciones 6 14 Soluci n de problemas Funciones limitadas 6 13 Mensajes de aviso al servicio t cnico 6 12 T...

Страница 582: ...n your regional dealer CANON LATIN AMERICA INC 703 Waterford Way Suite 400 Miami Florida 33126 U S A CANON AUSTRALIA PTY LTD 1 Thomas Holt Drive North Ryde Sydney N S W 2113 Australia CANON CHINA CO L...

Отзывы: