


2
Prepare the printer for use by installing it and connecting the power cord.
Preparations
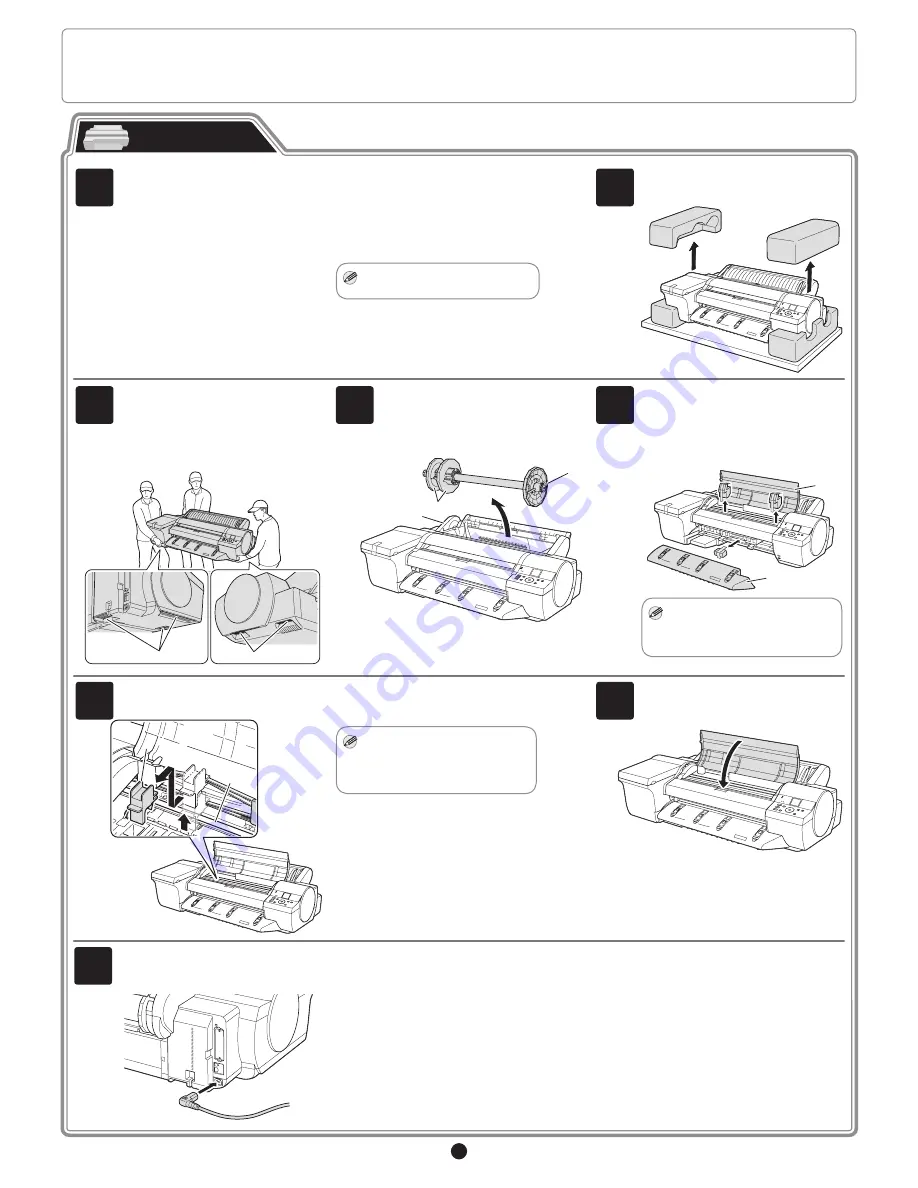
1
Install the printer. You can use the following two methods for installing the printer.
• Install with the optional stand
Assemble the stand and install the
printer referring to the Printer Stand
Setup Guide included with the stand.
If you are using the spectrophotometer
unit, install the spectrophotometer unit
and printer by referring to the "SU-21
Spectrophotometer Unit Setup Guide".
After installation, proceed to step 4.
• Install without a stand on a table
Proceed to step 2.
MEMO
• The stand is a standard accessory
in some locations.
2
Remove the printer from the box and
remove the packing materials from the
top of the printer.
3
At least three people are needed to lift the
printer by its carrying handles (a), located
under its right and left ends, and to place
it on a table or other flat surface.
The printer weighs 54 kg and requires at
least three people to lift it by its carrying
handles (a) under its right and left ends.
a
a
4
Remove all the orange tape from the roll
feed unit (a). Remove the roll holder (b)
from the roll feed unit (a) and remove the
protective materials and all the orange
tape on the two holder stoppers (c).
b
c
a
5
Remove the orange tape on the top cover
(a) and the ejection guide (b) and all the
packing materials.
After removing the orange tape and
packing material from inside the ejection
guide (b), reattach it.
a
b
MEMO
• If the Spectrophotometer Unit
(optional) is attached, the
Ejection Guide (b) does not need
to be reattached.
6
Lift the belt stopper (b) from the carriage
shaft (a) and pull it towards you to remove
it.
a
bb
MEMO
• The belt stopper is used when
transporting the printer. Keep
the belt stopper after removing
it, in case the printer needs to be
moved again.
7
Close the top cover.
Order to read through the setup guides
Only purchased printer: "This Setup Guide" only
Purchased printer and printer stand at the same time: "ST-28 Printer Stand Setup Guide"
→
"This Setup Guide"
Purchased printer, printer stand, and spectrophotometer unit at the same time: "ST-28 Printer Stand Setup Guide"
→
"SU-21 Spectrophotometer Unit Setup Guide"
→
"This
Setup Guide"
8
Plug the power cord into the power supply
connector on the back of the printer and
plug the other end into an electric outlet.


