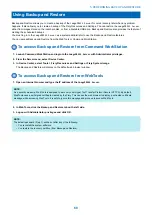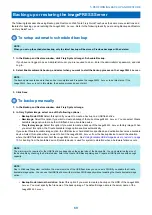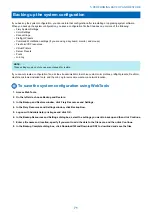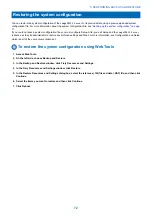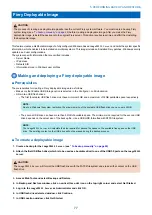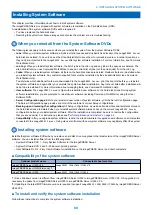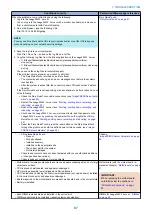
4. When the language selection screen displays, select a language.
The language selection screen displays on the monitor and on Fiery QuickTouch. If you select a language on either device,
you will need to complete the entire installation on that device, and the other device’s screen will be locked for the duration
of the installation.
5. When “What do you want to do?” screen displays four choices, select New Installation.
6. When “This installation will erase all data on the hard disk drive(s). Continue?” message displays, select Continue.
7. After copying the System Software DVD 1 contents to the hard drive, eject DVD 1 and insert System Software DVD 2.
8. After copying the System Software DVD 2 contents to the hard drive, eject DVD 2 and insert System Software DVD 3.
9. After copying the System Software DVD 3 contents to the hard drive, eject DVD 3 and insert User Software DVD 4.
When you eject User Software DVD 4, the imagePRESS Server reboots to begin the software installation.
10. Wait while the imagePRESS Server complete the installation. This will take about 45 minutes.
Fiery.1 is the default password and is case-sensitive. After you log on to the Fiery server, change the Fiery password for
Fiery Windows OS and the Fiery system to prevent unauthorized usage.
11. Ask the site administrator to follow the on-screen instructions in the Fiery Setup Wizard to configure the imagePRESS Server
for the customer’s print environment.
Once the configuration in the Fiery Setup Wizard is done, you must restart the server for the changes to take effect. If desired,
you can print a Server Configuration page after the restart to confirm the default settings.
12. Shut down the imagePRESS Server (see
“Starting, shutting down, restarting, and rebooting” on page 26
).
■ After installing or updating the system software
1. Restore the dongles and devices that you removed in a previous step.
2. Start the imagePRESS Server (see
“Starting, shutting down, restarting, and rebooting” on page 26
).
3. Install any required software patches by System Updates (see
“Installing software patches” on page 83
4. (Optional) Set up the proxy configuration if you have a proxy server.
In Configure, click Network > Proxy > Select "Enable HTTP Proxy", If you choose "Manual", you input the following items.
Address, Port, User name, Password. Save your changes and reboot the imagePRESS Server.
You can also enter the proxy server information in System Updates application if a monitor, mouse, and keyboard are
attached to the imagePRESS Server.
For more information on setting up proxy configuration, see Configuration and Setup, which is part of the user documentation.
■ Verify the imagePRESS Server operation
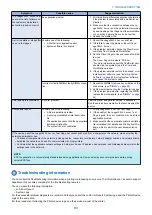
1. Print the Test Page and the Server Configuration page.
If the Test Page does not print, verify that the printer interface cables are securely connected and on the correct ports, and
verify that the printer interface board is securely connected to the motherboard.
If image quality is poor, test the printer (see the service documentation that accompanies the printer).
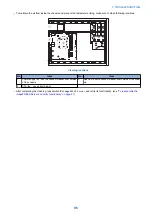
2. Verify that the imagePRESS Server is connected to the network (see
“Network status LEDs” on page 25
).
3. Ask the site administrator to download a test job over the network.
If the job does not print or has poor image quality, see the Troubleshooting topics in Configuration and Setup, which is part
of the user documentation.
■ Before you leave the customer site
1. Remind the site administrator to do the following:
• Import archived jobs.
Please note that some archived jobs may not print if you have upgraded the imagePRESS Server to the newer version.
• (Optional) Register Adobe Acrobat the first time you use it.
2. Reinstall the following:
• Fonts
• Custom simulations
NOTE:
This upgrade may not be compatible with old user software.
3. Back up the imagePRESS Server hard disk drives.
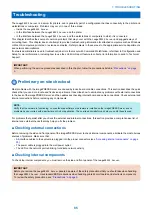
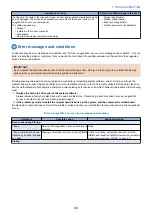
System software installation error messages
If an error message displays when you install or upgrade system software, do the following:
• If prompted, save the log.
6. INSTALLING SYSTEM SOFTWARE
82
Содержание ImagePRESS Server H350 V2
Страница 8: ...Introduction 1 Introduction 2 Specifications 7 ...
Страница 17: ...INSTALLING HARDWARE 2 Installing Hardware 11 ...
Страница 26: ...USING THE IMAGEPRESS SERVER 3 Using the imagePRESS Server 20 ...
Страница 35: ...REPLACING PARTS 4 Replacing parts 29 ...
Страница 38: ...1 2 Figure 19 Inside the front panel No Item 1 DVD drive 2 DVD eject button 4 REPLACING PARTS 31 ...
Страница 86: ...INSTALLING SYSTEM SOFTWARE 6 Installing System Software 80 ...
Страница 91: ...TROUBLESHOOTI NG 7 Troubleshooting 85 ...
Страница 104: ...INSTALLATION PROCEDURE 8 Installation 98 Removable HDD Kit B5 108 ...

