Canon imagePRESS C8000VP Скачать руководство пользователя страница 36

36


 Refreshing the Fixing Roller 

 If streaks appear on the output paper, or gloss unevenness occurs in the high density area of the printed heavy paper, 
follow the procedure below. 


IMPORTANT


 This function is displayed only if the settings are made available by your local authorized Canon dealer. Even if 
this function is displayed, do not allow anyone to change the settings except for the system manager. For more 
information on changing the settings, contact your local authorized Canon dealer. 

1

Press  (Settings/Registration).

2

Press [Adjustment/Maintenance] 

 [Maintenance] 

[Refresh Fixing Roller].

3

Press [Start].


NOTE


 The fixing roller is refreshed automatically every several sheets of paper is printed. You can adjust the refresh frequency 
and time in [Fixing Roller Auto Refresh Level]. 


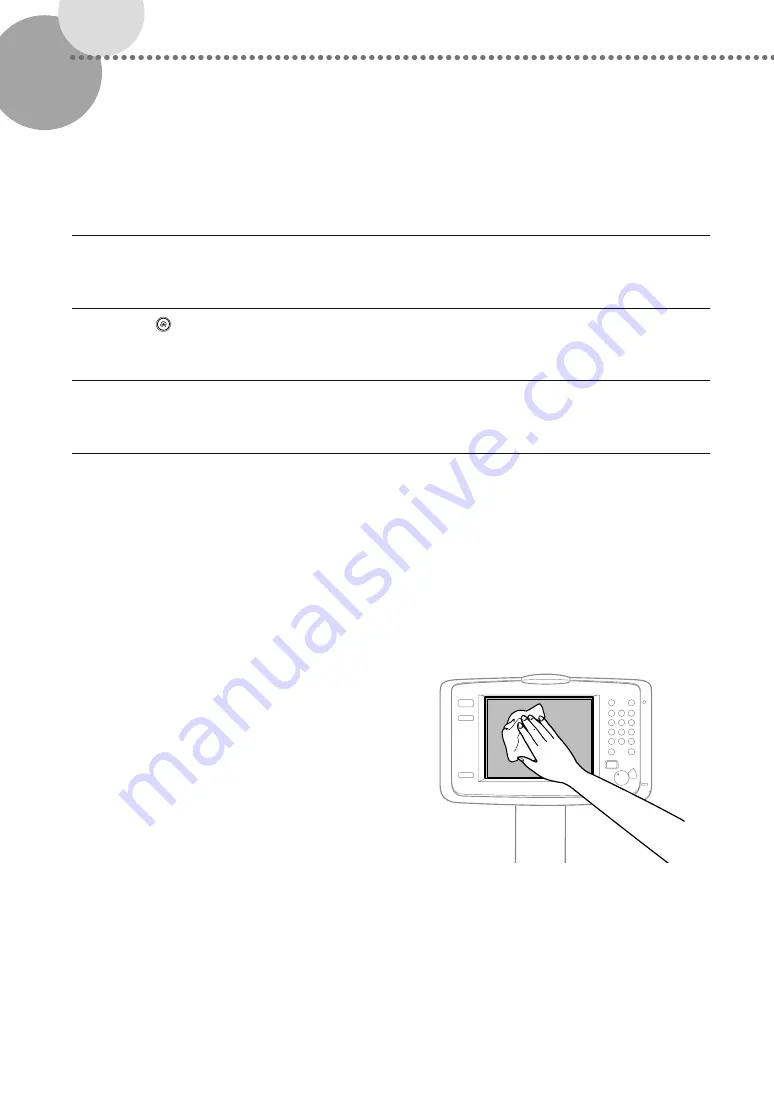
 Cleaning the Touch Panel Display 

Wipe the touch panel display with a cloth dampened in water 
or a mild cleaning agent, and then wipe with a soft, dry cloth.

Содержание imagePRESS C8000VP

Страница 1: ...is guide before operating this product After you finish reading the guide store it in a safe place for future reference Quick Guide You can access canon com oip manual to read the User s Guide that describes all functions of this machine ...

Страница 2: ...nd Finishing Calibration in the User s Guide Optimum Print Result for Each Paper Type Paper information which includes the basis weight finish fixing and curl correction level can be registered as the paper characteristics As the detailed information can be specified for each different paper type you can obtain the fine print result with considering the paper characteristics This function is also ...

Страница 3: ...ted in various menus every time is a quite complicated operation In this case register frequently used settings in Settings Registration Shortcut button You can directly access to the setting screen with this button and save the effort to search necessary setting items Settings Registration in the User s Guide Alternative Settings for Your Needs Productivity or Quality You can set a priority to ei...

Страница 4: ...ighly recommended OPTION Indicates an optional product which can be used with this machine Important Safety Instructions 6 Installation 6 Power Supply 9 Handling 10 Maintenance and Inspections 14 Consumables 15 Safety Related Symbols 16 Parts and Their Functions 17 External View 17 Internal View Marking Engine 18 Internal View Fixing Station 19 Control Panel Upright Control Panel F1 OPTION 20 Stat...

Страница 5: ...o it the Duplex Color Image Reader Unit K1 Upright Control Panel F1 and Saddle Finisher AN2 Keys and Buttons Used in This Manual The followings are examples of how keys and buttons are expressed in this manual Touch Panel Display Keys Key Name Copy Close Control Panel Keys Key Icon Key Name Start Stop Buttons on Computer Operation Screens Button Name OK Add Cancel ...

Страница 6: ...e read these instructions thoroughly before operating the machine Also since it may result in unexpected accidents or injuries do not perform any operation unless otherwise specified in the manual Improper operation or use of this machine could result in personal injury and or damage requiring extensive repair that may not be covered under your Limited Warranty Installation Read the following inst...

Страница 7: ... room be appropriately ventilated sufficient to maintain a comfortable working environment in areas of machine operation In addition do not install this machine where it exhausts directly onto a person Do not install the machine in a location where condensation occurs If the room where the machine is installed is heated rapidly or the machine is moved from a cool dry location to a hot humid locati...

Страница 8: ...ght Control Panel F1 and POD Deck D1 are attached 31 1 2 800 mm or more 457 3 4 11 628 mm 77 5 8 1 971 mm 19 3 4 500 mm or more 19 3 4 500 mm or more 19 3 4 500 mm or more When the Two Knife Booklet Trimmer A1 Booklet Trimmer D1 Saddle Finisher AN2 Paper Folding Unit J1 High Capacity Stacker H1 x 2 Perfect Binder E1 Multi Function Professional Puncher A1 Document Insertion Unit N1 Duplex Color Ima...

Страница 9: ...o do not place heavy objects on the power cord as this could cause electrical damage and result in a fire or electrical shock Do not connect or disconnect the power plug with wet hands as this may result in electrical shock Do not connect the power cord to a multiplug power strip or do not use extension cords as this may cause a fire or electrical shock Do not bundle up or tie the power cord in a ...

Страница 10: ...e used for an extended period of time When opening and closing covers be careful not to get your hands caught as this may result in personal injury Keep your hands hair clothing etc away from the rollers in the output area as your hand hair or clothing may get caught in the rollers which may result in personal injury In order to prevent burns do not touch the fixing transport unit and its surround...

Страница 11: ...ty when the machine will not be used for a long period of time such as overnight Also turn OFF the main power switch and disconnect the power cord for safety when the machine will not be used for an extended period of time such as during consecutive holidays Finisher only for products with a finisher Do not place your hands in the part of the tray where stapling is performed near the rollers espec...

Страница 12: ...ne during any phase of user operation Read the following remarks and instructions for safety Never open covers other than those instructed in the manuals for this machine Controlling adjusting or operating the machine in ways not mentioned in the manuals for this machine may cause dangerous radiation to escape from the machine If the laser beam escapes from the machine exposure may cause serious d...

Страница 13: ...chine Doing so may result in damage to the machine During printing do not turn OFF the main power open and close covers or load and remove paper in order to prevent a paper jam Do not use this product for uses other than as a color digital multitasking machine Transporting the machine If you intend to move the machine over a long distance contact your local authorized Canon dealer beforehand Do no...

Страница 14: ...ky location dust can build up around the power plug and become damp This may cause a short circuit and result in a fire Check the power cord and power plug regularly to see if there are any excessive heat generation rust deformation scratches or cracks Using the power cord and power plug under these conditions may result in a fire or electrical shock CAUTION If a paper jam occurs follow the instru...

Страница 15: ... immediately Be careful not to allow toner to get into your eyes and mouth If toner gets into your eyes or mouth wash them immediately with cold water and consult a physician immediately Be careful not to allow toner to directly touch your skin If toner touches your skin wash it away with soap and water If your skin still feels irritated after washing it consult a physician immediately Keep toner ...

Страница 16: ...tion Push push switch ON OFF Protective earthing terminal Dangerous voltage inside Do not open covers other than instructed CAUTION Hot surface Do not touch Class II equipment Moving parts Keep body parts away from moving parts NOTE Some of symbols shown above may not be affixed depending on the product ...

Страница 17: ...d fixing station 3 Main Power Switch Press to the side to turn the power ON 4 Marking Engine Front Right Cover Front Left Cover Open these covers to clear a paper jam inside the marking engine 5 Open Button Press to open the paper deck when you need to load paper or check for a paper jam The paper supply indicator enables you to check the amount of paper remaining in the paper deck 6 Right Left Pa...

Страница 18: ...am inside the unit 4 Skew Correction Roller Compensates for paper skewing or dispersion of side edges 5 Test Button Located on the back of the power supply unit Press this button to periodically test the circuit breaker 6 Breaker Located on the back of the power supply unit Detects excess current or leakage current 7 Network Connector Located on the upper left area of the marking engine This port ...

Страница 19: ...securely Pull out the secondary fixing unit to clear a paper jam inside the assembly 3 Waste Toner Container Tray Pull out this tray to replace the waste toner container 4 Reverse Unit Reverses paper and returns it to the marking engine when performing two sided printing This unit also reverses paper to output the printed side face up or down according to the Face Up Face Down mode settings Pull o...

Страница 20: ...gistration key Press to register and specify settings 4 Energy Saver key Press to set the Energy Saver mode or Sleep mode The mode activated after pressing the Energy Saver key can be selected beforehand This key lights when the machine enters either mode To reactivate the machine press this key again 5 Counter Check key Press to display the copy and print count totals 6 Numeric keys Press to ente...

Страница 21: ...e favorite functions stored in Quick Menu Also if you are using authentication Quick Menu set for each individual user can be displayed 19 Main Menu key Press to return to the Main Menu screen such as when you want to switch functions Setting the Energy Saver mode Sleep mode to minimize energy consumption You can save energy consumption by using the Energy Saver mode Sleep mode when the machine is...

Страница 22: ...icient paper loading When you want to cancel a job which is registered by mistake Job screen The Job screen enables you to check the status of jobs in the job list On this screen you can cancel a job in progress and change the order of waiting jobs to print your job prior to others Paper screen You can check the paper information and the remaining amount of paper in all paper sources You can also ...

Страница 23: ...rned ON 1 Open the main power switch cover 2 Press the main power switch to the side The main power indicator on the control panel lights IMPORTANT If you want to turn ON the main power again wait for at least 10 seconds after the main power and the main power indicator are turned OFF NOTE The response of the keys and buttons may not be optimal immediately after turning ON the main power of the ma...

Страница 24: ...s When using the I Fax function When the message Backing up stored data from the Remote UI is displayed When operating scan or print function 1 Press Energy Saver 2 Press Shutdown The main power indicator on the control panel turns OFF Shutting Down the Machine ...

Страница 25: ...pecify the loaded paper size and type for the paper deck Selecting Paper Types from the Paper Database on p 31 Available Paper This section describes the available paper for this machine Paper that can be loaded differs depending on the paper sources The following description includes the optional products as well as the standard paper decks The optional products are indicated with OPTION icon Pap...

Страница 26: ...tion unit such as coated paper Paper Capacity Upper and Lower trays 200 sheets 20 lb bond 80 g m2 each Paper Type Thin 1 to 2 Plain Heavy 1 to 6 Color Recycled 1 to 3 Pre Punched 1 to 2 Tab 1 to 2 Bond 1 Sided Coated Thin 1 Sided Coated 1 to 7 2 Sided Coated Thin 2 Sided Coated 1 to 7 Matte Coated Thin Matte Coated 1 to 7 Textured 1 to 7 and Vellum 1 to 2 Paper Size 13 x 19 12 5 8 x 17 11 16 12 x ...

Страница 27: ...tep Loading Paper into the Paper Deck 1 Press Settings Registration 2 Press Preferences Paper Settings Paper Type Management Settings 3 Press Paper Database 4 Select the paper type from the list press OK 5 Confirm that the selected paper type is displayed in the Paper Type Management Settings screen press OK If the desired paper type is not listed in the Paper Database select and duplicate a paper...

Страница 28: ...tion IMPORTANT If the machine is in the Sleep mode the touch panel is not displayed and only Energy Saver is lit you may be unable to open the paper deck In this case press Energy Saver to reactivate the machine and then press the open button on the paper deck 3 Squeeze the lever on the paper holder plate as shown below Without releasing the lever slide the paper holder plate until it does not cat...

Страница 29: ...paper holder plate when loading paper into the paper deck as this may result in a malfunction or damage to the machine Adjust the guides correctly to avoid causing a paper jam dirty prints or making the inside of the machine dirty 6 Lock the lever of the size change plate and fix it 7 Squeeze the lever on the paper holder plate as shown below Without releasing the lever slide the paper holder plat...

Страница 30: ...priate orientation as the paper orientation differs depending on the paper source If there are instructions on the package of paper about which side of the paper to load follow those instructions When the paper is loaded into the paper deck the side facing down is the one printed on If problems occur such as poor print quality or paper jams try turning the paper stack over and reload it However yo...

Страница 31: ...ress Settings Registration 2 Press Preferences Paper Settings Paper Settings 3 Select the paper deck in which you loaded paper press Set 4 Select the same paper type as the one you loaded press Next 5 Select the same paper size as the one you loaded press OK If you load paper other than standard paper select Custom Size ...

Страница 32: ...32 6 Confirm that the selected paper type and size are displayed in Details of Selected Paper press OK ...

Страница 33: ... and then clean with a soft and dry cloth Use the provided glass cleaning cloth for simple cleaning 1 Clean the Platen Glass Clean the platen glass and the underside of the feeder Cleaning the Original Scanning Area If originals which are fed from the feeder cannot be scanned properly follow the procedure below 1 Press Settings Registration 2 Press Adjustment Maintenance Maintenance Original Scann...

Страница 34: ...h a soft and dry cloth Use the provided glass cleaning cloth for simple cleaning 1 Clean the original scanning area Open the feeder and clean the original scanning area thin glass strip 2 1 2 Open the covers 1 Pull the lever above the feeder and open the cover 2 Open the inside cover 3 Clean the original scanning area of the feeder 1 2 4 Close the covers 1 Close the inside cover 2 Close the cover ...

Страница 35: ...Settings Registration 3 Press Adjustment Maintenance Maintenance Clean Feeder 4 Press Start Cleaning the Inside of the Main Unit If output paper becomes dirty follow the procedure below 1 Press Settings Registration 2 Press Adjustment Maintenance Maintenance Clean Inside Main Unit 3 Press Start NOTE Similarly perform Adjustment Maintenance Maintenance Clean Wire and Adjustment Maintenance Maintena...

Страница 36: ...ettings except for the system manager For more information on changing the settings contact your local authorized Canon dealer 1 Press Settings Registration 2 Press Adjustment Maintenance Maintenance Refresh Fixing Roller 3 Press Start NOTE The fixing roller is refreshed automatically every several sheets of paper is printed You can adjust the refresh frequency and time in Fixing Roller Auto Refre...

Страница 37: ...r 2 Push the test button located on the rear of the machine Push the test button with the tip of a ball point pen or a similar object Briefly push the test button 3 Confirm that the breaker dial is in the OFF side position If the breaker dial does not turn to the OFF position repeat step 2 If the breaker dial does not turn to the OFF position despite carrying out the above procedure two or three t...

Страница 38: ...38 5 Turn the breaker dial to ON side 6 Turn ON the main power ...

Страница 39: ...he touch panel display replace the used toner cartridge with a new one For information on how to replace the toner cartridge see the User s Guide For optimum print quality using Canon genuine toner is recommended Maintenance Replacing the Toner Cartridge in the User s Guide Supported Canon Genuine Toner Canon imagePRESS Toner T02 Black Canon imagePRESS Toner T02 Cyan Canon imagePRESS Toner T02 Mag...

Страница 40: ...tached to the Saddle Finisher AN2 for saddle stitching For information on how to replace the staple cartridge see the User s Guide Maintenance Replacing the Staple Cartridge For Optional Products Replacing the Staple Cartridge in the Saddle Stitcher Unit Saddle Finisher AN2 in the User s Guide Staple P1 Genuine Supplies Canon has developed and manufactured Toner Cartridge and Parts specifically fo...

Страница 41: ...staple jam and procedures for clearing the jam are displayed Reducing the Frequency of Paper Jams If paper jams occur frequently the following reasons may be the cause There are torn pieces of paper left inside the machine As a result of pulling jammed paper out by force torn pieces of paper may be left inside the machine Remove all of the torn pieces Paper which does not match with the setting is...

Страница 42: ... Dealer on p 43 If a key for the Limited Functions mode is displayed If Limited Functions Mode is displayed you can temporally set the Limited Functions mode to continue to use some functions Problem Solving Service Call Message in the User s Guide If a message is displayed on the bottom of the screen If an error message appears on the bottom of the screen printing and scanning functions are restr...

Страница 43: ...OFF and then ON contact your local authorized Canon dealer by following the procedure below 1 Note the error code Write down the error code EXXXXX XXXX 2 Turn OFF the main power Press Shutdown on the touch panel display 3 Remove the power plug from the power outlet 4 Confirm the product name and contact your local authorized Canon dealer ...

Страница 44: ... After processing the job scan the remaining pages No A job for the pages scanned into memory is cancelled Scan the whole pages again Scanning will be canceled because the memory is full Wait a moment then try again OK Scan the whole pages again after the current operation is complete Could not perform the operation because the memory is full OK Delete unnecessary data from memory and then scan th...

Страница 45: ...6 lb cover to 66 lb cover 151 g m2 to 180 g m2 Heavy 4 67 lb cover to 77 lb cover 181 g m2 to 209 g m2 Heavy 5 78 lb cover to 95 lb cover 210 g m2 to 256 g m2 Heavy 6 95 lb cover to 110 lb cover 257 g m2 to 300 g m2 Heavy 7 111 lb cover to 120 lb cover 301 g m2 to 325 g m2 Heavy 8 121 lb cover to 129 lb cover 326 g m2 to 350 g m2 Color Recycled Pre Punched Transparency Tab 1 Bond paper Textured 2 ...

Страница 46: ...k 1 000 sheets x 2 cassettes 20 lb bond 80 g m2 Multiple Copies 1 to 9 999 sheets Power Source 1 phase 3 wire 208 V AC 50 60 Hz 20 A 3 phrase 5 wire 208 V AC 50 60 Hz 30 A Power Consumption Maximum Power Consumption 1 phase 3 wire 4 000 W maximum 3 phase 5 wire 10 000 W maximum Memory Capacity Standard System domain RAM 1 5GB Image handling domain RAM 2GB Hard Disk Capacity Standard 250 GB The har...

Страница 47: ...17 LTR 1 0 50 11 x 17 STMT 1 0 25 Enlargement 1 1 21 LGL 11 x 17 1 1 29 LTR 11 x 17 1 2 00 STMT 11 x 17 1 4 00 Copy Ratio 25 to 400 in 1 increments Original Feeding Mechanism Automatic Document Feeder Original Tray Capacity 300 sheets 20 lb bond 80 g m2 Original Scanning Speed Copying 1 sided scanning 120 sheets minute 1 LTR in Black and White at 600 dpi 70 sheets minute LTR in Full Color at 600 d...

Страница 48: ...heets 17 lb bond 7 1 8 64g m2 385 mm 3 500 sheets 20 lb bond 7 1 8 80g m2 385 mm Power Source Maximum Power Consumption 120 127 V AC 60 Hz 2 2 A 480 W or less Dimensions W x D x H 25 7 8 x 27 x 22 1 2 656 mm 686 mm 570 mm Weight Approximately 149 9 lb 68 kg Installation Space Including the Main Unit W x D 158 5 8 x 45 3 8 4 029 mm x 1 152 mm When the Duplex Color Image Reader Unit K1 the Upright C...

Страница 49: ...e Upright Control Panel F1 and the Finisher AN1 or the Saddle Finisher AN2 are attached LONG SHEET TRAY A1 Item Specifications Paper Size Weight Type Size Custom Size 8 1 4 x 19 1 4 to 13 x 30 210 0 mm x 487 7 mm to 330 2 mm x 762 0 mm Weight 16 lb bond to 95 lb cover 60 g m2 to 256 g m2 Type Thin paper 16 lb bond to 20 lb bond 60 g m2 to 79g m2 Plain paper 20 lb bond to 28 lb bond 80 g m2 to 105g...

Страница 50: ... paper Coated paper Color paper Tab paper Textured paper Prepunched paper Vellum Bond paper Through path All paper type engines supports Paper Capacity 200 sheets x 2 20 lb bond 80g m2 Power Source Maximum Power Consumption 100 240 V AC 50 60 Hz 1 0 A 120 W or less Dimensions W x D x H 29 3 8 x 31 1 4 x 55 3 8 746 mm x 793 mm x 1 407 mm Including the Inserter Option controller Kit A1 Weight Approx...

Страница 51: ...lb bond to 20 lb bond 60 g m2 to 79 g m2 Plain paper 20 lb bond to 28 lb bond 80 g m2 to 105g m2 Recycled paper Color paper Coated paper Bond paper Textured paper Through path All paper type engines supports Power Source Maximum Power Consumption From the finisher 150 W or less Dimensions W x D x H 13 1 4 x 31 1 4 x 46 7 8 336 mm x 793 mm x 1 190 mm Weight Approximately 157 lb 71 kg Installation S...

Страница 52: ... Paper 16 lb bond to 129 lb cover 60 g m2 to 350 g m2 Coated Paper 19 lb bond to 129 lb cover 70 g m2 to 350 g m2 Type Upper Tray All paper type engines supports Lower Tray All paper type engines supports Capacity Per Tray Upper Tray Non Staple Non Sort Normal Stacking Mixed Stacking If it reaches either condition below motion stops All size 147 mm 1 000 sheets No high volume stack mode Z fold 11 ...

Страница 53: ...s LTRR EXER size 285 mm 2 000 sheets LTR LDR LGL EXE 13 19 12 18 size 147 mm 1 000 sheets Z fold A3S B4S 11 x17 S 10 sheets per 1 set or 30 sheets Half fold A4S LTRS 50 sheets In case of high volume stack mode LTRR EXER 4 000 sheets or 19 1 4 490 mm in height 20 lb bond 80 g m2 or less LTRR EXER 3 000 sheets or 16 5 8 423 mm in height 20 lb bond 80 g m2 or more LTR 2 000 sheets or 11 1 4 285 mm in...

Страница 54: ...81 4 g m2 50 Sheets 22 lb bond to 28 lb bond 81 5 g m2 to 105 g m2 30 Sheets 28 lb bond to 74 lb cover 105 1 g m2 to 200 g m2 10 Sheets Over 74 lb cover 200 g m2 Front Back Cover Sheet only Coated Paper 19 lb bond to 74 lb cover 70 g m2 to 200 g m2 10 Sheets Over 74 lb cover 200 g m2 Front Back Cover Sheet only If cover back sheet is more than 110 lb cover 300 g m2 or body is glossy coated paper o...

Страница 55: ...er 60 g m2 to 350g m2 Coated Paper 19 lb bond to 129 lb cover 70 g m2 to 350 g m2 Type Upper Tray All paper type engines supports Lower Tray All paper type engines supports Saddle Stitch Size 11 17 LTR LGL 12 18 13 19 Custom Size 8 1 4 x 11 to 13 x 19 1 4 210 0 mm x 279 4 mm to 330 2 mm x 487 7 mm Weight Plain Paper Body Paper 16 lb bond to 80 lb cover 60 g m2 to 220 g m2 Cover Paper 17 lb bond to...

Страница 56: ...dy paper s weight for cover sheet Available Saddle Stitch Capacity Size Saddle Stitch 25 sheets 20 lb bond 80 g m2 including 1 cover sheet Saddle Folding 5 sheets 20 lb bond 80 g m2 Size 13 x 19 12 5 8 x 17 11 16 12 x 18 11 x 17 LGL LTRR and Custom Size 8 1 4 x 11 to 13 x 19 1 4 210 0 mm x 279 4 mm to 330 2 mm x 487 7 mm Cover Weight Requires the paper weight of the main document more than 17 lb b...

Страница 57: ...t Photo Photo Other Preview Browse Windows SMB File Server Optional PDF XPS OOXML Functions PDF Compact Trace and Smooth Limited Color Encryption OCR Device Signature Optimization for Web 1 PDF A 1b Policy Applied XPS Compact OCR Device Signature OOXML PowerPoint Word OCR 1 PDF files optimized for Web viewing E Mail and I Fax Features Item Specifications Communication Protocol SMTP POP3 I Fax Comm...

Страница 58: ...ia the LDAP Server Preview Optional PDF XPS OOXML Functions E mail only PDF Compact Trace and Smooth Limited Color Encryption OCR Device Signature Optimization for Web 3 PDF A 1b Policy Applied XPS Compact OCR Device Signature OOXML PowerPoint Word OCR 1 Available after setting RX conditions of the destination 2 Sent as LTR 3 PDF files optimized for Web viewing Network Environment Hardware Specifi...

Страница 59: ...he Operator s Manual may cause harmful interference to radio communications Operation of this equipment in a residential area is likely to cause harmful interference in which case the user will be required to correct the interference at his own expense If this equipment does cause harmful interference to other equipment which can be determined by turning the equipment off and on the user is encour...

Страница 60: ...radiation emitted inside the product is completely confined within protective housings and external covers the laser beam cannot escape from the machine during any phase of user operation Read the following remarks and instructions for safety Never open covers other than those instructed in the manuals for this machine If the laser beam should escape and enter your eyes exposure may cause damage t...

Страница 61: ... CANON INC SHALL NOT BE LIABLE FOR ANY DIRECT INCIDENTAL OR CONSEQUENTIAL DAMAGES OF ANY NATURE OR LOSSES OR EXPENSES RESULTING FROM THE USE OF THIS MATERIAL The following applies in California USA only The battery included with your product contains Perchlorate Material and may require special handling See http www dtsc ca gov hazardouswaste perchlorate for details Legal Limitations on the Usage ...

Страница 62: ...48 6 515 763 6 639 593 6 754 382 7 046 403 7 213 269 7 242 415 Patents pending in the U S and other countries All instances of the name PostScript in the text are references to the PostScript language as defined by Adobe Systems Incorporated unless otherwise stated The name PostScript also is used as a product trademark for Adobe Systems implementation of the PostScript language interpreter Except...

Страница 63: ...PostScript language interpreter Except as otherwise stated any reference to a PostScript printing device PostScript display device or similar item refers to a printing device display device or item respectively that contains PostScript technology created or licensed by Adobe Systems Incorporated and not to devices or items that purport to be merely compatible with the PostScript language Adobe the...

Страница 64: ...y not decrypt decompile reverse engineer disassemble or otherwise reduce the code of the SOFTWARE to human readable form 7 You may not modify adapt translate rent lease or loan the SOFTWARE or create derivative works based on the SOFTWARE 8 You are not entitled to remove or make separate copies of the SOFTWARE from the PRODUCT 9 The human readable portion the source code of the SOFTWARE is not lic...

Страница 65: ...ndefaced removed oraltered ANY SOFTWARE THAT IS DISTRIBUTED WITH THE PRODUCT AND HAS AN ASSOCIATED END USER AGREEMENT IS LICENSED WARRANTEDANDPROVIDEDACCORDINGTOTHE TERMSOFTHAT AGREEMENT INCLUDINGANY LIMITATIONS ANDDISCLAIMERS THEREIN SUCHSOFTWARE IS SOLDWITHOUT WARRANTYOFANY KINDBY CANON PLEASECONTACT CANON IMMEDIATELY IF YOU HAVE NOT RECEIVED A COPY OF THE SOFTWARE SUPPLIER S END USER AGREEMENT ...

Страница 66: ...faced removed oraltered ANY SOFTWARE THAT IS DISTRIBUTED WITH THE PRODUCT AND HAS AN ASSOCIATED END USER AGREEMENT IS LICENSED WARRANTEDANDPROVIDEDACCORDINGTOTHE TERMSOFTHATAGREEMENT INCLUDINGANY LIMITATIONS ANDDISCLAIMERS THEREIN SUCHSOFTWARE IS SOLDWITHOUT WARRANTY OFANY KINDBY CANON PLEASECONTACT CANON IMMEDIATELY IF YOU HAVE NOT RECEIVED A COPY OF THE SOFTWARE SUPPLIER S END USER AGREEMENT CAN...

Страница 67: ......

Страница 68: ...ad Brampton ON L6Y 5Z7 Canada CANON EUROPA N V Bovenkerkerweg 59 1185 XB Amstelveen The Netherlands See http www canon europe com for details on your regional dealer CANON AUSTRALIA PTY LTD Building A The Park Estate 5 Talavera Road Macquarie Park NSW 2113 Australia CANON CHINA CO LTD 2F Jinbao Building No 89 Jinbao Street Dongcheng District Beijing 100005 China CANON SINGAPORE PTE LTD 1 Fusionopo...

Отзывы: