


1
On the [Time Zone] screen, select your time zone and press
.
Set the time zone (UTC
*1
) and Daylight Saving Time according to the region where this machine is installed.
*1 The UTC (Coordinated Universal Time) is a coordinated universal time that is standard for all parts of the
world. Internet-based communication relies on the UTC being set correctly.
2
On the [Current Time Set.] screen, enter the date and time, and press
.
➠
The time and date are set, and the Remote UI confirmation screen is displayed.
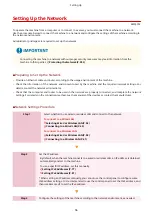
Step 3: Setting Remote UI
With Remote UI, you can use a Web browser on a computer to check the operation status of the machine, change the
settings, and perform other operations.
Set the Remote UI Access PIN for using Remote UI to prevent unauthorized access to the machine.
1
On the Remote UI confirmation screen, select [<Yes>] and press
.
To continue without using the Remote UI, select [<No>], press
, and proceed to "Step 4: Connecting to
a Wireless LAN." Step 4: Connecting to a Wireless LAN(P. 54)
2
Confirm the message press
confirm the message select [Yes] press
.
Restrict the use of Remote UI to only those users who know the Remote UI Access PIN.
To set the Remote UI Access PIN at a later time, select [No] and proceed to "Step 4: Connecting to a Wireless
LAN." Step 4: Connecting to a Wireless LAN(P. 54)
3
Enter the Remote UI Access PIN, and press
.
Specify any number. You cannot set a PIN consisting of all zeros, such as "00" or "0000000."
4
Enter the PIN again, and press
.
➠
After the message [Settings applied.] appears, the screen for confirming the wireless LAN connection is
displayed.
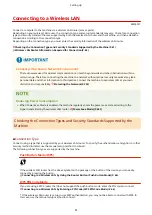
Step 4: Connecting to a Wireless LAN
Connect to the network using wireless local area network (LAN).
1
On the screen for confirming the wireless LAN connection, select [Yes] and press
.
●
If the machine is not connected to a wireless LAN, select [No], press
, and proceed to "Step 5:
Configuring Settings for Toner Replenishment Service." Step 5: Configuring Settings for Toner
Replenishment Service(P. 55)
●
When connecting to a wired LAN, configure the wired LAN connection settings after exiting the Setup Guide.
Selecting Wired or Wireless LAN(P. 58)
Setting Up
54
Содержание imageCLASS MF264dw
Страница 72: ... Shared Key Encryption for WPA WPA2 TKIP AES CCMP IEEE 802 1X Authentication Setting Up 63 ...
Страница 96: ...7 Click OK 8 Restart the machine Restarting the Machine P 113 The settings are applied Setting Up 87 ...
Страница 139: ...Basic Operations 130 ...
Страница 160: ...Paper with logo in portrait orientation Paper with logo in landscape orientation Basic Operations 151 ...
Страница 165: ... You can change the paper size displayed on the screen in Step 3 Hiding Unused Paper Sizes P 166 Basic Operations 156 ...
Страница 201: ...Press on the control panel Function Settings Copy Initialize Default Settings Yes Basic Operations 192 ...
Страница 204: ... The volume is adjusted Basic Operations 195 ...
Страница 319: ... To reduce moire vertical pattern noise in photos Press on the control panel 3 Press Copying 310 ...
Страница 333: ...Copying 324 ...
Страница 368: ...8 Log out from Remote UI Security 359 ...
Страница 501: ... Confirm Destination Scan PC Settings Menu Items 492 ...
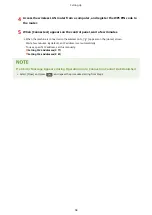
Страница 538: ...10 Plug the power cord into the outlet and turn ON the machine Turning ON the Machine P 111 Maintenance 529 ...