Entering Sleep Mode
0W20-016
The sleep mode function reduces the amount of power consumed by the machine by disabling power flow to the
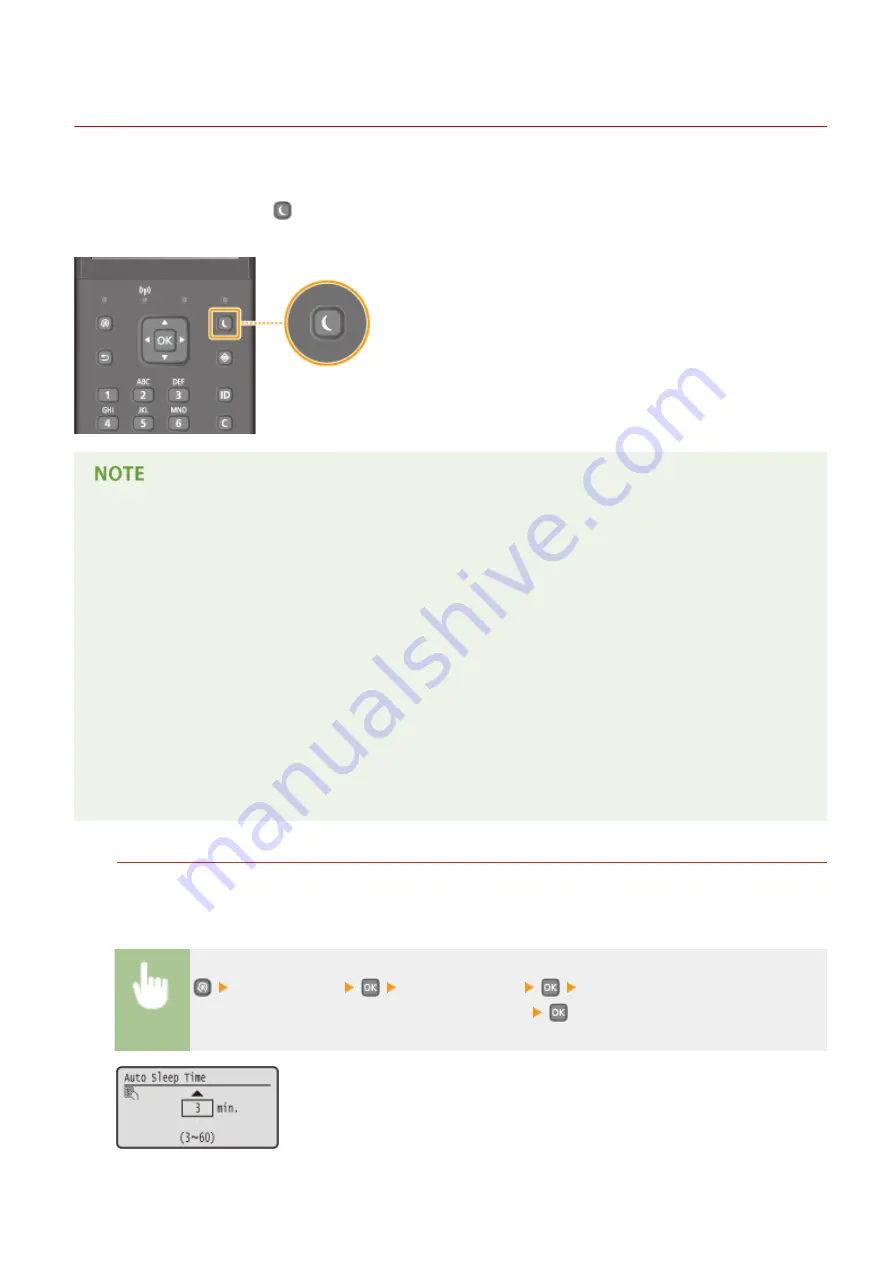
operation panel. If no operations will be performed on the machine for a while, such as during a lunch break, you can
save power simply by pressing
on the operation panel. You can also use the Auto Sleep Time setting to
automatically put the machine into sleep mode if it remains idle for a specified length of time.
When in sleep mode
●
When the machine enters sleep mode, the display turns OFF and the Main Power indicator turns ON.
Situations in which the machine does not enter sleep mode
●
When the machine is in operation
●
When the Processing/Data indicator is lit up or blinking
●
When the machine is performing an operation such as adjustment or cleaning
●
When a paper jam occurs
●
When the menu screen is displayed
●
When an error message is displayed on the screen (There are some exceptions. The machine sometimes
enters sleep mode when error messages are displayed.)
●
When the SSID/network key screen for Direct Connection is displayed.
●
When settings data is being imported/exported
When You Want to Set the Auto Sleep Timer
The factory default setting for the amount of time that elapses before the machine enters auto sleep mode is 3
minutes (the user setting range is 3 to 60 minutes). We recommend using the factory default settings to save
the most power. If you want to change the amount of time that elapses before the machine enters auto sleep
mode, follow the procedure below.
<Timer Settings>
<Auto Sleep Time>
Set the amount of time that elapses
before the machine automatically enters sleep mode
Basic Operations
62
Содержание imageclass LBP251dw
Страница 1: ...LBP252dw LBP251dw User s Guide USRMA 0786 00 2016 06 en Copyright CANON INC 2015 ...
Страница 35: ...LINKS Using the Operation Panel P 30 Basic Operations 29 ...
Страница 69: ...Exiting Sleep Mode Press any key on the operation panel Basic Operations 63 ...
Страница 75: ...Printing 69 ...
Страница 83: ...LINKS Basic Printing Operations P 70 Checking the Printing Status and Log P 78 Printing 77 ...
Страница 101: ...LINKS Basic Printing Operations P 70 Printing Borders P 93 Printing Watermarks P 96 Printing 95 ...
Страница 117: ...LINKS Printing via Secure Print P 112 Printing 111 ...
Страница 122: ...Checking the Printing Status and Log P 78 Printing 116 ...
Страница 127: ...LINKS Basic Printing Operations P 70 Registering Combinations of Frequently Used Print Settings P 118 Printing 121 ...
Страница 164: ...4 Click Edit in IPv6 Settings 5 Select the Use IPv6 check box and configure the required settings Network 158 ...
Страница 178: ...3 Click OK 4 Click Close LINKS Setting Up Print Server P 173 Network 172 ...
Страница 233: ...LINKS Configuring Printer Ports P 168 Security 227 ...
Страница 316: ...0 Auto Shutdown is disabled 1 to 4 to 8 hr Setting Menu List 310 ...
Страница 355: ...Troubleshooting 349 ...
Страница 405: ...4 Install the toner cartridge Fully push it in until it cannot go any further 5 Close the front cover Maintenance 399 ...
Страница 469: ...4 Click Next Uninstall begins Wait a moment This process may take some time 5 Click Exit 6 Click Back Exit Appendix 463 ...
Страница 470: ...Appendix 464 ...
Страница 478: ...Manual Display Settings 0W20 08J Appendix 472 ...


