


23
Checking the Installation Results
P. 24
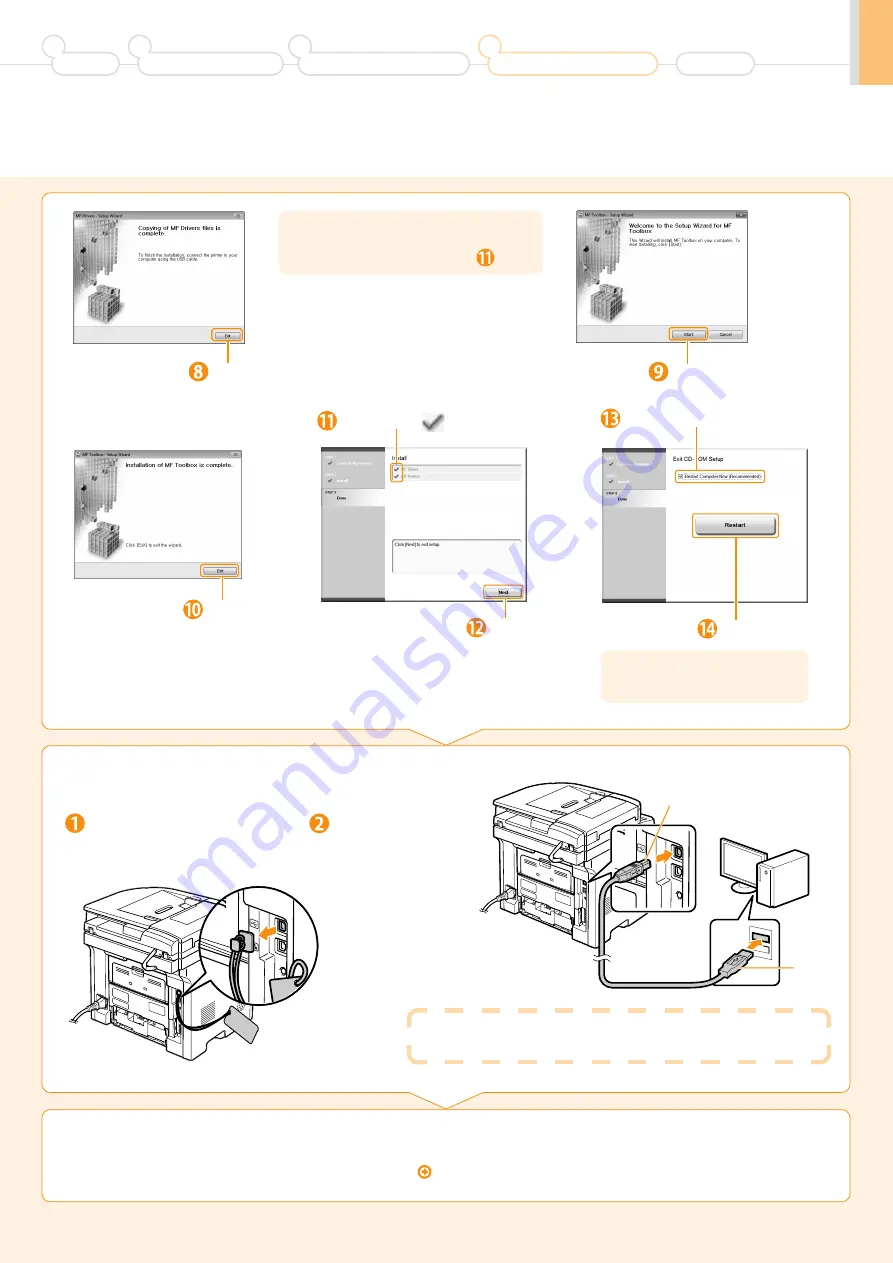
3.
Connect the USB cable.
When a dialog box is displayed
Follow the on-screen instructions and complete the installation.
Click.
Next, installation of MF Toolbox starts.
* In Windows 2000 Server/Server 2003/2008, MF
Toolbox is not installed. Proceed to Step
.
Select the check box.
Click.
Click.
Ensure that [
] is added.
Click.
Click.
The CD-ROM may be removed
once this screen appears.
Preface
1
Installing the Machine
2
Configuring and Connecting the Fax
3
Connecting to a Computer and
Installing the Drivers
4
Appendix
(A)
(B)
Remove cap plug.
Remove by pulling the string.
Connect the cable.
•
Flat end (A):
Connect to the USB port
on the computer.
•
Square end (B):
Connect to the USB port
on the machine.


