Chapter 3
3-7
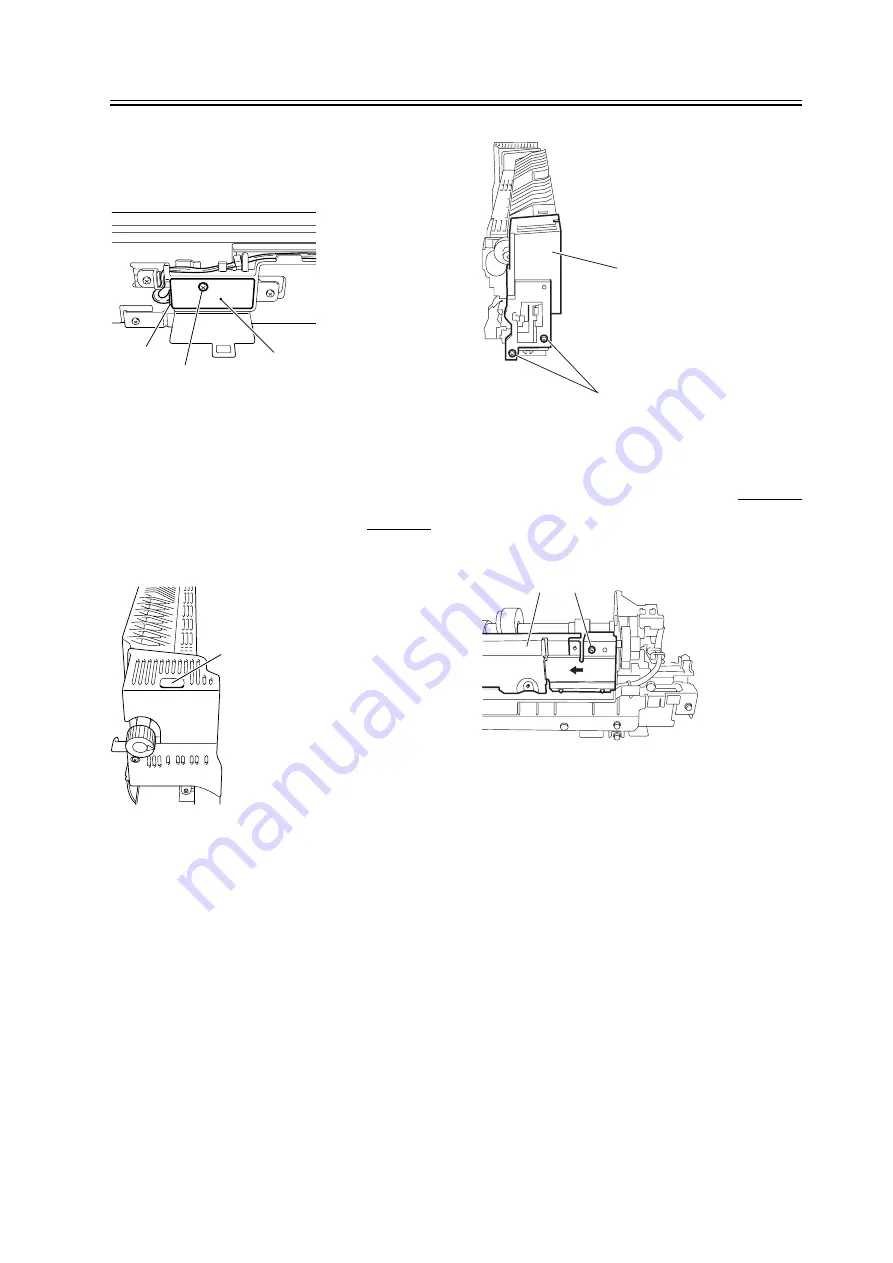
2) Remove the screw[1]and disconnect the
connector[2].
3) Remove the scrap full detector PCB [3].
F-3-23
3.3.3
Punch Controller PCB
3.3.3.1
Removing the Upper
Cover
0008-1875
1) Remove the screw [1] at the front.
F-3-24
2) Remove the two screws [1] at the back to detach the
upper cover [2].
F-3-25
3.3.3.2
Removing the Punch
Controller PCB
0008-1815
1) Remove the screw [1] to move the plate [2] to the
left.
F-3-26
2) Flip up the Mylar [1] and disconnect the seven
connectors [2].
3) Remove the two screws [3] to remove the punch
controller PCB [4].
[1]
[2]
[3]
[1]
[1]
[2]
[1]
[2]
Содержание Finisher-Q1
Страница 1: ...Oct 25 2004 Service Manual Finisher Sorter DeliveryTray Puncher Q1 S1 T1 ...
Страница 2: ......
Страница 6: ......
Страница 9: ...Chapter 1 Specifications ...
Страница 10: ......
Страница 12: ......
Страница 17: ...Chapter 1 1 5 1 2 2 Cross Section 0006 6509 F 1 6 T 1 3 1 Cam 2 Hole puncher 3 Punch dust container ...
Страница 18: ......
Страница 19: ...Chapter 2 Functions ...
Страница 20: ......
Страница 22: ......
Страница 30: ......
Страница 31: ...Chapter 3 Parts Replacement Procedure ...
Страница 32: ......
Страница 34: ......
Страница 36: ...upper cover 2 F 3 6 1 2 ...
Страница 38: ...Chapter 3 3 4 F 3 12 8 Remove the two screws 1 to detach the punch motor 2 F 3 13 1 4 5 3 2 1 2 ...
Страница 42: ...F 3 27 4 1 3 2 3 2 ...
Страница 43: ...Chapter 4 Maintenance ...
Страница 44: ......
Страница 46: ......
Страница 55: ...Chapter 5 Error Code ...
Страница 56: ......
Страница 58: ......
Страница 63: ...Oct 25 2004 ...
Страница 64: ......


