background image

20

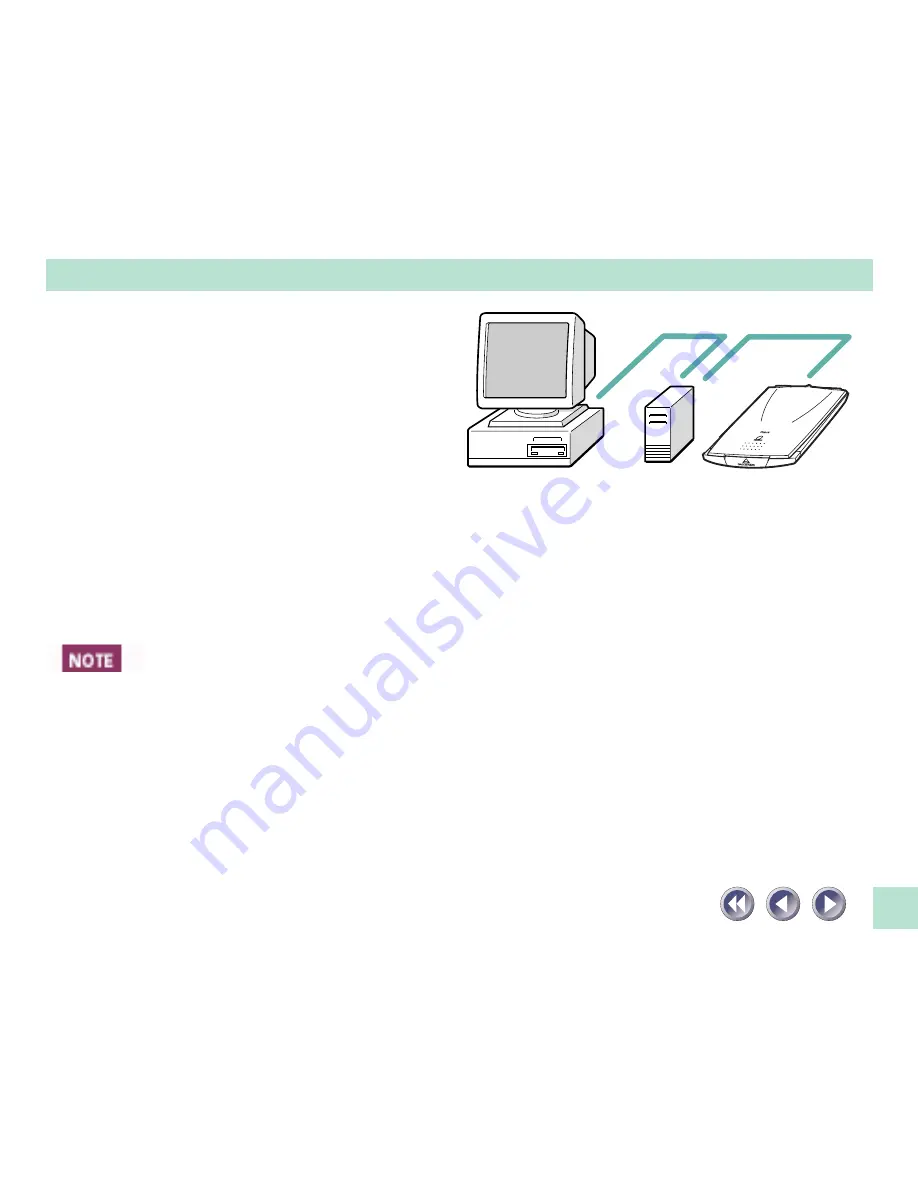
Configuration 3

Scanner Connected to Another
USB Device

1.Attach the PC end of the USB interface cable to the computer’s USB connector, a USB

connector on a USB hub or the throughput USB connector on another USB device.

2.Attach the scanner end of the USB interface cable to the scanner’s USB connector (the

rectangular connector labeled USB on the back panel).

• Most USB-compatible computers have 2 USB ports. Other devices, such as keyboards, may

be equipped with an additional USB port. The scanner may be connected to any of these
ports.

Содержание FB620U - CanoScan - Flatbed Scanner

Страница 1: ...dware Guide dware Guide canner U ...

Страница 2: ...2 ...

Страница 3: ...3 e CanoScan FB620U color eady read the Quick Start ng this guide not be covered in the Quick nit You need only read the ments for scanning ...

Страница 4: ... useful information ts of the EMC Directive s accurate and complete no fy the nearest Canon Customer es the right to change the otice stem or translated into any a mistaken operation or ated er countries ks of their respective companies ...

Страница 5: ...5 7 9 13 16 18 19 21 22 24 24 25 27 29 30 a USB Port 31 32 32 34 35 37 ...

Страница 6: ...6 38 40 41 42 ...

Страница 7: ...ng the following features 63 millimeters for an A4 ds this scanner is so light nce ll operation The standby n ultrahigh sensitivity CIS red green and blue RGB rilliant tones at high ows convenient use of the ...

Страница 8: ...8 and other prohibited riminal prosecution kets and certain public and tion of such items may be t may not be reproduced pt for personal or household ...

Страница 9: ...ry to persons t safely always pay attention to injury to persons or to use the equipment safely ohol or thinners If the uids fire or electric shocks t If the internal electrical cks may result ediately unplug the AC Center ...

Страница 10: ...tions fall and cause injuries dapter Do not place heavy ed wires may cause fire or ay be electrocuted al outlet It could cause fires ires or electric shocks ot plugged in completely cause fire or electric shocks onger than 15 ft 5 m ction between the power ...

Страница 11: ...c shocks or electric shocks body of the adapter Do not e wires and lead to fire or to be unplugged during h voltage parts within that smell anything unusual er or Canon Customer Care not spill water liquids or his equipment and contact thing enters the equipment er or Canon Customer ...

Страница 12: ...rung out Do ers If a flammable liquid c shocks ur hands t glass may break and injure ds unplug the equipment for ropping it could cause an over it Otherwise it may roduces excessively loud and clean the area around removed If dust accumulates ...

Страница 13: ...13 ll times umidity conditions can be met 35 degrees C ensations tlets can be met in your ner ...

Страница 14: ... that the cable n in temperature or humid reas to low humidity areas high humidity areas to low adapt to the new conditions he humidity may rise inside y If you have to use the o block the light emperature environments ...

Страница 15: ...15 ons subject to strong direct sunlight near TVs or devices generat strong magnetic fields ...

Страница 16: ...16 Document Cover Holds documents in place Document Glass Place documents here g or operating the lock er Operating the scanner in Quick Start Guide ...

Страница 17: ...17 Power cord ...

Страница 18: ...18 Connecting to the Computer 19 About the USB Interface 21 Positioning Documents 22 How to Use the Start Button 24 Transporting the Scanner 27 Placement and Connection ...

Страница 19: ...an be connected directly to the USB connector on the com puter directly to a USB hub that is connected to the computer or to a throughput USB connector on another device that supports the USB interface The three configurations are shown below Configuration 1 Scanner Directly Connected to Computer Configuration 2 Scanner Directly Connected to HUB Other USB Device USB Hub ...

Страница 20: ... or the throughput USB connector on another USB device 2 Attach the scanner end of the USB interface cable to the scanner s USB connector the rectangular connector labeled USB on the back panel Most USB compatible computers have 2 USB ports Other devices such as keyboards may be equipped with an additional USB port The scanner may be connected to any of these ports ...

Страница 21: ... devices to be connected to one USB controller Supports two way communication at speeds faster than a parallel port 12 megabits per second versus 1 or a serial port Supports hot swapping which is the ability to add or remove devices without turning off the computer an improvement over the SCSI interface that makes it easy to share devices between computers Supports true plug and play eliminating t...

Страница 22: ...ce the document Place the document face down on the document glass with its top edge at the front of the scanner the edge farthest away from the document cover hinge Align the edges of the document with the alignment mark 3 Close the document cover being careful not to dislodge the document Alignment Mark Bottom Edge of Document Top Edge of Document ...

Страница 23: ...d with an ultra sensitive scanning unit Opening the document cover during scanning or improperly closing it may not produce proper results When the document cover cannot be closed because you are scanning thick documents such as books cover the document glass with a dark cloth to prevent ambient light from affecting the scan ...

Страница 24: ...ed in the Quick Start Guide ScanGear Toolbox CS is a software utility that simplifies the scanning process Its default settings include several preset buttons such as the Save button which automatically initiates a scan and saves the image when clicked It also has several buttons that can be easily set to work with other programs For example it can automatically start a program initiate a scan sav...

Страница 25: ...o have the option of selecting which program is started when the button is pressed follow the procedures below For details see the ScanGear CS U User s Guide 1 Click the Windows Start menu and select Settings and Control Panel 2 Double click the Scanners and Cameras icon 3 Select CanoScan FB620U from the Devices tab 4 Click the Properties button 5 Click the Events tab The window shown to the right...

Страница 26: ...elect the name of the application that the start button will initiate Place a check mark beside the name of an application you wish to select If you select more than one application you ll see this dialog box when you press the scanner start button Select an application to receive the image and click OK ...

Страница 27: ...it is not at the front remove all documents from the document glass close the document cover and plug in the power cord Then plug the AC adapter into the electrical outlet Check to see that the scanning unit has correctly returned to the front of the scanner then unplug the AC adapter from the electrical outlet Lastly unplug the power cord plug from the scanner Scanning Unit Confirm that the scann...

Страница 28: ... scanning unit by pushing the lock switch toward the lock mark Carrying or transporting the scanner without locking the scanning unit may damage it Be particularly careful to lock the scanning unit when transporting the scanner in a vehicle ...

Страница 29: ...29 Appendices Troubleshooting 30 Care and Maintenance 38 Major Specifications 40 Index 41 Canon Technical Support 42 ...

Страница 30: ...port options to assist you Please refer to the Canon Technical Support information listed at the end of this manual When you contact a Canon Customer Care Center our technicians need to know about the computer connected to the scanner For assistance with problems related to the installation and operation of the software please also refer to the Readme and Help files accompanying each program These...

Страница 31: ...SB port Computers running Windows 95 with a USB port on an optional expansion card fall outside the limits of the guarantee Computers with operating systems that have been upgraded to Windows 98 may have the USB interface setting set to Off in the system BIOS You must change the BIOS settings to enable the USB interface Please refer to the manual that accompanied your computer for these instructio...

Страница 32: ...m Solution Start the menu program manually See Quick Start Guide Problems Starting Software Programs TWAIN problem message is displayed Windows Cause 1 Scanner not detected because the AC adapter is not correctly plugged into the electrical outlet Solution Plug the AC adapter securely into the electrical outlet See Quick Start Guide Cause 2 Scanner not detected because the power cord plug is not c...

Страница 33: ...another application Solution Close the ScanGear CS U already running as a TWAIN driver See ScanGear CS U User s Guide electonic manual Cause 3 ScanGear CS U is not installed Solution Install ScanGear CS U See Quick Start Guide Cause 4 Application program is not TWAIN_32 compatible Solution Start ScanGear CS U from within a TWAIN_32 compatible program Cause 5 The scanner not selected Solution Selec...

Страница 34: ...ion Use the following procedures to have the computer recognize the scanner 1 Click the Windows Start menu and select Settings and Control Panel 2 Look for an icon labeled Scanners and Cameras Double click it 3 Confirm that CanoScan FB620U appears in the list of installed devices The computer will not detect the scanner correctly if the Scanners and Cameras icon is missing or the respective CanoSc...

Страница 35: ...ch to unlocked position See Quick Start Guide Cause 3 Software incorrectly installed Solution Reinstall software See Quick Start Guide Scanning unit fails to return to ready position front of scanner Cause AC adapter out of contact with electrical outlet or scanner while scanning unit in motion Solution Clear all documents and objects from the document glass close the document cover unplug the AC ...

Страница 36: ...cument glass or document cover See p 38 Cause 5 Incorrect scan settings Solution Rescan with adjusted settings See the ScanGear CS U User s Guide electronic manual Cause 6 A power cord is too close to the scanner Solution Move all power cords away from the top of the scanner and surrounding area Glossy color photo will not scan clearly Cause Optical interference created by the photo adhering to do...

Страница 37: ...Guide electronic manual Whitened edges on image scanned from thick book Cause Scanner employs an ultra sensitive scanning unit that picks up ambient light if document cover cannot stop light from entering around the edges of the book Solution Cover the book and document glass with a dark cloth to prevent ambient light from affecting the scan Slow scanning speed Cause Resolution is set higher than ...

Страница 38: ...e particularly careful to remove any traces of dirt or liquid from the document glass by wiping it with a dry soft cloth Do not dampen the connectors ports or other metallic components on the scanner s back panel Immediately remove any moisture that contacts these components by wiping them with a dry cloth Do not use a sodden cloth or apply a liquid directly to any portion of the scanner Any moist...

Страница 39: ...ner with a dry cloth Moisture left on the document glass or cover may damage photographs and other documents as well as produce poor results Never use substances containing alcohol thinners or benzene to clean the equipment Outer Casing Document Cover Document Glass ...

Страница 40: ... output Prescan Speed 15 sec Start Button Yes Interface USB Maximum Document Size A4 Letter 8 5 x 11 7 in 216 x 297 mm Operating Range Temperature 41º to 95º F 5º to 35º C Humidity 10 to 90 without condensation formation Power Requirements AC adapter 120V Power Consumption 5 watts maximum stand by 2 5 watts Provided AC adapter used External Dimensions w x l x h 10 1 x 14 7 x 2 5 in 256 x 372 5 x 6...

Страница 41: ...cument Glass 16 L Locations 9 14 Locations to Avoid 14 Lock mark 28 Lock Position 28 Lock Switch 16 28 M Maximum Scanning Size 23 P Positioning the Documents 22 Power Connector 17 Power cord 17 Power Supply 10 S Scanning Unit 16 27 Space around the scanner 13 Specifications 40 Start Button 16 T Troubleshooting 30 U USB 19 21 ...

Страница 42: ...der warranty 1 757 413 2848 Speak to a technician currently 24 99 per call during holidays and days hours not listed above regarding urgent product questions or for products no longer under warranty 1 800 423 2366 The same service is available for a charge of 2 50 per minute to a maximum or 25 00 per call 1 900 246 1200 E mail support via Canon Computer Systems Inc Web site www ccsi canon com 24 h...

Страница 43: ...I OE 018AA CANON INC 1998 99 CREATED IN JAPAN ...

Отзывы: