


110
Sending Images to a Registered Web Service
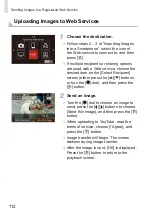
3
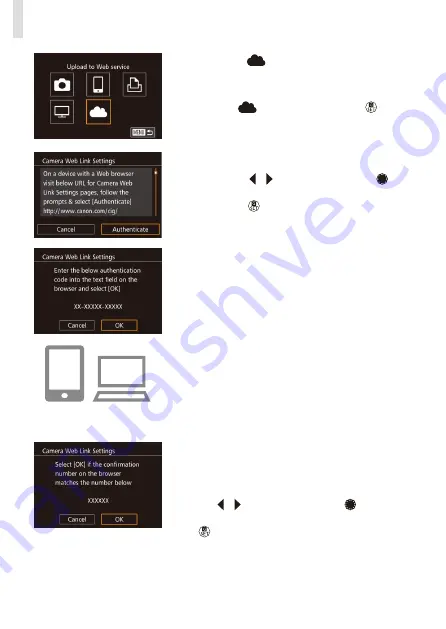
Choose [
].
●
Following steps 2 – 3 in “Importing
choose [
], and then press the [ ]
button.
4
Connect to an access point.
●
Press the [ ][ ] buttons or turn the [ ]
dial to choose [Authenticate], and then
press the [ ] button.
●
Connect to the access point as described
in steps 4 – 6 in “Using Another Access
●
Once the camera is connected to CANON
iMAGE GATEWAY via the access point,
an authentication code is displayed.
●
Keep this display on and available for
viewing until step 5 is complete.
5
Enter the authentication code.
●
On the smartphone or computer, enter
the authentication code displayed on the
camera and go to the next step.
●
A six-digit confirmation number is
displayed.
6
Check the confirmation numbers
and complete the setup process.
●
On the second screen in step 4, press
the [ ][ ] buttons or turn the [ ] dial
to choose [OK], and then press the
[
] button to display the confirmation
number.
●
Make sure the confirmation number on
the camera matches the number on the
smartphone or computer.
Содержание EOS M3
Страница 16: ...15 Basic Operations Basic information and instructions from initial preparations to shooting and playback...
Страница 38: ...37 Auto Mode Hybrid Auto Mode Convenient mode for easy shots with greater control over shooting...
Страница 59: ...58...
Страница 89: ...88...
Страница 90: ...89 Playback Mode Have fun reviewing your shots and browse or edit them in many ways...
Страница 122: ...CEL SV7MA211 2015 PRINTED THE EU...


