background image

6

13

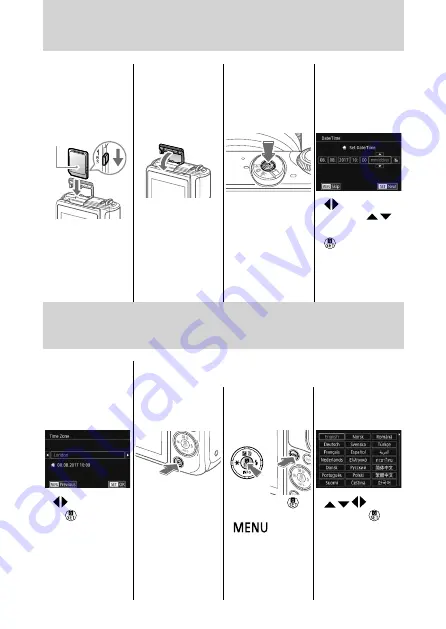
Set your home time 

zone


/  buttons to adjust 


 button

14

Set the display 

language


Hold down the 


button and press the 

 button.


/

/ /  buttons 

to adjust 


button

Getting Ready

9

Insert the memory 

card

Label

10

Close the memory 

card cover

11

Turn the camera 

on

12

Set the date and 

time


/  buttons to 

navigate 


/


buttons to adjust 


 button

Getting Ready

Содержание EOS M100

Страница 1: ...CEL SX1XA210 ENGLISH Getting Started...

Страница 2: ...Help Guide available for download You may be requested to enter the serial number body number when downloading the manuals or software In this case enter the number on the camera body behind the scre...

Страница 3: ...ble alter or apply heat to the product Do not peel o the adhesive covering if the battery pack has it Avoid dropping or subjecting the product to severe impacts Do not touch the interior of the produc...

Страница 4: ...be sure to attach these accessories rmly If the lens accessory becomes loose and falls o it may crack and the shards of glass may lead to cuts On products that raise and lower the ash automatically m...

Страница 5: ...ck 2 1 Terminals 7 Close the battery cover 1 2 8 Open the memory card cover Getting Ready 1 Attach the strap 1 2 3 4 2 Insert the battery pack 2 3 1 3 Charge the battery pack Charging Orange Fully cha...

Страница 6: ...display language Hold down the button and press the button buttons to adjust button Getting Ready 9 Insert the memory card Label 10 Close the memory card cover 11 Turn the camera on 12 Set the date an...

Страница 7: ...sure the camera is off 2 Remove the lens cap and body cap 3 Attach the lens 1 2 4 Remove the front lens cap 1 2 1 1 Access the menu screen 2 Choose the setting item 1 2 2 Date Time button 3 Set up th...

Страница 8: ...s 1 as you turn the lens toward 2 until it stops Remove it in the direction shown 3 3 Attach the lens cap and body cap 5 Prepare to shoot 1 2 Press 1 as you turn 2 slightly and then release 1 Turn 2 a...

Страница 9: ...f shots 3 Remaining record ing time 3 Zoom in or out as needed 4 Focus Press the shutter button lightly The camera beeps twice after focusing An AF frame is displayed around positions in focus 5 Raise...

Страница 10: ...number of shots 3 Remaining record ing time 3 Zoom in or out as needed 4 Start recording Frames are displayed around any detected faces that are in focus 5 Stop recording Shooting Recording Movies Sc...

Страница 11: ...Enter Playback mode 2 Browse your images button Previous image button Next image 1 Enter Playback mode 2 Browse your images button Previous image button Next image Movies are labeled with 3 Play the m...

Страница 12: ...12 buttons button 4 Adjust the volume Playback Viewing Movies Erasing Images 1 Enter Playback mode 2 Browse your images button Previous image button Next image 3 Erase buttons Erase button...

Страница 13: ...ll measurements based on Canon testing standards Information subject to change without notice as are product speci cations and appearance Illustrations and screenshots in this guide may di er slightly...

Страница 14: ...electrical and electronic equipment EEE and batteries and accumulators Improper handling of this type of waste could have a possible impact on the environment and human health due to potentially haza...

Страница 15: ...t Do not use the wireless function of this product near medical equipment or other electronic equipment Use of the wireless function near medical equipment or other electronic equipment may a ect oper...

Отзывы: