4
Printing
You do all the printing operations with the camera.
h
images cannot be printed with PictBridge.
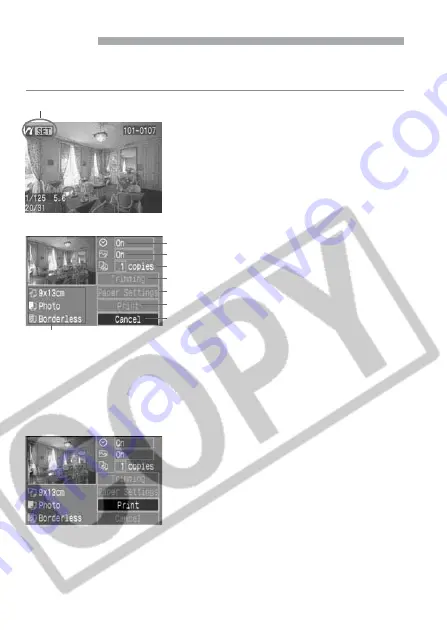
Select the image to be printed.
•
Check that the <
w
> icon is displayed
on the upper left of the LCD monitor.
•
Press the <
µ
> keys to select the
image to be printed.
1
Press <
p
>.
s
The print setting screen will appear.
2
Set the printing options.
•
For the setting procedure, see “Setting
the Printing Options” on the next page.
3
Connected printer icon
Print the image.
•
Press the <
å
> keys to select [
],
then press <
p
>.
s
Printing will start.
•
When the printing is completed
properly, the screen returns to step
1
.
4
Print setting screen
The Paper Size, Type, and Page Layout you have set will be displayed.
Sets the trimming area.
Sets the Paper Size, Type, and Page Layout.
Starts the printing.
Sets the quantity to be printed.
Set the date imprinting to on or off.
Set the printing effects.
Returns to the screen in step
1
.
* Depending on your printer, certain settings like the date imprinting and
trimming might not be available.


