Please read this manual before using the scanner.After you finish reading this manual, keep it in a safe place for future reference.
User Manual
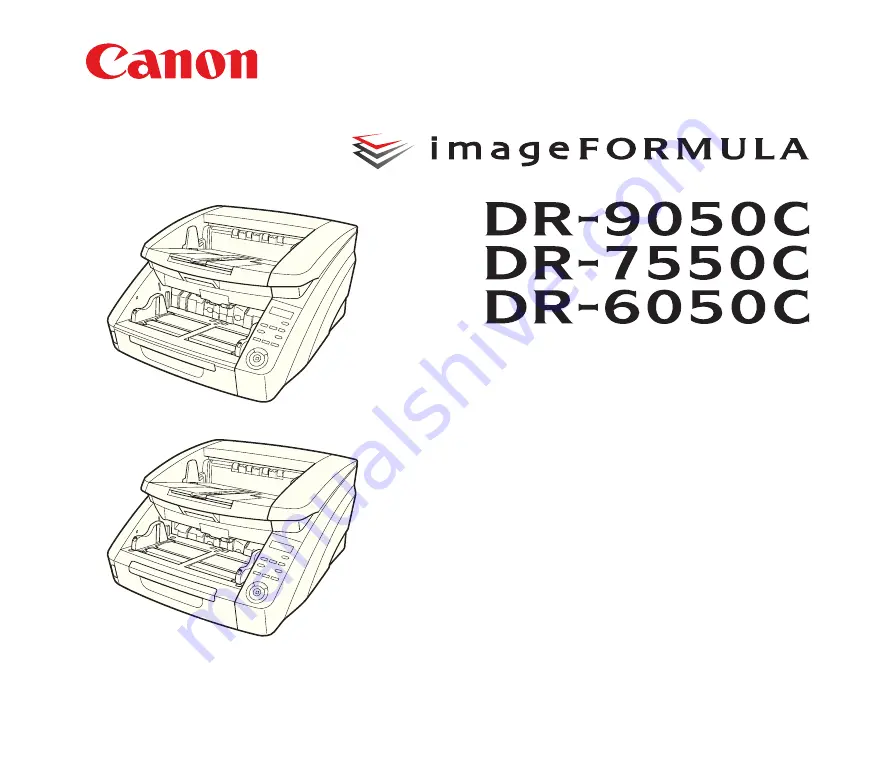
DR-9050C/DR-7550C
DR-6050C
Страница 1: ...Please read this manual before using the scanner After you finish reading this manual keep it in a safe place for future reference User Manual DR 9050C DR 7550C DR 6050C...
Страница 2: ...required to comply with class B limits in Subpart B of Part 15 of FCC Rules Do not make any changes or modifications to the equipment unless otherwise specified in the manual If such changes or modifi...
Страница 3: ...ns in each sales region of the Document Scanner DR 6050C Model M11070 DR 7550C Model M11069 DR 9050C Model M11068 Trademarks Canon and the Canon logo are registered trademarks of Canon Inc in the Unit...
Страница 4: ...Please follow the procedures in the Easy Start Guide to set up the scanner Reference Guide This manual consists of the basic scanner operating instructions extracted from the User Manual User Manual...
Страница 5: ...contains additional explanations for a procedure Reading these notes is highly recommended How This Manual is Organized This manual consists of the following chapters Hardware Chapter 1 Before You Sta...
Страница 6: ...User Manual Hardware Please read this manual before using the scanner After you finish reading this manual keep it in a safe place for future reference...
Страница 7: ...About the Power Switch 3 2 2 Documents 3 3 Acceptable Documents 3 3 3 Document Feed and Eject Trays 3 6 Preparing the Document Feed Tray 3 6 Adjusting the Document Guides 3 8 Preparing the Document E...
Страница 8: ...ractical Examples 1 Messages 6 2 Status Display 6 2 Error Messages 6 3 2 Troubleshooting 6 5 Trouble Categories 6 5 Problem and Solution 6 5 3 Uninstalling the Software 6 9 Uninstalling the ISIS TWAIN...
Страница 9: ...mportant Safety Instructions 1 2 Installation Location 1 2 Power 1 2 Moving the Scanner 1 3 Handling 1 3 Disposal 1 5 2 Features 1 6 3 Names and Functions of Parts 1 10 Front View Feeder Inlet and Eje...
Страница 10: ...which the scanner is installed is cold but rapidly heated water droplets condensation may form inside the scanner This may result in a noticeable degradation in scanning quality The following conditi...
Страница 11: ...rried with these items connected the plugs and connectors may be damaged or cause the scanner to fall and result in personal injury or damage to the scanner Handling WARNING Note the following precaut...
Страница 12: ...scanner to fall resulting in personal injury or damage to the scanner Do not block the ventilation openings Doing so could case the scanner to overheat creating a risk of fire Never place small metal...
Страница 13: ...kties and long hair If anything becomes caught in the scanner immediately disconnect the power cord to stop the scanner Be careful when placing paper in the scanner and when removing jammed paper It i...
Страница 14: ...t Only Mode When operating the scanner as a stand alone device this mode counts the number of loaded document sheets See Count Only Mode on p 4 4 Adjustable Document Feed Tray The position of the docu...
Страница 15: ...s See Double Feed Detection on p 4 5 Using the length of the first document page as a reference the scanner detects a double feed when a page of a different length is fed Prescan At the start of scann...
Страница 16: ...eder inlet can be folded and scanned on both sides and the images combined into a single image Folio Scan supports up to A1 size 23 4 33 1 594 841 mm documents when used together with the Long Documen...
Страница 17: ...d See Clearing a Paper Jam or Double Feed Error on p 3 23 The Rapid Recovery System is effective when feeding stops as a result of detection of a Paper Jam Double Feed Skew or Staple Options Imprinter...
Страница 18: ...ument Eject Tray Extension Open the Document Eject Tray Extension when documents look like they are going to fall off of the eject tray See p 3 10 g Eject Paper Stoppers Adjust to fit the length of do...
Страница 19: ...lied power cord here See p 2 7 c USB Connector Type B Connect the supplied USB cable here See p 2 6 d SCSI Connector 50 pin half pitch D sub receptacle Connect the SCSI cable here See p 2 7 e DIP Swit...
Страница 20: ...cepts settings d Keys Selects the user mode and job e Menu Key Displays the user mode See p 4 8 f Job Key Selects jobs See p 3 14 g Count Only Key Feeds and counts the number of document pages See p 4...
Страница 21: ...Software Installation 2 4 About the Setup Menu 2 4 4 Connecting the Scanner to the Computer 2 6 Interface Connector Locations 2 6 Connecting the Scanner to the Computer 2 6 5 Turning the Power ON Sca...
Страница 22: ...r See p 2 6 Step 4 Turn the power ON Scanner recognition See p 2 9 IMPORTANT Make sure that you install the software before connecting the scanner to the computer If you connect the scanner to the com...
Страница 23: ...ollowing points when using the USB interface that was provided with your computer The USB connection should be a Hi Speed USB 2 0 interface Scanning speeds are lower if your computer s standard USB in...
Страница 24: ...ing Windows Vista the User Account Control dialog box may appear In this case enter your login user password for Administrator privileges and click OK The Typical Installation Screen This screen appea...
Страница 25: ...ual Screen From this screen you can select one of the supplied electronic manuals to read the Easy Start Guide a printed copy is also supplied the Reference Guide the User Manual this manual or the Ca...
Страница 26: ...uld both be turned OFF when making connections Make sure that the computer is turned OFF before connecting the SCSI cable The scanner may not be properly recognized by the computer if it is connected...
Страница 27: ...efore connecting the SCSI cable If the cable is connected while the computer is on the scanner may not be properly recognized by the computer 1 Shut down Windows and turn the computer s power OFF 2 Co...
Страница 28: ...ration with other SCSI devices set the DIP switches so that SCSI ID numbers are not duplicated in the system The scanner incorporates a SCSI terminator which is permanently set to ON When using a dais...
Страница 29: ...e scanner first and then turn ON the computer If you turn ON the computer first the scanner may not be properly recognized by the computer After turning the scanner OFF wait at least 10 seconds before...
Страница 30: ...evices as CANON DR XXXX USB or CANON DR XXXX SCSI XXXX varies depending on the model you are using From the Control Panel you can display the Device Manager using the following procedure With Windows...
Страница 31: ...ing the Document Guides 3 8 Preparing the Document Eject Tray 3 10 4 Document Feeding Methods 3 11 Selecting the Document Feeding Method 3 11 5 Scanning 3 14 About the Job Function 3 14 CapturePerfect...
Страница 32: ...turn the scanner OFF Hint In the User Mode if the tray position is set to a height other than the lowest position then the Document Feed Tray moves up and down when the power is turned on In this cas...
Страница 33: ...s in the Document Feed Tray Manual feeding requires feeding one document at a time while the Separation Off key on the control panel is lit and the Document Feed Tray is raised IMPORTANT A document mu...
Страница 34: ...IMPORTANT Do not exceed the load limitation mark when placing documents in the Document Feed Tray It may cause paper jams Small Size Limitation Mark When placing documents that are smaller than LTR A4...
Страница 35: ...priority the image may be lost If this occurs scan by using black and white or reducing the image quality When scanning with the Long Document Mode set to ON2 if the scan is performed at 400 600 dpi o...
Страница 36: ...Setting The height of the Document Feed Tray is set by the Tray Position in the User Mode setting which minimizes the time required to start feeding by specifying in advance the proper position for th...
Страница 37: ...cted height 7 Press the Stop key to exit the User Mode Document Guides Slide the document guides to fit the width of your document Hint The positions of the left and right document guides can also be...
Страница 38: ...However each document guide has its own lock lever so you can load documents to the left or right of center by locking the document guides at the appropriate positions Loading Documents at the Left Si...
Страница 39: ...s To reset the guides so that they are equidistant from the center perform the following procedure to spread the guides to the left and right as far as they will go 1 Confirm that the right document g...
Страница 40: ...Only Mode on p 4 4 Document Eject Tray Extension Open the Document Eject Tray Extension when documents look like they are going to fall off of the eject tray Eject Paper Stoppers Raise the appropriate...
Страница 41: ...cked up automatically by the pickup roller and transported by the feed roller while the retard roller separates each page to avoid double feeding Manual Feeding The Separation Off key lights and the D...
Страница 42: ...ous Manual Feeding you must place the documents on the Document Feed Tray and insert them into the Document Feed Tray opening one page at a time making operation easier Continuous Manual Feeding Mode...
Страница 43: ...c Operation 4 Press Enter The current setting is indicated by blinking square brackets 5 Press the or key to select ON or OFF and press Enter to accept the selection 6 Press the Stop key to exit the U...
Страница 44: ...ion settings image file format selection save destination and image data processing settings for each job to be used with the Job Function Hint The Job Registration Tool is a TWAIN compliant applicati...
Страница 45: ...t scanning conditions and the scanned image data is saved to a specified folder Scan Batch to Printer Documents are scanned with the preset scanning conditions and the scanned image data is printed on...
Страница 46: ...in the folder Pictures Scan To Presentation This mode is convenient when a compact scanner is used in an environment such as a conference hall where it is connected to a large display or projector By...
Страница 47: ...list of scanners you must re install the ISIS TWAIN driver 4 Select the default page size and click OK IMPORTANT If you select Default in the ISIS driver properties dialog box that setting is applied...
Страница 48: ...must load your documents as described below depending on the specified Feed Option setting If the Standard Feeding Feed Option is enabled load your documents before scanning When all of the documents...
Страница 49: ...lit You must load a document and press the Start key to scan Pressing the Stop key causes the Continue Scanning dialog box to appear 12 When the Continue Scanning dialog box appears verify that a doc...
Страница 50: ...ed by CapturePerfect 3 0 Printing Patchcode Sheets Open the desired patchcode sheet file with an application that supports CapturePerfect 3 0 or the PDF file format and print the page image only at it...
Страница 51: ...of the ISIS driver properties select Patchcode from the Batch Separation drop down list IMPORTANT If the patchcode decoder is not installed the Patchcode batch separation setting is not displayed See...
Страница 52: ...chcode so that it fits into the effective area for detecting patchcode patterns When copying a patchcode pattern the copy should be the same size as the pattern on the original Be careful to keep patc...
Страница 53: ...personal injury Paper Jam Handling When a paper jam occurs during scanning the following message appears on the display panel and transport stops Hint The displayed error code indicates the location...
Страница 54: ...scanning from the document page where the paper jam occurred or from the beginning When the Rapid Recovery System is enabled scanning pauses when a paper jam is detected and an error message is displ...
Страница 55: ...k yet to be scanned and resume scanning When the Rapid Recovery System is Enabled 1 Check the double fed document page s Hint If attached paper such as a label on the document page appears to be the c...
Страница 56: ...Chapter 4 Other Functions 1 Other Functions and Settings 4 2 2 Function Description 4 4 3 User Mode 4 8 User Mode Operating Procedure 4 8 4 User Mode Functions 4 10...
Страница 57: ...p 8 25 Imprinter Test p 4 12 p 5 17 Counter Total Counter p 4 12 Count Roller Counter p 4 12 Count Only Mode p 4 4 Display Contrast p 4 11 Key Repeat p 4 12 Skew Detection Always On p 4 6 Deskew p 8 9...
Страница 58: ...ing the control panel keys User Mode The scanner function setting is made as a User Mode selection ISIS TWAIN The function is an ISIS TWAIN driver scanning setting The page count for the Verify Scan o...
Страница 59: ...when the Count Only mode is enabled 3 Press the Start key to start scanning and count the loaded document sheets IMPORTANT To reset the page counter press the Count Clear key for approximately two se...
Страница 60: ...ntrol Setting on p 4 10 Detecting Double Feeds by Document Length This detection method is effective when scanning documents with pages of the same size The length of the first page scanned serves as...
Страница 61: ...ot operate properly in the following cases where bending does not occur in documents The document is stapled at two or more corners The document is size smaller than STMT A5 The position of the left o...
Страница 62: ...ong Document Mode to OFF except when scanning 22 34 A1 document pages If scanning is performed with the scanning mode set to color image quality set to Image quality priority and scanning side set to...
Страница 63: ...er Mode operations are controlled by the following procedure Hint Operating procedures differ according to User Mode function For details refer to the indicated pages 1 Press the Menu key on the contr...
Страница 64: ...unctions 3 Press Enter The current setting is indicated by blinking square brackets 4 Press the or key to select ON2 ON1 or OFF and press Enter to accept the selection 5 Press the Stop key to exit the...
Страница 65: ...led when the Count Only mode is enabled See Staple Detection on p 4 6 ON Detects staples in the Count Only mode OFF Does not detect staples in the Count Only mode Staple Detection Level Setting Sets t...
Страница 66: ...ontrol panel EN English display panel JP Japanese display panel FR French display panel Display Contrast Adjustment Use to adjust display panel contrast SCSI Speed Setting Selects the scanner s SCSI t...
Страница 67: ...e functions in the User Mode Total Counter Displays the lifetime total number of document pages fed by the scanner Roller Counter Displays the number of document pages fed since roller installation or...
Страница 68: ...4 2 Replacing the Transport Rollers 5 5 Roller Replacement Cycle 5 5 Checking and Resetting the Page Counter 5 5 Removing and Reinstalling the Rollers 5 7 3 Imprinter Ink Cartridge Replacement and Cl...
Страница 69: ...leaning the Scanner Exterior To clean the outside of the scanner use a cloth moistened with water or mild detergent solution Wring out the cloth thoroughly and use a clean dry cloth to wipe the scanne...
Страница 70: ...ized Canon dealer or service representative to have the glass replaced 1 Turn the power switch off and disconnect the power plug from the power outlet 2 Close the document eject tray extension if it i...
Страница 71: ...s that you removed See Removing and Reinstalling the Rollers on p 5 7 9 Gently lower the upper unit a Press down on both sides of the upper unit to ensure that it is securely closed b IMPORTANT If pap...
Страница 72: ...g and Reinstalling the Retard Roller on p 5 10 When the rollers start to wear out problems such as paper jams and document misfeeds may occur more frequently If this happens replace the rollers regard...
Страница 73: ...ode 2 Press the key twice to display Roller Counter 3 Check the number of pages fed by the rollers and press Enter The counter reset mode is activated 4 Press the key to select RESET and press Enter T...
Страница 74: ...rs Leaving the power turned ON may result in an electric shock Do not place excessive force on the rollers when removing or reinstalling the rollers Deformation of the rollers may cause feed errors Re...
Страница 75: ...ed to its original position IMPORTANT Failure to firmly close the roller holder and roller cover may cause a feed error Always be sure to check that the roller holder and roller cover are closed 7 Gen...
Страница 76: ...roller lock lever down 4 Slide the feed roller to the right and then pull them towards you 5 Remove the feed roller 6 Place the new feed roller on the pin 7 Put the feed roller in place a and align th...
Страница 77: ...osition IMPORTANT Failure to firmly close the roller cover may cause a feed error Always be sure to check that the roller cover is closed 10 Gently lower the upper unit a Press down on both sides of t...
Страница 78: ...nd move it to the left b to unlock the roller 4 Remove the retard roller 5 Set the retard roller into place in the scanner 6 Align the notches in the roller with the shaft pins in the scanner then sli...
Страница 79: ...curely returned to its original position 10 Gently lower the upper unit a Press down on both sides of the upper unit to ensure that it is securely closed b CAUTION Make sure that the hook is completel...
Страница 80: ...s For details contact your local authorized Canon dealer or service representative Product Name Ink Cartridge Blue Product Code 3693A002 Product Name Ink Cartridge Red Product Code 3693A003 Product Na...
Страница 81: ...lever outward a to release the ink cartridge lock b 5 Remove the ink cartridge 6 Peel off the seal covering the nozzles of a new ink cartridge CAUTION Peel off the seal covering the nozzles of a cartr...
Страница 82: ...sh in the area of the imprinter cover shown by the arrow to lock it Hint The imprinter cover will not close unless the carriage is correctly aligned with a positioning hole If it will not close check...
Страница 83: ...se unless the carriage is correctly aligned with a positioning hole If it will not close check the position of the carriage Cleaning the Imprinter Cleaning the Guide Plate Ink that collects on the gui...
Страница 84: ...nting Test printing is performed by the Imprinter Test User Mode selection IMPORTANT Before performing an Imprinter Test load a sheet of paper into the Document Feed Tray Performing an Imprinter Test...
Страница 85: ...printer Test is enabled 5 Press the key to select OK and press Enter The test print is executed IMPORTANT If no paper is loaded for test printing the imprinter test finishes without printing 6 Press t...
Страница 86: ...ractical Examples 1 Messages 6 2 Status Display 6 2 Error Messages 6 3 2 Troubleshooting 6 5 Trouble Categories 6 5 Problem and Solution 6 5 3 Uninstalling the Software 6 9 Uninstalling the ISIS TWAIN...
Страница 87: ...in Count Only mode Press Start Key Status Waiting Load a document and press the Start key Ready Status The scanner is ready to use Scanning Status Scanning is in progress Sleeping Status The scanner i...
Страница 88: ...or Code Pxxx Problem Paper has jammed Solution Open the upper unit and remove the jammed paper See p 3 23 Hint The displayed error code indicates the location of the paper jam P001 P002 The document i...
Страница 89: ...ted while scanning with the Rapid Recovery System enabled Solution Remove the double fed document page s return them to the Document Feed Tray and scan again See p 3 24 Staple Detected Error Code J001...
Страница 90: ...B If the scanner s USB connection is not recognized first confirm the following Are the scanner and PC connected correctly using the proper cable Is the scanner s power switch turned ON If this does n...
Страница 91: ...error turn the scanner OFF and wait at least 10 seconds before turning it back ON If errors continue to occur reboot the scanner and computer When scanning with configurations that use a large amount...
Страница 92: ...the Continuous Manual Feed Mode to OFF from the User Mode See Continuous Manual Feeding Mode Setting on p 3 12 Saved Image Files Do Not Open If image files saved by CapturePerfect 3 0 cannot be opene...
Страница 93: ...our document Problem Lines smudges or dirt appear on the scanned image Cause The scanning glass or rollers inside the scanner are dirty Solution Clean the scanning glass and rollers See Regular Mainte...
Страница 94: ...ocedure to uninstall the Job Registration Tool and CapturePerfect 3 0 Make sure to substitute the name of the software in step 3 IMPORTANT As always when uninstalling software log on using an account...
Страница 95: ...6 10 Chapter 6 Practical Examples 4 Click the Continue button The file deletion confirmation screen appears 5 Click Yes to proceed with uninstallation 6 When uninstallation is finished click Finish...
Страница 96: ...r 7 Appendix 1 Specifications 7 2 Unit Specifications 7 2 Options 7 3 Consumables 7 3 External Dimensions 7 4 2 Option Specifications 7 5 Barcode Specifications 7 5 Imprinter Specifications 7 6 3 Inde...
Страница 97: ...II 256 Level Grayscale and 24 Bit Color Scanning Resolution 100 150 200 240 300 400 and 600 dpi Scanning Speed LTR A4 portrait Other Double Feed Detection Deskew User Mode Long Document Mode and Foli...
Страница 98: ...e 8927A003 Add on software that enables barcode recognition by the ISIS TWAIN driver See Barcode Dialog Box Settings on p 8 22 Patchcode Decoder Product Code 4009B002 This unit detects patchcode sheet...
Страница 99: ...7 4 Chapter 7 Appendix External Dimensions 28 27 718 mm 23 62 600 mm 20 91 531 mm 12 24 311 mm 15 35 390 mm 18 90 480 mm 6 38 162 mm...
Страница 100: ...Full ASCII Modulus 43 ITF 2 to 32 Even number of digits only Modulus 10 Weight 3 Code 128 1 to 32 Valid data only Modulus 103 UPC A 13 Modulus 10 Weight 3 UPC E 8 Modulus 10 Weight 3 Item Condition Pr...
Страница 101: ...ed space between characters Number of Printable Characters Up to 32 characters Printable Paper Plain paper without water resist coating Compatible Ink Cartridges HP Ink Cartridges Color Blue Red Green...
Страница 102: ...es 3 7 3 10 adjusting 3 10 Documents 3 3 Double Feed Detection 4 5 Double Feed Errors 3 24 E Eject Paper Stoppers 3 10 Error Messages 6 3 F Folio Scanning 4 6 H Handling 1 3 I Imprinter 4 7 5 13 Impri...
Страница 103: ...nuals 2 5 typical installation 2 4 Skew Detection 4 6 Software installing 2 4 uninstalling 6 9 Staple Detection 4 6 Status Display 6 2 System Requirements 2 3 T Terminator 2 8 Troubleshooting 6 5 trou...
Страница 104: ...User Manual Software Please read this manual before using the scanner After you finish reading this manual keep it in a safe place for future reference...
Страница 105: ...Tool Settings 1 Before Use 9 2 Job Function 9 2 Starting the Job Registration Tool 9 2 2 Job Registration Tool 9 3 3 Settings Dialog Boxes 9 5 New Editing Dialog Box 9 5 Admin Dialog Box 9 8 Chapter 1...
Страница 106: ...r Settings 1 Before You Start Using the Scanner 8 2 2 ISIS TWAIN Driver Settings Dialog Box 8 4 Basic Tab Sheet 8 6 Brightness Tab Sheet 8 14 Image processing Tab Sheet 8 16 Others Tab Sheet 8 18 Impr...
Страница 107: ...ion procedure depends on the application program being used refer to your application s user s manual if necessary for instructions on selecting the scanner 1 Click the Start button then select All Pr...
Страница 108: ...ver Settings IMPORTANT Clicking the Default in the ISIS Driver Properties dialog box the setting is applied here For the TWAIN driver the default paper size is LTR A4 and cannot be changed 5 Click OK...
Страница 109: ...l the following ISIS TWAIN Driver Settings dialog box is displayed The ISIS TWAIN Driver Settings dialog box consists of the standard tab sheets Basic Brightness Image processing Others and Imprinter...
Страница 110: ...8 5 Chapter 8 ISIS TWAIN Driver Settings Basic Tab Sheet See p 8 6 Brightness Tab Sheet See p 8 14 Image processing Tab Sheet See p 8 16 Others Tab Sheet See p 8 18...
Страница 111: ...r the open tab sheet and dialog box Basic Tab Sheet You can set basic scan conditions on the Basic tab sheet The items that can be set vary depending on the application program you are using Specify t...
Страница 112: ...Tab Sheet Settings You can configure the following settings on the Basic tab sheet User Preference Click Save to open the Save User Preference dialog box The Save User Preference dialog box saves the...
Страница 113: ...t The background in tight spaces around text may not be removed Documents with low contrast text can be made more readable by adjusting Contrast on the Brightness tab sheet If the background is non un...
Страница 114: ...x Adjust the Content density setting in the BlankSkip Setting dialog box if you specify Skip blank page but blank pages are not skipped or if non blank pages are skipped Adjust the content density acc...
Страница 115: ...to Simplex Image Quality When the scanning resolution is set to 400 or 600 dpi you can enable this setting and select either Speed Priority or Image Quality Priority Speed priority This mode gives pr...
Страница 116: ...e is detected as black and white Color Saturation Proportion of Color These settings are for judging whether a document is in color Depth of color in documents is detected by Color Saturation and Prop...
Страница 117: ...ge size and register non standard document page sizes The Scan Area dialog box is different for ISIS and TWAIN drivers for the TWAIN driver one of two dialog box types is displayed depending on the ap...
Страница 118: ...be adjusted by dragging the handles bordering the Area panel with your mouse With CapturePerfect the last scanned image appears in the Area panel Margin This control adjusts the top bottom left and ri...
Страница 119: ...le for setting or auto Brightness Tab Sheet Settings You can configure the following settings on the Brightness tab sheet Auto Check Box This is enabled when the scanning mode is Black and White The b...
Страница 120: ...rrection value Custom Check Box Select this check box to set custom gamma correction Select Select the side and color for custom setting Hint The color bar and color of the sample image are changed to...
Страница 121: ...ton Clicking this button exports the custom gamma curve settings as a gamma table file pxg Image processing Tab Sheet The Image processing tab sheet provides settings affecting the processing of scann...
Страница 122: ...grams do not support Text Orientation Recognition Please disable Text Orientation Recognition if your application program behaves abnormally when this setting is enabled Erase Dot Check Box Select thi...
Страница 123: ...nt affects the colors you specify on screen they may not match those actually dropped out or enhanced that is the colors you specify may not match those processed Others Tab Sheet The settings on the...
Страница 124: ...requests depend on the specifications of the particular program Image Compression Ratio Adjusts the compression ratio of the scanned image data Moving the slider towards High Quality reduces the compr...
Страница 125: ...The scanner enters a waiting state when the document has been scanned and then continues scanning when you load the next document and press the start key When all of the documents have been scanned pr...
Страница 126: ...ption Patchcode Batches are separated whenever a patchcode sheet is detected between documents See Using Patchcode Sheets Option on p 3 20 IMPORTANT When Patchcode is selected the Folio Scanning Side...
Страница 127: ...nal barcode module is installed and opens the Barcode dialog box for configuring settings for detecting barcodes in documents Barcode Dialog Box Settings The Barcode dialog box is displayed when you c...
Страница 128: ...to within a specified area of the document and then enter the start positions and end positions for the horizontal direction and vertical direction Hint When specifying an area on the front side of d...
Страница 129: ...T SP Output Start and Stop codes included in barcodes Method Select the checksum calculation method Code 128 Detect Code 128 barcodes Enable Detect and read Code 128 barcodes ITF Detect ITF barcodes i...
Страница 130: ...eck Boxes Imprinter Check Box Configure settings for imprinting any character string or counter on scanned documents IMPORTANT Confirm that an ink cartridge is installed in the scanner before you use...
Страница 131: ...ate Year Month Day abbreviation YMD Imprint add the date of scanning using 10 digits in Year Month Day format Up arrow abbreviation U Imprint add an up arrow Down arrow abbreviation D Imprint add a do...
Страница 132: ...a white background White on Black Add white text on to a black background Black on Image Add black text on to an image Counter button Open the Counter dialog box and configure counter settings Counte...
Страница 133: ...The counter increases when a batch separation occurs according to the Batch Separation settings on the Others tab sheet See Batch Separation on p 8 20 Every Page Increments once per page None No count...
Страница 134: ...Job Registration Tool Settings 1 Before Use 9 2 Job Function 9 2 Starting the Job Registration Tool 9 2 2 Job Registration Tool 9 3 3 Settings Dialog Boxes 9 5 New Editing Dialog Box 9 5 Admin Dialog...
Страница 135: ...egistered by Job Registration Tool and allows you to execute scanning without using a scanning application Hint Job registration stores scanning condition settings image file format selection save des...
Страница 136: ...t If you select a registered job Copy and Delete are enabled Selecting Copy displays the following dialog box Specify the job number to copy to and job title and click the OK button to copy the job to...
Страница 137: ...9 Job Registration Tool Settings Job List Displays the job numbers 01 to 99 and job titles Job Information Displays the information for the job selected in the job list Close Button Ends the Job Regis...
Страница 138: ...to open the New Editing dialog box Hint The New Editing dialog box can also be opened in the following ways Right click the job number you want to register and click New Editing in the submenu Select...
Страница 139: ...of up to 32 alphanumeric characters A time stamp is appended to the file name indicating the time of scanning File type Enter the file format for saved files When scanning multi page documents image f...
Страница 140: ...mpression Hint Select Normal to save files with normal compression Select High Compression to save files with high compression Although file size is reduced image quality may be slightly degraded IMPO...
Страница 141: ...ing Admin Dialog Box The Admin dialog box allows you to configure settings for monitoring the storage folder for images and backing up job data Opening the Admin Dialog Box Click Admin setting in the...
Страница 142: ...pears follow the instructions in the message to either continue scanning or change the save destination first Job Back Up Function You can use this function to back up the registered jobs when the sam...
Страница 143: ...gs 10 2 Confirming the Basic Conditions for Scanning 10 2 2 Practical Examples 10 4 Scanning Documents of Unregistered Page Sizes 10 4 Specifying the Scanning Area 10 5 Configuring Scanner Settings Ac...
Страница 144: ...g Side on the Basic tab sheet Mode Select the scanning mode Hint Advanced Text Enhancement removes or processes the background color and background surrounding text to enhance the text for easy readin...
Страница 145: ...elect which page side s to scan Hint If the scanning side is set to Skip blank page the images of blank pages are deleted when the images are saved Folio recombines the front and back images scanned f...
Страница 146: ...to ON1 or ON2 See Long Document Mode Setting on p 3 4 2 Set the page size to Auto detection and scan the document IMPORTANT When scanning a long document load and scan the pages of the document one at...
Страница 147: ...Long Document Mode Registering of unregistered non standard page sizes You can register a non standard page size that has not been registered as a page size by naming and registering it as a custom pa...
Страница 148: ...the document is deskewed and edges are missing from the image or black borders are created around the image adjust the scanning area by setting the margins See p 8 13 Configuring Scanner Settings Acc...
Страница 149: ...termediate colors to ignore drop out or enhance When you want to prevent the bleed through of text and other items from the back side of thin pages or remove the background from scanned images Select...
Страница 150: ...around scanned images Select Border Removal on the Image processing tab sheet The black borders created around scanned images are removed When you want to reduce the moire patterns that appear when c...
Страница 151: ...de for when documents are judged to be black and white See p 8 11 When you want to reverse black and white in scanned images TWAIN driver only Select Reverse Image on the Image processing tab sheet Th...
Страница 152: ...ab sheet See p 8 17 The text orientation on each page is detected and the scanned image is rotated in 90 degree increments to correct the orientation Hint When Text Orientation Recognition is selected...
Страница 153: ...ip blank page is selected the Setting button is enabled and you can adjust the level for judging whether pages are blank Registering Your Settings You can register the scanning conditions so that you...
Страница 154: ...P O BOX 2262 1180 EG AMSTELVEEN THE NETHERLANDS CANON LATIN AMERICA INC 703 WATERFORD WAY SUITE 400 MIAMI FLORIDA 33126 U S A CANON AUSTRALIA PTY LTD 1 THOMAS HOLT DRIVE NORTH RYDE SYDNEY N S W 2113...