background image

OSD Menu

44

Sub Menu

Setting Options (Factory default)

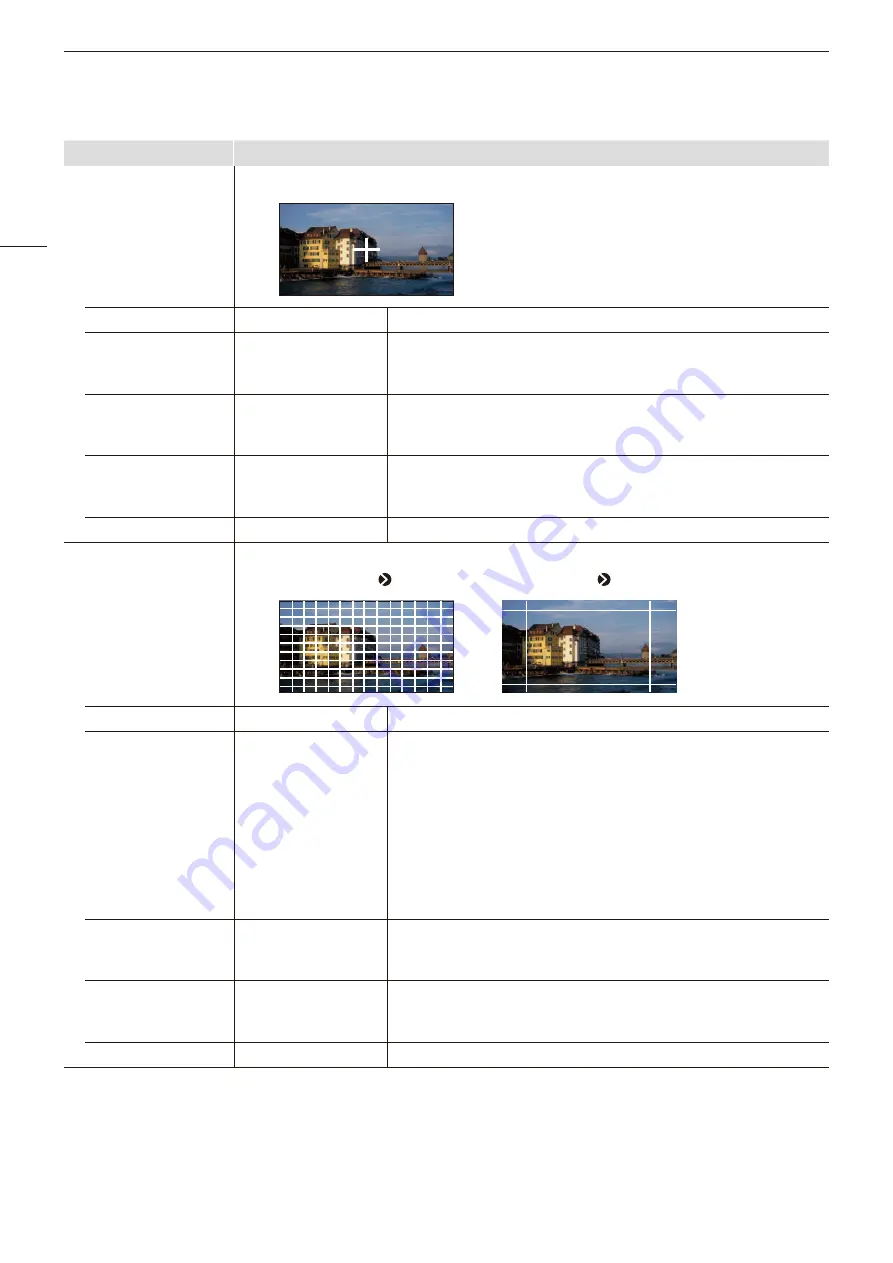
Center Marker

2

[Center Marker] shows the center of the image.

Enable

On, Off

Switches the center marker On, Off.

Size

Large
Middle
Small

Sets the size of the center marker.

Line Width

Thick
Normal
Thin

Sets the width of the center marker line.

Line Color

White, Red, Green, 
Blue, Yellow, Cyan, 
Magenta, Gray

Sets the color of the center marker line.

Line Brightness

High, Low, Half

Sets the brightness of the center marker line.

Grid Marker

3

[Grid Marker] is marker used to check the horizontal and vertical position.


When [Distance]   [*** dots]


When [Distance]   [***% (UHD)]


Enable

On, Off

Switches the grid marker On, Off.

Distance

160 dots
240 dots
320 dots
80% (UHD) 
83% (UHD) 
85% (UHD) 
88% (UHD) 
90% (UHD) 
93% (UHD) 
95% (UHD)

Sets the horizontal and vertical line distance.

[160/240/320 dots]: Sets the line distance to the selected number of dots.
[80% (UHD) to 95% (UHD)]: This indicates the percentage of the display 

area of the 3840x2160 area. The area of the selected ratio is indicated 
by the marker.

Line Width

Thick
Normal
Thin

Sets the width of the grid marker line.

Line Color

White, Red, Green, 
Blue, Yellow, Cyan, 
Magenta, Gray

Sets the color of the grid marker line.

Line Brightness

High, Low, Half

Sets the brightness of the grid marker line.

Содержание DP-V1830

Страница 1: ...ing the safety and handling precautions Reading this guide will help you learn to use the video display properly Store this guide safely so that you can use it in the future English Instruction Manual Operation Guide Video Display Firmware ver 1 0 ...

Страница 2: ...GPI terminal 17 Operating the video display using an external device LAN terminal 18 OSD Menu 19 Adjustment 19 Channel Settings 34 Display Settings 37 Audio Settings 39 Marker Settings 40 Function Settings 47 Picture Function Settings 56 Network IMD Settings 60 System Settings 61 Signal Information 68 System Information 68 Supported Signal Format 69 Image Frame Display 83 Error Messages 86 Trouble...

Страница 3: ...nce information CAUTION Indicates an item you must observe Note Indicates a note Adjustment Picture Mode Pressing the MENU button shows the OSD Menu levels You can move between the items and select from them Trademarks HDMI HDMI logo and High Definition Multimedia Interface are trademarks or registered trademarks of HDMI Licensing Administrator Inc in the U S and other countries VESA is a register...

Страница 4: ...the OSD menu or moves up one level in a menu RESET button Resets the items to be adjusted using the slider and entered characters Jog dial or rotation Used to move to a different item and change settings Press Confirms settings or moves the selection frame up down 1 level 1 Open the OSD menu Press the MENU button 2 Select the Main Menu Select the Main Menu item using the jog dial and press it to d...

Страница 5: ...onds The settings that cannot be set are grayed out The following functions can be returned to their factory default settings or their anchor point 7 by pressing the RESET button after adjusting the image quality Luminance Brightness Chroma HDR Range Power Saturation Offset Slope When Picture Mode User 1 9 When executing calibration pressing the RESET button while adjusting the image quality will ...

Страница 6: ... jog dial The indication changes to RGB R G and B Selecting RGB will allow you to adjust RGB as a whole 4 When adjustments are completed press the jog dial The screen returns to the original OSD menu Color temperature detailed settings xy values 1 Select Adjustment Color Temperature 2 Select Custom xy You can set x and y individually using the jog dial 3 Select either x or y The color map is displ...

Страница 7: ...urn to their factory default values Enlarging the display Zoom function 38 The zoom display position can be adjusted and the zoom magnification 2x 4x 8x can be selected 1 Select Display Settings Zoom 2 Select Zoom Preset Select a preset zoom display 3 Select Position The zoom adjustment screen is displayed To move the display position Move the jog dial or rotation To return to the center Press the...

Страница 8: ...o video metadata HDMI 28 1 Select Adjustment Picture Mode User 1 User 9 2 Select Adjustment Detail Settings HDMI Link Automatic Adjustment Select On See HDMI Link 28 for the configurable settings Note When automatic changing of image quality according to video resolution 4K 2K or SDI metadata is set information showing which resolution 4K 2K etc is selected will be displayed at the top right of th...

Страница 9: ...o Display Refer to the Canon website for the file format and how to create the LUT file Up to 1000 LUT import files are recognized You can delete the imported LUT as well as rename the LUT 26 The configuration of LUT files cube format is shown below LUT filename Type of characters that can be used One byte alphabetical characters and numbers only No of characters that can be used Up to 64 characte...

Страница 10: ...Filename The factory default is dinfo_dpv dat Number of the product name You can change the name of the file to be exported to the USB memory within 16 one byte characters including alphabetical characters numbers and symbols Importing 1Select Target from USB or User 1 to User 3 Specify the destination to save the file to be imported 2Select Filename when USB is selected 3In Settings select All or...

Страница 11: ...t Date Time 61 This section describes how to set the video display Date Time The video display Date Time will be reset if the power cord is not connected for approximately 20 days 1 Select System Settings Date Time A screen to input the Date Time appears 2 Set the Date Time The selection frame moves and numbers change as you operate the jog dial Repeat until you complete setting the year month dat...

Страница 12: ...ric characters A to Z a to z 0 to 9 Symbols _ space Characters that cannot be entered are automatically skipped 3 Repeat steps 1 and 2 until the desired text has been input 4 Press the jog dial when you are finished The selection frame moves to OK 5 Check the content and press the jog dial to confirm the settings Reference When selecting Cancel or pressing MENU button before selecting OK the setti...

Страница 13: ... default F button Normal mode ALT mode F1 Picture Mode CDL User LUT F2 Brightness CDL SOP SAT F3 TC ALM CDL User LUT Bypass F4 WFM VEC Single Input Dual View F5 Frame Hold False Color F6 Pixel Value Check Range Check F7 Zoom Preset 2020 Outside of Gamut View F8 Volume Compare View Reference Holding the F button down will display the function selection screen and you can set the function you wish t...

Страница 14: ...s on the video display and switch channels instantly 1 Select System Settings Function Channel Button Channel Button The button selection screen will be displayed 2 Select the button name and press the jog dial 3 Select the channel to assign See Channel Settings 34 for the configurable settings 4 Press the jog dial The setting is confirmed ...

Страница 15: ...ormat Automatic Automatic Automatic Automatic Automatic Audio Input Automatic Automatic Automatic Automatic Automatic Channel Name Blank Blank Blank Blank Blank Picture Mode Type Normal Normal Normal 4K 2K Normal Picture Mode Picture Mode L Resolution 4K ITU R BT 709 ITU R BT 709 User 2 2020 HLG User 1 2020 PQ User 1 2020 PQ Picture Mode R Resolution 2K ITU R BT 709 Payload UHD PQ User 1 2020 PQ U...

Страница 16: ...L Resolution 4K User 1 2020 PQ User 2 2020 HLG User 2 2020 HLG User 2 2020 HLG ITU R BT 709 Picture Mode R Resolution 2K ITU R BT 709 Payload UHD PQ User 1 2020 PQ UHD HLG User 2 2020 HLG UHD ITU R BT 2020 709 PQ 709 HLG 709 ITU R BT 709 VANC Unknown Camera CINEMA EOS SYSTEM CINEMA EOS SYSTEM ARRI User 6 VARICAM User 7 Single Input Dual View Automatic Automatic Off Automatic Off Separator Off Off ...

Страница 17: ...gnal is synchronized Operating the video display using an external device GPI terminal You can operate the video display using an external device connected to the GPI terminal and execute the functions registered in each pin Remote operation is possible only when the video display is turned on Pin layout for GPI terminal Pin No Signal Factory default 1 Pin1 CH1 2 Pin2 CH2 3 Pin3 CH3 4 Pin4 Time Co...

Страница 18: ...erminal 2 Set SCREEN and INDEX to 0x0000 in the TSL Protocol settings 3 Select Network IMD Settings In Monitor Display 4 Select Control TSL Ver 5 00 This will allow operation from an external control device and display characters and tally lights 5 Select Position Top or Bottom This sets the position where characters and tally lights will be displayed Note When Multi View Dual or Multi View Quad i...

Страница 19: ...he ideal mode for displaying images captured with Cinema EOS cameras Using Camera Link you can have the image quality setting change automatically Automatic Adjustment CINEMA EOS 52 ACESproxy ver 1 0 1 A mode to display ACESproxy videos in optimum gamma EOTF and color gamut ACESproxy ver 1 0 1 cannot be set when Channel Settings Picture Mode Type are 4K 2K or Automatic Luminance 0 to 1000 0 Adjust...

Страница 20: ...cted at the same time When Gain R G B or Bias R G B value is adjusted an asterisk is displayed by color temperature preset mode The color coordinates x y are just a guide and not guaranteed absolute values Color Gamut ITU R BT 709 ITU R BT 2020 Adobe RGB DCI P3 Native Cinema Gamut to 709 Cinema Gamut to 2020 Cinema Gamut to DCI S Gamut3 to 709 S Gamut3 to 2020 S Gamut3 to DCI S Gamut3 Cine to 709 ...

Страница 21: ... Hybrid Log Gamma This method processes the system gamma for the Y signal Compliant with ITU R BT 2100 Then the system gamma value will be displayed in the Setting Options on the menu screen Not settable in the following cases When ACESproxy ver 1 0 1 is selected in Picture Mode When CDL User LUT ARRI Rec2100 PQ 1K 100 ARRI Rec2100 HLG 1K 200 VARICAM V Log to V 709 RED Log3G10 to 709 1886 RED Log3...

Страница 22: ...E ST 2084 PQ as an example When set at 1000 those areas that exceed 1 000 cd m2 are clipped and those that are 1 000 cd m2 or below are assigned to the dynamic range of the video display When displaying an image with a PQ of 1 000 cd m2 you can check the entire dynamic range of the image Also when displaying an image with a PQ of 4 000 cd m2 you can check the image up to 1 000 cd m2 When set at 40...

Страница 23: ...d Full or Limited is set automatically depending on HDMI signal information When SDI is selected the setting is configured according to the settings for Picture Mode Color Gamut and Gamma EOTF 30 Operations when Format is set to ICtCp are described below When Color Range is set to other than Full Wave Form Monitor will display only a signal set with Color Range Output Transform ITU R BT 709 ITU R ...

Страница 24: ...t to Cinema Gamut to XXX or S GamutXXX When Gamma EOTF is set to Canon Log Canon Log 2 or Canon Log 3 When 2020 Constant Luminance is set to Constant When the Format signal method is set to ICtCp or XYZ l When CDL 1 8 is selected Power 0 50 to 4 00 1 00 Adjusts the Gamma of the image 0 01 increments Saturation 0 000 to 2 000 1 000 Adjusts the color saturation of the image 0 001 increments Offset 1...

Страница 25: ...ted Select a preset of the 3D LUT 3D LUT Selects the User LUT 3D LUT to apply and imports an external LUT 3D LUT 3D LUT 3D LUT 1 to 3D LUT 8 Off Select the 3D LUT preset saved in one of User LUT 1 8 LUT Import Same as Detail Settings LUT Import LUT Name LUT Delete 26 Cannot be set when 3D LUT Off LUT Name LUT Delete Color Range Automatic Manual Sets the method of color range conversion performed b...

Страница 26: ...s are stored until the video display is turned off Bypass is set to Off in the following cases Picture Mode has been changed When the CDL User LUT setting has been changed Picture Function Settings Compare View Enable settings have been changed User LUT Preset Name You can change the name of User LUT 1 8 within 24 characters including one byte alphabetical characters numbers and symbols Detail Set...

Страница 27: ...converted and then converted into RGB signals Non constant Luminance YUV signals are converted into RGB signals without changing gamma 0 45 Not settable in the following cases When Gamma EOTF is set to Canon Log Canon Log 2 or Canon Log 3 When the Format signal method is set to ICtCp or XYZ 2020 Gamut Mapping Gamut Mapping Clipping When Picture Mode or Color Gamut ITU R BT 2020 Gamut Mapping Mappi...

Страница 28: ...R BT 2020 Adobe RGB DCI P3 User 1 2020 PQ User 2 2020 HLG User 3 DCI PQ User 4 DCI PQ D65 User 5 User 9 Select Picture Mode Copy from User 1 9 Select from other than the currently set mode Execute Performs copy Picture Mode Name You can change the name of User 1 9 within 24 characters including alphabetical characters numbers and symbols Anchor Adjustment OK Cancel Temporarily saves parameters for...

Страница 29: ... 2020 1 0 2 2 2 35 2 4 2 6 ITU R BT 1886 SMPTE ST 2084 PQ Hybrid Log Gamma Canon Log Canon Log HDR Canon Log 2 Canon Log 2 HDR Canon Log 3 Canon Log 3 HDR S Log2 HDR S Log3 HDR Adobe RGB 1 0 2 2 2 35 2 4 2 6 ITU R BT 1886 DCI P3 1 0 2 2 2 35 2 4 2 6 ITU R BT 1886 SMPTE ST 2084 PQ Canon Log Canon Log HDR Canon Log 2 Canon Log 2 HDR Canon Log 3 Canon Log 3 HDR S Log2 HDR S Log3 HDR Native 1 0 2 2 2 ...

Страница 30: ... R BT 2020 SMPTE ST 2084 PQ ARRI Rec2100 HLG 1K 200 ITU R BT 2020 Hybrid Log Gamma VARICAM V Log to V 709 ITU R BT 709 2 2 RED Log3G10 to 709 1886 ITU R BT 709 ITU R BT 1886 RED Log3G10 to 2020 PQ ITU R BT 2020 SMPTE ST 2084 PQ 2020 PQ to 2020 SDR ITU R BT 2020 2 4 2020 PQ to 709 SDR ITU R BT 709 2020 HLG to 709 HLG ITU R BT 709 User selectable 2020 HLG to 709 SDR ITU R BT 709 2 4 Parameter of HDM...

Страница 31: ...023 1023 1023 When D65 Custom 1000 1023 1023 Bias R G B 0 0 0 0 Color Gamut ITU R BT 709 ITU R BT 2020 Adobe RGB DCI P3 Gamma EOTF 2 2 2 2 2 2 2 6 Color Range Automatic Automatic Automatic Automatic Output Transform Output Transform Surround CDL User LUT Off Off Off Off YCbCr Color Matrix Automatic Automatic Automatic Automatic 2020 Constant Luminance Non constant Luminance Non constant Luminance ...

Страница 32: ...020 DCI P3 DCI P3 ITU R BT 709 Gamma EOTF SMPTE ST 2084 PQ Hybrid Log Gamma SMPTE ST 2084 PQ SMPTE ST 2084 PQ 2 2 Color Range Automatic Automatic Automatic Automatic Automatic Output Transform Output Transform Surround CDL User LUT Off Off Off Off Off YCbCr Color Matrix Automatic Automatic Automatic Automatic Automatic 2020 Constant Luminance Non constant Luminance Non constant Luminance Non const...

Страница 33: ...B 1023 1023 1023 When D65 Custom 1000 1023 1023 Bias R G B 0 0 Color Gamut ITU R BT 2020 Gamma EOTF Canon Log 2 HDR Color Range Automatic Output Transform DCI P3 Output Transform Surround Dark Surround CDL User LUT Off Off YCbCr Color Matrix Automatic Automatic 2020 Constant Luminance Non constant Luminance Non constant Luminance 2020 Gamut Mapping Clipping Clipping HLG System Gamma Automatic Auto...

Страница 34: ...Settings that can be set differ according to the input signal HDMI This is fixed to Automatic Image Division When Input Configuration 12 3G HD SDI Sets the display method when using either Quad Input or Dual Input Two division methods Square Division and 2 Sample Interleave are supported for 4K video signals Automatic Select Input Signal When Quad Input Square Division 2 Sample Interleave Select I...

Страница 35: ...ST 2084 PQ or Hybrid Log Gamma If you need to use the ICtCp format for SDI signals select any of the following to match the signal 4 2 2 ICtCp 10 bit 4 2 2 ICtCp 12 bit 4 4 4 ICtCp 10 bit 4 4 4 ICtCp 12 bit To use 4 4 4 XYZ 10 bit for SDI signals select 4 4 4 XYZ 10 bit Then signals will be processed as signals where XYZ data is included in RGB data output in 4 4 4 RGB 10 bit format With SDI signa...

Страница 36: ...wing standard SMPTE ST 2082 10 2018 12G SDI SMPTE ST 2081 10 2018 6G SDI SMPTE ST 425 1 2017 3G SDI Single Link Square Division SMPTE ST 425 3 2019 3G SDI Dual Link 2SI SMPTE ST 425 5 2019 3G SDI Quad Link 2SI SMPTE ST 292 1 2018 HD SDI Settings that can be set differ according to the input signal Input Configuration HDMI 4K 2K and Automatic cannot be set in Type Single Input Dual View Automatic O...

Страница 37: ...wing cases the maximum magnification is 200 even if Automatic is selected When Peaking False Color or Range Check Enable is set to an option other than Off In the following cases images are shown in reduced size when Automatic is selected 4096 2160 When Image Division Square Division is selected 2048 1080 When Image Division Multi View Dual is selected Anamorphic x2 0 x1 8 x1 5 x1 33 Off Set when ...

Страница 38: ... Zoom Preset Zoom 1 Zoom 2 Zoom 3 Off Sets the zoom display method There are three presets Magnification x2 x4 x8 Sets the display scale of zoom Position The zoom adjustment screen is displayed Use the jog dial to adjust the display position Frame Hold On Off Pauses the video If the image quality setting is changed while the video is paused the setting may not change correctly In the case of an in...

Страница 39: ...ly CH R SDI CH1 to CH16 CH2 CH L HDMI CH1 to CH8 CH1 CH R HDMI CH1 to CH8 CH2 Volume speaker 0 to 100 30 Sets the volume of the speaker or headphone AUDIO OUT terminal Increments of 1 When the headphone is connected to the headphone terminal output from the speaker stops The AUDIO OUT terminal can be used at the same time as the speaker The volume of the headphone and AUDIO OUT terminal is the sam...

Страница 40: ...ask Black Half Off Switches the mask color Mask is the blanking area outside the range of the marker Black Half 50 gray Off Turns mask off Aspect Ratio 16 9 15 9 14 9 13 9 4 3 2 39 1 2 35 1 1 896 1 1 85 1 1 66 1 Variable When Variable is selected 1 00 1 to 3 00 1 Sets the aspect ratio of the aspect marker The aspect ratio can be entered as a numeric value when you select Variable 0 01 1 increments...

Страница 41: ...he aspect ratio of the safety zone marker Variable The aspect ratio can be entered as a numeric value 0 01 1 increments The grayed out slider becomes active and can be used to set the aspect ratio When Area Size is set to Variable dot you cannot select Aspect Ratio Area Size 80 85 88 90 93 95 Variable Variable dot Sets the safety zone marker area size Variable The grayed out Rate becomes active Va...

Страница 42: ...ety zone marker line Line Color White Red Green Blue Yellow Cyan Magenta Gray Sets the color of the safety zone marker line Line Brightness High Low Half Sets the brightness of the safety zone marker line H Position 1920 to 1920 Adjusts the marker horizontal position with the set aspect and size in increments of 2 V Position 1080 to 1080 Adjusts the marker vertical position with the set aspect and...

Страница 43: ...ectangle in increments of 2 Width dot 10 to 3840 Sets the width of the rectangle in increments of 2 Height dot 10 to 2160 Sets the height of the rectangle in increments of 2 Mask Black Half Off Switches the mask color in the marker Line On Off When Mask Black or Half Turns On Off the outlines of the rectangular box Line Width Thick Normal Thin When Mask Off or Line On Sets the width of the area ma...

Страница 44: ...ck the horizontal and vertical position When Distance dots When Distance UHD Enable On Off Switches the grid marker On Off Distance 160 dots 240 dots 320 dots 80 UHD 83 UHD 85 UHD 88 UHD 90 UHD 93 UHD 95 UHD Sets the horizontal and vertical line distance 160 240 320 dots Sets the line distance to the selected number of dots 80 UHD to 95 UHD This indicates the percentage of the display area of the ...

Страница 45: ...put Dual View 3 The marker is not displayed in the following cases When an enlarged image is displayed Details of the factory default settings for marker preset Item Factory default Marker 1 to 4 Marker 5 Aspect Marker Enable Off On Mask Off Half Aspect Ratio 16 9 16 9 When Variable is selected 1 78 1 1 78 1 Line On On Line Width Normal Normal Line Color White Gray Line Brightness Low Half Safety ...

Страница 46: ... Line On On Line Width Normal Normal Line Color White Gray Line Brightness Low Half Center Marker Enable Off On Size Middle Small Line Width Normal Normal Line Color White White Line Brightness Low Half Grid Marker Enable Off On Distance 160 dots 85 UHD Line Width Normal Normal Line Color White White Line Brightness Low Half When Safety Zone Marker 2 is used When Area Marker 2 is used ...

Страница 47: ...y position This setting becomes invalid in the Multi View Dual display When Top Left or Top Right is selected When set to Audio Level Meter Enable On the time code will not be displayed H Offset 0 to 1332 0 Adjusts the display position of the time code When Multi View Dual is displayed the H Offset setting is invalid Type String Display On Off Sets display of VITC LTC strings Brightness Normal Hal...

Страница 48: ...d toward the center of the screen This prevents the indication from overlapping with the banner Peak Hold On Off One second of audio signal at the peak is kept Reference Level 40 to 0 20 Sets the reference level Brightness Normal Low Half Sets brightness for the audio level meter Wave Form Monitor1 Configures various settings for the wave form monitor On the wave form monitor the horizontal axis s...

Страница 49: ...Range Limited outside the limited range is tinted Automatic Sets in accordance with the Gamma EOTF and Color Range settings Reference Level High 468 to 1023 Sets the reference display level high Reference Level High is not displayed when 1023 is selected Reference Level Low 0 to 468 Sets the reference display level low Reference Level Low is not displayed when 0 is selected Color Sets the signals ...

Страница 50: ...on When Gamma EOTF is set to SMPTE ST 2084 PQ or Hybrid Log Gamma the brightness value is also displayed The non constant value is displayed even if 2020 Constant Luminance is set to Constant Enable On Off Switches the pixel value check On Off H Position 1 to 4096 960 Sets the pixel position horizontal V Position 1 to 2160 540 Sets the pixel position vertical Reset Position Normal Around Peak Lumi...

Страница 51: ...is displayed can be adjusted with In Monitor Display Position Control On Off Sets whether Signal Monitoring is used or not Error Hold On No time out On 5 sec Off Sets the length of time for displaying errors when they are detected On No time out Errors continue to be displayed To hide the displayed error press the RESET button when closing the OSD menu On 5 sec The displayed error will disappear 5...

Страница 52: ...d in the Select File screen Finish Playback File Finishes playback Camera Link Sets the functions to link with Cinema EOS cameras and ARRI Panasonic cinema cameras Automatic Adjustment CINEMA EOS When Picture Mode CINEMA EOS SYSTEM Input Configuration 12 3G HD SDI Sets whether or not to link to the camera s image quality setting On Off Refer to the Setting Values Correspondence Table when Color Ga...

Страница 53: ...when the information has changed On Camera information is always displayed Off Camera information is not displayed Not displayed when Multi View Quad Multi View Dual 1 The information display functions that can be displayed vary depending on the video display s settings or the input signal status Time Code Audio Level Meter Wave Form Monitor Vector Scope Pixel Value Check When Frame Hold is On Dur...

Страница 54: ... BT 2020 ITU R BT 2020 D65 DCI P3 DCI P3 DCI P3 Cinema Gamut Cinema Gamut to 709 D65 Cinema Gamut to 2020 D65 Cinema Gamut to DCI DCI P3 Cinema EOS cameras Canon display Gamma EOTF Gamma EOTF HDR Range Canon Log Canon Log HDR Canon Log 2 Canon Log 2 HDR Canon Log 3 Canon Log 3 HDR ST 2084 PQ SMPTE ST 2084 PQ 1000 Normal BT 709 2 2 EOS Std Wide DR 2 4 DCI P3 2 6 ...

Страница 55: ...00 PQ 1K 100 ARRI Rec2100 PQ 1K 100 ITU R BT 2020 SMPTE ST 2084 PQ 1000 Rec2100 HLG 1K 200 ARRI Rec2100 HLG 1K 200 ITU R BT 2020 Hybrid Log Gamma 3D LUT 1 8 User LUT 1 8 Parameter of Panasonic Cinema camera and Canon displays Panasonic Cinema camera Canon display Color Space Display Color Gamut CDL User LUT Color Gamut Gamma EOTF HDR Range V 709 ITU R BT 709 2 2 V Log V Log to V 709 VARICAM V Log ...

Страница 56: ... be colored Color White Red Green Blue Yellow Cyan Magenta Sets the color to be used False Color1 Displays different colors for the video s brightness levels to make it easier to check the exposure and brightness distribution Customizes the false color and sets it to false color 1 or false color 2 Enable False Color 1 False Color 2 Off Switches between False Color display mode and non display Type...

Страница 57: ... ST 2084 PQ or Hybrid Log Gamma outside the range of the Color Range and HDR Range settings is tinted Manual Only areas that exceed the range set at SMPTE ST 2084 PQ or Hybrid Log Gamma are tinted SMPTE ST 2084 PQ 100 to 10000 1000 When Over Range Manual Sets the tint color range 100 to 1000 10 increments 1000 to 4000 100 increments 4000 to 10000 1000 increments Hybrid Log Gamma 100 to 1000 1000 W...

Страница 58: ...e image to compare Automatic HDR SDR when Adjustment CDL User LUT is Off otherwise set at CDL User LUT HDR SDR HDR and SDR images are displayed CDL User LUT The image on which CDL or User LUT is applied is displayed only in the left screen Not settable in the following cases When Color Gamut is set to Cinema Gamut to XXX or S GamutXXX When Gamma EOTF is set to Canon Log Canon Log 2 or Canon Log 3 ...

Страница 59: ...c User LUT Sets the comparison target 1 Peaking False Color Range Check 2020 Outside of Gamut View Compare View Operation in accordance with the configuration of the video display Peaking False Color Range Check 2020 Outside of Gamut View Compare View When Monochrome Blue Only Red Off Green Off or Blue Off On During execution of Playback File under Screen Capture Can be displayed set Cannot be dis...

Страница 60: ...ol TSL Ver 5 00 Manual Off Sets whether or not to receive the control signal from the connected device Manual Select to input the characters on this video display Does not receive a control signal from the connected device Position Top Bottom This sets whether the characters and tally lights will be displayed at the top or the bottom Manual Display Type Automatic Single Dual A B Dual C D Quad A B ...

Страница 61: ...to 7 This function will not work correctly in the following cases If the same function is assigned to multiple pins If the changes to this menu item setting and the pin assignments were made when the pins were shorted Type Level Short Edge Level Operates while shorted Short Edge Switches between operate do not operate for each short Pin1 Pin7 Assigns functions in each GPI pin 17 Functions that can...

Страница 62: ...adjusted to suit the luminance when Automatic is selected You can choose between High Low and High Middle adjustment ranges Protect Settings Locks the settings so they cannot be changed When you press the MENU button Signal System Information appears but other operations are grayed out because they are locked Password Set a password to protect settings Use a four digit number 0000 to 9999 The init...

Страница 63: ...nal Turn off power and the power will be turned off The power is not automatically turned off when this function is set to Off Power Indicator Button LED Settings Power Indicator Brightness Off 1 to 5 3 Adjusts the brightness of the power indicator on the main unit The greater the number the higher the brightness Display Button LED On Off Sets the F buttons and the lamp on the face Button Name Lig...

Страница 64: ...ort Import Target USB User 1 to User 3 Specify the save destination for the file to be imported Filename Displays files with the extension dat so you can select from among them Settings All Adjustment Channel Settings Display Settings Audio Settings Marker Settings Function Network System Settings Select the settings to import Execute Performs import Power on Setting Last memory User 1 to User 3 Y...

Страница 65: ...Settings Peaking Enable False Color Enable Range Check Enable 2020 Outside of Gamut View Enable Monochrome Blue Only Red Off Green Off Blue Off Compare View Enable System Settings Date Time Export Import Power on Setting User LUT data cannot be exported or imported to User 1 to User 3 under Target The main menu cannot be imported or exported between the video display and other products ...

Страница 66: ...EOTF Anamorphic HDR Range Zoom Preset Gain Zoom 1 Bias Zoom 2 xy Zoom 3 Picture Mode ITU R BT 709 Frame Hold ITU R BT 2020 Audio Settings CH L Adobe RGB CH R DCI P3 Volume User 1 2020 PQ Mute User 2 2020 HLG Marker Settings1 Marker Preset User 3 DCI PQ Marker 1 User 4 DCI PQ D65 Marker 2 User 5 User 9 Marker 3 CINEMA EOS SYSTEM Marker 4 ACESproxy ver 1 0 1 Marker 5 CDL User LUT CDL User LUT CDL RG...

Страница 67: ... Color False Color 1 False Color 2 Range Check Range Check 1 Range Check 2 2020 Outside of Gamut View Monochrome Blue Only Red Off Green Off Blue Off Compare View System Settings Signal Information Hide OSD2 1 When any marker settings are changed using an F button those changes will be applied to Enable under the currently selected Marker Preset 2 Hide OSD is a function to hide all OSD When On is ...

Страница 68: ...1 3G SDI 4 4 4 4 GBRA 10 bit 24 00 Progressive Progressive Transport Picture Single Link_1 UHD SDR TV Channel Input Configuration Format Resolution Picture Rate I P PsF Pixel Encoding Color Depth Matrix Range EOTF Max Luminance Peak Avg Display Luminance Max Min White Point Primary Color Red Primary Color Green Primary Color Blue CH4 HDMI Automatic 4096x2160 60 00P 4 2 2 YCbCr 10 bit ITU R BT 709 ...

Страница 69: ...00 Hz 1920x1080P 23 98 24 00 Hz 1920x1080PsF 23 98 24 00 Hz 2048x1080P 29 97 30 00 Hz SMPTE 292 1 SMPTE 428 9 SMPTE 428 19 SMPTE 2048 2 2048x1080PsF 29 97 30 00 Hz 2048x1080P 25 00 Hz 2048x1080PsF 25 00 Hz 2048x1080P 23 98 24 00 Hz 2048x1080PsF 23 98 24 00 Hz 3G SDI Level A 1280x720P 59 94 60 00 Hz 4 4 4 RGB 4 4 4 YCbCr 10 bit SMPTE 425 1 SMPTE 296 1280x720P 50 00 Hz 4 4 4 RGB 4 4 4 YCbCr 10 bit 1...

Страница 70: ...2 bit 4 4 4 YCbCr 12 bit 4 4 4 YCbCr 10 bit SMPTE 425 1 SMPTE 274M 4 2 2 YCbCr 12 bit 1920x1080P 25 00 Hz 4 4 4 RGB 4 4 4 YCbCr 12 bit 10 bit 4 2 2 YCbCr 12 bit 1920x1080PsF 25 00 Hz 4 4 4 RGB 10 bit 12 bit 4 4 4 YCbCr 12 bit 4 4 4 YCbCr 10 bit SMPTE 425 1 SMPTE 274M 4 2 2 YCbCr 12 bit 1920x1080P 23 98 24 00 Hz 4 4 4 RGB 4 4 4 YCbCr 12 bit 10 bit 4 2 2 YCbCr 12 bit 1920x1080PsF 23 98 24 00 Hz 4 4 ...

Страница 71: ... 12 bit 2048x1080P 25 00 Hz 4 4 4 RGB 12 bit 10 bit SMPTE 425 1 SMPTE 428 9 SMPTE 428 19 SMPTE 2048 2 4 4 4 X Y Z 12 bit 4 4 4 YCbCr 12 bit 10 bit SMPTE 425 1 SMPTE 2048 2 4 2 2 YCbCr 12 bit 2048x1080PsF 25 00 Hz 4 4 4 RGB 12 bit 10 bit SMPTE 425 1 SMPTE 428 9 SMPTE 428 19 SMPTE 2048 2 4 4 4 X Y Z 12 bit 4 4 4 YCbCr 12 bit 10 bit SMPTE 425 1 SMPTE 2048 2 4 2 2 YCbCr 12 bit 2048x1080P 23 98 24 00 H...

Страница 72: ... bit 1920x1080PsF 29 97 30 00 Hz 4 4 4 RGB 4 4 4 YCbCr 12 bit 10 bit 4 2 2 YCbCr 12 bit 1920x1080P 25 00 Hz 4 4 4 RGB 4 4 4 YCbCr 12 bit 10 bit 4 2 2 YCbCr 12 bit 1920x1080PsF 25 00 Hz 4 4 4 RGB 4 4 4 YCbCr 12 bit 10 bit 4 2 2 YCbCr 12 bit 1920x1080P 23 98 24 00 Hz 4 4 4 RGB 4 4 4 YCbCr 12 bit 10 bit 4 2 2 YCbCr 12 bit 1920x1080PsF 23 98 24 00 Hz 4 4 4 RGB 4 4 4 YCbCr 12 bit 10 bit 4 2 2 YCbCr 12 ...

Страница 73: ...bit SMPTE 425 1 SMPTE 372 SMPTE 2048 2 4 2 2 YCbCr 12 bit 2048x1080P 25 00 Hz 4 4 4 RGB 12 bit 10 bit SMPTE 425 1 SMPTE 372 SMPTE 428 9 SMPTE 428 19 SMPTE 2048 2 4 4 4 X Y Z 12 bit 4 4 4 YCbCr 12 bit 10 bit SMPTE 425 1 SMPTE 372 SMPTE 2048 2 4 2 2 YCbCr 12 bit 2048x1080PsF 25 00 Hz 4 4 4 RGB 12 bit 10 bit SMPTE 425 1 SMPTE 372 SMPTE 428 9 SMPTE 428 19 SMPTE 2048 2 4 4 4 X Y Z 12 bit 4 4 4 YCbCr 12...

Страница 74: ...MPTE 372 SMPTE 274M 3840x2160P 25 00 Hz 3840x2160P 23 98 24 00 Hz 4096x2160P 29 97 30 00 Hz SMPTE 425 3 SMPTE 372 SMPTE 2048 2 4096x2160P 25 00 Hz 4096x2160P 23 98 24 00 Hz Quad Link HD SDI 3840x2160i 59 94 60 00 Hz 4 2 2 YCbCr 10 bit SMPTE 292 1 SMPTE 274M 3840x2160i 50 00 Hz 3840x2160P 29 97 30 00 Hz 3840x2160PsF 29 97 30 00 Hz 3840x2160P 25 00 Hz 3840x2160PsF 25 00 Hz 3840x2160P 23 98 24 00 Hz ...

Страница 75: ...YCbCr 12 bit 3840x2160PsF 29 97 30 00 Hz 4 4 4 RGB 10 bit 12 bit 4 4 4 YCbCr 12 bit 4 4 4 YCbCr 10 bit SMPTE 425 1 SMPTE 274M 4 2 2 YCbCr 12 bit 3840x2160P 25 00 Hz 4 4 4 RGB 4 4 4 YCbCr 12 bit 10 bit 4 2 2 YCbCr 12 bit 3840x2160PsF 25 00 Hz 4 4 4 RGB 10 bit 12 bit 4 4 4 YCbCr 12 bit 4 4 4 YCbCr 10 bit SMPTE 425 1 SMPTE 274M 4 2 2 YCbCr 12 bit 3840x2160P 23 98 24 00 Hz 4 4 4 RGB 4 4 4 YCbCr 12 bit...

Страница 76: ... SMPTE 425 1 SMPTE 2048 2 4 2 2 YCbCr 12 bit 4096x2160P 25 00 Hz 4 4 4 RGB 12 bit 10 bit SMPTE 425 1 SMPTE 428 9 SMPTE 428 19 SMPTE 2048 2 4 4 4 X Y Z 12 bit 4 4 4 YCbCr 12 bit 10 bit SMPTE 425 1 SMPTE 2048 2 4 2 2 YCbCr 12 bit 4096x2160PsF 25 00 Hz 4 4 4 RGB 12 bit 10 bit SMPTE 425 1 SMPTE 428 9 SMPTE 428 19 SMPTE 2048 2 4 4 4 X Y Z 12 bit 4 4 4 YCbCr 12 bit 10 bit SMPTE 425 1 SMPTE 2048 2 4 2 2 ...

Страница 77: ...2 bit 4096x2160P 59 94 60 00 Hz 4 2 2 YCbCr 10 bit SMPTE 425 5 SMPTE 428 9 SMPTE 428 19 SMPTE 2048 2 4096x2160P 50 00 Hz 4 2 2 YCbCr 10 bit 4096x2160P 47 95 48 00 Hz 4 2 2 YCbCr 10 bit 4096x2160P 29 97 30 00 Hz 4 4 4 RGB 4 4 4 YCbCr 12 bit 10 bit 4 4 4 X Y Z 4 2 2 YCbCr 12 bit 4096x2160P 25 00 Hz 4 4 4 RGB 4 4 4 YCbCr 12 bit 10 bit 4 4 4 X Y Z 4 2 2 YCbCr 12 bit 4096x2160P 23 98 24 00 Hz 4 4 4 RGB...

Страница 78: ...Cr 12 bit 3840x2160P 25 00 Hz 4 4 4 RGB 4 4 4 YCbCr 12 bit 10 bit 4 2 2 YCbCr 12 bit 3840x2160PsF 25 00 Hz 4 4 4 RGB 4 4 4 YCbCr 12 bit 10 bit 4 2 2 YCbCr 12 bit 3840x2160P 23 98 24 00 Hz 4 4 4 RGB 4 4 4 YCbCr 12 bit 10 bit 4 2 2 YCbCr 12 bit 3840x2160PsF 23 98 24 00 Hz 4 4 4 RGB 4 4 4 YCbCr 12 bit 10 bit 4 2 2 YCbCr 12 bit 4096x2160P 59 94 60 00 Hz 4 2 2 YCbCr 10 bit SMPTE 425 1 SMPTE 372 SMPTE 4...

Страница 79: ...t 10 bit SMPTE 425 1 SMPTE 372 SMPTE 2048 2 4 2 2 YCbCr 12 bit 4096x2160P 25 00 Hz 4 4 4 RGB 12 bit 10 bit SMPTE 425 1 SMPTE 372 SMPTE 428 9 SMPTE 428 19 SMPTE 2048 2 4 4 4 X Y Z 12 bit 4 4 4 YCbCr 12 bit 10 bit SMPTE 425 1 SMPTE 372 SMPTE 2048 2 4 2 2 YCbCr 12 bit 4096x2160PsF 25 00 Hz 4 4 4 RGB 12 bit 10 bit SMPTE 425 1 SMPTE 372 SMPTE 428 9 SMPTE 428 19 SMPTE 2048 2 4 4 4 X Y Z 12 bit 4 4 4 YCb...

Страница 80: ... 3840x2160P 25 00 Hz 4 4 4 RGB 4 4 4 YCbCr 12 bit 10 bit 4 2 2 YCbCr 12 bit 3840x2160P 23 98 24 00 Hz 4 4 4 RGB 4 4 4 YCbCr 12 bit 10 bit 4 2 2 YCbCr 12 bit 4096x2160P 59 94 60 00 Hz 4 2 2 YCbCr 10 bit SMPTE 425 5 SMPTE 372 SMPTE 428 9 SMPTE 428 19 SMPTE 2048 2 4096x2160P 50 00 Hz 4 2 2 YCbCr 10 bit 4096x2160P 47 95 48 00 Hz 4 2 2 YCbCr 10 bit 4096x2160P 29 97 30 00 Hz 4 4 4 RGB 4 4 4 YCbCr 12 bit...

Страница 81: ...10 4 2 2 YCbCr 12 bit 3840x2160P 25 00 Hz 4 4 4 RGB 4 4 4 YCbCr 12 bit 10 bit 4 2 2 YCbCr 12 bit 3840x2160P 23 98 24 00 Hz 4 4 4 RGB 4 4 4 YCbCr 12 bit 10 bit 4 2 2 YCbCr 12 bit 4096x2160P 25 00 Hz 4 4 4 RGB 4 4 4 YCbCr 12 bit 10 bit 4 4 4 X Y Z 4 2 2 YCbCr 12 bit 4096x2160P 23 98 24 00 Hz 4 4 4 RGB 4 4 4 YCbCr 12 bit 10 bit 4 4 4 X Y Z 4 2 2 YCbCr 12 bit 3840x2160P 59 94 60 00 Hz 4 2 2 YCbCr 10 b...

Страница 82: ...48x1080P 59 94 60 00 Hz 2048x1080P 50 00 Hz 2048x1080P 29 97 30 00 Hz 2048x1080P 25 00 Hz 2048x1080P 23 98 24 00 Hz 3840x2160P 59 94 60 00 Hz 4 4 4 RGB 8 bit 4 4 4 YCbCr 8 bit 4 2 2 YCbCr 12 bit 4 2 0 YCbCr 12 bit 10 bit 8 bit 3840x2160P 50 00 Hz 3840x2160P 29 97 30 00 Hz 4 4 4 RGB 12 bit 10 bit 8 bit 4 4 4 YCbCr 12 bit 10 bit 8 bit 4 2 2 YCbCr 12 bit 3840x2160P 25 00 Hz 3840x2160P 23 98 24 00 Hz ...

Страница 83: ... 00 P 23 98 24 00 PsF 47 96 48 00 P 25 00 PsF 50 00 P 29 97 30 00 PsF 59 94 60 00 P 23 98 24 00 P 47 96 48 00 P 25 00 P 50 00 P 29 97 30 00 P 59 94 60 00 P 50 00 P 50 00 P 59 94 60 00 P 59 94 60 00 P 2048x1080 23 98 24 00 PsF 47 96 48 00 P 25 00 PsF 50 00 P 29 97 30 00 PsF 59 94 60 00 P 23 98 24 00 P 47 96 48 00 P 25 00 P 50 00 P 29 97 30 00 P 59 94 60 00 P 47 95 48 00 P 47 95 48 00 P 50 00 P 50 0...

Страница 84: ...60 00 P 23 98 24 00 P 47 96 48 00 P 25 00 P 50 00 P 29 97 30 00 P 59 94 60 00 P 50 00 P 50 00 P 59 94 60 00 P 59 94 60 00 P 4096x2160 23 98 24 00 PsF 47 96 48 00 P 25 00 PsF 50 00 P 29 97 30 00 PsF 59 94 60 00 P 23 98 24 00 P 47 96 48 00 P 25 00 P 50 00 P 29 97 30 00 P 59 94 60 00 P 47 95 48 00 P 47 95 48 00 P 50 00 P 50 00 P 59 94 60 00 P 59 94 60 00 P Displaying same frame ...

Страница 85: ...7 30 00 P 59 94 60 00 P 1920x1080 25 00 P 50 00 P 1920x1080 23 98 24 00 P 47 96 48 00 P 2048x1080 59 94 60 00 P 59 94 60 00 P 2048x1080 50 00 P 50 00 P 2048x1080 29 97 30 00 P 59 94 60 00 P 2048x1080 25 00 P 50 00 P 2048x1080 23 98 24 00 P 47 96 48 00 P 3840x2160 59 94 60 00 P 59 94 60 00 P 3840x2160 50 00 P 50 00 P 3840x2160 29 97 30 00 P 59 94 60 00 P 3840x2160 25 00 P 50 00 P 3840x2160 23 98 24...

Страница 86: ...Check the USB memory Failed to import There is an error in the file to be imported Check the file No import file Check and ensure that the file has been saved to the USB memory or imported to User 1 to User 3 Screen Capture Failed to capture The USB memory may be defective or protected Check the USB memory Invalid Signal A screen displaying no video is being captured for example there is no signal...

Страница 87: ... for approximately 3 seconds CDL User LUT Bypass is on When CDL User LUT Bypass is turned On you cannot adjust Power Saturation Offset or Slope Invalid Password Enter the correct password No license This function cannot be used as the license file has not been applied Refer to the Canon website for detailed information USB memory USB memory is not connected Correctly connect the USB memory to the ...

Страница 88: ...splay power on If you use another power source check the input voltage of the DC power supply Invalid Voltage Turn off power The power has shut off as the DC power input voltage exceeded the operational threshold Check the input voltage of the DC power supply Power Saving No Signal Turn off power by Power Save function This indicates that there have not been any signals for the time set to Power S...

Страница 89: ...turned off when there were not any signals When Power Save is set to other than Off the video display s power is automatically turned off if the no video signal is input for a certain period of time Turn on the power again The power suddenly goes off when a DC power supply is used Depending on the model of DC power supply used the output voltage may decrease suddenly and even turn off 0 V output w...

Страница 90: ...s not set 62 Aspect Marker Safety Zone Marker or Area Marker does not appear A channel with no signal unsupported signal or with Input Configuration not set may be selected Check the signal 68 You forgot the password for Protect Settings Press the jog dial and the button while the video display is in standby The configuration will be reset to the state where no password is set The video display do...

Страница 91: ...me free software requires the acquirement of the source code of modules in order to distribute the executable form of those software modules For information on how to acquire the source code for free software such as these and confirming terms of the GPL LGPL and other license agreements please check with the distributor from whom the product was purchased License Agreement for this Product Obliga...

Страница 92: ... AND NONINFRINGEMENT IN NO EVENT SHALL THE DANIEL VEILLARD BE LIABLE FOR ANY CLAIM DAMAGES OR OTHER LIABILITY WHETHER IN AN ACTION OF CONTRACT TORT OR OTHERWISE ARISING FROM OUT OF OR IN CONNECTION WITH THE SOFTWARE OR THE USE OR OTHER DEALINGS IN THE SOFTWARE Except as contained in this notice the name of Daniel Veillard shall not be used in advertising or otherwise to promote the sale use or oth...

Страница 93: ... Software to deal in the Software without restriction including without limitation the rights to use copy modify merge publish distribute sublicense and or sell copies of the Software and to permit persons to whom the Software is furnished to do so subject to the following conditions The above copyright notice and this permission notice shall be included in all copies or substantial portions of th...

Страница 94: ...HALL THE REGENTS OR CONTRIBUTORS BE LIABLE FOR ANY DIRECT INDIRECT INCIDENTAL SPECIAL EXEMPLARY OR CONSEQUENTIAL DAMAGES INCLUDING BUT NOT LIMITED TO PROCUREMENT OF SUBSTITUTE GOODS OR SERVICES LOSS OF USE DATA OR PROFITS OR BUSINESS INTERRUPTION HOWEVER CAUSED AND ON ANY THEORY OF LIABILITY WHETHER IN CONTRACT STRICT LIABILITY OR TORT INCLUDING NEGLIGENCE OR OTHERWISE ARISING IN ANY WAY OUT OF TH...

Страница 95: ... Canon Log CanonLog 2 Canon Log 3 21 CDL Export CDL Import 11 CDL User LUT 24 Center Marker 44 Channel 61 Channel Button 61 Channel Name 35 Channel Order 48 Channel Settings 34 Chroma 19 Chromaticity Diagram 50 CINEMA EOS SYSTEM Picture Mode 19 Color Gamut 20 Color Range 23 Color Range User LUT 25 Color Temperature 6 20 Compare View 58 Copy Picture Mode 28 Custom xy Color Temperature 20 D Date Tim...

Страница 96: ...UT Preset 10 25 M MAC Address 68 Marker Preset 40 Marker Settings 40 MENU button 4 Metadata 8 Monochrome 58 Multi View Dual Quad 34 N Native Input Resolution Screen Scaling 37 Network IMD Settings 60 O Offset 24 OSD Brightness 62 OSD Menu 4 19 OSD Settings 62 Output Transform 23 Output Transform Surround 23 Over Range 57 P Password 62 Peak brightness 19 Peaking 56 Picture Function Settings 56 Pict...

Страница 97: ... 51 Single Input 34 Single Input Dual View 36 S Log2 S Log3 21 Slope 24 Speaker 39 Square Division 34 Subnet Mask 60 System Information 68 System Settings 61 T Test Pattern 51 Time Code 47 Troubleshooting 89 TSL Protocol 18 U Usage Time 68 User 1 9 19 User LUT 24 User LUT Preset Name 26 V Vector Scope 50 Video Position Multi View 38 VITC 47 Volume 39 W Wave Form Monitor 48 Y YCbCr Color Matrix 27 ...

Страница 98: ...ion USA http pro usa canon com CANON U S A INC http pro usa canon com support 855 4K CANON 855 452 2666 USA only UNITED KINGDOM Canon UK Ltd Unit 160 Centennial Park Centennial Avenue Elstree Hertfordshire WD6 3SG 020 7660 0186 Canon Inc 30 2 Shimomaruko 3 chome Ohta ku Tokyo 146 8501 Japan Canon Europa N V Bovenkerkerweg 59 1185 XB Amstelveen The Netherlands http www canon europe com ...

Отзывы: