


28
F-1-41
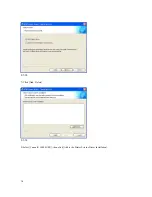
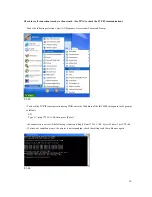
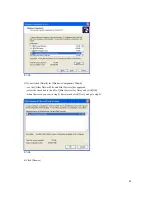
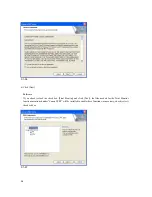
9) On [Completing the Windows Components Wizard] screen, click [Finish].
Click [Exit] on the Windows setup screen and remove the CD-ROM disk of the Windows XP.
F-1-42
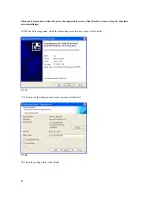
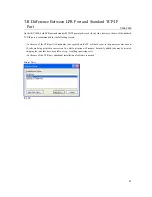
Changing from Standard TCP/IP Port to LPR Port (UNIX print service)
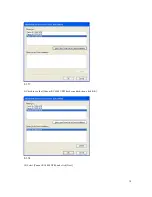
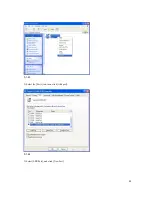
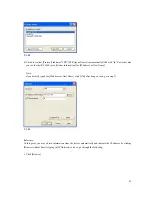
1) Right-click the printer icon; then, select and click [Properties] of the short cut menu.
Содержание Color Network UFR Printer Kit-C1
Страница 1: ...Mar 18 2004 UFR Quick Setup Guide for Windows XP Canon Color Color Network UFR Printer Kit C1 ...
Страница 2: ......
Страница 6: ......
Страница 8: ...Contents ...
Страница 9: ...Chapter 1 UFR Setup Guide for WinXP ...
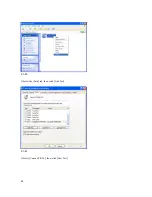
Страница 16: ...8 F 1 5 3 Select and click Network Connections F 1 6 4 Select and double click Local Area Connection ...
Страница 17: ...9 F 1 7 5 Click Properties F 1 8 6 Check the name of the network interface card and TCP IP ...
Страница 18: ...10 F 1 9 ...
Страница 24: ...16 F 1 19 11 Select Add Port and click Settings F 1 20 12 Select Standard TCP IP Port and click OK ...
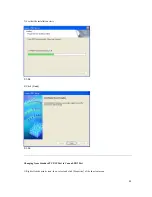
Страница 29: ...21 F 1 29 19 Click Yes Note If you click No installation will not start F 1 30 20 See that installation starts ...
Страница 35: ...27 F 1 39 7 Check that LPDSVC DL_ is displayed in File name field and click Open F 1 40 8 Click OK ...
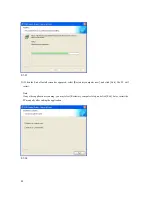
Страница 37: ...29 F 1 43 2 Select the Ports tab then click Add port F 1 44 3 Select LPR Port and click New Port ...
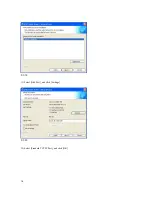
Страница 39: ...31 F 1 48 7 Click OK F 1 49 ...
Страница 40: ...32 ...
Страница 43: ...35 ...
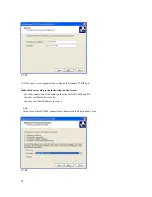
Страница 45: ...37 F 1 54 4 Click Next F 1 55 5 Select I accept the terms in the license agreement then click Next ...
Страница 48: ...40 F 1 60 2 Select the Ports tab then click Add Port F 1 61 3 Select Canon LPR 2 0 then click New Port ...
Страница 53: ...45 F 1 70 ...
Страница 59: ...51 LPR Setting F 1 79 ...
Страница 61: ...Mar 18 2004 ...
Страница 62: ......