


27
Configuring the Fax
Turn OFF the machine.
Wait for at least 10
seconds.
Turn ON the machine.
The machine will restart, and
the telephone line type will be
automatically set
*
.
Press [
▲
] to select <Yes>.
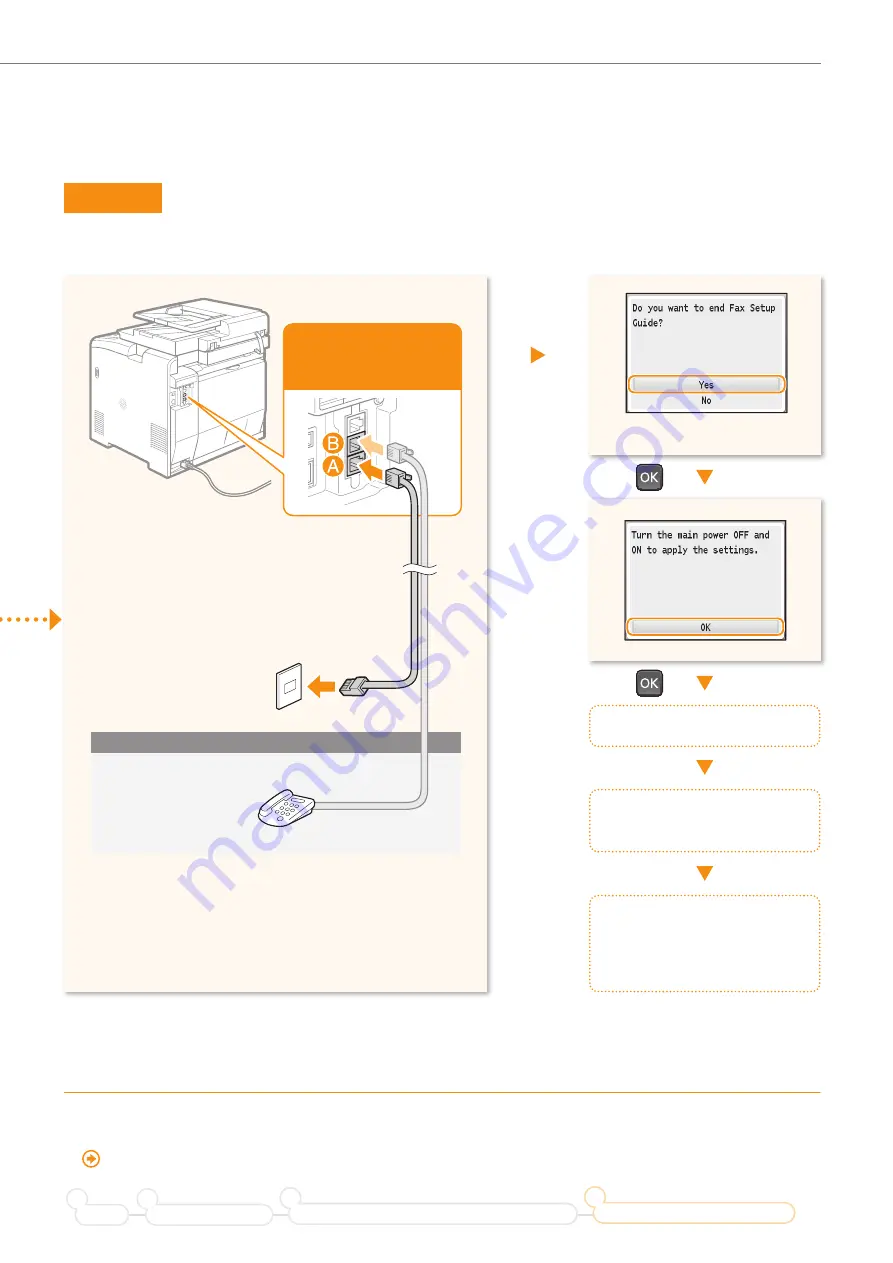
Set Up 3
Connecting the Telephone Line
* If the telephone line type is not automatically set:
See the Basic Operation Guide to set manually.
“Fax” → “Change the Fax Settings” → “Changing Fax Sending Settings” in the Basic Operation Guide
Preface
Installing the Machine
2
1
Connecting to a Computer and Installing the Drivers
3
Configuring and Connecting the Fax
4
To an analog
telephone line
You cannot use the
fax function if it is not
properly connected.
Telephone
(answering machine)
Connect if necessary


