


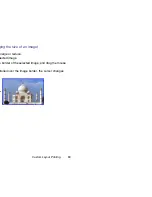


Fixed Photo Size Printing
88
7
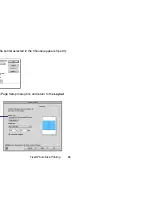
Click the
OK
button to exit the layout selection wizard.
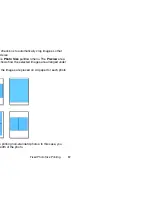
The
window appears where the selected images are arranged so that they fit
the paper size you specified.
Page Artwork
When printing using the fixed photo size printing option, you cannot change the
location and size of the images although the image cropping and text insertion
features are available.
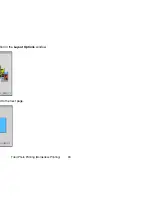
Starting Printing
Click the
button to begin printing.
Содержание BJC-S830D
Страница 1: ...V2...
Страница 3: ...3 Table of Contents 69 70 84 Printing 89 95 102 103 107 115 116 125 130 133 134...
Страница 6: ...6 Printing with ImageBrowser...
Страница 9: ...9 tation and size of paper on the image index list format or the perforated paper...
Страница 10: ...10 e also easy tasks Remember however you can rearrange the ected the Custom layout printing option...
Страница 15: ...15 wser and its functions ser Area ail oStitch er Area from Other Applications...
Страница 30: ...Slide Show 30 s in the Browser area as a slide show in full screen ns from the View menu for a slide show opens...
Страница 32: ...Slide Show 32 rea you want to display as a slide show...
Страница 33: ...Slide Show 33 e View menu entially displayed in full screen mode n the last image has been processed...
Страница 35: ...Slide Show 35 mage uspend the slide show en the Hides buttons check box in the Slide Show...
Страница 48: ...48 eBrowser to import download images from your Wizard Window...
Страница 69: ...69 features he Browser Window or the Camera Window and ng...
Страница 74: ...Custom Layout Printing 74 g printing n printing...
Страница 81: ...Custom Layout Printing 81 menu Select the font used Select the font size Specify text s justification...
Страница 83: ...Custom Layout Printing 83 n the Print window can also be added Refer to Inserting Text for more es n printing...
Страница 85: ...Fixed Photo Size Printing 85 inting option in the Layout Options window d to the next page...
Страница 90: ...Tiled Photo Printing Borderless Printing 90 tion in the Layout Options window d to the next page...
Страница 101: ...Canon Perforated Paper Printing 101 printing...
Страница 103: ...Starting Printing 103 or the page layout follow the steps below to start ter selected in the Chooser appears...
Страница 111: ...Index Printing 111 n d to the next page...
Страница 112: ...Index Printing 112 he printer selected in the Chooser appears Specify e Page Setup dialog box and return to the Layout...
Страница 115: ...115...
Страница 116: ...Editing the Layout Format 116 ption in the Layout Options dialog box you can t window...
Страница 121: ...Editing the Layout Format 121 the 90 degrees right 90 degrees left or 180 when clicking the ROTATE button otate image...
Страница 124: ...Editing the Layout Format 124 The image disappears can also delete the selected image by selecting ar from the Edit menu...
Страница 127: ...Inserting Text 127 the Print window within the frame blue The text the mouse...
Страница 133: ...133 lp formation about functions and operations It that you can read on the screen while operating the...
Страница 134: ...134 Index 81 128 129 37 28 28 37 67 87 92 8 13 49 52 55 66 51 91 19 25 40 46 89 110 55 58 12 21 22 119...
Страница 138: ...138 Index 103 113 114 73 128 61 69 103 63 62 121 62 29 7 59 94 67 59 30 34 65 37 39 39 94 100 63 17 4 44 58 109 113...
Страница 139: ...139 Index 89 91 5 89 90 94 36 4 10 25 63 63 36 39 20 36 21 106 9...


