5
1
2
3
4
5
6
7
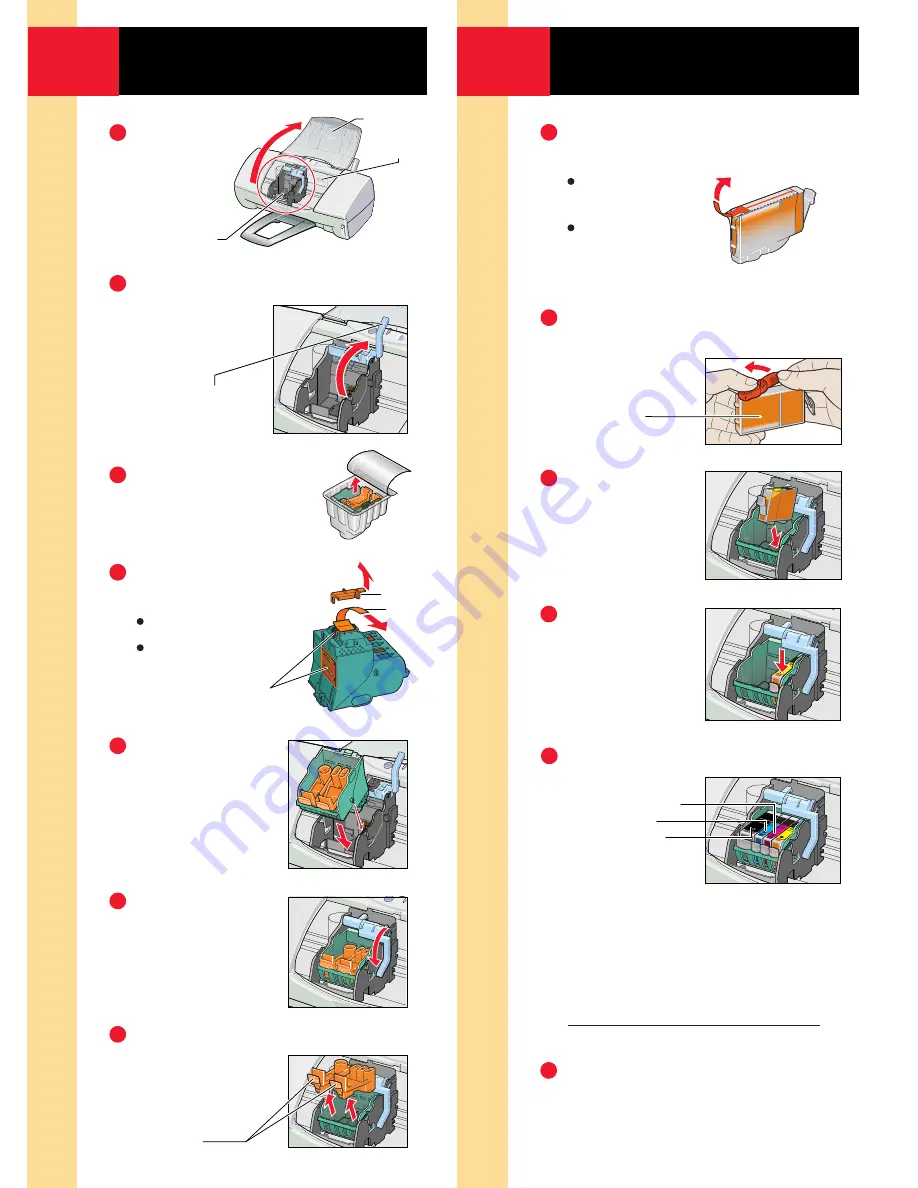
Insert the Four
Ink Tanks
Install the Canon
BJ
®
Cartridge
1
6
2
3
4
5
6
Lift the
front cover.
The cartridge
holder moves
to the left.
Raise the blue cartridge lock lever
on the
cartridge
holder.
Remove the cartridge
from its package.
Remove these
protective materials:
Orange cap
Orange tape
Set the
cartridge into
the cartridge
holder.
Lower the
blue cartridge
lock lever until
it locks into
place.
Press in on the
tabs to remove
the caps.
Front Cover
Cartridge Holder
Cap
Tape
Do Not Touch
these areas
Serial
Number
Lock Lever
Remove the two orange
protective
cartridge caps.
Twist off the orange
protective cap.
To prevent spills,
do not press
the side of
the ink tank.
Insert the
yellow ink
tank into the
right slot of
the cartridge.
Press down
on the top of
the ink tank
until it locks
into place.
Install the other 3 ink tanks
as shown.
Magenta (BCI-3M)
Cyan (BCI-3C)
Black (BCI-3BK)
Important!
Before you close the front cover, write down
the serial number (located inside the printer
to the right of the cartridge holder).
Close the front cover.
When the
POWER
light stops flashing,
the printer is ready.
Pick up the BCI-3Y (Yellow)
Ink Tank.
Pull up the
orange tape.
Remove the
plastic wrapper
from the tank.
Serial No. Date of Purchase


