manualshive.com logo in svg
background image

Windows

Macintosh

p. 10

p. 49

• This guide explains how to install the software programs and 

briefly introduces their functions and operating procedures. 

• Please read the software license agreement in this guide before 

using the software. By using the software, you agree to be 
bound by the terms of the agreement. 

Software Starter Guide

(For the Canon Digital Camera Solution Disk Version 20)

CDI-E150-010

xx04xxxx

© 2004 CANON INC.

PRINTED IN JAPAN

ENGLISH

Windows/Macintosh

Windows

Macintosh

Software Starter Guide For V

ersion 20

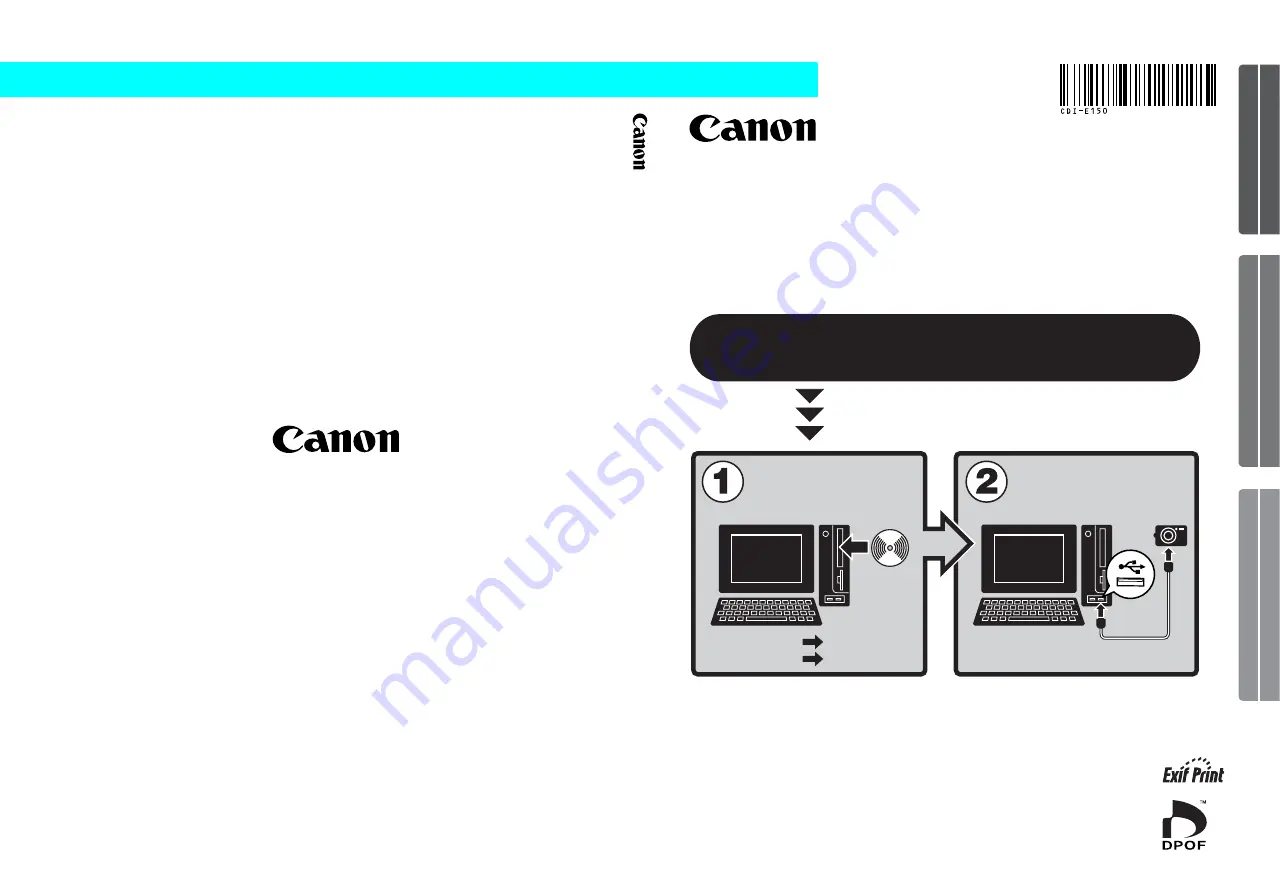
You must install the software bundled on the Canon 

Digital Camera Solution Disk before connecting the 

camera to the computer.

Install the software.

Connect the camera 

to the computer.

Содержание 9685A001AA - PowerShot G6 Digital Camera

Страница 1: ...are you agree to be bound by the terms of the agreement Software Starter Guide For the Canon Digital Camera Solution Disk Version 20 CDI E150 010 xx04xxxx 2004 CANON INC PRINTED IN JAPAN ENGLISH Windo...

Страница 2: ...Blvd Fremont CA 94538 Tel 510 440 9901 Mon Fri 8 30 AM 5 30 PM PST E mail support arcsoft com Other Regions Please see the ArcSoft web site http www arcsoft com maininternational html SAFETY PRECAUTIO...

Страница 3: ...of this Agreement You must reproduce and include the copyright notice on the back up copy 3 SUPPORT AND UPDATES Neither Canon nor its subsidiaries dealers or distributors will be responsible for prov...

Страница 4: ...null and void with respect to the jurisdiction of that court or tribunal and all the remaining provisions of this Agreement shall remain in full force and effect 9 CONTROLLING LAW The terms of this A...

Страница 5: ...Images 21 Using the Software on the Windows Platform Advanced Techniques 26 The ZoomBrowser EX Windows 26 ZoomBrowser EX Features 32 Checking Images before Downloading 34 Replaying Movies 36 Editing M...

Страница 6: ...owerShot G6 98 PowerShot S70 98 Index 99 Using the PDF Manuals The following PDF format manuals hereafter PDF manuals are provided to explain the features and procedures for using ZoomBrowser EX and I...

Страница 7: ...required to use the software About this Guide The explanations in this guide are based on Windows XP and Mac OS X v10 3 If you are using another version of these operating systems the actual screen c...

Страница 8: ...e a Pro 4 It s so Simple Make Prints Right at Home Like a Pro See your Camera User Guide for shooting instructions Just install the software once at the beginning Shoot the images Install the software...

Страница 9: ...5 Download images to the computer Print the images Connect the camera to the computer Windows p 15 Macintosh p 51 Windows p 21 Macintosh p 55 p 97...

Страница 10: ...h the diverse layouts available in PhotoRecord Windows and ImageBrowser Macintosh The examples shown are from PhotoRecord Windows Stitch a Panorama Together Create a panoramic image from a series of i...

Страница 11: ...d edit movies link movies and stills that have been downloaded to your computer add background music superimpose titles and other text and apply various effects to the movies Convert a RAW Format Imag...

Страница 12: ...gital Camera Solution Disk Macintosh software cannot be used on disks formatted in the UFS Unix File System format OS Windows 98 Second Edition SE Windows Me Windows 2000 Service Pack 4 Windows XP inc...

Страница 13: ...e OS should be pre installed on computers with built in USB ports CPU PowerPC G3 G4 G5 RAM 256 MB or more Interface USB Free Hard Disk Space Canon Utilities ImageBrowser 200 MB or more PhotoStitch 40...

Страница 14: ...Prepare Your camera and computer Canon Digital Camera Solution Disk Interface cable supplied with the camera Installation Procedures 1 Confirm that the camera is NOT connected to the computer If it i...

Страница 15: ...automatically Windows XP 1 Select My Computer from the Start menu 2 Right click the CD ROM icon and select Open 3 Double click the Setup exe icon Windows 2000 Windows Me Windows 98 SE 1 Double click t...

Страница 16: ...ns to proceed The items displayed here differ according to the software installed When Custom Installation is Selected The USB driver the software for connecting is required when the camera is connect...

Страница 17: ...camera to the correct mode for connecting Users of Windows XP and Windows 2000 must log in as an Administrator computer system administrator after restarting to carry out the subsequent procedures If...

Страница 18: ...ompted to do so by a message A dialog allowing you to set the default settings will display after installation See Using the Software on the Windows Platform The Basics p 15 for the subsequent procedu...

Страница 19: ...a camera to computer connection see below or a memory card reader p 19 Camera to Computer Connection 1 Attach the supplied interface cable to the computer s USB port and the camera s DIGITAL Terminal...

Страница 20: ...omputer Set the following settings the first time you connect the camera to the computer These procedures are not required from the second connection onward Select Canon CameraWindow when a dialog Eve...

Страница 21: ...r the Direct Transfer function the Direct Transfer settings menu will appear in the LCD monitor In addition the Print Share button will light if your camera is equipped with one See the Camera User Gu...

Страница 22: ...mputer 18 By default when downloading is complete the thumbnails tiny versions of the downloaded images display in ZoomBrowser EX s Main Window Thumbnail Shows the folder where the images are saved Ne...

Страница 23: ...w will display 3 Click Starts to download images You can adjust the settings such as the type of image downloaded and the destination folder by clicking Preferences If the dialog above fails to appear...

Страница 24: ...window Next print out the images p 21 By default all the images that have yet to be downloaded will download to the My Pictures folder To download images that have had their transfer settings set with...

Страница 25: ...ground of the selected image s will turn blue Movies cannot be printed With images shot by Exif 2 2 called Exif Print compatible cameras shooting information such as the shooting settings and mode can...

Страница 26: ...d image and the information selected in Step 3 in the Album window In addition the steps that will take you through the printing process will display on the left side Follow the steps in order to proc...

Страница 27: ...Type category 2 Click 3 Select Paper and select the paper size and orientation 3 Click 4 Print confirm the number of copies and other printing settings and click Print This will start printing To clo...

Страница 28: ...t the paper size and orientation 3 Click Decorate Album and change the design of the image background and border as desired Click the Themes Backgrounds Photo Frames Text Frames or Clipart button to s...

Страница 29: ...y slightly according to the printer in use Album Type Description One Photo Per Page Prints one image on each sheet of paper One Photo Per Sheet Free Form Allows images to be freely positioned on the...

Страница 30: ...Platform The Basics chapter The ZoomBrowser EX Windows This section describes the principal ZoomBrowser EX windows the Main Window Viewer Window and Properties Window Main Window This window is for d...

Страница 31: ...play here The display style will vary according to your Display Mode selection You can sort the image order in the Browser Area by file name shooting date or other characteristics by clicking the Tool...

Страница 32: ...folders at once If the displayed folder is at the highest level then all thumbnails in the lower level folders also display You can change the folder level folder depth by clicking the Tools menu and...

Страница 33: ...is feature filters your images by their Star Ratings displaying only those images in the Browser Area One of three Star Ratings can be assigned to an image in the Viewer Window the Properties Window o...

Страница 34: ...witches between images Full Screen Button Displays the image in the full screen mode Click the image or press any key on the keyboard to restore the normal display mode Synchronize Button Synchronizes...

Страница 35: ...ys detailed information about the shooting settings when the image was captured such as the shutter speed or exposure setting The camera model will determine what information is displayed Protect Prev...

Страница 36: ...Browser Area Rename Multiple Files Changes the file names of the selected images in a single pass Classify into Folder Classifies images and saves them into a specified folder Search Performs image se...

Страница 37: ...images to a CD R RW disk for backup Print Layout Print Allows you to arrange the selected images in an attractive layout and print them p 21 Contact Sheet Print Prints the selected images as a contact...

Страница 38: ...steps 1 2 in the Memory Card Connection section p 19 The Camera Control Window will display 2 Click Lets you select and download images The images in the camera or memory card will display in the Came...

Страница 39: ...ding Images to the Computer There is no need to install ZoomBrowser EX with either method Windows XP Installation of USB Driver Not Required Your camera uses a standard image transfer protocol called...

Страница 40: ...ese procedures 1 Place the Canon Digital Camera Solution Disk in the CD ROM drive If the installer panel fails to appear automatically display it using the procedures in the How to Display the Install...

Страница 41: ...eps at the left of the window to edit the movie and save it QuickTime is required to play and edit movies Use the Installation Procedures for QuickTime section p 36 to install it Movies are saved as A...

Страница 42: ...W Images The Main Window the Navigator window and the Image Quality Adjustment Window will display Use the buttons here to switch between images and display modes rotate images and set the conversion...

Страница 43: ...amera used This section adjusts the white balance according to the light source and color temperature This section adjusts the digital exposure compensation photo effect contrast sharpness and saturat...

Страница 44: ...red settings when you convert a RAW image You can also select preset color schemes such as Positive Film Furthermore you can add your own color schemes My Color to apply to other RAW images when they...

Страница 45: ...onnecting The Camera Control Window will display 2 Open the lens cover or remove the lens cap on models equipped with them Proceed to the next step if your model does not have one 3 Click the Remote s...

Страница 46: ...which images are captured You can add comments to images by placing a check mark here and typing text in the boxes below Viewfinder Display Click the Start Stop Viewfinder button while a connection to...

Страница 47: ...ormance cannot be guaranteed if the computer enters the standby mode If your camera is equipped with the Auto Rotate function and you set it to On the image will automatically be rotated and appear in...

Страница 48: ...the camera In addition the symbol below displays by the image in the Browser Area Starting PhotoStitch 1 Click Edit in the ZoomBrowser EX s Main Window and click Stitch Photos 2 Click 1 Select Images...

Страница 49: ...ying the My Camera Window 1 Attach the supplied interface cable to the computer s USB port and the camera s DIGITAL terminal and place the camera in the correct mode for connecting The Camera Control...

Страница 50: ...Do not detach the interface cable turn the camera power off or disconnect the camera from the computer while the My Camera settings are being saved to the camera or the settings from the camera are b...

Страница 51: ...s My Camera Settings to the Computer 1 Select the Setup as a theme tab in the My Camera window To set the start up image or sound individually click the Set individually tab and select it 2 Select the...

Страница 52: ...he Create a My Camera Sound button The My Camera Sound Maker program will start 3 Create a file following the instructions in the guidance panel Instructions 4 Click once you have saved the sound file...

Страница 53: ...the software from the Canon Digital Camera Solution Disk Items to Prepare Your camera and computer Canon Digital Camera Solution Disk Interface cable supplied with the camera Installation Procedures...

Страница 54: ...ense agreement 7 Review the installation settings and click Next Follow the onscreen instructions to proceed 8 When the installation is over click OK 9 Click Exit in the installer panel and remove the...

Страница 55: ...p is not required from the second connection onward You may not be able to download the camera images if there are more than approximately 1000 images in the camera Use a memory card reader to downloa...

Страница 56: ...Settings OS X v10 1 1 Start Image Capture and select Other from the Hot Plug Action list box 2 Select CameraWindow in the program selection window CameraWindow is generally installed into the folder o...

Страница 57: ...he second connection onward 1 Insert the memory card into the reader Use a separately sold card adapter PCMCIA adapter if required See the manual for the memory card reader for details on how to conne...

Страница 58: ...the downloaded images will display in ImageBrowser s Browser Window when downloading is complete Continue by printing out an image p 55 By default all the images that have yet to be downloaded will d...

Страница 59: ...he Print button and select Layout printing from the displayed menu This displays the Layout Options dialog and the Print window From this point onward the procedures vary according to whether you sele...

Страница 60: ...hange the layout and add text in the Print window See Print Window Features p 57 for the procedures for changing layouts and adding text 4 Click the Print button in the Print window This will display...

Страница 61: ...lace check marks besides the desired items in the Items to Print in Caption category A PDF format manual for ImageBrowser is also available It provides further information about the program s features...

Страница 62: ...e Using the Software on the Macintosh Platform The Basics chapter The ImageBrowser Windows This section describes the principal ImageBrowser windows the Browser Window Viewer Window and File Informati...

Страница 63: ...n will display around images according to their attributes Images shot with the camera s Stitch Assist mode RAW images Movies Images with sound memo attachments Protected images Images shot with the c...

Страница 64: ...larger size as well as the image information List Displays the images in the folder selected in the Explorer Panel section in rows and columns TimeTunnel Displays images in chronological order in a si...

Страница 65: ...images in the Browser Area Hide Buttons Left Hides the Explorer Panel Middle Hides the control panel Right Hides the image information in the Preview display mode Display Size Changes the size of the...

Страница 66: ...een images Zoom Changes the image zoom setting Full Screen Button Displays the image in the full screen mode Click the image or press any key on the keyboard to restore the normal display mode Synchro...

Страница 67: ...n image Shooting Information Displays detailed information about the shooting settings when the image was captured such as the shutter speed or exposure setting The camera model will determine what in...

Страница 68: ...ng Allows you to operate the camera shutter from the computer p 72 View Images Displays the selected image in the Viewer Window SlideShow Starts a slide show of the selected images Click the View menu...

Страница 69: ...Rename changes the files names of multiple images in a single pass Convert RAW Images File menu RAW image processing Converts RAW format images into the TIFF or JPEG formats You can adjust the image b...

Страница 70: ...51 or steps 1 2 in the Memory Card Connection section p 53 The Camera Control Window will display 2 Click Lets you select and download images The images in the camera or memory card will display in t...

Страница 71: ...also download images to the computer by dragging images displayed in the Camera Browser Window and dropping them onto the Browser Area or Explorer Panel in ImageBrowser Other Downloading Methods Your...

Страница 72: ...Replaying Movies 68 Replaying Movies 1 Double click an image with a movie icon in ImageBrowser s Browser Area The movie will appear in the Viewer Window Movie icon 2 Click the Play button...

Страница 73: ...vies or stills 2 Click the Edit menu and select Movie Edit 3 Follow the steps displayed in the middle of the window to edit the movie and save it Click this button to play the movie being edited Follo...

Страница 74: ...essing The main window the Navigator window and the Image Quality Adjustment Window will display Use the buttons here to switch between images and display modes rotate images and set the conversion pa...

Страница 75: ...u can add your own color schemes My Color to apply to other RAW images when they are being converted See the PDF manual for ImageBrowser for more information p 2 This section adjusts the white balance...

Страница 76: ...DIGITAL terminal and place the camera in the correct mode for connecting The Camera Control Window will display 2 Open the lens cover or remove the lens cap on models equipped with them Proceed to the...

Страница 77: ...e captured You can add comments to images by placing a check mark here and typing text in the boxes below Viewfinder Display Click the Start Stop Viewfinder button while a connection to the camera is...

Страница 78: ...The device performance cannot be guaranteed if the computer enters the sleep mode If your camera is equipped with the Auto Rotate function and you set it to On the image will automatically be rotated...

Страница 79: ...nloaded from the camera In addition the symbol below displays by the image in the Browser Area Symbol displayed by images shot in Stitch Assist mode Starting PhotoStitch 1 Select a series of images in...

Страница 80: ...to the camera and vice versa Displaying the My Camera Window 1 Attach the supplied interface cable to the computer s USB port and the camera s DIGITAL terminal and place the camera in the correct mode...

Страница 81: ...s type Displays the list of settings files saved onto the computer Add Button Adds the settings file to the list Play Button Plays the audio from the selected settings file Send to Trash Button Delete...

Страница 82: ...ttings to the Computer 1 Select the type of setting you wish to save to the computer from the Type list box 2 Select the setting in the Camera list that you wish to save to the computer 3 Click the bu...

Страница 83: ...newly created data to the camera using the procedures described in the Saving the My Camera Settings to the Camera section p 78 Add an Original Sound File Use a program such as ArcSoft VideoImpressio...

Страница 84: ...This topic explains the program features and installation procedures for the programs on these CD ROMs ArcSoft Camera Suite 2 1 CD ROM This CD ROM contains the following programs A symbol indicates it...

Страница 85: ...double click the ARCSOFT icon or right click it and select Open and double click the Setup exe icon Windows 2000 Windows Me and Windows 98 users should double click the My Computer icon on the deskto...

Страница 86: ...for compiling a movie from multiple movie clips or stills and for editing out unwanted frames from movies Installing ArcSoft Camera Suite 1 3 Windows 1 Close all programs that are running 2 Place the...

Страница 87: ...Edit Image 2 Click 1 Select Images and select an image to edit 3 Click 2 Select Editing Tool and select Edit with external image editor 4 Select a program from the list and click 3 Finish ImageBrowse...

Страница 88: ...licking the Start menu and selecting Control Panel and Add or Remove Programs With Windows 2000 Me 98 uninstall the program by clicking the Start menu and selecting Settings followed by Control Panel...

Страница 89: ...a for communication with the computer For interface cable connection instructions see Information about Your Camera p 96 2 Click the Finish button if the Camera Control Window displays 3 Click the Sta...

Страница 90: ...with no substitutions Windows Me Substitute the following for the underlined portions of Step 6 Camera WIA Driver x x Uninstall WIA Driver The uninstall process will start To connect the camera to th...

Страница 91: ...n the name i e STA_0001 JPG STB_0002 JPG STC_0003 JPG All folders except the xxxCANON folders contain image settings files Do not open or delete them IMG_xxxx JPG JPEG format images _MG_xxxx JPG JPEG...

Страница 92: ...d at both ends Is the camera set to the playback mode some models only Some models require the camera to be set to the playback mode to transfer data See Information about Your Camera p 98 for details...

Страница 93: ...e of the items in the Start by Checking This section p 88 Solution Resolve the problem Cause 2 The USB driver is not installed Windows only Solution Install it with the procedures in Installing the So...

Страница 94: ...dows XP and Windows 2000 Check to see if the camera is being recognized as an other device and delete the driver if it is 1 Windows XP Click the Start menu followed by Control Panel Performance and Ma...

Страница 95: ...art with CAP The represents a number such as 0 or 1 CAP files come in pairs of CAP inf and CAP pnf files For example CAP0 inf and CAP0 pnf Step 7 and above are not required for Windows XP If the Inf F...

Страница 96: ...nd delete the driver if it is 1 Click the Start menu and select Settings followed by Control Panel Double click the System icon This will display the System Properties window 2 Click the Device Manage...

Страница 97: ...the Other devices or Imaging devices categories do not appear or your camera model name or Canon Camera does not appear Proceed to Step 6 temporarily quit the procedures and investigate the other pot...

Страница 98: ...d Appearance and Themes With Windows 2000 Windows Me or Windows 98 SE click the Start menu and select Settings followed by Control Panel 2 Click the Display icon followed by the Settings tab Advanced...

Страница 99: ...point and click the Start button e g C Program Files Canon ZoomBrowser EX Database My Database zbd This will display the titles and comments input in the earlier versions in the comments section of Z...

Страница 100: ...capabilities of your camera model Information Common to All Models See the respective page for your camera model for information specific to that model p 98 Programs and Compatible Operating Systems...

Страница 101: ...camera If this occurs disconnect the other devices from the computer and try reconnecting the camera Do not connect two or more cameras at the same time to the same computer via the USB interface The...

Страница 102: ...es for the programs on the disk Non Supported Programs and Features All programs and features are supported PowerShot S70 How to Connect the Camera to a Computer and Prepare to Transfer Data 1 Attach...

Страница 103: ...Windows 35 Direct Transfer Function 17 Display Control Panel Macintosh 58 61 Windows 26 29 Display Mode Macintosh 58 60 Windows 26 28 Downloading Images Macintosh 51 Windows 15 E E mail 7 Events Dialo...

Страница 104: ...operties Window 31 PTP Picture Transfer Protocol Macintosh 67 Windows 35 Q QuickTime Windows 36 48 R Remote Shooting Macintosh 72 Windows 41 Replaying Movies Macintosh 68 Windows 36 S Save Folder for...

Страница 105: ...101 MEMO...

Страница 106: ...102 MEMO...

Отзывы: