


2-2
Document and P
aper Handling
Platen glass
Feeder
Document type
• Plain paper
• Heavy paper
• Photograph
• Small documents (e.g., index cards)
• Special types of paper (e.g., tracing paper, transparencies, etc.)
*1
• Booklet (Up to 3/4” (20 mm) thickness)
Plain paper
(Multi-page documents of the same size, thickness and
weight/one page documents)
Size (W x L)
Maximum 8 1/2” x 11 3/4” (215.9 mm x 297 mm)
Maximum 8 1/2” x 14” (216 mm x 356 mm)
Minimum 5 7/8” x 4 1/8” (148 mm x 105 mm)
Weight
Maximum 4.4 lb (2 kg)
13.3 to 27.9 lb Bond (50 to 105 g/m
2
)
Paper Capacity
1 sheet
Maximum 35 sheets
*2
*1
When copying transparent documents such as tracing paper or transparencies, use a piece of plain white paper to cover the document after
placing it face-down on the platen glass.
*2
21 lb Bond (80 g/m
2
) paper
IMPORTANT
When placing document
Place the document after glue, ink or correction fluid on the document is completely dry.
To prevent paper jams in the feeder
Do not use any of the following.
• Wrinkled or creased paper
• Carbon paper or carbon-backed paper
• Curled or rolled paper
•
Coated
paper
•
Torn
paper
• Onion skin or thin paper
• Documents with staples or paper clips attached
• Paper printed with a thermal transfer printer
•
Transparency
Document Requirements
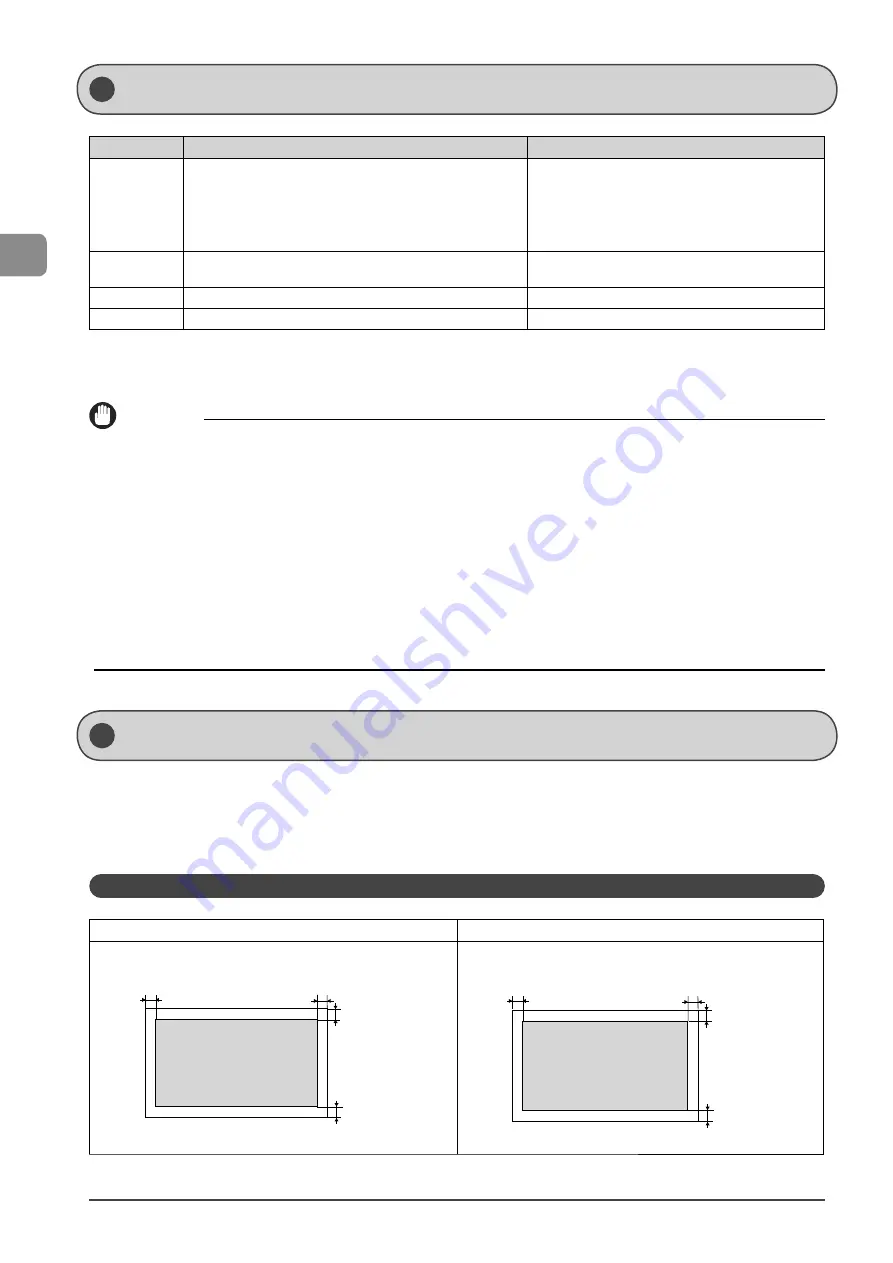
Scanning Range
Ensure your document’s text and graphics fall within the area specified in the following diagram.
* Note that the margin widths listed below are rough standards and there may be slight variations in actual use.
* The loading orientation of documents is as follows.
-
Platen glass: With the document facing down
-
Feeder: With the document loaded in the document feeder tray
Copy
Platen Glass
Feeder
7/32 in.
(5.5 mm)
17/64 in.
(6.5 mm)
19/64 in.
(7.5 mm)
19/64 in.
(7.5 mm)
15/64 in.
(6 mm)
17/64 in.
(6.5 mm)
5/16 in.
(8 mm)
5/16 in.
(8 mm)
Содержание 5259B007AA
Страница 24: ...xxiv ...
Страница 54: ...2 18 Document and Paper Handling ...
Страница 64: ...3 10 Copying ...
Страница 70: ...4 6 Printing from a Computer ...
Страница 84: ...5 14 Registering Destinations in the Address Book ...
Страница 114: ...7 4 Using the Scan Functions ...
Страница 132: ...8 18 Maintenance ...


