background image

42

Refit the hood glass and fasten the glass screws. Make sure the screws are

fully tightened.

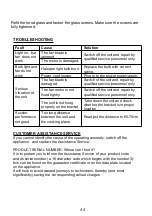
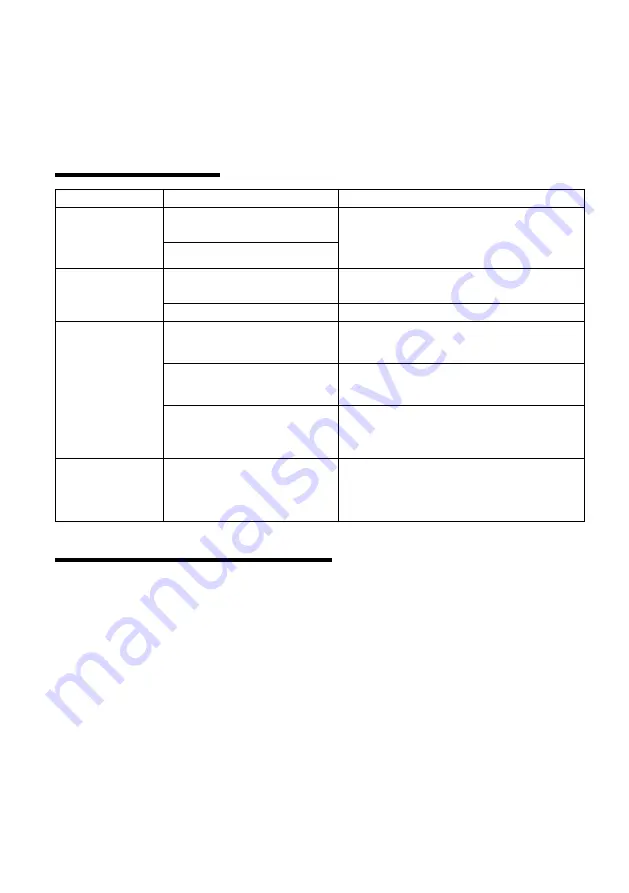
TROBULESHOOTING

Fault

Cause

Solution

Light on, but

fan does not

work

The fan blade is

jammed.

Switch off the unit and repair by

qualified service personnel only.

The motor is damaged.

Both light and

fan do not

work

Halogen light bulb burn. Replace the bulb with correct

rating.

Power cord looses.

Plug in to the power supply again.

Serious

Vibration of

the unit

The fan blade is

damaged.

Switch of the unit and repair by

qualified service personnel only.

The fan motor is not

fixed tightly.

Switch off the unit and repair by

qualified service personnel only.

The unit is not hung

properly on the bracket.

Take down the unit and check

whether the bracket is in proper

location.

Suction

performance

not good

Too long distance

between the unit and

the cooking plane

Readjust the distance to 65-75cm

CUSTOMER ASSISTANCE SERVICE

If you cannot identify the cause of the operating anomaly, switch off the

appliance and contact the Assistance Service.

PRODUCT SERIAL NUMBER. Where can I find it?

It is important you to inform the Assistance Service of your product code

and its serial number (a 16 character code which begins with the number 3);

this can be found on the guarantee certificate or on the data plate located

on the appliance.

It will help to avoid wasted journeys to technicians, thereby (and most

significantly) saving the corresponding callout charges.

4

4

Содержание CCE116/1X

Страница 1: ...T D UTILISATION GERMAN BEDIENUNGS INSTALLATIONSANLEITUNG GREEK ΟΔΗΓΙΕΣ ΧΡΗΣΕΩΣ ITALIAN MANUALE D ISTRUZIONE POLISH INSTRUKCJA OBSŁUGI I MONTAŻU PORTOGUESE MANUAL DE INSTALAÇÃO E UTILIZAÇÃO ROMANIAN MANUAL DE UTILIZARE SI INSTALARE SLOVENIAN NAVODILA ZA PRIKLJUČITEV IN UPORABO SPANISH INSTALACIÓN Y MANUAL DEL USUARIO DUTCH GEBRUIKSAANWIJZING ...

Страница 2: ...TRODUCTION 29 SAFETY PRECAUTION 29 SPECIFICATION 31 INSTALLATION VENT OUTSIDE 32 INSTALLATION VENT INSIDE 36 DESCRIPTION OF COMPONENTS 37 OPERATION 38 MAINTENANCE 38 TROBULESHOOTING 39 CONFORMITY WITH DIRECTIVES 40 ENVIRONMENTAL PROTECTION 40 31 ...

Страница 3: ... purpose The cooker hood and its filter should be clean regularly in order to keep in good working condition Clean the cooker hood according to the instruction manual and keep the unit from danger of burning Forbid the direct baking from the gas cooker Please keep the kitchen room a good convection Before connecting this appliance check that the power supply cord is not damaged A damage supply cor...

Страница 4: ...ay become hot when used with cooking appliance Electrical Shock Hazard Only plug this unit into a properly earthed outlet If in doubt seek advice from a suitably qualified engineer Failure to follow these instructions can result in death fire or electrical shock 33 ...

Страница 5: ...Accessories List Spec Illustration Picture Qty Casing 1 Upper Chimney 1 Lower Chimney 1 Lower chimney bracket 1 Upper chimney bracket 1 Hanging Board 1 φ8 rawl plugs φ8 φ6 white color 9 Screws ST4 0 30 9 φ7 2screws ST4 0 8 2 34 ...

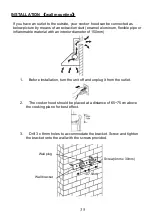
Страница 6: ...mmable material with an interior diameter of 150mm 1 Before installation turn the unit off and unplug it from the outlet 2 The cooker hood should be placed at a distance of 65 75cm above the cooking plane for best effect 3 Drill 3 x 8mm holes to accommodate the bracket Screw and tighten the bracket onto the wall with the screws provided Wall plug Wall bracket 107 5mm Screw 4mm x 30mm 35 ...

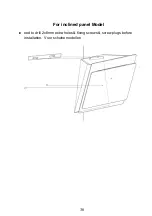
Страница 7: ...eed to drill 2x8mm extra holes fixing screws screw plugs before installation Voor schuine modellen 36 For inclined panel Model ...

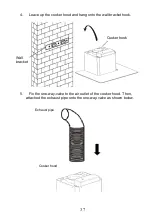
Страница 8: ...r hood and hang onto the wall bracket hook Cooker hook Wall bracket 5 Fix the one way valve to the air outlet of the cooker hood Then attached the exhaust pipe onto the one way valve as shown below Exhaust pipe Cooker hood 37 ...

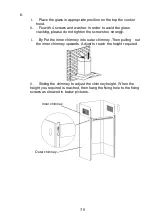
Страница 9: ...t tighten the screws too strongly i By Put the inner chimney into outer chimney Then pulling out the inner chimney upwards Adjust to reach the height required ii Sliding the chimney to adjust the chimney height When the height you required is reached then hang the fixing hole to the fixing screws as showed in below pictures Inner chimney Outer chimney 38 ...

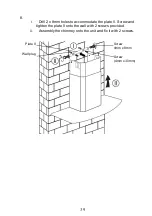
Страница 10: ...m holes to accommodate the plate II Screw and tighten the plate II onto the wall with 2 screws provided ii Assembly the chimney onto the unit and fix it with 2 screws Plate II Wall plug Screw 4mm x 8mm Screw 4mm x 30mm 39 ...

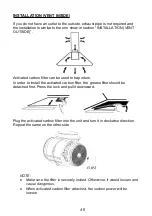
Страница 11: ...o trap odors In order to install the activated carbon filter the grease filter should be detached first Press the lock and pull it downward Plug the activated carbon filter into the unit and turn it in clockwise direction Repeat the same on the other side NOTE o Make sure the filter is securely locked Otherwise it would loosen and cause dangerous o When activated carbon filter attached the suction...

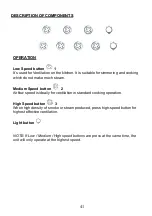
Страница 12: ... much steam Medium Speed button 2 Airflow speed is ideally for ventilation in standard cooking operation High Speed button 3 When high density of smoke or steam produced press high speed button for highest effective ventilation Light button NOTE If Low Medium High speed buttons are press at the same time the unit will only operate at the highest speed 41 ...

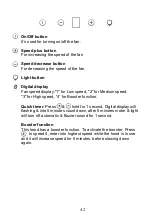
Страница 13: ...r Medium speed 3 for High speed 4 for Booster function Quick timer Press hold for 1 second Digital display will flashing into 5 minutes count down after 5 minutes motor light will turn off automatic Buzzer sound for 1 second Booster function This hood has a booster function To activate the booster Press to speed 4 enter into highest speed while the hood is in use and it will increase speed for 5 m...

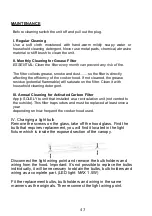
Страница 14: ...ing for Activated Carbon Filter Apply SOLELY to unit that installed as a recirculation unit not vented to the outside This filter traps odors and must be replaced at least once a year depending on how frequent the cooker hood used IV Changing a light bulb Remove the screws on the glass take off the hood glass Find the bulb that requires replacement you will find it located in the light fixture whi...

Страница 15: ...ed service personnel only The unit is not hung properly on the bracket Take down the unit and check whether the bracket is in proper location Suction performance not good Too long distance between the unit and the cooking plane Readjust the distance to 65 75cm CUSTOMER ASSISTANCE SERVICE If you cannot identify the cause of the operating anomaly switch off the appliance and contact the Assistance S...

Страница 16: ...the environment and human health which could otherwise be caused by inappropriate waste handling of this product The symbol on the product indicates that this product may not be treated as household waste Instead it shall be handed over to the applicable collection point for the recycling of electrical and electronic equipment Disposal must be carried out in accordance with local environmental reg...

Отзывы: