background image


9                                                           


 

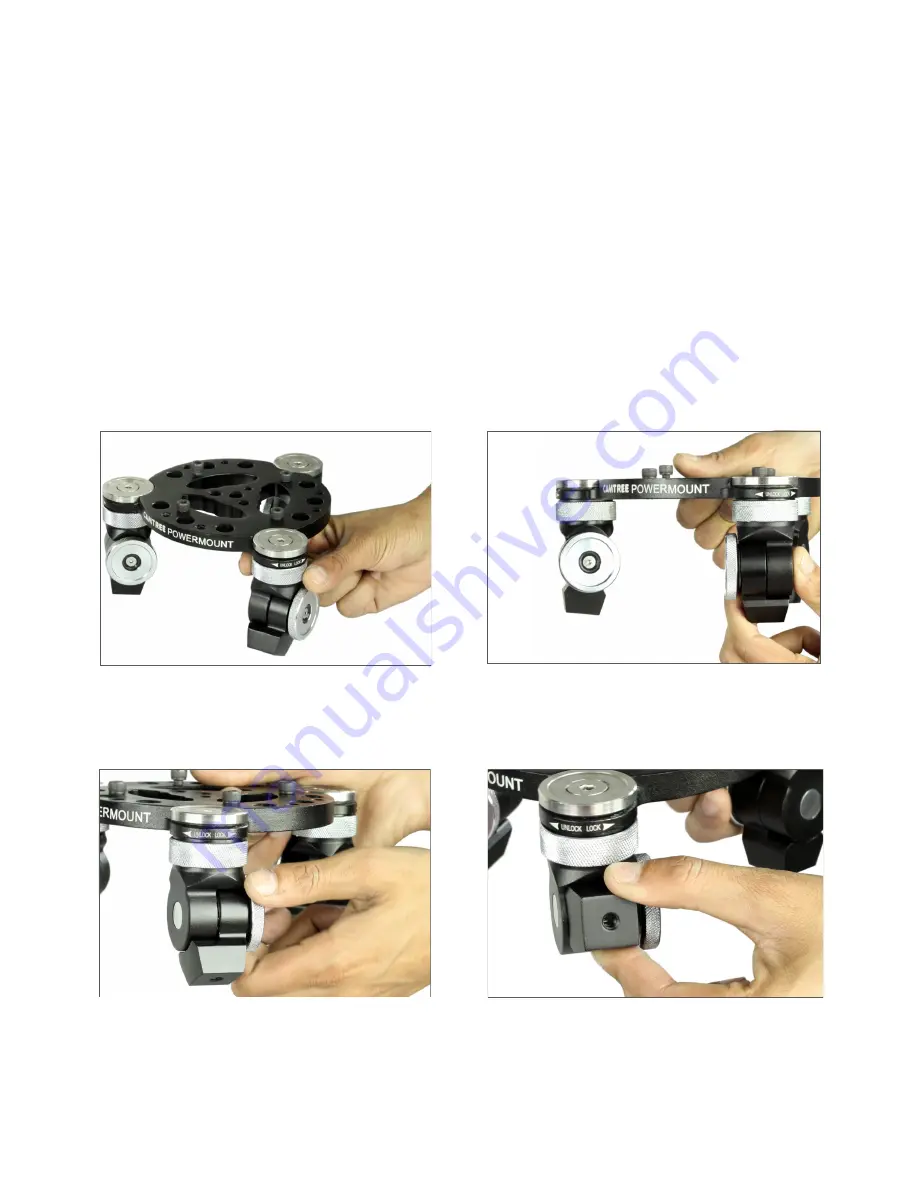
The Camera mounting platform of the Power Mount Gripper has three leg attachment points 

that  are  each  fitted  with  two  positive  locking  ratchet  joints,  one  for  tilt  and  one  for  swivel. 

Each locking ratchet joint has a quick turn knurled lock ring foe easy adjustment. You can un-

lock and lock each joint with a slight twist.  

 

To adjust the tilt or swivel of each leg, first make sure the lock ring on the appropriate joint is 

in the UNLOCK position, then adjust the position of the leg as per the need. And then turn the 

lock  ring  back  in  the  LOCK  direction  so  that  the  camera  won’t  shake  from  joint  movement 

while the vehicle is in motion. 

Swivel Adjustments 

Tilt Adjustments 

Содержание CH-QM-H

Страница 1: ...No part of this document may be reproduced stored in a retrieval system or transmitted by any form or by any means electronic mechanical photocopying recording or otherwise except as may be expressly...

Страница 2: ...ct video equipment to execute those tricky moving shots with confidence WHAT S IN THE BOX Please inspect the contents of your shipped package to ensure you have received all that is pictured and liste...

Страница 3: ...out any smooth surface on any vehicle They provide a solid stable adjustable base for the 3 variable length legs With a few pumps of the large pin on the side of each unit suction mounts are good to g...

Страница 4: ...adjustable locking ball lt heads at the top of the 3 suc on cup mounts Three rods are provided for each length 3 6 12 These rods can be linked together in any combina on you need to create the perfect...

Страница 5: ...Now fix both the suction cup with metal loops on your vehicle Attach one end of Rope with metal Hooks to camera mounting platform and another end to Metal loop of Suction cup Tighten the Rope properl...

Страница 6: ...four Allen bolts on Camera platform align 100mm bowl with it Now mount your Fluid Head NOT Included on Bowl Head And then secure your camera set up on fluid head Re insert the bolts and ghten with Al...

Страница 7: ...the lever to loosen the rope Remove the metal hook from Metal loop of suction cups The built in low suc on indicator helps to insure that the Power Mount Gripper remain securely a ached to your vehic...

Страница 8: ...attach metal hooks to Rope Hooks and tighten the rope properly to secure your gripper You can also attach your camera set up directly to camera mounting platform with provided screw YOUR CAMTREE POWER...

Страница 9: ...d lock ring foe easy adjustment You can un lock and lock each joint with a slight twist To adjust the tilt or swivel of each leg first make sure the lock ring on the appropriate joint is in the UNLOCK...

Страница 10: ...y anyone other than our company We are not liable for incidental or consequential damages resulting from the use of the unit or occurring due to any breach of this warranty Replacement parts of the pr...

Отзывы: