


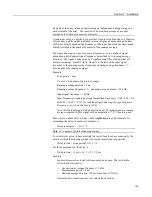


Section 7. Installation
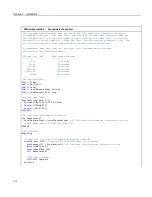
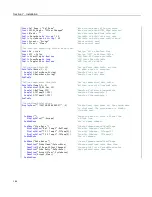
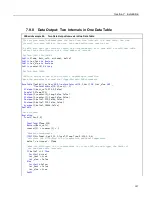
#If
LoggerType = 3000
'This instruction is used if the datalogger is a CR3000
VoltSe
(ValueRead,1,mV1000,22,0,0,_50Hz,0.1,-30)
#ElseIf
LoggerType = 1000
'This instruction is used if the datalogger is a CR1000
VoltSe
(ValueRead,1,mV2500,12,0,0,_50Hz,0.1,-30)
#ElseIf
LoggerType = 800
'This instruction is used if the datalogger is a CR800 Series
VoltSe
(ValueRead,1,mV2500,3,0,0,_50Hz,0.1,-30)
#ElseIf
LoggerType = 6
'This instruction is used if the datalogger is a CR6 Series
VoltSe
(ValueRead,1,mV1000,U3,0,0,50,0.1,-30)
#Else
ValueRead = NAN
#EndIf
NextScan
EndProg
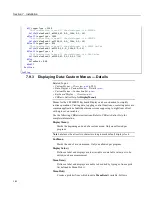
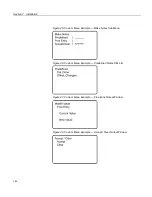
7.9.3 Displaying Data: Custom Menus — Details
Related Topics:
•
Custom Menus — Overview
(p. 84,
•
Data Displays: Custom Menus — Details
(p. 182)
•
Custom Menus — Instruction Set
(p. 581)
•
Keyboard Display — Overview
(p. 83)
•
CRBasic Editor Help
for
DisplayMenu()
Menus for the CR1000KD Keyboard Display can be customized to simplify
routine operations. Viewing data, toggling control functions, or entering notes are
common applications. Individual menu screens support up to eight lines of text
with up to seven variables.
Use the following CRBasic instructions. Refer to
CRBasic Editor Help
for
complete information.
DisplayMenu()
Marks the beginning and end of a custom menu. Only one allowed per
program.
Note
Label must be at least six characters long to mask default display clock.
EndMenu
Marks the end of a custom menu. Only one allowed per program.
DisplayValue()
Defines a label and displays a value (variable or data table value) not to be
edited, such as a measurement.
MenuItem()
Defines a label and displays a variable to be edited by typing or from a pick
list defined by MenuPick ().
MenuPick()
Creates a pick list from which to edit a
MenuItem()
variable. Follows
182
Содержание CR1000
Страница 2: ......
Страница 4: ......
Страница 6: ......
Страница 32: ......
Страница 36: ......
Страница 38: ......
Страница 40: ......
Страница 60: ...Section 4 System Quickstart Figure 16 PC200W View Line Graph 60 ...
Страница 96: ......
Страница 98: ...98 ...
Страница 302: ......
Страница 350: ...Section 8 Operation Figure 91 Pulse Sensor Output Signal Types Figure 92 Switch Closure Pulse Sensor 350 ...
Страница 453: ...Section 8 Operation Figure 115 Using the Keyboard Display 453 ...
Страница 454: ...Section 8 Operation 8 8 1 Data Display Figure 116 Displaying Data with the Keyboard Display 454 ...
Страница 456: ...Section 8 Operation Figure 118 Real Time Custom 456 ...
Страница 457: ...Section 8 Operation 8 8 1 3 Final Memory Tables Figure 119 Final Memory Tables 457 ...
Страница 458: ...Section 8 Operation 8 8 2 Run Stop Program Figure 120 Run Stop Program 458 ...
Страница 460: ...Section 8 Operation Figure 122 File Edit 460 ...
Страница 461: ...Section 8 Operation 8 8 4 PCCard Memory Card Display Figure 123 PCCard CF Card Display 461 ...
Страница 478: ......
Страница 506: ......
Страница 536: ......
Страница 636: ......
Страница 642: ......
Страница 644: ......
Страница 676: ......
Страница 677: ......


