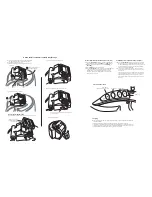
Normal Operation (Power Adapter connected)
13)
Press the
PLAY/ MUTE
button to select ON or STANDBY. The
PLAY/ MUTE
light will glow
GREEN
(On) or
RED
(Standby).
14)
With the Roady connected and “On”, adjust
VOLUME
or
VOLUME
.
15)
Use the
WIDE
mode for enhanced sound.
16)
Use the
PLAY/ MUTE
button to switch between STANDBY and
ON whenever the AC power adapter is plugged in. Use the
POWER switch on the side of the PlayDockXM to save the
battery charge level if the PlayDockXM is stored without the
Power Adapter connected.
PlayDockXM Controls
E
M
UL
OV
E
DI
W
ET
U
M
PLAY/ MUTE
(Activate portable operation)
Volume Up
Volume Down
WIDE Mode
Connect the Roady/Roady 2
8)
Push the Roady or Roady II into the Glove until it is firmly seated.
9)
Connect the Power and Signal plugs.
4)
Locate the Stage and Bar at the top of the PlayDockXM.
See illustrations
A
and
C
on the previous page.
5)
Slip the Glove lip under the Stage.
6)
Push the Power Plug and Signal Plug through the hole
in the Glove.
7)
Press the Glove claw onto the Bar.
Portable Operation (without Power Adapter)
18)
Press the
PLAY/ MUTE
button to activate portable operation.
The light will glow green. The PlayDockXM automatically turns
off (
PLAY/ MUTE
light off) after about five minutes of inactivity
to preserve the battery. In this case, press the
PLAY/ MUTE
button to reactivate the PlayDockXM.
19)
Connecting the Power Adapter without AC power available
prevents operation. Disconnect the Power adapter if AC power is
not available.
After a 12-hour charge cycle, the PlayDockXM will operate from
its internal battery for about 10-12 hours of continuous play at
moderate volume. When the battery charge is too low, the
sound distorts at higher volumelevels. Recharge the battery if
this occurs.
Charging
Make sure the Roady or Roady 2 is
Off
before inserting or removing the Power Adapter from
the PlayDockXM.
The PlayDockXM battery will charge anytime an active AC power adapter is connected.
Keep the Power Supply Adapter connected to the PlayDockXM whenever portable operation is not
needed and AC power is available. This will keep the PlayDockXM battery at optimum charge level.
The PlayDockXM sealed battery (lead-acid type) cannot be overcharged.
10)
Connect the Antenna plug and route the wire.
11)
Position the antenna.
Route the antenna wire under the side of the glove
for a finished look.
11
Attach the Glove And Install the Roady/Roady 2
PLA
Y
/
The Roady or Roady II
fits with or without the
bracket in place.
10
9
8
Power
Plug
Signal
Plug
Slip the Glove lip under
the PlayDock Stage.
5
6
Press Claw
onto Bar
7


