7
8
Periodic Maintenance
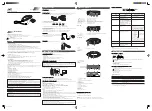
Tips on Cassettes
Winding & Rewinding the tape
• Press
FAST REWIND
to search backward to the beginning of the tape.
• Press
FAST FORWARD
to search forward to the end of the tape.
Make sure that the cassette tape has no slack prior to inserting it into the
recorder. Unless the tape is taut, it may wind around the head mechanism
and trouble may result. Use a pencil to wind the reels as necessary to
take up any tape slack.
Cassette Tape Selection
The quality condition of cassette tapes used will have a direct effect on
the performance of this unit. Califone recommends using tapes no longer
than 60 minutes since longer tapes are more prone to stretching, breaking
and can easily become entangled in the drive mechanism causing
major damage. Use only NORMAL “tape A” or “type 1” cassette tape.
Safeguard Against Accidental Erasing
Note: Do not force the record button when the cassette record-protect
tab has been removed. This may result in damage to the unit. To record on a
cassette whose tab have been broken off, simply attach adhesive tape
over the tab opening.
Cassette Deck
This unit has been permanently lubricated at the factory, no further lubrication
is necessary. If a loss in brilliance (high frequency response) is noticed, the
tape head probably needs cleaning. This may be done by playing a special
head cleaning cassette, available at most dealers. As an alternative, the surface of
the head may be cleaned with a cotton swab moistened in alcohol or special
head-cleaning fluid. Carefully rub the face of the head, being careful not to
scratch its polished surface. Make sure to also clean the surface of the capstan
and pinch roller.
ADHESIVE TAPE
BREAK OUT
TAB TO
PROTECT
SIDE A
BREAK OUT
TAB TO
PROTECT
SIDE B
ADHESIVE TAPE
BREAK OUT
TAB TO
PROTECT
SIDE A
BREAK OUT
TAB TO
PROTECT
SIDE B
ADHESIVE TAPE
BREAK OUT
TAB TO
PROTECT
SIDE A
BREAK OUT
TAB TO
PROTECT
SIDE B
Erase
Head
Play/Record
Head
Capstan
Pinch
Roller
Lens
Blower
Erase
Head
Play/Record
Head
Capstan
Pinch
Roller
Lens
Blower
Compact Disc Player
The accumulation of dust particles on the laser pickup lens may cause skipping or track
jump. Use a camera lens brush/blower to blow clean. Do not touch the pickup lens.
Fingerprints will also cause the player to malfunction.
Periodic Maintenance
External Care
Periodically wipe the cabinet with a soft cloth damped in diluted soapy solution, then wipe with a dry cloth. Do not use harsh
cleansing chemicals, they may damager or discolor the cabinet finish. Do not allow liquids or foreign objects to enter the CD
compartment.
Care and Maintenance
Care and Handling of Compact Discs
1. Handle the disc by its edges or center hole. To keep the disc clean, avoid touching the data surface.
2. Data is embedded directly beneath the label, protected only by a thin lacquer layer and is more vulnerable to damage than
the bottom. A scratch that penetrates the label will certainly destroy data, whereas a scratch on the bottom can often be
overlooked or corrected by the laser pickup.
3. Do not write on the label surface. A ballpoint will damage data; marking pens have solvents that may penetrate the top layer.
4. Do not stick paper or tape on the label surface; this probably won’t hurt the disc but might jam the disc drive.
5. Do not expose a disc to high temperature or humidity for an extended period of time. The disc material will soften at around 200
degrees Fahrenheit. Allow the disc to reach room temperature before playing if it has been subjected to extreme cold.
6. Preventive cleaning is unnecessary and potentially harmful. Clean only when required.
7. Clean a disc with a soft moistened cloth. Pat dry. Wipe the disc from the center out like spokes of a wheel. Never wipe across
a disc as you would an LP record.
8. Never use solvents, commercial cleaners or sprays designed for LP’s. Plain lukewarm water is recommended.
9. Keep discs protected at all times.
Cassette Maintenance & Service Cleaning
The heads, capstan and pinch roller should be cleaned from time to time to prevent buildup of tape oxide,
which degrades performance.
1. Remove cassette tape before cleaning.
2. Clean the head of all visible, reddish-brown oxide with a cotton-tipped swab moistened with a methyl alcohol
or any solution specifically manufactured for this purpose.
Caution:
DO NOT scrape the head surface with hard, sharp or abrasive objects. This will permanently damage the heads.
3. Clean the pinch roller by scrubbing the surface of the roller with the moistened swab. Rotate the roller by hand
until the entire surface is clean.
4. Clean external case surfaces with a moist, soft cloth. Use only a mild detergent water solution.
Tape Head Demagnetization
It is recommended that the tape heads be demagnetized from time to time. This eliminates residual magnetism
which degrades sound reproduction and the recording function.
1. After cleaning the heads and capstan, place the demagnetizer several feet away from the cassette unit and
plug it into an AC outlet.
2. Follow the manufacturer’s operating instructions supplied with the demagnetizer.
califone_1776_manual.indd 10-11
10/2/08 3:51:14 PM


