califone.com
10
califone.com
11
5. To activate recording, release the PAUSE button.
6. To stop recording temporarily, press the PAUSE button. To continue
the recording, press the PAUSE button once again.
7. Press the STOP/EJECT button to stop recording.
8. When the tape runs to its end, the cassette operation will be stopped
automatically.
RECORDING FROM THE BUILT-IN CONDENSER MICROPHONE TO
CASSETTE DECK
1. Set the FUNCTION SELECTOR SWITCH to the TAPE position.
2. Open the CASSETTE COMPARTMENT by pressing the STOP/
EJECT button and insert a blank tape into the CASSETTE
COMPARTMENT. Close the door gently.
3. Press the RECORD button and PLAY button simultaneously to start
the recording process. This process will record the signals that are
received by the built-in CONDENSER MICROPHONE.
4. Press the STOP/EJECT button when finished.
NOTE: Monitoring during MICROPHONE recording is not possible.
RECORDING FROM THE CD PLAYER TO CASSETTE DECK
1. Slide the FUNCTION SELECTOR SWITCH to "CD" position.
2. Put a CD into the CD COMPARTMENT with the label side upward.
3. Insert a blank cassette into the CASSETTE COMPARTMENT and
press PAUSE button of the cassette deck.
4. Press RECORD button and PLAY button simultaneously for
recording stand-by. With the built-in ALC, the best recording quality is
adjusted automatically.
5. Activate the CD players, playing in a desired TRACK as described
in the COMPACT DISC PLATER OPERATION section. Release the
PAUSE button of the cassette deck to start recording.
6. To stop recording temporarily, press the PAUSE button. To continue
recording, press the PAUSE button again.
7. Press STOP/EJECT button of the cassette deck to stop
recording. Then stop CD playback by pressing the STOP button of
the CD player.
5.3 CD OPERATION
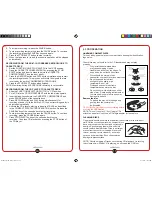
HANDLING COMPACT DISCS
This unit is designed to play only compact discs bearing the identification
logo below.
Other discs may not conform to the CD standard and may not play
properly.
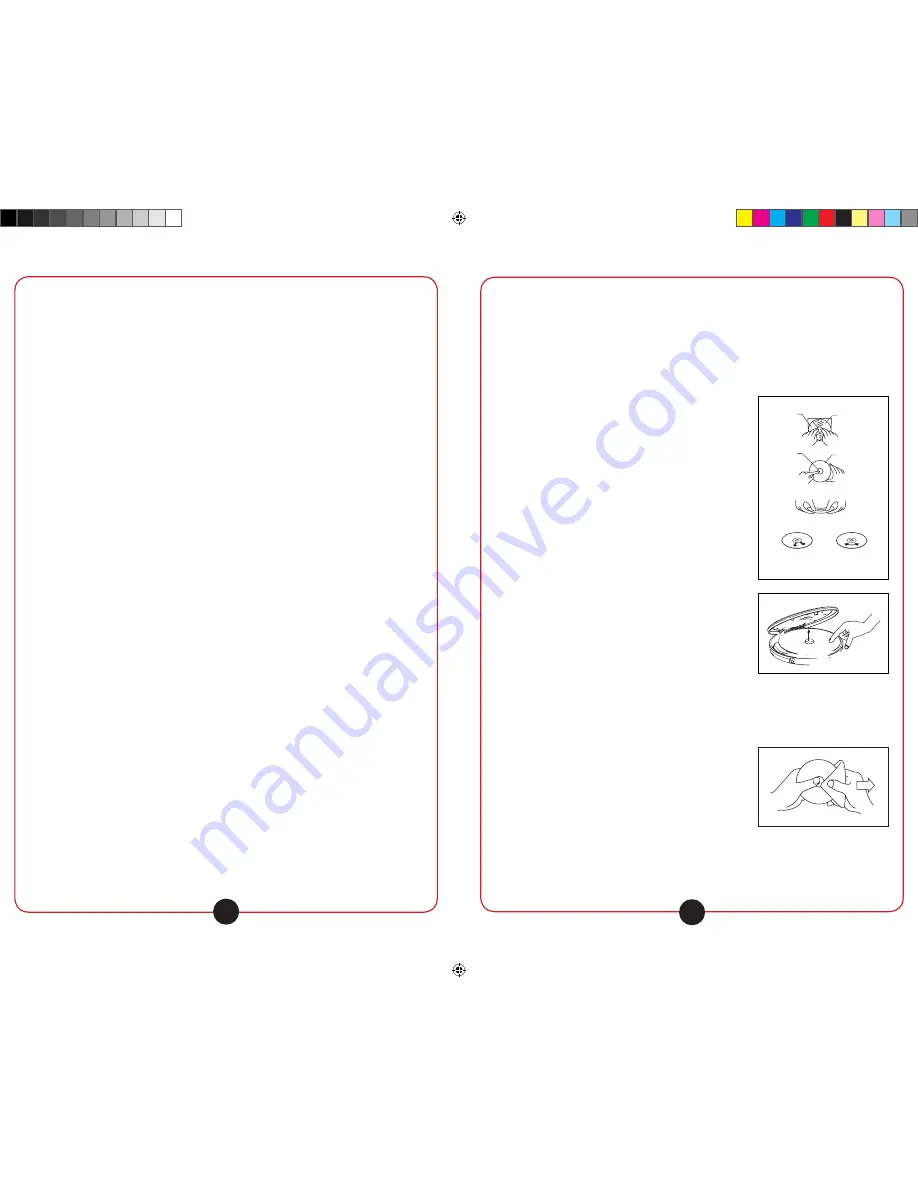
• Dirty, scratched or warped discs
may cause skipping or noise.
• Handle the disc only by the edges. To
keep clean, do not touch its surface.
• Discs should be stored in their
cases after use to avoid serious scratches.
• Do not expose disc to direct
sunlight, high humidity, high
temperature, dust, etc.
Prolonged exposure to extreme
temperatures can warp the disc.
• Do not stick or write anything on either
side of disc. Sharp writing instruments or
the inks used in some felt tip pens may
damage its surface
Remove the disc
• To pick up the disc, hold the edge and
gently press the center pivot
as illustrated.
CAUTION: Wait for the disc to stop rotating before
pressing the OPEN button.
NOTE: This unit can play 3” (8 cm) single CDs
without an adapter. Do not use a CD single adapter for these discs.
CLEANING DISCS
Finger prints should be carefully wiped from the surface of disc with a soft
cloth. Unlike conventional records, compact discs
have no grooves to collect dust and microscopic
debris, so gently wiping them with a soft cloth
should remove most particles. Wipe in a straight
motion from the center to the edge. Never use
thinner, benzine, record cleaner or anti-static
spray on a compact disc. Such chemicals can
damage its plastic surface.
NOTE: Should skipping of tracks occur during CD playback, try turning
the volume down. When CD is playing, do not open the CD Door.
INSERT WITH
THE LABEL
FACING UP.
PRESS THE CLAWS
AT THE CENTER OF
THE DISC CASE.
PRESS THE
DISC GENTLY
TO INSERT IT.
LIFT OUT WITHOUT
TOUCHING THE
RECORDED SURFACE.
INCORRECT
CORRECT
FROM THE CENTER TO THE EDGE
INCORRECT
1886 Manual - JH 2009.11.09.indd 10-11
11/11/2009 1:20:06 PM


