background image

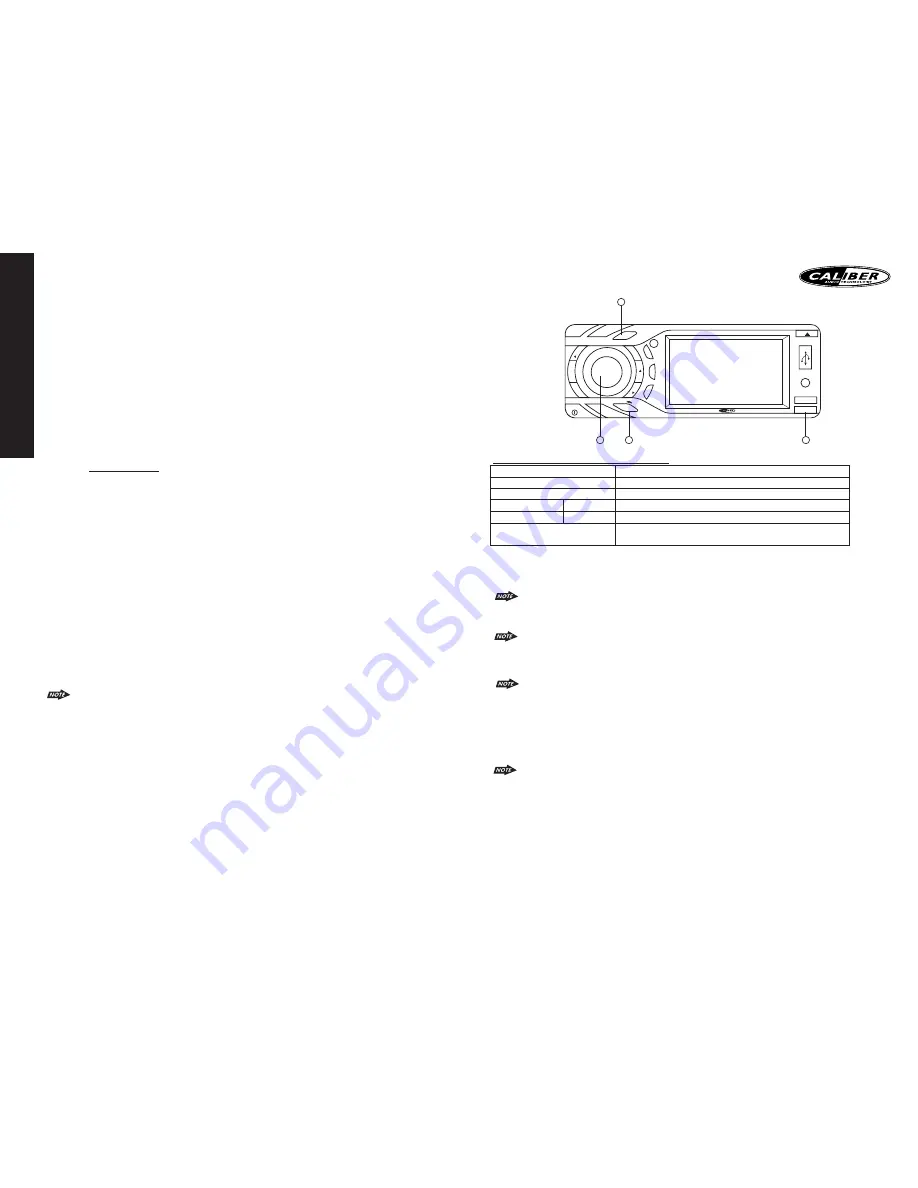
Bluetooth hand free panel function key matrix

Panel function button

Bluetooth hand free function

1

AUDIO 

Answer Incoming call

2

BAND

Reject Incoming call

3

MODE     Long Press 

Transfer Phone Conversation backward to Mobile Phone

Short Press 

Answer Incoming call

4

MENU

Pairing / Re-Connection etc
Note: See Menu operation for more details.

PAIRING

Pairing the bluetooth system between user’s mobile phone & the unit

Access into MENU - PAIRING mode to activates the operation of Pairing .

Pls see MENU Operation for more details of how to access into MENU mode .

Once the “PAIRING?” is appearing on the LCD Display, press the AUDIO button to activate
the Pairing mode.

Keep the mobile phone within 2 meter from the unit when making the pairing.

To terminate the pairing, you can press the “CLEAR(BAND)” button at any time.
Select the Blue Tooth set up on the Mobile Phone

Please refer to the instruction manual of your mobile phone on how to enter into the blue
tooth set up and blue tooth on / off, and blue tooth pairing.

“BT60” should appear in the pairing list on the mobile phone. User need to select
and then input the password “1234”.
If the pairing is successful, the display will show “PAIRING OKE!” and Mobile Phone Name.
If the pairing failed, “PAIRING FAIL!” will be flashing on the Display for 3 seconds. And the unit
will switch back to the previous mode automatically.

During the Pairing, only Power, CLEAR(BAND) ,/- & Mute are functional, other

function keys are disabled & non-operational during the pairing mode.

Re-Connection of the bluetooth system

The unit is with built-in Auto-Reconnection function. In some conditions, user need to
reconnect manually. For example like the following.

If The Mobile Phone is out of range. (2 meters away from the Head unit) Under the
condition of lost connection when the user come back to the unit. At the same time, there is
an incoming call or user is under conversation on the Mobile Phone 2 meters away from
the Head Unit and come back to Head unit.
If user wants Audio Transfer back from Mobile Phone to Head unit. It needs to re-connect
manually.

ENGLISH

34

B L U E TO OT H   H A N D S F R E E   O P E R AT I O N

User guide for bluetooth operation

1.When user use our Blue tooth HEAD UNIT, please make sure the mobile phone you use must
/ does support Blue tooth functions (Headset or Handsfree profiles or both)
2. Before you start to use our Bluetooth HEAD UNIT, please make sure complete pairing with your mobile phone first.
Please refer to the user manual, section “PAIRING” for detail “PAIRING”
instruction.To ensure the best reception for Pairing or Re-connection, please make sure the Phone Battery is fully
charged when making the Pairing or Re-connection.
3. Please always try pairing the Mobile Phone with Head unit after a few minutes of the Mobile
Phone was Switched On to ensure the best pairing result.
4. is this unit device model number which is displayed on the mobile phone. “BT60”
5.To achieve the best performance, please always keep the Mobile Phone within 3 meters of the
Head unit.
6. Please always keep a clear path between the Mobile Phone & the Head unit.
7. Never put any metal object or any obstacle between the path of the Mobile Phone & the
Head unit.
8. Some brand of Mobile Phone like Sony Ericsson may have "Power Saving Mode" selection when Blue Tooth mode is
switched on.

PLEASE DO NOT

Switches ON Power saving Mode when

operating with this Head Unit, as some abnormal communal behavior will happen occasionally if
Power Saving Mode is switched on.
9. Before user make Outgoing call or Incoming call, make sure the mobile phone's “Blue Tooth
function” was switched “ON”.
10.To ensure the best conversation quality / performance, please always keep talking within 1
meter of the Head Unit.
11. If user want to Dis-connect the Head unit with the Mobile Phone, please switch "OFF" Blue
Tooth connectivity on the Mobile Phone,or go to the system menu, "dis-connect" to disconnect
the bluetooth connectivity manually. ( please refer to the user manual, section "dis-connection
of the bluetooth system for details instruction. )
12. Some Mobile Phones can support “IN BAND RING TONE”, such as Nokia. In such case, the
Incoming Ringing Tone will be same as the original Ring-tone of the Mobile Phone. But some
Mobile Phones like Sony Ericsson do not support this feature.The Ring-tone will be using the
standard Ring-tone of the Head unit.

13.When in telephone mode, during talking, it is highly recommended to set the volume to
below “30” in order to achieve the best sound quality. As if the volume is too high, it may create
unwanted echo inside the car, and this unwanted echo may feedback into the microphone.

14. If the Bluetooth related operation is not performing normally, like cannot make pairing, cannot
making an outgoing call, User can try to make a SOFT-RESET of the Bluetooth module by removing / detaching the
panel from the main unit and waiting for about 1 min.Then re-attach the panel to the unit & retry the Bluetooth
operation again. Or user can RESET the whole unit by pressing the RESET
button behind the panel.

By pressing the RESET button all the stored memory will resume to factory default.

>>I

REL

>>I

BAND

MODE

2

5

6

3

MUTE

RPT

ST
OP

4

RDM

ZONE

SUBW

IXB

A

SS

TA

AF

PTY

CLEAR

MIC

II  >

R

DISP-MENU

AS-FS

OSD-SET UP

AV IN-OUT

4

1

MCD 785

4x 75W

3

2

35

Содержание MCD 785

Страница 1: ...UBW IX B AS S TA AF PT Y CLEAR MIC II R DISP MENU AS FS OSD SET UP AV IN OUT 18 11 21 4 14 1 13 MCD 785 4x 75W 12 6 20 5 15 16 9 2 3 7 8 10 17 19 1 MUTE POWER 2 EJECT 3 PANEL RELEASE 4 AUDIO MENU BUTTON CD DVD OK BUTTON 5 MODE 6 ENCODER VOLUME 7 3 5MM A V IN JACK 8 SUBWOOFER TUNER AF 9 2 ZONE TUNER TA 10 1X BASS TUNER PTY 11 TUNER PS AS CD SET UP DVD OSD SET UP 12 TUNER M1 MEMORY 1 CD PAUSE PLAY D...

Страница 2: ...touch the unlabeled side DO NOT attach any seal label or data protection sheet to either side of a disc DO NOT expose a CD to direct sunlight or excessive heat Wipe a dirty CD from the center outward with a cleaning cloth Never use solvents such as benzine or alcohol This unit cannot play 3 inch 8cm CDs NEVER insert a 3 inch CD contained in the adapter or an irregularly shaped CD The unit may not ...

Страница 3: ... A CD Press Open button to slide down the panel if a CD is loaded it will be ejected automatically No further key press is needed If the ejected CD is not being removed after 10 seconds it will be reloaded automatically And the panel will automatically slide up after disc has been reloaded Warning If the ejected disc remains in the slot the Open button will not function so closing the panel by usi...

Страница 4: ...T I O N R E M O T E F U N C T I O N S 7 I REL I BAND MODE 2 5 6 3 MUTE R P T STOP 4 R D M 2 Z O N E SUBW IX B A S S T A AF P T Y CLEAR MIC II R DISP MENU AS FS OSD SET UP AV IN OUT 18 11 21 4 14 1 13 MCD 785 4x 75W 12 6 20 5 15 16 9 2 3 7 8 10 17 19 ...

Страница 5: ...urn off the IX Bass function Please refer to the related description in Audio Operation of iX Bass for details operation of iX Bass control The IX Bass Boost Level control will only appear in the Audio Menu only if the iX Bass function is currently activated On 5 MODE BUTTON MODE Short Press the MODE button to select a different mode of operation as indicated on the display panel Available modes i...

Страница 6: ...will be TURNED OFF This function is useful while listening with the HEADPHONE and user doesn t need Rear Speakers sounds output through rear speakers Select ON to reactivate the rear speakers sound output When the Rear Speaker is OFF the Audio Function FADER will not be functional INTER AMPLIFIER ON OFF INTER AMP This is a option selection for user to turn the unit s built in Amplifier system on o...

Страница 7: ...t and the R Zone Rear sources If Front Zone F Zone is selected user have 10 seconds to use theVolume UP DOWN button to navigate through different modes Tuner DVD AV In are available for selection for Front AV Output If Rear Zone R Zone is selected user have 10 seconds to use theVolume UP DOWN button to navigate through different modes Tuner DVD AV In are available for selection for Rear AV Output ...

Страница 8: ...z 15KHz or 17 5KHz BALANCE User has 5 seconds to use the encoder volume knob to adjust the Balance between the right and left speakers from R12 full right to L12 full left C00 represents an equal balance between the right and left speakers FADER User has 5 seconds to use encoder volume knob to adjust the Fader between the front and rear speakers from R12 full rear to F12 full front C00 represents ...

Страница 9: ...he following keys on the remote control 17 PAUSE PLAY BUTTON M1 1 Press PAUSE to pause playback still mode The sound from the disc is muted during still mode 2 Press PLAY to resume normal playback 18 STOP 1 Press STOP to stop playback and show the logo screen The player memorizes the location where playback is stopped 2 Press PLAY to resume playback from the location where playback is stopped DVD ...

Страница 10: ...l appear on the TFT monitor The player automatically plays the first track The elapsed time within the track is displayed on the right side of the top line When the track is finished the second track will begin playing and the track number on the top line will be updated Press STOP to stop playback of the current file MP3 WMA OPERATION REMOTE CONTROL To operates CD function through the following k...

Страница 11: ...RIGHT page which the MP3 WMA interface displayed on the TFT monitor When the last file playback completed the unit will automatically enter into STOP mode User can press play button to start the DISC playback again when in the STOP mode 12 PAUSE PLAY BUTTON 1 1 Press PAUSE to pause playback still mode The sound from the disc is muted during still mode 2 Press PLAY to resume normal playback 13 STOP...

Страница 12: ... via the disc menu 5 When a disc is replaced the Set Up returns to the default setting E N G L I S H 22 19 29 NUMERIC BUTTONS 1 When playback CD MP3 WMA use for track number or File number direct access and use when function need numeric Selection or Input like in the Goto function etc 2 When playback DVD use when function need numeric Selection or Input like in the Goto function etc 30A DVD MENU ...

Страница 13: ...play 2 Press AS PS a second time to additionally display the disc type current chapter DVD or track VCD SVCD audio CD and total number of chapters or tracks Also displayed for DVD only is the current title total number of titles audio language type of channels subtitle language and angle selection For example the OSD may display The AS PS in MPEG4 file will display the file name version file size ...

Страница 14: ...r MMC Memory Card playback operation function is same as the operation on CD MP3 WMA Pls refer to CD MP3 WMA Operation for more details 27 USB OPERATION The unit can support playback MP3 WMA JPEG MPEG4 format which are stored on the Memory Stick Max 1000 tracks Please read carefully the below instruction before you start the operation of USB Function Mode change to USB HOST Under any other mode wh...

Страница 15: ...FORMAT DISC FILTER FUNCTION If a DISC or USB or MEMORY CARD contains various categories of files This Filter function can hide the files and not allow selection during the File Folder searching 1 The selection is done among the 3 categories a Audio b Photo c Video 2 Use right arrow keys to go the Filter field press OK key to open the selection box Use up down keys to navigate through the categorie...

Страница 16: ... the Rating settings will appear 2 Use the Right buttons to select the setting 3 Use the Up Down buttons to select the setting to be changed The following subsections explain how to change each of the player s Rating settings 31 OSD Language Selecting the OSD setting allows the user to select a preferred language for the OSD menu and messages The following options are available English Menu OSD is...

Страница 17: ...indow Use Default Setting there are two selections Yes No No Close Setup menu Yes Return to Use Default Setting 33 Parental Control Rating Selection The Rating allows the user to have parental control feature of the player Press the OK button the below window will appear on the screen to allow user to enter the password will pop up a window let user set password Once entered the correct password p...

Страница 18: ...ception for Pairing or Re connection please make sure the Phone Battery is fully charged when making the Pairing or Re connection 3 Please always try pairing the Mobile Phone with Head unit after a few minutes of the Mobile Phone was Switched On to ensure the best pairing result 4 is this unit device model number which is displayed on the mobile phone BT60 5 To achieve the best performance please ...

Страница 19: ...to MENU mode Once the RECONNECT is displayed on the LCD press the AUDIO button to activate the manual RE Connect mode 1 Keep the mobile phone within 2 Meter from the unit when making the connection 2 The manual re connect is only function with the Mobile Phone has already been paired with the unit before The LCD Display will displayed RECONNECT during the connecting period If the re connection is ...

Страница 20: ...W x 324 H DVD CD SECTION Compatible Disc Format See Disc Note for more details description Signal to Noise Ratio 90 dB Dynamic Range 90 dB Frequency Response 20Hz to 20Khz 3dB VIDEO SECTION Color System NTSC PAL Video Output Composite 1 0 Vp p 0 2 75 ohm Video Input Composite 1 0 Vp p 0 2 75 ohm AUDIO SECTION Line out level 2 Volt Line out Impedance 200 ohm AUXILIARY INPUT SECTION Input Maximum Vo...

Отзывы: