background image

  3 


Preparare l’attacco da G1/2” per il montaggio del 
nebulizzatore. 


Prepare the 

G1/2” connecting for the installation of the 

atomizer. 


Préparer le raccord G1/2

” pour le montage du nébuliseur. 

 
Vorbereitung der G1 / 2 "Verbindung für die Installation 
des Zerstäubers.


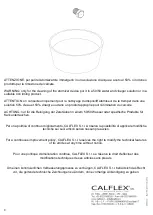
Rifinire l’intonaco e applicare il rivestimento. 
ATTENZIONE: profondità minima ammissibile tra fondo filetto e rivestimento finito 30 mm. 
ATTENZIONE: profondità massima ammissibile tra attacco da G1/2" e rivestimento finito 20 mm. 
 
Finish the plaster and apply the covering. 
WARNING: make sure that the distance between the bottom of the threading and the finished covering is 
min. 30 mm. 
WARNING: make sure that the distance between the G 1/2

” connecting and the finished covering is max. 

20 mm. 
 
Finir l’enduit et appliquer le revêtement. 
ATTENTION: 

S’assurer que la distance entre le fond du filetage et le revêtement fini soit au minimum de 

30 mm. 
ATTENTION: 

S’assurer que la distance entre le raccord G 1/2” et le revêtement fini soit au maximum de 

20 mm. 
 
Beenden Sie den Putz und wenden Sie die Abdeckung.  
WARNUNG: Stellen Sie sicher, dass der Abstand zwischen dem Boden des Gewindes und dem fertigen 
Belag min. 30 mm ist. 
WARNUNG: Stellen Sie sicher, dass der Abstand zwischen der G 1/2 "Anschluss und die fertige 
Abdeckung beträgt max. 20 mm ist. 

Содержание Carimali 24930-CR

Страница 1: ...INSTALLAZIONE INSTALLATION MONTAGE EINBAU Art 24930 CR Art 24934 CR Art 24939 CR NEBULIZZATORE ATOMIZER NEBULISEUR ZERST UBER...

Страница 2: ...2 Art 24930 CR Art 24934 CR Art 24939 CR...

Страница 3: ...that the distance between the bottom of the threading and the finished covering is min 30 mm WARNING make sure that the distance between the G 1 2 connecting and the finished covering is max 20 mm Fin...

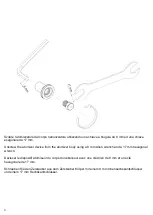
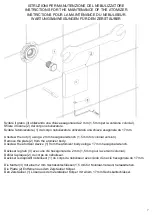
Страница 4: ...atomizer device from the atomizer body using a 8 mm Allen wrench and a 17 mm hexagonal wrench D visser le dispositif atomiseur du corps du n buliseur avec une cl Allen de 8 mm et une cl hexagonale de...

Страница 5: ...en de 8 mm Utiliser du chanvre ou mat riaux similaires pour assurer l tanch it Mit dem Ausstattungen Schl ssel schrauben die Unterputz D se bis zur Wand Um eine Wasserdichte zu realisieren benutzen ei...

Страница 6: ...ng the nut 3 with a 2 mm hexagonal wrench 1 5 mm for the colonial version Visser le dispositif atomiseur 1 sur le corps du n buliseur jusqu en bas avec l aide d une cl hexagonale de 17 mm Ins rer la p...

Страница 7: ...sing a 2 mm hexagonal wrench 1 5 mm for colonial version Remove the plate 2 from the atomizer body Unscrew the atomizer device 1 from the atomizer body using a 17 mm hexagonal wrench D visser le grain...

Страница 8: ...uber in einem 50 50 Wasser oder spezifische Produkte f r Kalk untertauchen Per una politica di continuo miglioramento CALFLEX S r l si riserva la possibilit di applicare modifiche tecniche sui suoi a...

Отзывы: