4
SETUP
Read through entire instructions prior to beginning setup
Smartphone Connectivity
1. Go to the appropriate application marketplace for your smartphone/mobile device and search for
“Caldwell Ballistic Precision Target Camera”.
2. Alternatively, http://www.btibrands.com/ provides direct links to the appropriate apps for the different mobile
platforms supported by Caldwell.
3. Once the app is installed you will see the Caldwell Ballistic Precision Target Camera app icon in your
smartphone home screen.
Transmitter Station Setup
• Position the Transmitter Station with consideration in
avoiding likely bullet path
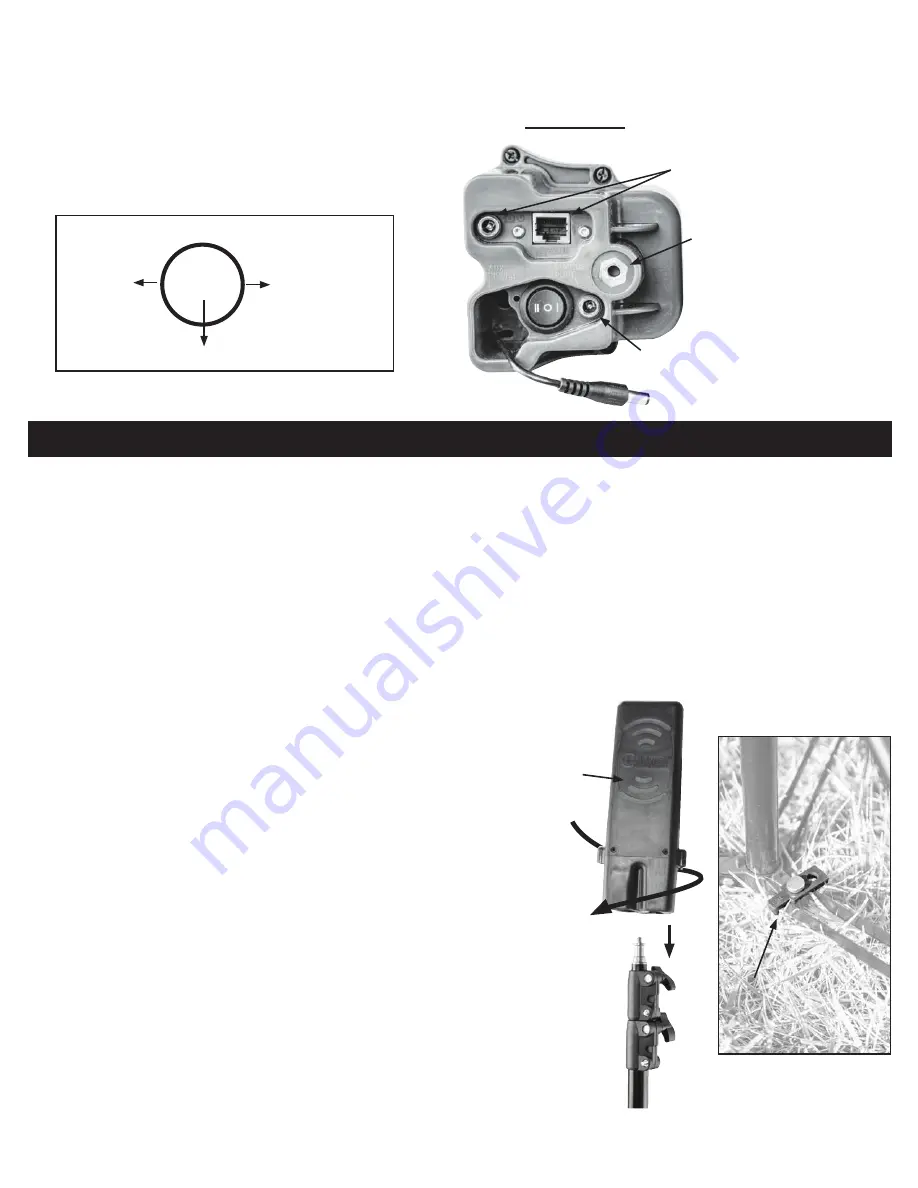
• Deploy Router Stand
• Attach Transmitter to Router Stand
(Photo 3)
• Adjust the Router Stand, until it is level and then use one of
the Router Stand Stakes to anchor the Router Stand
(Photo 4)
• Extend Stand height. For optimal performance over long
distances, extend the Router Stand height to the maximum height.
• Point the front of the transmitter towards the shooting bench
(Photo 3)
• Install Camera on the Camera Mount
(Photo 5)
NOTE: Storage case is designed to store the
Camera assembled on the Camera Mount
(Photo 3)
(Photo 4)
Rotate
Stake next to
center pole
Transmitter
Charge Port
II O I
Switch Function
External
12v DC
Power
Internal
Battery or
AC Power
OFF
Mounting
Point
AC Power
• This kit comes with an AC Wall Charger. The transmitter can operate on the AC Wall Charger
alone, by connecting the charger to the charge port, if AC power is available.
(Photo 2)
NOTE: Never connect anything except the included
AC wall charger to the charge port
(Photo 2)
Front
External Power Jack
Camera Power
and COM


