6
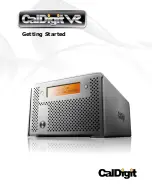
3. Press the CalDigit VR's power button. The CalDigit VR will
boot. You should see the CalDigit VR mount and it's ready
to use.
4. To change the RAID level or to customize your CalDigit
VR use the LCD or the RAID Tool software. For further
instructions see the Configuring your RAID section of this
manual.
*The eSATA extender included with the CalDigit VR does
not support hot plugging of additional eSATA devices, even
though there are 2 ports. The computer must be shut down
prior to adding additional devices. In order to use the eSATA
hot plugging capabilities with the CalDigit VR, you will need
to utilize either the FASTA-1ex, FASTA-2e or FASTA-4e eSATA
controller cards.
Содержание VR
Страница 1: ...Getting Started...
Страница 9: ...9...
Страница 20: ...CalDigit VR Manual v1 1 www caldigit com Copyright 2009 CalDigit Inc All Rights Reserved...


