User Manual
For more information visit www.caldigit.com
RAID
Страница 1: ...User Manual For more information visit www caldigit com RAID...
Страница 2: ...6 T4 Diagram 07 2 Using the T4 08 Installing the Software 08 Connecting the T4 09 Create a RAID 10 RAID 0 or RAID 1 11 RAID 5 14 Replacing the T4 Drive Module 18 Turning off the T4 20 3 CalDigit Drive...
Страница 3: ...AID 5 device that delivers great performance whilst at the same time giving users single drive redundancy for their valuable data The T4 is equipped with Thunderbolt 2 and is compatible with both 3 5...
Страница 4: ...rt your T4 with care Hard drives are sensitive to shock and rough handling and can result in degrading performance or disk failure Keep the T4 away from liquids and moisture Exposure to liquids on the...
Страница 5: ...t configuration average speeds are usually lower Weight varies by configuration and manufacturing process The use of this product is subject to acceptance of the software license agreements included T...
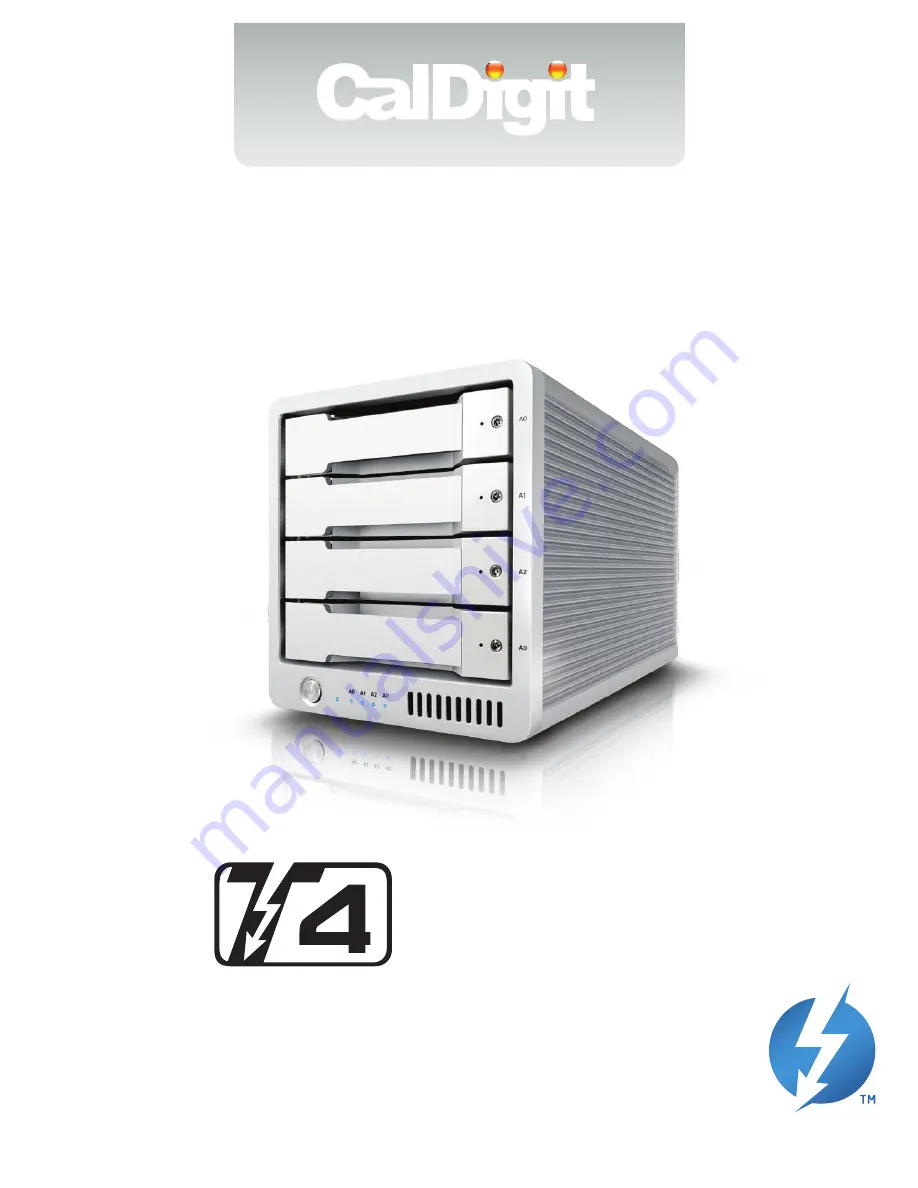
Страница 6: ...6 CalDigit Package Contents 1 1 x T4 RAID 2 4 x CalDigit universal drive modules 3 1 x Drive module pin release key 4 1 x Drive module lock key 5 1 x Power supply 6 1 x AC cord 1 5 6 2 4 3...
Страница 7: ...7 CalDigit T4 Diagram Exhaust Fan AC Power In Dual Thunderbolt 2 Ports Kensington Lock Removable Drive Module Power LED LED Status Lights Front Side Power Button Drive Module Lock PIN Release...
Страница 8: ...re from the CD that was included with the T4 The installer can also be downloaded from www caldigit com support asp This installation package will also install the drivers necessary to operate the T4...
Страница 9: ...you have logged into the OS 2 Connect a Thunderbolt cable from your computer to the T4 3 Connect the power supply to the T4 4 Press the T4 s power button and it will boot You will see it mount and it...
Страница 10: ...r any performance increase Parity Striped RAID Set RAID 5 creates identical copies of data across all drives in the RAID 5 volume Users that require a combination of performance and protection will op...
Страница 11: ...ck on the Disk Utility button on the left hand side of the window 3 Click the RAID Management button and then click on Delete RAID Sets Then click on Yes to proceed and the current RAID set will be de...
Страница 12: ...you would like to include in the RAID set and select create Drives are numbered from top to bottom A0 top A1 A2 middle A3 bottom 4 Go back into the Disk Utility tab and select Create New RAID Set Sel...
Страница 13: ...13 CalDigit 6 The RAID will be created and the T4 will mount on your computer...
Страница 14: ...hen click on Delete RAID Sets Then click on Yes to proceed and the current RAID set will be deleted If the T4 is currently in a RAID set users will need to delete the current RAID before creating a ne...
Страница 15: ...e drives that you would like to include in the RAID set and select create Drives are numbered from top to bottom A0 top A1 A2 middle A3 bottom 4 Go back into the Disk Utility tab and select Create New...
Страница 16: ...16 CalDigit You can go to the Device list to check status of RAID 5 6 Once the RAID has been created open OS X Disk Utility Finder Applications Utilities Disk Utility and highlight the T4 RAID...
Страница 17: ...nge the options such as partition name number of partitions and file system type Once you have selected your options confirm by selecting the partition button Once the partition has been created theT4...
Страница 18: ...nsert the drive key into the lock on the front of the drive module and turn clockwise to unlock it Insert the drive pin into the pin release until the handle of the drive module pops open Replacing th...
Страница 19: ...s the drive you removed The key holes should be on the same side as the drive labeling Push the drive in all the way and then press in the drive module handle until it locks securely into place Please...
Страница 20: ...erclockwise 1 2 Right click on the T4 volume icon and click Eject CalDigit T4 It is important that the T4 is ejected prior to shutting down to prevent directory data corruption After the T4 dismounts...
Страница 21: ...s tab allows users to set their S M A R T preferences Notifications The notifications tabs allows users to set their notification types and preferences Enter your network settings in the Email Notific...
Страница 22: ...hone 1 714 572 6668 Email support caldigit com Website www caldigit com support asp When contacting CalDigit technical support make sure to be by your computer and have the following information avail...
Страница 23: ...t abuse misuse or misapplication if it has been modified without permission of CalDigit or if any CalDigit serial number has been removed or defaced Warranty Exclusions and Limitations This Limited Wa...
Страница 24: ...BEEN ADVISED OF THE POSSIBILITY OF SUCH DAMAGES without the written permission of CalDigit or VIII if any CalDigit serial number on the product has been removed or defaced No CalDigit dealer agent or...
Страница 25: ...sions a newly purchased CalDigit product may be delivered in non working order We are working to avoid these issues but unfortunately these situations may arise from time to time Within the 15 calenda...
Страница 26: ...CalDigit T4 www caldigit com 2014 CalDigit Inc All Rights Reserved...