


9
36
53
55
54
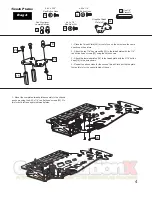
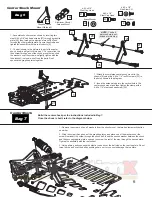
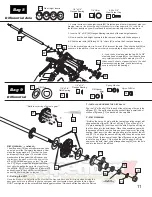
Installing the Lower arm to the Chassis
1 - Insert three 4-40 x 7/16” red FH screws [36] through the chassis,
then through the Front End Riser Plate [53], and top with the Front End
Mounting Plate [54]. Secure these parts with three red locknuts [9]. We
recommend starting in the middle hole of the plates as shown in the
pic. This will give you the option to go either wider or narrower if need
be.
2 - Now, secure the front end assembly to the plate using the 8-32 x ½”
low head front end screws [55]. Again, we recommend starting in the
middle hole, giving you the option to go longer or shorter.
3 - Repeat these steps for the other side.
4 - For fine ride height adjustments, you can use CRC’s 4262 plastic
shim kit (optional)
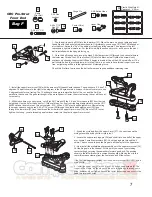
CRC Pro-Strut
Front End - cont.
4-40 x 7/16”
Red FH
36
Red Locknut
9
8-32 x ½”
Low Head
F.E. Screw
55
9
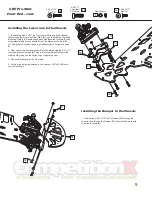
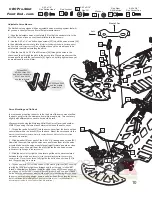
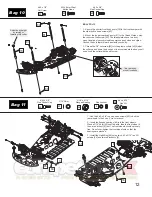
Installing the Bumper to the Chassis
1 - Insert three 4-40 x 5/16” red FH screws [56] through the
chassis, then through the Bumper [57] Secure these parts with
three red locknuts [9].
4-40 x 5/16”
Red FH
56
56
9
57


