001-0003-832 Rev3
Page 15 of 59
Find and select “
Internet Protocol (TCP/IP)
” from the list box and then click the “
Properties
” button
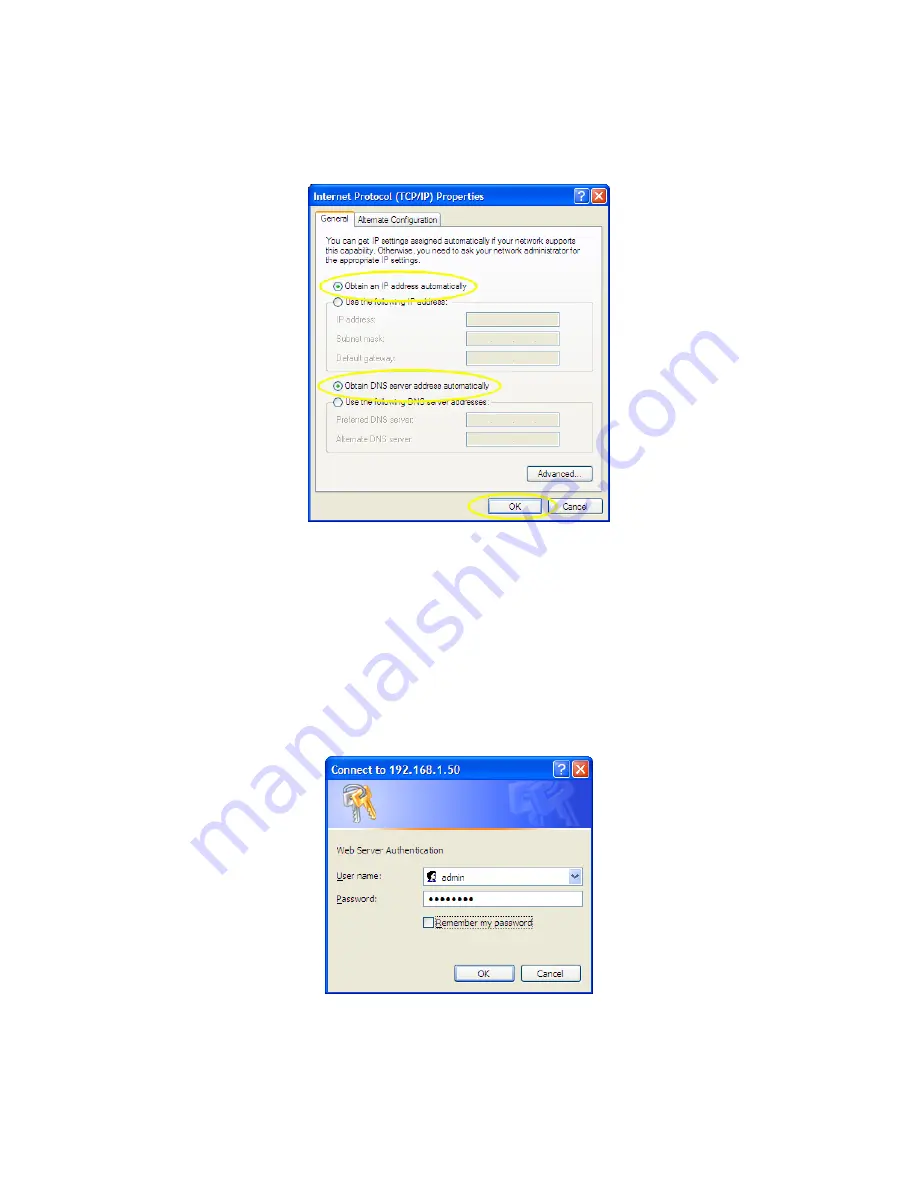
(Figure 3.1). The TCP/IP configuration window will pop up, refer to Figure 3.2. Under the General
tab, select radio button “
Obtain an IP address automatically
” and “
Obtain DNS server address
automatically
” (Figure 3.2). Click the OK button to close TCP/IP configuration window. Click the
Close button to complete the computer preparation for the 882 GSM Series modem.
Figure 3.2: Internet Protocol (TCP/IP) Properties Screen
Connect an antenna to the RF connector on the front panel of the 882-GPRS, 882-EDGE, or 882-
HSPA modem. Connect the Ethernet cross-over cable into the modem’s Ethernet Port and plug the
other end into the network port of your PC. Connect the Power Adapter to the modem and plug into
a proper AC power socket. The Power LED on the panel should activate. The Service LED (SVC TYPE)
and RSSI LED will light green to indicate the modem has finished starting up and is functioning.
Accessing the Modem’s Homepage
Start your web browser and enter
192.168.1.50
in the address bar. A login screen should appear,
enter the User Name:
admin
and the Password:
password
and click OK. Refer to Figure 3.3.
Figure 3.3: 882 GSM Series Browser Connection Login Screen


