Page 18
Owner’s Manual
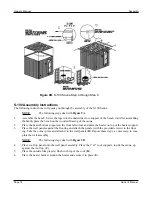
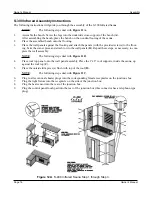
S-400 Infrared Assembly Instructions
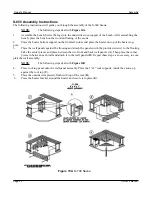
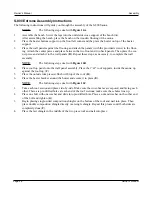
The following instructions will guide you through the assembly of the S-400 Infrared Sauna.
NOTE
:
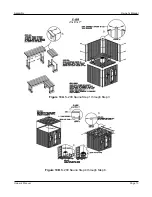
The following steps deal with
Figure 12A.
1.
Assemble the bench. Screw the legs into the underside cross-support of the bench (
A
).
After assembling the bench, place the bench on the wooden flooring of the sauna.
2.
Place the assembled bench onto the flooring.
3.
Place the wall panels against the flooring and attach the panels (with the provided screws) to the floor-
ing. Take the corner piece and attach to it to the wall panels (
B
). Repeat these steps, as necessary, to com-
plete the wall assembly.
NOTE
:
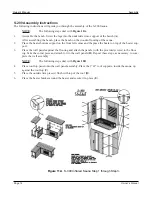
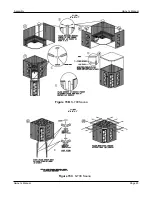
The following steps deal with
Figure 12B
.
4.
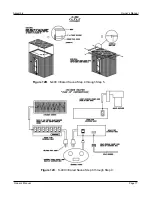
Place roof top panel onto the wall panel assembly. Place the 1”x2” roof supports, inside the sauna, up
against the roof top (
C
).
5.
Place the outside trim piece(s) flush with top of the roof (
D
).
NOTE
:
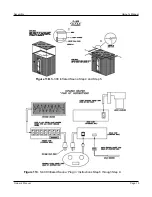
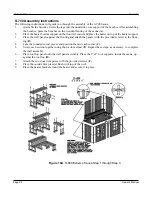
The following steps deal with
Figure 12C
.
6.
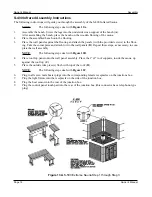
Plug in all seven male heater plugs into the corresponding female receptacles on the junctions box.
7.
Plug the light fixture into the receptacle on the side of the junction box.
8.
Plug the heat sensor into the rear of the junction box.
9.
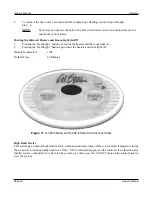
Plug the control panel touch pad into the rear of the junction box (this connector has a telephone-type
plug).
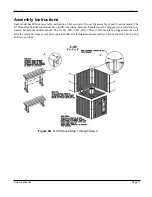
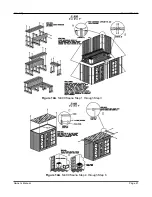
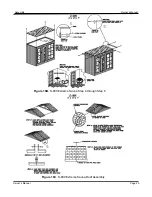
Figure 13A
. S-500 Extreme Sauna Step 1 through Step 3
Owner’s Manual
Assembly

