background image

905K463452 (267r)


 Server-Based System Setup Guide


6


1.2. Connect one end of an Ethernet cable to the institution network and the other 

end to Port 1.

*


NOTE: 

The  default  client  access  port  is  Port  1,  which  is  dedicated  to  the 

institution  network.


If  it  is  not  required  to  have  the  client  access  via  the 

institution network, Port 2 (A/V network) can be used for client access instead. 

 
1.3. During the setup process (see 

2.0


Initial Network Setup

), connect your client 

computer to Port 2 (A/V network).

**


IMPORTANT: 

Only Port 2 (A/V network) can be used during the initial network 

setup. DHCP service runs only on this port. 


*


If unsure,please consult with your local IT.


**


Client computer is not supplied. 

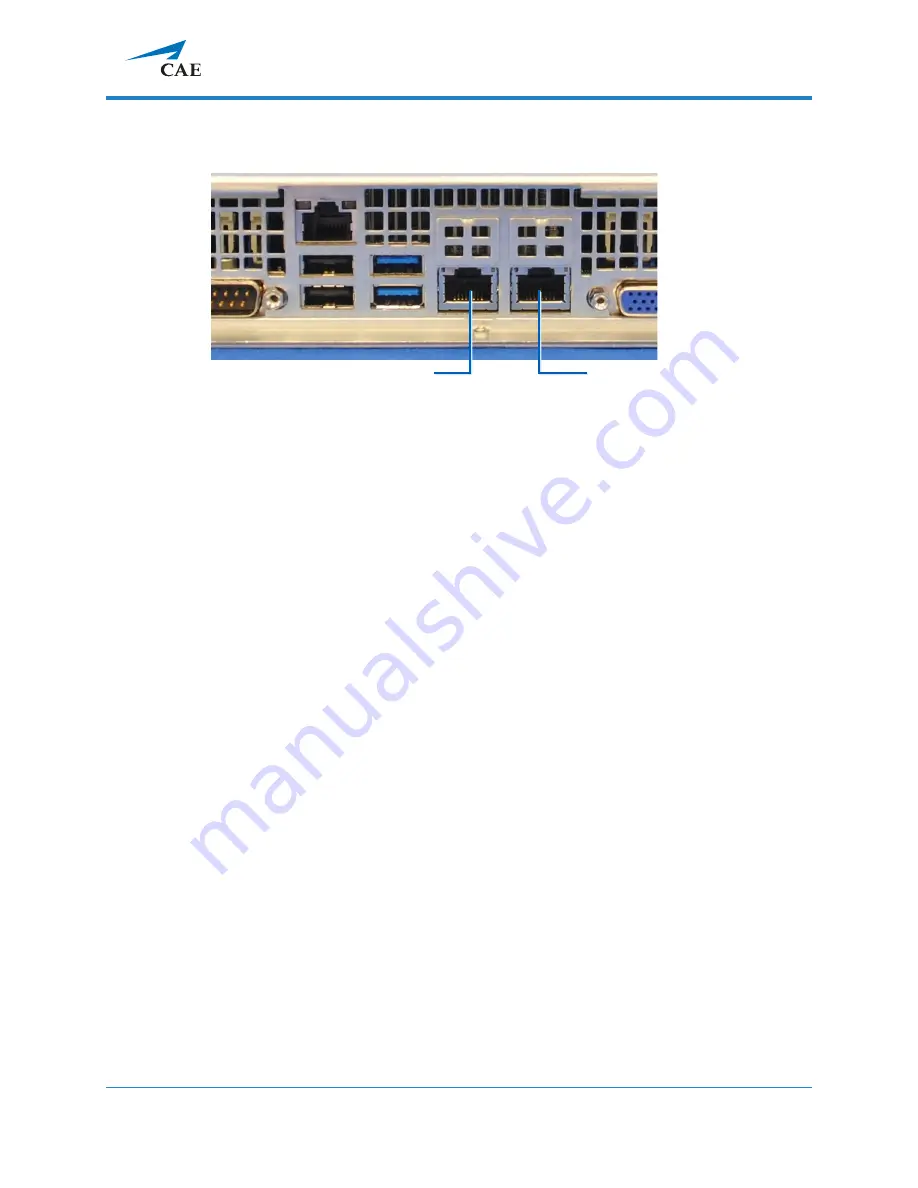
Port 1 and Port 2 on the Connect Server (back) 


Port 1 

Port 2 (A/V network) 

Содержание LearningSpace

Страница 1: ...905K463452 267r CAELearningSpace Server Based System Setup Guide...

Страница 2: ...05K463452 267r Server Based System Setup Guide 2 Copyright CAE Healthcare Academy 2019 All rights reserved No part ofthis document may be reproduced without written consent from CAE Healthcare Academy...

Страница 3: ...CAE LearningSpace web software The CAE LearningSpace Connect Server system includes the following components CAE LearningSpace software web based CAE LearningSpace Connect Server hardware If you have...

Страница 4: ...em started 1 0 Equipment Setup Server Based 5 2 0 Initial Network Setup 7 2 1 To configure your server as a MASTER Connect Server 7 2 2 To configure your server as a SLAVE Connect Server 9 2 3 Note ab...

Страница 5: ...ve the equipment from the packaging and set it up 1 1 Unpack the server IMPORTANT The slave and master Connect Servers are identical with respect to hardware component configuration CAE LearningSpace...

Страница 6: ...client access via the institution network Port 2 A V network can be used for client access instead 1 3 During the setup process see 2 0 Initial Network Setup connect your client computer to Port 2 A...

Страница 7: ...the initial login 2 1 To configure your server as a MASTER Connect Server 2 1 1 Ensure your client computer is connected to the server Port 2 A V network with an Ethernetcable IMPORTANT Make sure that...

Страница 8: ...The Master Connect Server is the host of the CAE LearningSpace system All settings become editable IMPORTANT All fields marked with an asterisk are required 2 1 5 When you are finished with editing c...

Страница 9: ...Server s hostname or IP address in the Master Connect Server Address field and all other required information IMPORTANT All fields marked with an asterisk are required 2 2 3 When you are finished wit...

Страница 10: ...space URL directs you to the Initial Settings tab see 4 3 in 4 0 where you are required to provide the Admin login credentials password and email and location In this way you skip logging in with the...

Страница 11: ...contacting the CAE support team IMPORTANT During the activation process the computer cannot be shut down 3 1 The Continue to LearningSpace button or learning space leads you to the licensing page unl...

Страница 12: ...ayed with a Login button to proceed to the login page 3 2 2 Offline activation IMPORTANT Please have the serial number ready to identify your unit Call CAE LearningSpace support to receive your Activa...

Страница 13: ...2 Logging in for the first time enter the default email address and password email admin learning space password mls changeme You will be redirected to the Initial Settings tab 4 3 Change the default...

Страница 14: ...ters lower case letters upper case letters numbers and special characters symbols You can change other settings e g language time format etc with the help of drop down menus optional When all required...

Страница 15: ...or Bridge is required which can be purchased separately In case of using wireless CAE simulators do the following 5 1 1 Connect a switch to Port 2 A V network with an Ethernet cable 5 1 2 Connect your...

Страница 16: ...o the desired room using the Rooms tab 5 2 Connecting CAE simulators using a wired connection IMPORTANT To connect a wired CAE simulator a CAE Simulator Bridge is required which can be purchased separ...

Страница 17: ...t will appear in 10 30 seconds 5 2 6 Click the desired icon in the Controls column to add or remove the simulator 5 2 7 To add the simulator to the desired room use the Rooms tab 5 3 Connecting third...

Страница 18: ...ignals from non CAE simulators with VGA output b Use a DVI to DVI video cable to capture signals from non CAE simulators with DVI output c UseanHDMItoDVIadaptercapture signals from non CAE simulators...

Страница 19: ...ehealthcare com Tel 1 941 377 5562 or 866 233 6384 For customer service please contact CAE Healthcare United States Monday Friday from 7 00 a m to 6 00 p m ET Phone 1 866 462 7920 Canada Monday Friday...

Отзывы: