background image

Black plate (44,1)

Cadillac CTS/CTS-V Navigation System - 2013 - crc - 4/2/12

44

Infotainment System

If four or less names are
available, a list displays. If more
than four are available, there is a
match counter with a number in
it, it represents the number of
available POI names. Select the
List button to view the list.

5. Select the POI name from

the list.

6. A confirmation screen displays

with the POI information. If the
POI information is correct, press
the Go screen button. The
system calculates the route.

7. Select the route preference

(Fastest, Shortest, or Easy). The
system highlights the route.

8. Press the Start Guidance screen

button. The route is now ready
to be started.

See

Getting Started on Your

Route

in this section.

Selecting a POI Category

1. Press the DEST control button.

2. Press the Point of Interest

screen button.

3. Press the Browse POI

Categories screen button.

4. Select a category, and then a

sub-category.

The system will display available
POI names in the selected
sub-category.

5. Select the POI name from

the list.

6. A confirmation screen displays

with the POI information. If the
POI information is correct, select
the Go screen button. The
system calculates the route.

7. Select the route preference

(Fastest, Shortest, or Easy). The
system highlights the route.

8. Press the Start Guidance screen

button. The route is now ready
to be started.

See

Getting Started on Your

Route

in this section.

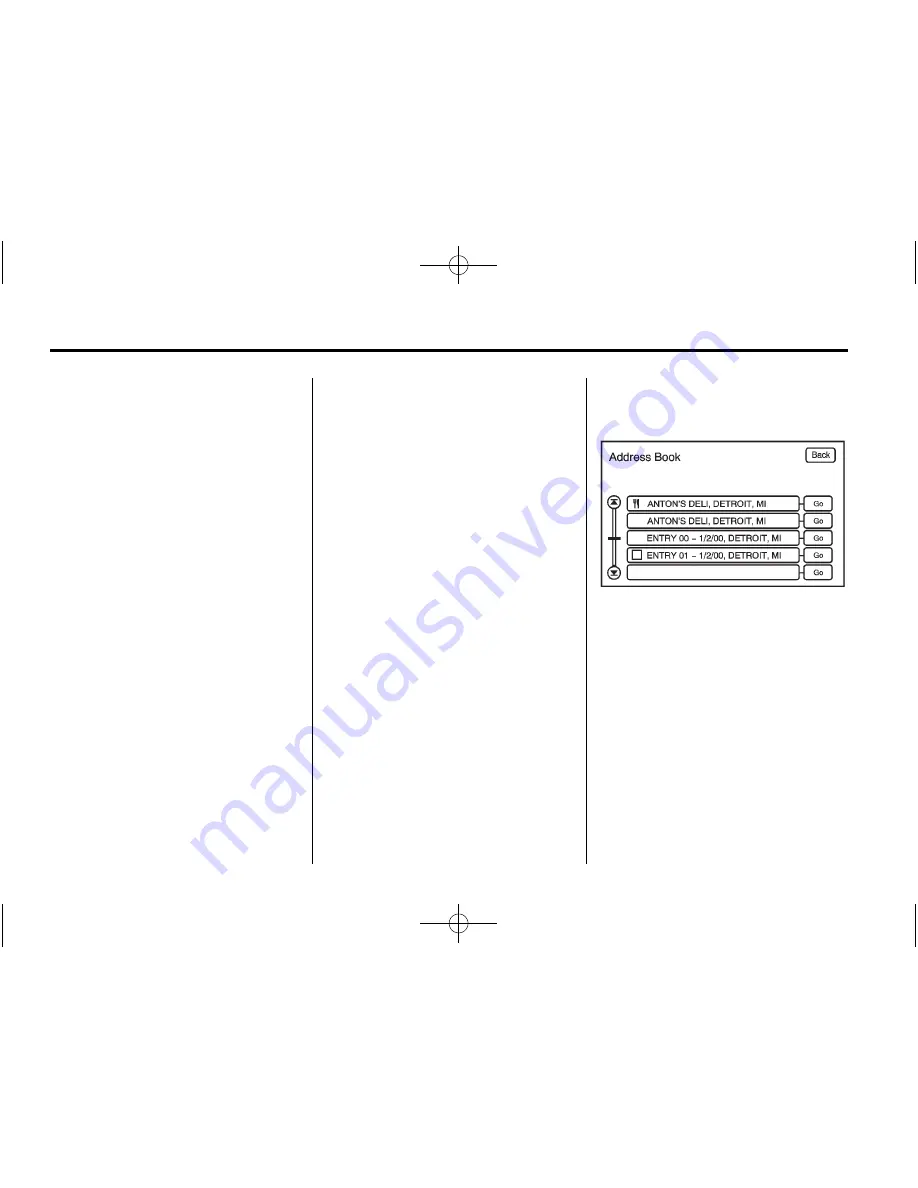
Address Book

Address Book:

The address book

entry method allows you to select a
destination by selecting an address
that has been stored in your
address book.

1. Press the DEST control button.

2. Press the Address Book screen

button.

A list of your address book
addresses display. Use the scroll
arrows to the left to move
through the list.

Содержание 2013 Cadillac CTS

Страница 1: ...yer 15 MP3 21 Hard Drive Device HDD 24 Auxiliary Devices 29 Navigation 32 Using the Navigation System 32 Maps 34 Navigation Symbols 36 Destination 40 Configure Menu 51 Global Positioning System GPS 58...

Страница 2: ...Black plate 2 1 Cadillac CTS CTS V Navigation System 2013 crc 4 2 12...

Страница 3: ...to the purchase documentation relating to your specific vehicle to confirm each of the features found on your vehicle Keep this manual with the owner manual in the vehicle so it will be there if it i...

Страница 4: ...use a crash and you or others could be injured or killed Focus your attention on driving and limit glances at the moving map on the navigation screen Use voice guidance whenever possible Use the navig...

Страница 5: ...arted and the navigation system is turned on the Caution screen appears After reading the caution select OK to load the map DVD information If OK is not selected all buttons except for NAV Navigation...

Страница 6: ...n This navigation system can record and store destinations and personal information such as names and addresses When disposing of the vehicle you may want to delete this information See Address Book E...

Страница 7: ...creen button if an incorrect character has been entered If four or less names are available for the entered characters a list displays If more than four are available there is a match counter with a n...

Страница 8: ...utton The route is now ready to be started See Point of Interest POI under Destination on page 40 for more information Storing Preset Destinations 1 Press VOL O to turn the system on 2 A caution may a...

Страница 9: ...cancel guidance prior to arrival at the final destination 1 Press DEST 2 Press the Cancel Guidance screen button 3 Press the Yes screen button to confirm cancellation Voice Guidance To adjust the vol...

Страница 10: ...ess to display the full audio screen 2 Press to switch between AM FM XM if equipped CD DVD HDD and AUX auxiliary input or press the screen button See Satellite Radio on page 15 if equipped CD DVD Play...

Страница 11: ...n a category to select if stations in the area support Radio Data Systems RDS Refresh Press to refresh the list of AM or FM stations Functions shown below only applies to XM if equipped DEL Delete Pre...

Страница 12: ...the Speakers Left Right Balance To adjust the balance between the left and the right speakers press and hold the Left or Right screen buttons Front Rear Fade To adjust the fade between the front and...

Страница 13: ...ton XM Category Restore Press to restore all of the XM Categories that have been removed See Satellite Radio on page 15 for more information Automatic Volume Control Bose equipped vehicles include Bos...

Страница 14: ...ps recording and all information is lost If stations are switched during this hour period timeshift erases all information that was recorded and starts recording from the current band If you switch to...

Страница 15: ...d to receive the XM service For more information contact XM at www xmradio com or call 1 800 929 2100 in the U S and www xmradio ca or call 1 877 438 9677 in Canada When XM is active the channel name...

Страница 16: ...n this section Playing an Audio CD RANDOM 1 Press to hear the tracks in random rather than sequential order 2 Press again to turn off random play r j Play Pause 1 Press to pause the CD the pause symbo...

Страница 17: ...to play a DVD Once a DVD is inserted the system automatically starts play of the DVD Press AUDIO then press the DVD screen button VOL O Volume Power 1 Press to turn the system on and off 2 Turn to in...

Страница 18: ...ar the tracks in random rather than sequential order 2 Press Random again to turn off random play This button is not available for DVD video c Stop 1 Press to stop play of the DVD 2 Press k play pause...

Страница 19: ...roup track or the menu number screen type in the appropriate number on the keypad Setup Press to display the DVD Setup screen The DVD Setup screen allows you to change the initial settings language an...

Страница 20: ...isplays for five seconds This may not be available on all DVDs u SEEK Next Track Chapter Press to go to the next track or chapter This button may not work when the DVD is playing the copyright informa...

Страница 21: ...ed that there is a maximum of 1024 files on a disc The files can be recorded on a CD R or CD RW with a maximum capacity of 700 MB Root Directory The root directory is treated as a folder If the root d...

Страница 22: ...t present in the file then the radio displays the file name with the extension such as mp3 as the track name Preprogrammed Playlists Preprogrammed playlists which were created by WinAmp MusicMatch or...

Страница 23: ...ws the elapsed time of the track TUNE TONE Knob Turn to go to the next or previous track q r Category Select the left or right arrow to go to the previous or next folder Artist Album Genre on the disc...

Страница 24: ...yed from a specific artist Album Press to view the albums that have been stored on the Disc Select an album name to view all songs on that list select a song It may take a few minutes for the system t...

Страница 25: ...audio book from a CD or a USB you must register with www audible com to receive an ID number The ID number must be entered into the system See Audio Book later in this section for information on www...

Страница 26: ...Press Yes to record this track press No to cancel the operation A progress bar displays if Yes was selected While recording a USB device to the HDD if the system is turned off the recording process s...

Страница 27: ...g categories All Songs 1 Press to view all songs stored on HDD 2 Select a song name from that list It may take a few minutes for the system to show the list Once a song has been selected from this cat...

Страница 28: ...ilable through the Genre menu 1 Press to view the genres that have been stored on the HDD Select an audio book name book title to view all sections in it 2 Select a section to listen to If the Last po...

Страница 29: ...e vehicle by either a CD or a USB storage device The use of the audible com playback feature requires that the audible com account be activated with the radio For more information on creating an accou...

Страница 30: ...uch as compressed audio files from the USB storage device onto the HDD The USB port is located in the center console bin between the Accessory Power Outlet APO socket and the auxiliary input jack In a...

Страница 31: ...od Menu and select Songs Artists Albums Playlists and Audio Books to play from the iPod The iPod charges while it is connected to the vehicle and if the vehicle is turned to ACC ACCESSORY or ON RUN It...

Страница 32: ...nformation Once the vehicle is moving various functions are disabled to reduce driver distractions Navigation Control Buttons The following control buttons are located on the navigation system VOL O V...

Страница 33: ...rmation Press for Speech Help See Speech Recognition on page 62 for more information on Speech Help Touch Screen Buttons Touch screen buttons are located on the screen Screen buttons are highlighted w...

Страница 34: ...ss Update 5 Enter the Authentication Code then press Enter 6 If correct code is entered the system reboots and starts updating the status bar displays 7 The disc is automatically ejected after the map...

Страница 35: ...m 1 32 of a mile to 550 km 350 mi To change from English or metric see DIC Operation and Displays in the Index of your vehicle s owner manual Scrolling the Map Press anywhere on the map screen and th...

Страница 36: ...p after a route has been planned marking the final destination The waypoint number displays on the map after a stopover has been added to your route A waypoint is a series of two or more marked stopov...

Страница 37: ...reen symbol to switch between North Up Heading Up and 3 D modes This north up symbol indicates the map with North Up known as North Up mode While in North Up mode the vehicle icon follows the north di...

Страница 38: ...ore the location on the screen in your address book The system automatically stores the point in the address book See Address Book under Destination for more information Displaying Points of Interest...

Страница 39: ...OI From this screen you can select Add to add this POI to the address book Go or Map Add Press to add this POI to the address book See Address Book under Destination on page 40 for information on addr...

Страница 40: ...ter more characters or reduce the amount of characters to reduce or expand the available options Entering the Street Name First 1 Press the DEST control button 2 Select the Street screen button 3 The...

Страница 41: ...1 Press the DEST control button 2 Press the Street screen button 3 Press the City screen button and start entering the city name If four or less names are available for the entered characters a list d...

Страница 42: ...type and use the Space screen button between street or city names Use the backspace screen button if an incorrect character has been entered If four or less names are available for the entered charact...

Страница 43: ...st button to view the list 4 Select the POI name from the list 5 A confirmation screen displays with the POI information If the POI information is correct select the Go screen button The system calcul...

Страница 44: ...trol button 2 Press the Point of Interest screen button 3 Press the Browse POI Categories screen button 4 Select a category and then a sub category The system will display available POI names in the s...

Страница 45: ...ibers to request and receive navigation assistance on the go Using OnStar Destination Download If Equipped Press the blue OnStar button and an Advisor can locate a point of interest or an address and...

Страница 46: ...l be available for the waypoint Refer to the section on Waypoints for more information Previous Destinations Previous OnStar Destination Downloads are saved under Previous Destinations in the navigati...

Страница 47: ...t can be performed Press the DEST to access the Route screen Turn List Turn List Select this screen button from the Route screen to view the list of maneuvers for the entire route Route Preview Route...

Страница 48: ...10 20 or 40 km 1 3 5 15 or 25 miles around the current route Select Entire Route to detour the entire route This option is only available while driving on a route Voice Volume Press this screen button...

Страница 49: ...m the Route screen to resume guidance on the current route Cancel Guidance Press this screen button from the Route screen to cancel the current route A confirmation window displays Select Yes to cance...

Страница 50: ...eting Entries To edit the name of an address book 1 Press the DEST control button 2 Press the Address Book screen button A list of address book entries will display Use the touch tap arrows to the lef...

Страница 51: ...ave two seconds to state the name The system responds back with the name To delete an address book entry 1 Press the DEST control button 2 Press the Address Book screen button A list of address book e...

Страница 52: ...ptions then press the CONFIG control button repeatedly until Nav is selected or press the Nav screen button Voice Volume Press the Voice Volume screen button to change the volume of the voice prompts...

Страница 53: ...abase coverage will not have these roads on the system This button highlights when it is active Delete Recorded Back Track Press to delete the recorded path Map Database Information Press the Map Data...

Страница 54: ...ditions reported to the navigation system do not affect the vehicle or no information is received while driving on a route that is not active Green indicates that the traffic condition is far away Yel...

Страница 55: ...pdates to remove the area with the traffic condition from the route Select each traffic condition to avoid Avoided List Once one or more traffic conditions have been avoided touch this screen button t...

Страница 56: ...mation for Guidance button This button highlights when it is active Alternate Route When the pop up display Detour Available appears on the screen to notify that a possibly quicker route is available...

Страница 57: ...ty Other Display Press the CONFIG control button to enter the menu options then press the CONFIG control button repeatedly until Display is selected or press the Display screen button Display Off Pres...

Страница 58: ...l To set the time 1 Press the CONFIG control button to enter the menu options then press the CONFIG control button repeatedly until the time is selected or press the clock screen button located in the...

Страница 59: ...tinting to the vehicle s windows Glass tinting interferes with the system s ability to receive GPS signals and causes the system to malfunction The window might have to be replaced to correct the prob...

Страница 60: ...using automatic rerouting for the next right or left turn The route may not be changed when using automatic rerouting There is no route guidance when turning at an intersection Plural names of places...

Страница 61: ...the Index of your vehicle owner manual for more information Mexico For any questions about the operation of the navigation system or the update process contact General Motors of Mexico Customer Care C...

Страница 62: ...le using speech recognition Press it again to turn speech recognition back on Overview 1 Press the INFO button to enter the menu options press the INFO button repeatedly until Speech Help is selected...

Страница 63: ...lable when an auxiliary device is being used Trademarks and License Agreements Manufactured under license under U S Patent s 5 451 942 5 956 674 5 974 380 5 978 762 6 487 535 other U S and worldwide p...

Страница 64: ...RATIFICATION OF ANY PREVIOUS CONSENT This EULA grants you the following license to use the SOFTWARE only on the DEVICE THE SOFTWARE IS NOT FAULT TOLERANT GM HAS INDEPENDENTLY DETERMINED HOW TO USE THE...

Страница 65: ...h the Supplemental Components then the terms of this EULA shall apply If MS Microsoft Corporation or their affiliates make available Supplemental Components and no other EULA terms are provided then t...

Страница 66: ...ces If this SOFTWARE contains documentation that is provided only in electronic form you may print one copy of such electronic documentation This EULA does not grant you any rights in connection with...

Страница 67: ...D DVD Player 15 Cleaning the Display 9 Commands 62 Compressed Audio 28 Configure Menu 51 D Database Coverage Explanations 61 Deleting Personal Information 6 Destination Navigation 40 Devices Auxiliary...

Страница 68: ...ew 62 Overview Infotainment System 3 P Playing a CD 15 Playing a DVD 17 Playing the Radio 10 Point of Interest POI 43 Power Mode 29 Preset Destinations Adding or Changing 49 Previous Destinations Dele...

Страница 69: ...0 USB Supported Devices 30 Using an MP3 CD and DVD 21 Using OnStar Destination Download If Equipped 45 Using Speech Recognition 62 Using the Radio Controls to Connect and Control Your iPod 30 Using th...

Страница 70: ...Black plate 4 1 Cadillac CTS CTS V Navigation System 2013 crc 4 2 12 i 4 INDEX 2 NOTES...

Отзывы: