background image

Содержание 2003 Seville

Страница 1: ......

Страница 2: ...w 3 4 Climate Controls 3 25 Warning Lights Gages and Indicators 3 34 Driver iniormaiion Center IC 3 43 Audio System s 3 72 1 Trip Computer 3 71 Driving YourVehicle 4 1 Your Driving the Road and Your V...

Страница 3: ...lease leave this manual in it so the new owner can use it Canadian Owners You can obtain a French copy of this manual from your dealer or from Helm Incorporated P O Box 07130 Detroit MI 48207 How to U...

Страница 4: ...ng These mean there is something that could hurt you or other people In the caution area we tell you what the hazard is Then we tell you what to do to help avoid or reduce the hazard Please read these...

Страница 5: ...or in different words You ll also see warning labels on your vehicle They use the same words CAUTION or NOTICE Vehicle Symbols Your vehicle may be equipped with components and labels that use symbols...

Страница 6: ...AFETY BELT WHENAlTACHlNG FASTEN SEAT BELTS MOVE SEAT FULLY REARWARD J SECURE CHILD SEAT PULL BELT COMPLETELY rHENSECURE CHILD SEAT DO NOT INSTALL A REAR FACING CHILD RESTRAINT INTHIS SEATING POSITION...

Страница 7: ...5...

Страница 8: ...ild Restraint Systems 1 30 Where to Put the Restraint 1 33 Top Strap 1 33 Top Strap Anchor Location 1 34 Lower Anchorages and Top Tethers for Children LATCH System 1 35 Securing a Child Restraint Desi...

Страница 9: ...If your vehicle has this feature the control is located on the outboard sides of the front seats Use the power seat controls first to get the proper position then continue with the lumbar adjustment P...

Страница 10: ...only be used when the ignition is rurnea on Tne nearing eiemenrs in rne seais automatically turn off when the vehicle s ignition is turned off See Head Restraints on pape 1 5 Only the outboard rear s...

Страница 11: ...shoulder belt can t do its job In a crash you could go intoit receiving neck or other injuries The lap belt can t do its job either In a crash the belt could goup over your abdomen The belt forces wo...

Страница 12: ...or down Moving the head restraint also changes the height of the shoulder belt The head restraints tilt forward and rearward also To tilt the head restraints forward grasp the top of the restraint an...

Страница 13: ...icle or be ejected from it You can be seriously injured or killed In the same crash you might notbe if you are buckled up Always fasten your safety belt and check that your passengers belts are fasten...

Страница 14: ...ety Belts Work that comes on as a reminder to buckle UP SeeWhenyouride in oron anything you go as fast as Safety Belt Reminder it goes Light on page 3 38 matter a lot Take the simplest vehicle Suppose...

Страница 15: ...Put someone on it Get it up to speed Then stop the vehicle The rider doesn t stop 1 8...

Страница 16: ...6 C...

Страница 17: ...ide down And your chance of being conscious during and after an accident so you can unbuckleand get out is much greater if you are belted Q If my vehicle has air bags why should I have to wear safety...

Страница 18: ...40 mph 65 km h Safety belts are for everyone home why should I wear safety belts This part is only for people of adult size Be aware that there are special things to know about safety belts and childr...

Страница 19: ...ulder belt may lock if you pull the belt across you very quickly If this happens let the belt go back slightly to unlock it Then pull the belt across you more slowly 4 Push the latch plate into the bu...

Страница 20: ...cross the chest These parts of the body are best able to take belt restraining forces The safety belt locks if there s a sudden stop or crash or if you pull the belt very quickly out of the retractor...

Страница 21: ...hurt if your shoulder belt is too loose In a crash you would move forward too much which could increase injury The shoulder belt should fit against your body A The shoulder belt is too loose It won t...

Страница 22: ...f your belt is buckled in the wrong place like this In a crash the belt would go up over your abdomen The belt forces would be there not at the pelvic bones This could cause serious internal injuries...

Страница 23: ...far forward which would increase the chanceof head and neck injury Also the belt would apply too much force to the ribs which aren t as strong as shoulder bones YOU could also severely injure internal...

Страница 24: ......

Страница 25: ...you can damage both the belt and your vehicle Safety Belt Use During Pregnancy Safety belts work for everyone including pregnant women Like all occupants they are more likely to be seriously injured i...

Страница 26: ...way as the driver s safety belt except for one thing Ifyou ever pull the lap portion of the belt out all the way you will engage the child restraint locking feature If this happens just let the belt...

Страница 27: ...s you very quickly If this happens let the belt go back slightly to unlock it Then pull the belt across you more slowly If the belt stops before it reaches the buckle tilt the latch plate and keep pul...

Страница 28: ...ching the thighs In a crash this applies force to the strong pelvic bones And you d be ZSS t i y t siide wider iile iap beii if you siia unaer if the belt would apply force at your abdomen This could...

Страница 29: ...e belt very qu lv out of the retractor u can be seriously hurt if your shoulder belt is too loose In a crash you would move forward too much which could increase injury The shoulder belt should fit ag...

Страница 30: ...2 c...

Страница 31: ...just touching the top of the thighs It should never be worn over the abdomen which could cause severe or even fatal internal injuries in a crash Accident statistics show that children are safer if th...

Страница 32: ...belt but the child is so small that the shoulder belt is very close to the child s face or neck A If the child is sitting in a seat next to a window move the child toward the center of the vehicle If...

Страница 33: ...led nor the age and size of the traveler changes the need for everyone to use safety restraints In fact the law in every state in the United States and in every Canadian province says children up to s...

Страница 34: ...h until a crash During a crash a baby will become so heavy it is not possible to hold it CAUTION Continued I Forexample in a crash at only 25 I b h 40 km h a 12 lb 5 5 kg baby will suddenly become a 2...

Страница 35: ...availablein four basic types Selectionof a particular restraintshould take into considerationnot onlythe child s weight height and age but also whether or not the restraint will be compatiblewith the...

Страница 36: ...always should be secured in appropriate infant restraints The bL y s cture of a young child is quite unlike that ofan adult or older child for whom the safety belts are designed A young child s hip bo...

Страница 37: ...1 30...

Страница 38: ...es such as T shaped or shelf like shields A booster seat F G is a child restraint designed to improve the fit of the vehicle s safety belt system Some booster seats have a shoulder belt positioner and...

Страница 39: ...and a crotch strap A shield may take the place of hip straps A T shaped shield has shoulder straps that are attached to a flat pad which rests low against the child s body A shelf or armrest type shi...

Страница 40: ...It s better to secure the child restraint in a rear seat Wherever you insta it be w e to secure the child restraint properly Keep in mind that an unsecured child restraint can move around in a collisi...

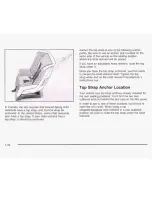
Страница 41: ...ave an adjustable head restraint route the top strap under it Once you have the top strap anchored you ll be ready to secure the child restraint itself Tighten the top strap when and as the child rest...

Страница 42: ......

Страница 43: ...H system symbol on the seatback directly above the anchors In order to use the system you need either a forward facing child restraint that has attaching points B at its base and a top tether anchor C...

Страница 44: ...sure that a LATCH type child restraint is properly installed using the anchorage points or use the vehicle s safety belts to secure the restraint See Securing a Child Restraint Designed for the LATCH...

Страница 45: ...nd pull the child restraint in different To remove the child restraint simply unhook the top strap from the top tether anchor and then disconnect the anchor points Securing a Child Restraint in a Rear...

Страница 46: ...Tilt the latch plate to adjust the belt if needed 3 Buckle the belt Make sure the release button is positioned so you would be able to unbuckle the safety belt quickly if you ever had to 1 39...

Страница 47: ...and let it go back all the way The safety belt will move freely again and be ready to work for an adult or larger child passenger Securing a Child Restraint in the Right Front Seat Position If your ch...

Страница 48: ...with the child restraint Secure the child in the child restraint when and as the instructions say 1 Because your vehicle has a right front passenger air bag always movethe seat as far back as it will...

Страница 49: ...aint You may find it helpful to use your knee to push down on the child restraint as you tighten the belt directions to be sure it is secure 7 Push and pull the child restraint in different To remove...

Страница 50: ...a crash helps reduce your chance of CAUTION Continued hitting things inside the vehicle or being ejected from it Air bags are designed to work with safety belts but don t replace them Frontal air bags...

Страница 51: ...while still maintaining control of the vehicle Front occupants should Anyone who is up against or very ose to any air bag when it inflates can be seriously injured or killed Air bags plus lap shoulde...

Страница 52: ...I L a a Q C C I v Q Q w G C 3...

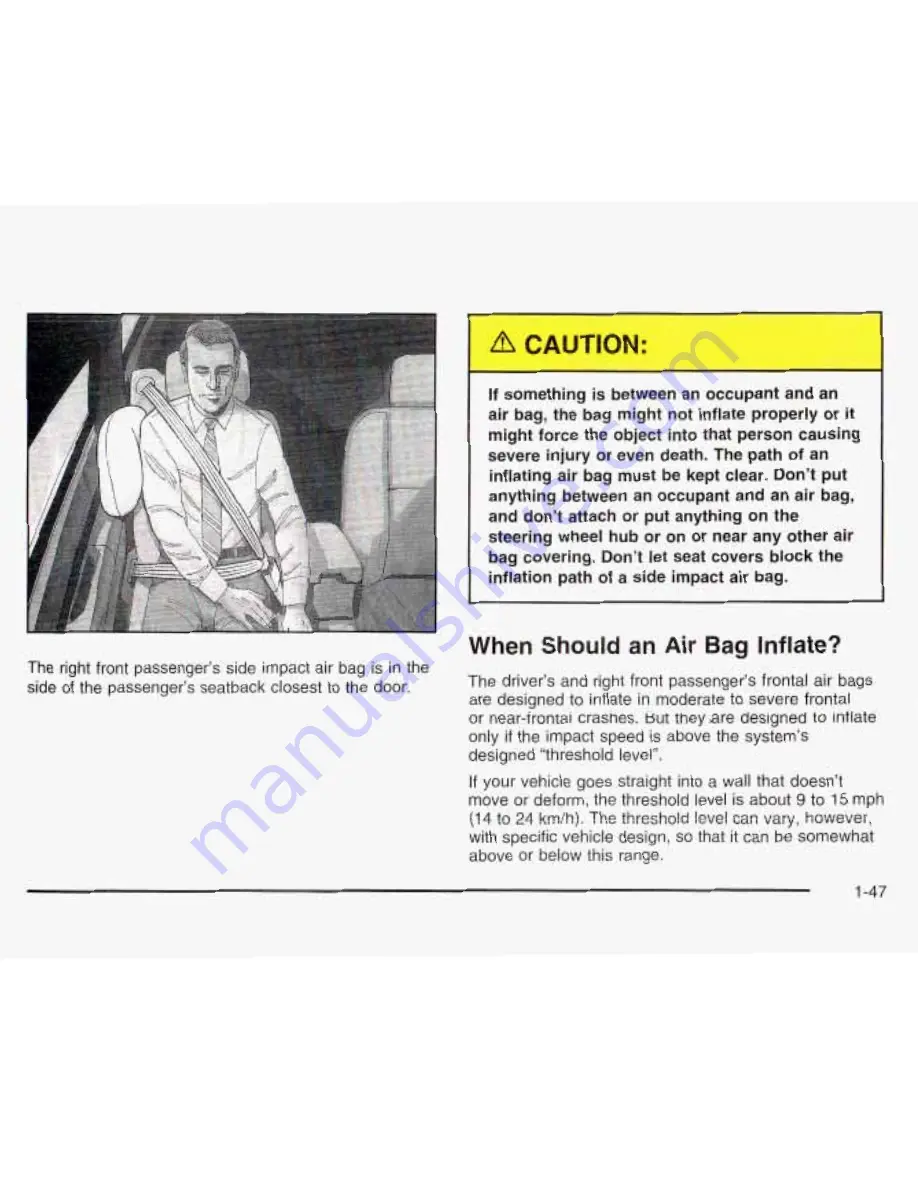
Страница 53: ...The right front passenger s frontal air bag is in the instrument panel on the passenger s side The driver s side impact air bag is in the side of the driver s seatback closest to the door 1 46...

Страница 54: ...ub or on ornear any other air bag covering Don t let seat covers block the inflation path of a side impact air bag When Should an Air Bag Inflate The driver s and right front passenger s frontal air b...

Страница 55: ...d by the location and severity of the impact What Makes an Air Bag Inflate In an impact of sufficient severity the air bag sensing system detects that the vehicle is in a crash For both frontal and si...

Страница 56: ...may be warm but not too hot to touch There will be some smoke and dust coming from the vents in the deflatedair bags Air bag inflationdoesn t preventthe driver fromseeing or beingable to steer thevehi...

Страница 57: ...odule records information about the readiness of the system when the system commands air bag inflation and driver s safety belt usage at deployment The module also records speed engine rpm brake and t...

Страница 58: ...ons Ordering Information on page 7 9 For up to10 seconds after the ignition keyis turned off and the batteryis disconnected an air bag can still inflate during improper service You can be injuredif yo...

Страница 59: ...y can rip apart under impact forces If a belt is torn or frayed get a new one right away Also look for any opened or broken air bag covers and have them repaired or replaced The air bag system does no...

Страница 60: ...damage also may mean you will need to have LATCH system safety belt or seat parts repaired or replaced New pa c 2nd repairs may be necessary even if the belt or LATCH system wasn t being used at the t...

Страница 61: ......

Страница 62: ...New Vehicle Break In 2 22 Ignition Positions 2 22 Starting Your Engine 2 23 Engine Coolant Heater 2 24 Automatic Transaxle Operation 2 26 Parking Brake 2 29 Shifting Into Park P 2 31 Shifting Out of...

Страница 63: ...46 Cellular Telephone 2 46 Center Console Storage Area 2 46 Map Pocket 2 46 Assist Handles 2 46 Garment Hooks 2 47 Umbrella Holder 2 47 Floor Mats 2 47 Convenience Net 2 47 Sunroof 2 48 Vehicle Person...

Страница 64: ...thers could be badly injured or even killed They could operate the power windowsor other controls oreven make the vehicle move If they turned the ignition toACC or ON and moved the shift lever out ofP...

Страница 65: ...vehicle has a number of features that can help prevent theft You can have a lot of trouble getting into your vehicle if you ever lock your keys inside You may even have to damage your vehicle to get...

Страница 66: ...cts may be blocking the signal Take a few steps to the left or right hold the transmitter higher and try again Check to determine if battery replacement is necessary See Battery Replacement under Remo...

Страница 67: ...l the memory settings for up to two drivers For more information see DIC Vehicle Personalization on page 3 60 and Memory Seat Mirrors and Steering Wheel on page 2 49 Matching Transmitter s to Your Veh...

Страница 68: ...ansmitter is separated use an ObJeCt like a pencil to remove the old battery Do not use a metal object 3 Insert the new battery as the instructions under the 4 Snap the transmitter back together tight...

Страница 69: ...ys lock your vehicle whenever you leaveit unlocked door when you slow down or stop your vehicle Locking your doors can help prevent this from happening 0 Young children who get into unlocked Outsiders...

Страница 70: ...front door to lock all of the doors at once Press the top of the switch to unlock all of the d a x s at mce Your vehicle is programmed so that when the doors are closed the ignition is on and the shif...

Страница 71: ...r lock switchor by lifting the rear door manual lock 2 Then open the door from the outside To cancel the rear door security lock do the following 1 Unlock the door and open it from the outside 2 Move...

Страница 72: ...hat will force outside air into your vehicle See Climate Controls in the Index instrument panel open them all theway I S _ I I 1 1 II yuu 1mve air uuutxs ui 1 u r ui der iiie See Engine Exhaust in the...

Страница 73: ...your vehicle Open all air ducts on the instrument panel Don t use the trunklid tie down if you are towing a trailer because of the danger of CO A Your vehicle may be equipped with a trunk lid tie dow...

Страница 74: ...when securing items in the trunk in the trunk I I ne rear seai arrnresi must be down ior ine pass through door to open To release the pass through Thereis a glow in the darktrunk release handle locate...

Страница 75: ...windows closed is dangerous A child can be overcome by the extreme heat and can suffer permanent injuries or even death from heat stroke Never leave a child alone in a vehicle especially with the win...

Страница 76: ...position to activate the express down feature If you want to stop the window as it is lowering press the down arrow on the switch again Express Up Window This feature is on both front power windows P...

Страница 77: ...tch 4 Continue holding the switch up for approximately until the window is fully closed two seconds after the window is completely closed The window is now programmed Repeat the process for the other...

Страница 78: ...capability The visors also have a storage flap Lighted Visor Vanity Mirrors Pull the visor down and lift the cover Move the slide switch up or down to brighten or dim the lamp Press this button to dis...

Страница 79: ...he theft deterrentsystem won t arm if you lock the doors with a key or use the manual door lock It activates only if you use a power door lock with the door open orthe remote keyless entry transmitter...

Страница 80: ...If the alarm does not sound when it should check to see if the horn works The horn fuse may be blown To replace the fuse see Fusesand Circuit Breakers on p y e 5 93 ii iire iuse does noi need io be r...

Страница 81: ...ty could void authorization to use this equipment PASS Key Ill uses a radio frequency transponder in the key that matches a decoder in your vehicle PASS Key 111 Operation Your vehicle is equippedwith...

Страница 82: ...nue with Step 3 To program the new key do the following 1 Verify that the new key has PK3 stamped on it 3 Affer the engine has sfaded turn the key to OFF and remove the key 4 Insert the key to be prog...

Страница 83: ...aking in guideline every time you get new brake linings Don t tow a trailer during break in See Towing a Trailer in the index for more information Ignition Positions With the key in the ignition switc...

Страница 84: ...a door is opened If you want power for another 10 minutes close all the doors and turn the ignition key to ON and then back to OFF If the cellular phone is being used while retained accessory power i...

Страница 85: ...be flooded with too much gasoline Try pushing your accelerator pedal all the way to the floor and holding it there as you hold the key in START for about three seconds If the vehicle starts briefly bu...

Страница 86: ...w nI ra 3 3 E 2 c 3 Q D Q 2 2 0 2 C 0 U 5 0 0 Q P S Q 5 D 2 2 E D 1 0 0 Q 2 0 E D 3 3 z I 0 cv tD 5tD...

Страница 87: ...d To be sure your vehicle won tmove even when you re on fairly level ground always set your parking brake and move the shift lever to PARK P See Shifting Into Park P in the Index If you re pulling a t...

Страница 88: ...gear while your engine is racing AuTOifiAiiC GvERDRivE 0 j This position is for normal driving If YOU need more power for passing and you re 9 Going less than 35 mph 55 km h push the accelerator pedal...

Страница 89: ...your front wheels won t turn don t try to drive This might happen if you were stuck in very deep sand or mud orwere up against a solid object You could damage your transaxle Also if you stop when goin...

Страница 90: ...brake on the located to the left of the regular brake pedal near the driver s door To set the parking brake hold the regular brake pedal down with your right foot and pushthe parking brake pedal down...

Страница 91: ...the arrow in the illustration If the parking brake does not release you should have your vehicle towed to your dealer for service Notice Driving with the parking brake on can cause your rear brakes to...

Страница 92: ...ound use the steps that follow Ifyou re pulling a trailer see Towing a Trailer inthe Index 1 Hold the brake pedal down with your right foot 2 M v e the shift lever into PARK P by pushing the lever all...

Страница 93: ...y before you leave the driver s seat To find out how see Shifting lnto Park P on page 2 3I If torque lock does occur you may need to have another vehicle push yours a little uphill to take some of the...

Страница 94: ...ng in if 0 Your exhaust system sounds strange or different Your vehicle gets rusty underneath e Your vehicle was damaged in a collision 0 Your vehicle was damaged when driving over high points on the...

Страница 95: ...Another closed in place can be a blizzard See Winter Driving in the Index It can be dangerous to get out of your vehicle if the shift lever is not filly inPARK P with the parking brake firmlyset Your...

Страница 96: ...automatic dimming feature GK or off press the on off button Theindicator light will be illuminated when the automatic dimming feature is on PI hAU L mn wt a ling 11 t IvriTTOr When cieaning the mirror...

Страница 97: ...ce may be caused by a magnetic antenna mount magnetic note pad holder or a similar magnetic item If the letter C should ever appear in the compass window the compass may need calibration The mirror ca...

Страница 98: ...kly until the correct zone number appears in the display Stop pressing ii e buiiwn arid ihe mirror wiii reiurn io normai operation If C appears in the compass window the compass may need calibration S...

Страница 99: ...pped with this feature the driver s side mirror will adjust for the glare of headlamps behind you This feature is controlled by the on and off settings on the automatic dimming rearview mirror See Aut...

Страница 100: ...ar them of fog or driver s seat This mirror does not have a dimming ice See Dual Cfimate Control Systemon page 3 25 feature for more information A convexmirrorcanmake t 1gs like other vehicles look fa...

Страница 101: ...Services Onstar provides a number of service plans Some of the services currently providedby Onstar are Automatic NotificationofAirBagDeployment EmergencyServices RoadsideAssistanceStolenVehicleTracki...

Страница 102: ...e controls are located on the left side of the steering wheel Press the tap part of the control to access OnStap You will hear a ready prompt from the system and then you can begin your Onstar session...

Страница 103: ...Operation is subject to the following two conditions 1 this device may not cause interference and 2 this device must accept any interference including interferencethat may cause undesiredoperation of...

Страница 104: ...Operator and Canadian Programming later in this section require yGu tG substitute Step 3 with the prGcedure 4 The indicator ight wi f ash s ow y at first and then rapidly after HomeLink successfully r...

Страница 105: ...ing HomeLink procedures regardless of where you live replace Step 3 under Programming HomeLink with the following Continue to press and hold the HomeLink button while you press and release every two s...

Страница 106: ...SP Z...

Страница 107: ...ation with remote record and hands free operation are standard features For more information contact your dealer A user s guide is provided with the telephone Center Console StorageArea The center con...

Страница 108: ...with rubber backedfront and rear floor mats Keep them clean by vacuuming and using a spot cleaner if necessary Do not machine wash Your vehicle may be equipped with a convenience net The net attaches...

Страница 109: ...The comfort stop position is designed to help reduce noise and make the rear seat passengers more comfortable The glass panel may then be fully opened by pressing the ROOF switch again If you press a...

Страница 110: ...that the position has been stored A second mirror seating and steering wheel position can be programmed by repeating the above steps and pressing button 2 for Driver 2 Each time a memory button is pr...

Страница 111: ...it position for the previously set driver can be recalled by pressing the EXIT button The mirrors power lumbar and shoulder belt height positions will not be stored or recalled for the exit positions...

Страница 112: ...el Cluster 3 35 Speedometer and Odometer 3 36 Tachometer 3 38 Safety Belt Reminder Light 3 38 Air Bag Readiness Light 3 39 Charging System Light 3 40 BrakeSystemWarningand Parking Brake Indicator Ligh...

Страница 113: ...d CD BaseLevel 3 73 Radio with Cassette andCD Up Level 3 80 NavigatiodRadio System 3 91 Console Mounted CD Changer 3 91 Radio Personalization withHomeandAway Feature 3 94 Theft Deterrent Feature 3 95...

Страница 114: ...E...

Страница 115: ......

Страница 116: ...Cluster F WindshieldWiperlWasherLever G Audio Steering Wheel Controls H IgnitionSwitch I Air Outlet Thumbwheel J HazardWarningFlasher Button K AudioSystem L Exterior Lamp Controls M Hood Release N Fue...

Страница 117: ...flashers work no matter what position the key is in and even if the key isn t in Press the button to make the front and rear turn signal lamps flash on and off Press the button again to turn the flash...

Страница 118: ...wn 3 If the power tilt control is pressed upor down and held i y in that position there will be aslightmovement and L To tilt the wheel hold the wheel and pull the lever Then control is the steering w...

Страница 119: ...ss For information on the exterior lamps see Exterior Lamps on page 3 15 t An arrow located on the instrument panel cluster will flash in the direction of the turn or lane change Raise or lower the le...

Страница 120: ...t flash to pass When you do the following will occur panel cluster will be on If the headlamps are either off or in the Daytime indicating high beam Running Lamps DRL mode the high beam usage headlamp...

Страница 121: ...lever to its resting position OFF to turn off the wipers MIST Pull the lever down once and release it for a single wipe cycle For more cycles hold the lever down in the MIST position longer To wash th...

Страница 122: ...setting level one This allows more rain or snow to collect on the windshield between wipes Turning the INT ADJ band away from you to thehigher sensitivity levels allows less rain or snow to collect on...

Страница 123: ...wiping speed To spray washer fluid on the windshield in the demand mode press and hold the button until you have enough fluid and the wipers will either stop or return to your original wiping speed C...

Страница 124: ...hen road conditions allow you to safely use it again you may turn I L l I I 11IC LI U I C LUI ILIV I uabn VII If you leave your cruise control on wkem you re not using cruise you mighthit a button and...

Страница 125: ...speed up approximately 1 mph 1 6 km h faster The accelerate feature will only work after you have set the cruise control speed by pressing SET CST Reducing Speed While Using Cruise Control There are t...

Страница 126: ...r i n g the controi to this position turns off all lamps except the Daytime Running Lamps DRL d Parking Lamps Turning the control to this position turns on the parking lamps together with the followi...

Страница 127: ...the front of your vehicle during the day DRL can be helpful in many different driving conditions but they can be especially helpful in the short periods after dawn and before sunset Fully functional...

Страница 128: ...r fog lamps As with any vehicle you should turn on the regular headlamp system when you need it Fog Lamps Use the fog lamps for better vision in foggy or misty conditions 0 Fog Lamps Press the button...

Страница 129: ...ee minutes after the ignition has been turned to OFF If you move the lever so it is barely on the lamps will go off quickly when you turn the ignition switch out of OFF You can adjust the delay time f...

Страница 130: ...6 C E...

Страница 131: ...mote keyless entry transmitter unlock button If activated due to the transmitter the lightingwill remain active for about 40 seconds Since the entry lighting system uses the light sensor it must be da...

Страница 132: ...on headlamps high beams fog lamps rear window defogger the climate control fan at high speeds heated seats and enginecooling fans hijth r r a l n nor rninltto rp n so tinn hQn r 3 If the battery cont...

Страница 133: ...ph 5 km h When the system comes on the three lights on the display will illuminate to let you know that the system is working URPA senses how close your vehicle is to an object The distance is determi...

Страница 134: ...ure to check for other vehicles obstructionsand blind spots nbwzaaumy r u v v c l wuJet A nnneenm C nmn nu AI m Your vehicle is equipped with accessory power outlets The outlets can be used to plug in...

Страница 135: ...ated below the climate control system on the instrument panel Press on the lower edge of the cover to access the ashtray To clean the ashtray lift it out by pulling on the snuffer ear Ashtray The asht...

Страница 136: ...main in manual mode at that temperature and it will not go into automatic mode In cold weather the system will start at reduced fan speeds to avoid blowing cold air into your vehicle until warmer air...

Страница 137: ...ler air is directed to the upper outlets and warmer air to the floor outlets Floor This mode directs most of the air to the floor outlets with some air directed to the outboard outlets for the side wi...

Страница 138: ...n the windows to let hot inside air escape then close them This helps to reduce the time it takes for your vehicle to cool down It also helps hn q r r r m A nrrrrrr rr mrrrrr r r n m l t L I I G J y 3...

Страница 139: ...ause a false reading in the temperature Defogging and Defrosting There are two modes to clearfog from your windshield Use the floor defog mode to clear the windows of fog or moisture and warm the pass...

Страница 140: ...ore turning off The defogger can also be turned off by pressing the button again or by turning off the engine The heated outside rearview mirrors will heat to help clear fog or frost from the surface...

Страница 141: ...t the highest setting the passenger compartment air filter may need to be replaced For more information see Passenger CompartmentAir Filter on page 3 32 and PartA Scheduled Maintenance Services on pag...

Страница 142: ...outlets see Outlet Adjustment listed previously in this section nnnum n V G I auulI Mode Knob Ttim the knob to direct the airflow in the rear seating area To change the current mode select one of the...

Страница 143: ...r removes certain contaminants from the air including pollen and dust particles routine scheduled maintenance See Part A Scheduled MainfenanceSewices on page 6 4 for replacement intervals See your dea...

Страница 144: ...nge the stored settings do the following 1 Select the desired temperature fan speed and airflow mode If desired a separate temperature setting may also beselected for the front seat passenger For info...

Страница 145: ...re working If you are familiar with this section you should not be alarmed when this happens Gages can indicate when there may be or is a problem with one of your vehicle s functions Often gages and...

Страница 146: ...let you know at a glance how your vehicle is running You ll know how fast you re going how much fuel you re using and many of the other things you ll need to know to drive safely and economically Unit...

Страница 147: ...to the left of the steering wheel on the instrument panel The two trip modes are indicated byTrip A and Trip B In order to change from one mode to the other press the A B portion of the TRIP button By...

Страница 148: ...I a c E s o S...

Страница 149: ...n the engine s rpm are critically high the fuel supply to the engine is shut off When the engine speed slows the fuel supply will come on again This helps prevent damage to the engine Safety Belt Remi...

Страница 150: ...This means the system is ready If the ai bag readiness light siajis on after you start the vehicle or comes on when you are driving your air bag system may not work properly Have your vehicle servic r...

Страница 151: ...art isn t working the other part can still work and stop you For good braking though you need both parts working well If the warning light comes on there is a brake problem Have your brake system insp...

Страница 152: ...may stay on for several seconds That s normal If the light stays on turn the ignition to OFF Or if the light comes on when you re driving stop as soon as possible and turn the ignition off Then start...

Страница 153: ...olsystem is affected by an engine relatedproblem the system will turn off and the warning light will come on If the traction controlsystem warninglightcomes on and stays on for an extended periodof ti...

Страница 154: ...his gage shows the engine coolant temperature If the gage pointer moves into the shaded area the engine is too hot That reading means the samething as the warning light the engine coolant hasoverheate...

Страница 155: ...ame Tire Performance Criteria TPC can affect your vehicle s emission controls and may causethis light to comeon Modifications to these systems could lead to costly repairs not covered by your warranty...

Страница 156: ...ical system dries out A few driving trips should turn the light off Are yn11 Inw on fne AS your engine starts to run out of fuel your engine may not run as efficientlyas designed since small amounts o...

Страница 157: ...the system The vehicle would be considered not ready for inspection This can happen if you have recently replaced your battery or if your battery has run down The diagnostic system is designed to eval...

Страница 158: ...t oil isn t flowing through your engine properly Youcould be low on oil and you might have some other system problem Security Light For information regarding this light see Theft DeterrentSystems SECU...

Страница 159: ...ets down to approximately three gallons 11 4 L of fuel remaining in the tank the FUEL LEVEL LOW message will appear on the Driver Information Center DIC and a single chime will sound Here are a few co...

Страница 160: ...6P 6...

Страница 161: ...NGINE OIL LIFE then press and hold the INFO RESET button until 100 ENGINE OIL LIFE is displayed This only needs to be reset after you have had the oil changed 0 TRANSMISSION FLUIDLIFE MONITOR Under no...

Страница 162: ...sure for each tire left front right front left rear and right rear Pressingthe INFO button will scroll through the tire pressure for each of the four tires such as the following If a tire pressure is...

Страница 163: ...y accessories to allow the battery to recharge BATTERY VOLTAGE HIGH 8 This message shows that the electrical charging system is overcharging more than 16 volts To avoid being stranded have the electri...

Страница 164: ...VN t ULL UMUL 3 w I I 1 1 3 I I tcaaayc VVIII appGa1 when the fuel supply is less than 5 gallons 18 9 L and the display is turned off A single chime will also sound when this message is displayed CHEC...

Страница 165: ...a tire is low you should stop as soon as possibleand inspect your tire s for damage If a tire is flat seeIf a Tire Goes Flat on page5 72 Oncethe TPM systemdetects the low or hightire pressurecondition...

Страница 166: ...ues to appear have the system repaired as soon as possibleto avoid compressor damage ENG NE OVERHEATED STOP ENGINE 42 This message will appear when the engine has overheated Stop and turn the engine o...

Страница 167: ...icle s speed is greater than 3 mph 5 km h SERVICE AC SYSTEM 14 This message appears when the electronic sensors that control the air conditioning and heating systems are no longer working Have the cli...

Страница 168: ...have your vehicle serviced atyour dealership SE V CETHEFT SYSTEM 34 This message means there is a problem with the PASS Key Ill system A fault has been detected in the system which means that the syst...

Страница 169: ...damaged remove the key and try to start the vehicle again If it still does not start try another ignition key or see your dealer for service THEFT ATTEMPTED 40 This message is displayed if the theft s...

Страница 170: ...ization These features allow both drivers to personalize their own climate control settings as well as their radio settings For more information see Climate Controls Personalization on page 3 33and Ra...

Страница 171: ...riate memory button 1 or 2 located on the driver s door Certain features can be programmed not to recall until the key is placed in the ignition To change feature preferences you must use one of the f...

Страница 172: ...his feature This feature recalls any previously programmed seat and mirror controls when the key is inserted intg the ignitim The telescoping steering column if equipped will return to its programmed...

Страница 173: ...To turn it off press the OWOFF button until OFF appears on the display The mode you selected is now set You can either exit the programming mode by following the instructions later in this section or...

Страница 174: ...our vehicle was shipped from the factory it was programmedto Mode 1 The mode to which the vehicle was programmed may have been changed since it left the factory To determine the mode to which the vehi...

Страница 175: ...ature press the ON OFF button until ON appears on the DIC display To turn it off press the ON OFF button until OFF appears on the display The mode you selected is now set You can either exit the progr...

Страница 176: ...I ON Mode 2 OFF Before your vehicle was shipped from the factory it was programmed to Mode 1 The mode to which the vehicle was programmed may have been changed since it left the factory To determine t...

Страница 177: ...All other doors will remain locked until the unlock button on either front door armrest or on the remote keyless entry transmitter is pressed Programmable Modes Mode 1 ON Mode 2 OFF Before your vehic...

Страница 178: ...it later in this section or program the next feature available on your vehicle the p gramming muuG h r v y f U l l U V V l l I I t n l i n n ly t LhG n I I in I S L l t r l r r u t uns i n Doors Unloc...

Страница 179: ...ng mode by following the instructions later in this section or program the next feature available on your vehicle Mirror to Curb In Reverse If your vehicle has the optional memory package you will hav...

Страница 180: ...ssage to be displayed on the DIC See DIC Warnings and Messages on page 3 52 for more information Mode 1 ON Mode 2 OFF Before your vehicle was shipped from the factory it was programmed to Mode 1 The m...

Страница 181: ...ayed in the DIC when the ignition is turned to ON This feature only works when the remote keyless entry transmitter is used to unlock the vehicle or when buttons 1 or 2 on the driver s door are presse...

Страница 182: ...ent oil life remains The DIC may display a CHANGE ENGINE OIL message For more information see Scheduled Maintenance on page 6 4 If you see CHANGE ENGINE OIL it means the oil life is gone and you shoul...

Страница 183: ...re getting the most out of the advanced engineering that went into it Your vehicle has a feature called Retained Accessory Power RAP With RAP you can play your audio system even after the ignition is...

Страница 184: ...XMXM 9696 Phying the Radio PWR Power Press this knob to turn the system on and off VOL Volume Turn this knob to increase or to decrease volume HR Hour or MN Minute Display the time with the ignition o...

Страница 185: ...for more than two secondsuntil you hear a beep Theradiowill go to the first preset station stored on yourpushbuttons play for five seconds then go on to thenext preset station Press SCAN again to sto...

Страница 186: ...ton is inoperable on this radio except if your radio is equipped with XMTM Satellite Radio Service I o seiect and find a desired PTY perform the following 1 Press PTY PTY will be displayed on the scre...

Страница 187: ...XMTMRadio Messages indicates content with Tune to another station If this station was one of your 3 76...

Страница 188: ...perly No text or informational messages are available at this time on this channel Your system is working properly The XM receiver in your vehicle may have previously been in another vehicle For secur...

Страница 189: ...the type of cassette tape for clearer sound of Cr02 cassette tapes If an error appears on the display see Cassette Tape Messages later in this section RW Rewind Press the left arrow to rewind the tape...

Страница 190: ...the radio are OR and the underlined compactdisc symbol appears on the display the disc will begin playing A compact disc a be Ioadec with the radio off but it will not start playing until the radio is...

Страница 191: ...CD is not playing correctly for any other reason try a known good CD If any error occurs repeatedly or if an error can t be corrected contact your dealer Radio with Cassette and CD Up Level Radio Dat...

Страница 192: ...wer Press this knob to turn the system on and off AVC Autematic Jo ume Cantro With AVC you audio system monitors the noise in the vehicle Then AVC adjusts the volume level so that it always sounds the...

Страница 193: ...ou hear a beep The radio will go to the first preset station stored on your pushbuttons play for five seconds then go on to the next preset station Press SCAN again to stop scanning presets The radio...

Страница 194: ...DSP This feature is usedto providea choice of four differentlisteningexperiences talk front seat ambience and spacious DSP can be used whilelistening to the radio cassette CD orXMTM Press this buttont...

Страница 195: ...nnouncements is found NO TRAFFIC STATION FOUND will appear on the display If the TA button is pressed and held for two seconds the radio will search for the next available TA station Press the TA butt...

Страница 196: ...ault display You may override this feature by pressing the MSG button to review all of the pages at your own pace Finding a PTY Stati n RDS and XMTM To se ect and find a desired PTY perform the follow...

Страница 197: ...eing updated and no action is required This process should take no longer than 30 seconds Your system is functioning correctly but you are in a location that is blocking the XM signal When you move in...

Страница 198: ...ng properly The XM receiver in your vehicle may have previously been in another vehicle For security purposes XM receivers cannot be swapped between vehicles If you receive this message after having y...

Страница 199: ...previous selection on the tape 2 NEXT Your tape must have at least three seconds of silence between each selection for next to work Press this pushbutton to seek to the next selection on the tape 3 R...

Страница 200: ...icensingCorporation Doiby and the doubie D symboi are trademarks of DolbyLaboratoriesLicensing Corporation Auto Cr02 aiiows the cassettetape playerto adjust to the type of cassette tape for clearersou...

Страница 201: ...stop scanning Eject Press this button located to the right of the CD slot to stop a CD when it is playing or to eject a CD when it is not playing Eject may be activated with the radio off and or the i...

Страница 202: ...tal sound processmg LISP a Hadio Data System HUS with program type selections PTY that will seek out the kind of music you want to listen to The radio system can also communicate with your navigation...

Страница 203: ...his will continue for up to one and a half minutes depending on the number of discs loaded Whenever a CD magazine with discs is loaded in the changer the CD changer symbol will appear on the radio dis...

Страница 204: ...er on the radio display will go to that of the next available CD 6 RDid jiiandomj Press this pushbutton to hear the tracks in random rather than sequential order RDM will appear on the display Press t...

Страница 205: ...corresponds to driver 1 or 2 If transmitter 1 is used to enter the vehicle the last used audio source and or settings set by driver 1 will be recalled If transmitter2 is used to enter the vehicle the...

Страница 206: ...ated and the audio system will not play If the radio is removed from your vehicle the original VIN in the radio can be used to trace the radio backto your vehicle Some audio controls can be adjusted a...

Страница 207: ...XM SIGNAL to indicate interference Cellular Phone Usage Cellular phone usage may cause interference with your vehicle s radio This interferencemay occur when making or receiving phone calls charging t...

Страница 208: ...eaning cassette from being ejected use the following steps 1 Turnthe ignition on 2 Turnthe radio off 4 Turn the radio on and insert the scrubbing action cleaning cassette 5 Eject the cleaning cassette...

Страница 209: ...ldand the antenna connector located on the driver s side top corner of the rear window need to be properly attachedto the buttons on the glass Do not apply aftermarket glass tinting The metallic film...

Страница 210: ...ff Road Recovery 4 12 Passing 4 13 Loss of Control 4 14 Driving at Night 4 15 Driving in Rain and on Wet Roads 4 17 City Driving 4 20 Freeway Driving 4 21 Before Leaving on a Long Trip 4 22 Highway Hy...

Страница 211: ...riving task Anything that distracts from the driving task such as concentrating on a cellular telephone call reading or reaching for something on the floor makes proper defensive driving more difficul...

Страница 212: ...heamount of alcoholconsumed The drinker s bodyweight The amount of food that is consumed before and 0 The length of time it has taken the drinker to during drinking curlsurrte ihe aicohoi According to...

Страница 213: ...ffected well below a BAC of 0 10 percent Research shows that the driving skills of many people are impairedat a BAC approaching 0 05 percent and that the effects are worse at night All drivers are imp...

Страница 214: ...amount of alcohol You can have a serious or even fatal collision if you drive after drinking Please don t drink and drive or ride with a driver who has been drinking Ride home in a driver who will no...

Страница 215: ...raking rather than keeping pace with traffic This is a mistake Your brakes may not have time to cool between hard stops Your brakes will wear out much faster if you do a lot of heavy braking If you ke...

Страница 216: ...at wheels are slowing down If one of the wheels is about to stop rolling the computer will separately work the brakes at each front wheel and at both rear wheels The anti lock system can change the br...

Страница 217: ...u get too close to the vehicle in front of you you won t have time to apply your brakes if that vehicle suddenly slows or stops Always leave enough room up ahead to stop even though you have anti lock...

Страница 218: ...o limit wheel spin especially in slippery road conditions you should always leave the system on But you can turn the traction control system off if you ever need to You should turn the system off if y...

Страница 219: ...a reasonable speed A lot of the driver lost control accidents mentioned on the news happen on curves Here s why Experienceddriver or beginner each of us is subject to the same laws of physics when dri...

Страница 220: ...aneuvers gear selection is controlled This will maximize the available drive wheel torque and minimize the transaxle maneuver the transaxle shifts automatically as vehicle speed changes racnnncn timn...

Страница 221: ...d reason to practice defensive driving at all times and wear safety belts properly Off Road Recovery You may find that your right wheels have droppedoff the edge of a road onto the shoulder while you...

Страница 222: ...cates it s all right to pass providingthe road ahead is clear Never cross a solid line on your side of the lane or a double solid line even if the road seems empty of approaching traffic 0 Eo not get...

Страница 223: ...ver has asked In any emergency don t give up Keep trying to steer and constantly seek an escape route or area of less danger Skidding In a skid a driver can lose control of the vehicle Defensive drive...

Страница 224: ...driving on a surface with reduced traction try your best to avoid sudden steering acceleration or braking includingengine braking by shifting to a lower gear Any sudden changescould cause the tires t...

Страница 225: ...also make a lot of things invisible You can be temporarily blinded by approaching headlamps It can take a second or two or even several seconds for your eyes to readjust to the dark When you are faced...

Страница 226: ......

Страница 227: ...ry to avoid puddles But if you can t try to slow down before you hit them Wet brakes can cause accidents They won t work as well in a quick stop and may cause pulling to one side You could lose contro...

Страница 228: ...snAk rl r a _ 3 L Y W c uIvm IyL I a a V U y l D UGGp puddles or standing water water can come in through your engine s air intake and badly damage your engine Never drive through water that is slight...

Страница 229: ...y map and plan your trip into an unknown part of the city just as you would for a cross countrytrip Try to use the freeways that rim and crisscross most large cities You ll save time and energy See th...

Страница 230: ...Once you are moving on the freeway make certain you allow a reasonablefollowing distance Expect to move slightly slower at night When you want to leave the freeway move to the Mile for mile freeways a...

Страница 231: ...ated to the recommended pressure along your route Should you delay your trip a short time to avoid a major storm system Maps Do you have up to date maps Weather Forecasts What s the weather outlook Hi...

Страница 232: ...levels and also the brakes tires cooling system and transaxle These parts can work hard on mountain roads O Know how to go down hills The most important thing to know is this let your engine do some o...

Страница 233: ...ill better 0 Stay in yourown lane when driving on two lane roads in hills or mountains Don t swing wide or cut across the center of the road Drive at speeds that let you stay in your own lane could be...

Страница 234: ...tion or grip and will need to be very careful Include an ice scraper a small brush or broom a supply of windshield washer fluid a rag some winter outer clothing a small shovel a flashlight a red you w...

Страница 235: ...ditions See Traction Control System TCS on page 4 8 Your anti lock brakes improve your vehicle s stability when you make a hard stop on a slippery road Even though you have the anti lock braking syste...

Страница 236: ...do to summon help and keep yourself and your passengers safe J Turn on your hazard flashers Tie a red cloth to your vehicle to alert police that you ve been stopped by the snow Put on extra clothing o...

Страница 237: ...doesn t collect there Open a window just a little on the side of the vehicle that s away from the wind This will help keep CO out You can run the engine to keep warm but be careful Run your engine on...

Страница 238: ...the wheels above 35 mph 55 km h as shown on the speedometer Notke Spinning ynnr whee CBR destroy parts of your vehicle as well as the tires If you spin the wheeis too fast while shifting your transax...

Страница 239: ...s a dolly With the proper preparation and equipment many vehicles can be towed in these ways See Dinghy Towing and Dolly Towing following What s the towing capacity of the towing vehicle Be sure you r...

Страница 240: ...MANUALFORMORE INFORMATION Two labels on your vehicle show howmuch weight it may properlycarry The Tire Loading Informationlabel found on the rear edge of the driver s door tells you the proper for the...

Страница 241: ...ave a heavy load you should spread it out Don t carry more than 176 Ibs 80 kg in your trunk Do no1 lad your ve leanyheavie Ian the GVWR or either the maximum front or rear GAWR If you do parts on your...

Страница 242: ...hen you pull a trailer For example if the trailer is too heavy the brakes may not work well or even at all You and your passengers could be seriously injured You may also damage your vehicle the resul...

Страница 243: ...ask a hitch dealer about sway controls Don t tow a trailer at all during the first 1 000 miles 1 600 km your new vehicle is driven Your engine axle or other parts could be damaged Then during the fir...

Страница 244: ...d A of any trailer is an important weight to measure because it affects the total or gross weight of your vehicle The Gross Vehicle Weight GVW includes the curb weight of the vehicle any cargo you may...

Страница 245: ...t when loaded will Will you have to make anyholes in the body of your vehicle when youinstalla trailer hitch If you do then be sure to seal the holeslaterwhen you remove the hitch If you don tsealthem...

Страница 246: ...p checkoccasionally to be sure that the load is secure and that the lamps and any trailer brakes are still working Fs o n lingDistance Stxy at least twice as far behind the vehicle ahead as you would...

Страница 247: ...so much that they would get hot and no longer work well On long uphill grades reduce speed to 45 to 50 mph 70to 90 km h and avoid prolonged use of SECOND 2 gear and engine speeds above 3800 rpm Climb...

Страница 248: ...ing a trailer See the Maintenance Schedule for more on this Things that are especially important in trailer operation are automatic transaxle fluid don t overfill engine oil drive belt coolinq system...

Страница 249: ...PP 0...

Страница 250: ...f 2 Coolant Surge Tank Pressure Cap 5 29 Engine Overheating 5 29 Cooling System 5 32 Power Steering Fluid 5 38 Windshield Washer Fluid 5 38 Brakes 5 40 Battery 5 43 Jump Starting 5 45 Headlamp Aiming...

Страница 251: ...5 89 Cleaning the Inside of Your Vehicle 5 84 Cleaning the Outside of Your Vehicle 5 86 Sheet Metal Damage 5 88 GM Vehicle Care Appearance Materials 5 89 Vehicle Identification 5 91 Vehicle Identific...

Страница 252: ......

Страница 253: ...enance Record on page6 16 You can be injured and your vehicle couldbe damaged if you try to do service work on a vehicle without knowing enough about it Be sure you have sufficient knowledge experienc...

Страница 254: ...s use a gasoline rated at 87 octane or higher as soon as possible Otherwise you might damage your engine Gas ine SpecjfScatiofis it is recommendedthat gasoline meet specifications which were developed...

Страница 255: ...aused by the type of fuel used repairs may not be covered by your warranty To provide cleaner air all gasolines in the United States are now required to contain additives that will help prevent engine...

Страница 256: ...ssion control system may be affected The malfunctionindicator lamp may turn on If this occurs return to your authorized GM dealer for service If you plan on driving in another country outside the Unit...

Страница 257: ...burns violently and that can cause very bad injuries Don t smoke if you re near fuel or refueling your vehicle Keep sparks flames and smoking materials away from fuel The fuel cap is located behind a...

Страница 258: ...control To open the fuel door press the fuel door release button upward The vehicle must be in PARK P or NEUTRAL N and the valet lockout button must be in OFF I An a ternafe fuel door release strap is...

Страница 259: ...et fuel on yourself and msomething ignites it you could be badly burned Fuel can spray out on you if you open the fuel cap too quickly This spray can happen if your tank is nearly full and is more lik...

Страница 260: ...ot fit properly This may cause your malfunction indicator lamp to light and may damage your fuel tank and emissions system See Malfunction Indicator Lamp in the Index I fill a porta fuel co Aner while...

Страница 261: ...ing and tools away from any underhood electric fan I Things that burn can get on hot engine parts and start a fire These include liquids likefuel oil coolant brake fluid windshieldwasher and other flu...

Страница 262: ...vehicle to open the hood It is located on the lower left side of the instrument panel 2 Then go to the front of the vehicle and find the secondary hood release which is located below the front grille...

Страница 263: ...z5 D 3 U 0 CD 3 d 3 D 5 0 0 Q m S P 3 8 I 0 0 3 8 I 2...

Страница 264: ...Fluid Cap and Dipstick H EngineAirCleaner Filter I Engine Coolant Surge Tank and Pressure Cap If the CHECK OIL LEVEL message appears on the instrument cluster it means you need to check your engine oi...

Страница 265: ...he driver s side of the vehicle The handle is a yellow loop For more information on location see Engine Compartment Overview on page 5 14 Turn off the engine and give the oil several minutes to drain...

Страница 266: ...nd the radiator on the passenger s side of the vehicle For more information on location see Engine Compartment Overview on page 5 14 Notice Don t add too much oil if your engine has so much oil that t...

Страница 267: ...l change service yourself be sure the oil you use has the starburst symbol on the front of the oil container If you have your oil changed for you be sure the oil put into your engine is American Petro...

Страница 268: ...tarburst symbol are all you will need for good performance and engine protection Your vehicle has a computer system that lets you know when to change the engine oil and filter This is based on engine...

Страница 269: ...checked at any time by pressing the INFO button until ENGINE OIL LIFE is displayed on the DIC For more information on the oil life indicator see Oil Life indicator on page 3 71 What to Do with Used O...

Страница 270: ...partmentOverview on page 5 14 for more information on location Be sure the engine has cooled before following these steps to inspect or replace the engine air cleanedfilter Loosenthe air duct clamp wh...

Страница 271: ...s that may be found lying in the base 6 Install a new air filter element See Normal Maintenance Replacement Parts on page5 707 for the proper type Follow these steps to reinstallthe engine air cleaned...

Страница 272: ...an cause a damaging engine fire And dirt can easily get into your engine which will damage it kiways have the air cieaneriiii ter in piace when you re driving When to Check and Change A good time to c...

Страница 273: ...r To get the right reading the fluid should be at normal operating temperature which is 180 F to200 F 82 C to 93 C Get the vehicle warmed up by driving about 15 miles 24 km when outside temperatures a...

Страница 274: ...fluid to use See Part D Recommended Fluids and Lubricants on page 6 15 If the fluid level is low add only enough of the proper fluid to bring the level into the cross hatched area on the dipstick 1 Pu...

Страница 275: ...COOL extended life coolant The following explains your cooling system and how to add coolant when it is low If you have a problem with engine overheating see Engine Overheating on page 5 29 A 50 50 m...

Страница 276: ...verheat warning Your engine could catch fire and you or others could be burned Use a 50 50 mixture o f clean drlnk2h LI n l er 2nd DEX CQQP ccc an IVL VII J V W w e b UII m m m m r m v r r m Y A h f i...

Страница 277: ...or are hot can allow steam and scalding liquids to blow out and burn you badly Never turn the surge tank pressure cap even a little when the engine and radiator are hot The vehicle must be on a level...

Страница 278: ...er DIC You will also hear a chime There is also an engine temperature warning light and or gage on the instrument panel cluster See Engine Coolant Temperature Warning Light on page 3 42 and Engine Coo...

Страница 279: ...ne Protection Operating Mode in the Index for information on driving to a safe placein an emergency Notice If your engine catches fire because you keep driving with no coolant your vehicle can be badl...

Страница 280: ...N while stopped If it safe to do so pull of the road engine idle shift e P4 W PI EKP P L I a et the 2 Set the tempe ture cnntm tn the highest heat setting and open the windows as necessary If you no...

Страница 281: ...ling Fans An electric engine cooling fan under the hood can start up even when the engine is not running and can injure you Keep hands clothing and tools away from any underhood electric fan If the co...

Страница 282: ...nning If the engine is overheating both fans should be r n l n f f h t r Qran f I I tr r n h i c l n nnndc cnr inn Y J J v u I V I V I r u u u v I I Notice Engine damage from running your engine witho...

Страница 283: ...ank pressure cap is cool before you do it See Engine Coolant on page 5 26 for more information If no coolant is visible in the surge tank add coolant as follows Steam and scalding liquids from a hot c...

Страница 284: ...ou wouldn t get the overheat warning Your engine could catch fire and you or others could be burned Use a 50 50 mixture of clean drinkable water and DEX COOL coolant Notice In cold weather water can f...

Страница 285: ...e is no longer hot Turn the pressure cap slowly counterclockwise left about one quarter turn and then stop If you hear a hiss wait for that to stop A hiss means there is still some pressure left remov...

Страница 286: ...the CHECK engine cooling fans COOLANT LEVEL message does not appear on the By thistime thecoolant level insidethecoolantDriver Information Center coolantisat the proper surgetankmaybelower If the leve...

Страница 287: ...e cap and wipe the dipstick with a clean rag Replace the cap and completely tighten it Then remove the cap again and look at the fluid level on the dipstick The level should be at the FULL COLD mark I...

Страница 288: ...to add fluid soon The windshield washer fluid reservoir is located next to the underhood fuse block on the passenger s side of the vehicle Open the cap with the washer symbol on it Add washer fluid u...

Страница 289: ...ter cylinder reservoir is on the driver s side of the engine compartment It is filled with DOT 3 brake fluid See Engine Compartment Overview on page 5 14 There are only two reasons why the brake fluid...

Страница 290: ...work well or they may not even work at all This could cause a crash Always use the proper brake fluid 0 Using the wrong fluid can badly damage brake system parts For example just a few drops of miner...

Страница 291: ...pair Some driving conditions or climates may cause a brake squeal when the brakes are first applied or lightly applied This does not mean something is wrong with your brakes Properly torqued wheel nut...

Страница 292: ...or a new battery get U I I iilai itas iile repiacerrlerli number snown on rne original battery s label We recommend an ACDelco battery Warning Battery posts terminals and related accessories contain l...

Страница 293: ...emove the black negative cable from the battery This will help keep your battery from running down Batteries ha acidthatcan bl youandgas that can explode You can be badly hurt if you aren t careful Se...

Страница 294: ...the vehicles aren t touching each other If they are it could cause a ground connection you don t want You wouldn t be able to start your vehicle and the bad grounding could damage the electrical syst...

Страница 295: ...need to access the battery for jump starting The remote positive terminal is for that purpose I I An electric fan can start up even when the engine is not running and can injureyou Keep hands clothing...

Страница 296: ...connect the cables here are some basic things you should know Positive will go io positive or to a remote positive terminal if the vehicle has one Negative will go to a heavy unpainted metal engine pa...

Страница 297: ...e terminal on the vehicle with the dead battery 8 Now connect the black negative cable to terminal location of the vehicle with the good battery Use a remote negative terminal if the vehicle has one I...

Страница 298: ...Good Battery or Remote Positive and Remote C Heavy UnpaintedMetal EnginePartorRemote Negative Terminals Negative 1 Terminal GND 1 Disconnectthe black negative cable from the 2 Disconnect the black ne...

Страница 299: ...heir high beams at you for vertical aim If you believe your headlamps need to be re aimed we recommend that you take your vehicle to your dealer for service However it i s possible for you to re aim y...

Страница 300: ...e vehicle should be normally loaded with a 0 Tires should be properly inflated Start the vehicle and rock it to level the suspension Headlamp aiming is done with the vehicle low beam lamps The high be...

Страница 301: ...before making any adjustmentsto the vertical aim Adjusting the vertical aim first will result in an incorrect headlamp aim 1 Find the aim dot on the lens of the low beam lamps 2 Measure the distance f...

Страница 302: ...g Covering a headlamp may cause excessive heat build up which may cause damage to the headlamp 4 Turn on the low beam headlamps and place a piece of cardboard or equivalent in front of the headlamp no...

Страница 303: ...ing screw C until the headlamp beam is aimed to the horizontal tape line The top edge of the cut off should be positioned at the bottom edge of the horizontal tape line 6 Repeat Steps 4 and 5 for the...

Страница 304: ...red Have your dealer or a qualified technician service them Your vehicle may have HID headlamps After your vehicle s HID headlamp bulb has been replaced you may notice that the beam is a slightly diff...

Страница 305: ...dlamp to the headlamp mounting bracket 4 Pull the headlamp straight forward to disengage the locator pin at the outboard edge of the headlamp 5 To replace the low beam bulb first remove the rubber hou...

Страница 306: ......

Страница 307: ...ing 9 After reinstalling the bulb and socket reinstall the rubber cover Make sure it fully covers the headlamp socket IO To replace the high beam bulb turn the bulb socket counterclockwiseto unlock th...

Страница 308: ...ve the o d bu h grasp the socket firmly and 4 Install the new bulb and reverse the steps to pull the bulb out reinstall the lamp housing Center High Mounted Stoplamp CHMSL It is recommended that this...

Страница 309: ...t retainers located at each end as shown 3 Move the spare tire cover out of the way 4 Pull the trunk trim away to access the wing nuts 1 5 Remove the three wing nuts that fasten the taillamp to the bo...

Страница 310: ...ler 7 Press the bulb socket tab and turn the socket counterclockwise to remove it To remove the bulb grasp the socket firmly and pull the bulb out Once you have replaced the burned out bulb reverse th...

Страница 311: ...the wiper blade assembly on a regular basis or when worn For proper windshield wiper blade length and type see Normal Maintenance Replacement Parts on page 5 101 To replace the wiper blade assembly do...

Страница 312: ...Index Underinflated tires pose the same danger as overloaded tires The resulting accident could cause serious injury Check all tires frequently to maintain the recommended pressure Tire pressure shou...

Страница 313: ...return to the cold inflation pressure shown on the Tire Loading Information label Example You ll find maximum load and inflation pressure molded on the tire s sidewall in small letters near the rim fl...

Страница 314: ...Canada This device complies with Part 15 of the FCC Rules Operation is subject to the following two conditions 1 this device may not cause harmful interference and 2 this device must accept any inter...

Страница 315: ...isplays If the DIC display doesn t show tire pressures or the SERVICE TPM SYSTEM message appears see your dealer for service The TPM system may not work properly while the compact spare tire is instal...

Страница 316: ...nitor TPM system will need to have the sensors reset after a tire rotation is pwfnrmed A speclih triol if nppdpd Q reset the sensor identificationcodes See your dealer for service Rust or dirt on awhe...

Страница 317: ...the damage Buying New Tires To find out what kind and size of tires you need look at the Tire Loading Informationlabel The tires installed on your vehicle when it was new had a Tire Performance Crite...

Страница 318: ...between tread shoulder and maximum section width For example Treadwear 200 Traction AA Temperature A The following information relates to the system developed by the United States National Highway Tra...

Страница 319: ...tire s resistance to the generation of heat and its ability to dissipate heat when tested under controlled conditions on a specified indoor laboratory test wheel Sustained high temperature can cause...

Страница 320: ...your vehicle airandmake u lose control You could have a collision in which you or others could be injured Always use the correct wheel wheel bolts and wheel nuts for replacement Notice The wrong wheel...

Страница 321: ...hains only where legal and only when you must Use only SAE Class S type chains that are the proper size for your tires Install them on the front tires and tighten them as tightly as possible with the...

Страница 322: ...ging a Flat Tire If a tire goes flat avoid further tire and wheel damage by driving slowly to a level place Turn on your hazard warning flashers Changing a tire can cause an injury The vehicle can sli...

Страница 323: ...s in the trunk Instructions for changing your tires are on the inside of the tire cover located in your trunk To gain access to the instructions spare tire and jacking equipment do the following 1 Pre...

Страница 324: ...e tools you ll be using include the jack A and the holds the wrench and jack wheel wrench B 4 Remove the wheel wrench jack and compact spare tire from the trunk See Compact Spare Tire on page 5 83 for...

Страница 325: ...nuts Don t remove them yet L 1 i 2 Find the jacking locationfrom the diagram above and corresponding hoisting notches located in the plastic molding The front location is 9 0 inches 23 cm from the re...

Страница 326: ...vehicledamage be sureto fit the jack lift head into the proper location befbre raising the vehicle 3 Turn the jack handle counterclockwiseto lower the jack lift head until the jack fits under the vehi...

Страница 327: ...change a wheel remove any rust or dirt from the places where the wheel attaches to the vehicle In an emergency you can use a cloth or a paper towel to do this but be sure to use a scraper or wire bru...

Страница 328: ...l nuts with the roundedend o f P the nuts toward the wheel Tighten each nut by hand until the wheel is held against the hub 11 Lower the vehicle by turning the jack handle counterclockwise Lower the j...

Страница 329: ...wheel nuts can cause the wheel to come loose and even come off This could lead toan accident Be sure to use the correct wheel nuts Ifyou have to replacethem be sure to get new GM original equipment wh...

Страница 330: ...Wheel covers won t fit on your compact spare If you try to put a wheel cover on your compact spare you could damage the cover or the spare Storing a jack a tire G ler equ menl nId the passenger compa...

Страница 331: ...lision loose equipment could strike someone Store all these in the proper place The compact spare is for temporary use only Replace the compact spare tire with a full size tire as soon as you can See...

Страница 332: ...t s best to replace your spare with a full size tire as soon as you can Your spare will last longer and be in good shape in case you need it again Nnfirn When V thn L m v Prrmnart Y V I p u Y C cn r y...

Страница 333: ...s when you re cleaning the inside Never use these to clean your vehicle Gasoline Benzene Naphtha Carbon Tetrachloride Acetone Paint Thinner Turpentine Lacquer Thinner Nail Polish Remover They can all...

Страница 334: ...er See your dealer for this product Use a soft cloth with lukewarm water and a mild soap or saddle soap and wipe dry with a soft cloth Then let the leather dry naturally Do not use heat to dry For stu...

Страница 335: ...ectric defogger element may bedamaged Any temporary license should not be attached across the defogger grid Care of Safety Belts Keep belts clean and dry Do not each or dye safc be __ you do it may se...

Страница 336: ...cle nnnn _ vL L aSlullal V V X I I I UI I I I poiisiiing of your vehicle by hand may be necessary to remove residue from the paint finish You can get GM approved cleaning products from your dealer See...

Страница 337: ...ls is similar to the painted surface of your vehicle Don t use strong soaps chemicals abrasive polishes abrasive cleaners cleaners with acid or abrasive cleaning brushes on them because you could dama...

Страница 338: ...underbody with plain water Clean any areas where mud and debris can collect Dirt packed in close areas of the frame should be loosened before being flushed Your dealer or an underbody car washing syst...

Страница 339: ...ingerprints and surface contaminants Spray on wipe off I Removes swirl marks Swirl Remover Polish light surface fine scratches and other Icontamination GM Vehicle Care Appearance Materials cont d Desc...

Страница 340: ...the certificates of title and registration The 8th character i L I VIN is the engine code This code will help you identify your engine specifications and replacement parts Service Parts Identificatio...

Страница 341: ...s an individual fuse An electrical overload will cause the lamps to go on and off or in some cases to remain off If this happens have the headlamp wiring checked right away Windshield Wiper Fuses The...

Страница 342: ...that you can get along without like the radio or cigarette lighter and use its fuse if it is the correct amperage Replace it as soon as you can The fuses are located in two fuse blocks one located nea...

Страница 343: ...ge 2 Windshield Wipers 3 Accessory 4 Headlamp Low Beam Left 5 Not Used 6 Instrument Panel 7 Headlamp Low Beam Right 8 Headlamls Hiah Beam Left 10 Headlamp High Beam Right 9 Powertrain Control Module B...

Страница 344: ......

Страница 345: ...t passenger The person sitting in that position could be badly injured After reinstalling the seat cushion always check to be sure that the safety belts are properly routed and are not twisted 1 Buckl...

Страница 346: ...h ends engage Rear Underseat Fuse Block To access the fuses push in the two tabs located at each end of the fuse block cover Then lift the cover off 1 Fuel Pump 2 3 Heater Ventilation Air Conditioner...

Страница 347: ...urn SignaVHazard Y S 37 Heated Seat Right Rear 38 Dash lntearation Module Relays Usage 39 Fuel PumD 40 Parking Lamps 41 Park Brake A 42 Ignition 1 I 45 I 46 Park Brake B Park Shift Interlock Reverse L...

Страница 348: ...Relays Usage 51 Interior Lamps The spare fuses and fuse puller are located in the underhood fuse block See Underhood Fuse Block listed previously for more information 5 99...

Страница 349: ...ollowing approximate capacities are given in English and metric conversions Please refer to Pan D Recommended Fluids and Lubricants on page 6 15for more information En ine S ecifications 4 6 L DOHC V...

Страница 350: ......

Страница 351: ...0 N d...

Страница 352: ...OwnerChecksandServices 6 9 At Each Fuel Fill 6 9 At Least Once a Month 6 9 At Least Twice a Year 6 10 At Least Once a Year 6 10 Part C Periodic Maintenance Inspections 6 13 Steering Suspension andFro...

Страница 353: ...commended maintenance procedures are important Improper vehicle maintenance can even affect the quality of the air we breathe Improper fluid levels or the wrong tire inflation can increase the level o...

Страница 354: ...et the service information see Service Publications Ordering lnformation on page 7 9 Part B Owner Checks and Services tells yo2 what should be checked and when It also explains what you can easily do...

Страница 355: ...services you should have done and when you should schedule them When you go to your dealer for your service needs you ll know that GM trained and supported service people will perform the work using g...

Страница 356: ...ife system to work properly you must reset the system every time the oil is changed I _ I When the system has calculated that oil life has been diminished it will indicate that an oil change is necess...

Страница 357: ...rly under dusty conditions the filter may require replacement more often U Inspect throttle body bore and valve plates for deposits openthe throttle valve and inspect all surfaces Clean as required An...

Страница 358: ...and valve plates for deposits open the throttle valveand inspect a surfaces Clean as required An Emission Control Service See footnote t 0 Rotate tires See Tire Inspection and Rotatior on page 5 66fo...

Страница 359: ...rk plugs An Emission Control Service U Change automatic transaxle fluid and filter if the vehicle is mainly driven under one or more of these conditions In heavy city traffic where the outside tempera...

Страница 360: ...6 9...

Страница 361: ...under Cleaning the Outside of Your Vehicle on page 5 86 Weatherstrip Lubrication Silicone grease on weatherstrips will make them last longer seal better and not stick or squeak Apply silicone grease w...

Страница 362: ...on your vehicle needs service When you are doing this check the vehicle could move suddenly If it does you or others could be injured Follow the steps below 1 2 3 Before you start be sure you have eno...

Страница 363: ...r brake at once should the vehicle begin to move Park on a fairly steep hill with the vehicle facing downhill Keeping your foot on the regular brake set the parking brake To check the parking brake s...

Страница 364: ...spension andsteering system for damaged loose or missing parts signs of wear or lack of lubrication Inspect the power steering lines and hoses for proper hook up binding leaks cracks chafing etc Clean...

Страница 365: ...hrottle system for interference or binding and for damaged or missing parts Replace parts as needed Replace any components that have high effort or excessive wear Do not lubricate accelerator and crui...

Страница 366: ...I IChassis Lubricant GM Part No U S 12377985 in Canada 88901242 or equivalent or lubricant meetina reauirements of Parking Brake Cable Guides Fluid Lubricant GlLl Power Steering Fluid GM Part No U S 1...

Страница 367: ...performed record the date odometer reading and who performedthe service and any additional information from Owner Checks and Services or Periodic Maintenance on the following record pages Also you sho...

Страница 368: ......

Страница 369: ...Maintenance Record cont d 6 18...

Страница 370: ...Y Users 7 3 Customer Assistance Offices 7 3 GM MobilityProgramforPersonswith Disabilities 7 5 RoadsideService 7 5 Courtesy Transportation 7 7 Reporting Safety Defects to the United States Government 7...

Страница 371: ...f Canada Customer Communication Centre in Oshawa by calling 1 800 263 3777 English or 1 800 263 7854 French We encourage you to call the toll free number in order to give your inquiry prompt attention...

Страница 372: ...ess Bureaus Inc 4200 Wilson Boulevard Suite 800 Arlington VA 22203 1 804 Telephone 1 800 955 51 00 This program is available in all 50 states and the District mileage and other factors General Motors...

Страница 373: ...ral Motors of Canada Limited Customer Communication Centre 163 005 1908 Colonel Sam Drive Oshawa Ontario L1H 8P7 1 800 263 3777 English 1 800 263 7854 French 1 800 263 3830 For Text Telephone devices...

Страница 374: ...ll TTY users call 1 800 263 3830 fhe A c li ity A i s v e Cents at 7 gcc 323 9935 Cadillac s exceptional Roadside Service is more than an auto club or towing service It provides every Cadillac owner w...

Страница 375: ...30 mile 50 km radius of a participating Cadillac dealership If beyond this radius we will arrange to have your car towed to the nearest Cadillac dealership Reaching Roadside Service Dial the toll free...

Страница 376: ...roblem is safety related If it is please call your dealership let them know this and ask for instructions If the dealer requests that you simplydrop the vehicle oii for service you are urged to do so...

Страница 377: ...shed with each new vehicle provides detailed warranty coverage information Courtesy Transportation is available only at participating dealers and all program options such as shuttle service may not be...

Страница 378: ...u should immediately notify Transport Canada in addition to notifying General Motors of Canada Limited You may write to Transport Canada 330 Sparks Street Tower C Ottawa Ontario K1A ON5 Reportins Safe...

Страница 379: ...cally for owners and intended to provide basic operational information about the vehicle The owner s manual will include the Maintenance Schedule for all models Current and Past Model Order Forms Serv...

Страница 380: ...tside of Your Vehicle 5 86 FinishDamage 5 89 GMVehicle Care Appearance Materials 5 89 AppearanceCare cont Sheet Metal Damage 5 88 Weatherstrips 5 86 Ashtrays 3 24 Assist Handles 2 46 Audio System s 3...

Страница 381: ...stemWarningand Parking Brake Braking 4 6 Break In NewVehicle 2 22 Bulb Replacement cont Front Turn Signal Lamps 5 59 Halogen Bulbs 5 55 HeadlampAiming 5 50 Headlamps 5 55 Replacement Bulbs 5 61 High I...

Страница 382: ...icle 5 84 Outside of YourVehicle 5 86 UnderbodyMaintenance 5 89 Charging System Light 3 40 Trip Strq 1 33 Cleaning cont Weatherstrips 5 86 Cleaning the Mirror 2 35 2 37 Climate Control System AirFilte...

Страница 383: ...Defrosting DinghyTowing Display Mode Diversity Antenna Doing Your Own Service Work Dolly Towing 3 16 4 2 3 28 4 30 3 37 3 98 5 4 4 31 Door Central DoorUnlockingSystem 2 9 Locks 2 8 PowerDoorLocks 2 9...

Страница 384: ...ry 5 43 CheckandServiceEngineSoonLight 3 43 Engine cont Coolant 5 26 Coolant TemperatureGage 3 43 Coolant TemperatureWarningLight 3 42 Cooling System Inspection 6 14 Engine CompartmentOverview 5 14 Ex...

Страница 385: ...inish Damage 5 89 Flat Tire Changing 5 73 Fluid Front Ashtray 3 24 Filling a Portable Fuel Container 5 11 Filling YourTank 5 8 Fuel cont Fuels in Foreign Countries 5 7 Gasoline Specifications 5 5 Syst...

Страница 386: ...to Check 5 24 5 65 How to CheckPower Steering Fluid 5 38 H iiv to Reset the irarisaxie Fiuid Change Indicator 5 26 How to Use This Manual ii How to Wear Safety Belts Properly 1 11 Hydroplaning 4 19 If...

Страница 387: ...RestraintDesignedforthe LATCHSystem 1 38 Leather 5 85 Leaving Your Vehicle 2 10 Leaving Your Vehicle With the Light EngineRunning 2 32 AirBagReadiness 3 39 Indicator 3 40 Charging System 3 40 Cruise...

Страница 388: ...anceSchedule cont MaintenanceRequirements 6 2 Part A Schedilrd I laintenance Services 6 4 Part B OwnerChecksand Services 6 9 Part C Periodic Maintenance Inspections 6 13 Part D Recommended Fluids and...

Страница 389: ...System 2 40 Onstar Personal Calling 2 40 Oil Life Indicator 3 71 Pressure Light 3 46 OnStap Services 2 40 Onstar Steerinq Wheel Controls 2 41 2 41 3 6 3 29 OnStap Virtual Advisor Other Warning Devices...

Страница 390: ...ering Fluid 5 38 Power Steering 4 10 PowerTiltWheelandTelescopic Steering Pretensioners SafetyBelt 1 23 Windrr nls L r I C I d Column 3 7 Programmable Automatic DoorLocks 2 9 ProgrammingtheHomeLink Tr...

Страница 391: ...m Parts 5 43 Replacing Restraint System Parts After a Crash Reporting Safety Defects CanadianGovernment 7 9 General Motors 7 9 United States Government 7 8 1 52 ReprogrammingaSingleHomeLink Button 2 4...

Страница 392: ...ng Information 7 9 Service Engine Soon Light in the United States orCheckEngine Light in Canada 3 43 Ser ice Ilrlal li als 7 3 Setting Preset Stations 3 74 3 82 Setting the Time Radios with Radio Data...

Страница 393: ...ft Deterrent Systems TCS Warning Light 3 38 5 60 3 42 2 19 3 95 2 18 Theft Detsrrent Systems cont PASS Key II 2 20 PASS Key Ill Operation 2 20 Throttle System Inspection 6 14 TiltWheel 3 7 Tire Inflat...

Страница 394: ...3 18 Fluid Automatic 5 23 U Umbrella Holder 2 47 UnderhoodFuse Block 5 93 UnderbodyFlushing Service 6 12 Nnclercfandi KJ Radio ecep ior 3 96 Uniform Tire Quality Grading 5 69 United States 7 4 UsedRep...

Страница 395: ...Oil When to Check 5 65 When to CheckandChange 5 23 When to CheckPower Steering Fluid 5 38 When YouAreReady to Leave After Parking ona Hill 4 39 Replacement 5 71 GM Oil Life SystemTM 5 19 Where to Put...

Страница 396: ......

Страница 397: ...NOTES...

Страница 398: ......

Страница 399: ...b NOTES...

Страница 400: ......

Страница 401: ...b NOTES...

Страница 402: ......

Отзывы: