background image

8

HEATER

PLUG

WIRE

TIES

A05385

Fig. 9 -- Power Connection to Heater

Single Point Electrical Connection
NOTE

: All electrical connections, wire sizes and type of conduit

shall meet the National Electric Code (NEC) and state and local
codes (or International Electric Code) as applicable.

NOTE

: Use minimum 75

_

C copper wire only.

1. Make sure all disconnects are still open and tagged out as

required previously.

2. Mark the main unit nameplate with an “X” for the electric

heater size being installed. Refer to the electrical data
marked with an “X” on the nameplate for wire and
maximum over current protection sizing.

3. Connect low voltage wires as shown in unit schematic

diagrams found on the base unit installation instructions.

There connections must be made in the 24v barrier section
inside the unit panel (See Fig. 10 or Fig. 11).

4. Insert field power line through the Electrical Panel hole (see

Fig. 10 or Fig. 11) and connect to electric heater as shown
in their respective wiring diagram. Electrical heaters with

factory installed circuit breakers must have their field lines
connected to the breaker block lugs and electric heater

without factory installed circuit breakers must have their
field lines connected to the heater leads using wire nuts.
Ground electrical equipment in the appropriate locations.

IMPORTANT

: Heaters with factory installed circuit breakers may

be installed on a branch circuit protected by either a fuse or circuit
breaker. For all other heaters, the branch circuit must be protected
by a fuse or circuit breaker supplied by others.

5. Connect black and yellow stripped wires from heater to the

unit compressor contactor leads using supplied wire nuts
according to their heater wiring diagram.

NOTE

: Dress wires with wire ties provided. Separate all wires

from incoming power leads.

6. Close control box access panel.

Dual Point Heater Installation

NOTE

:

Complete single point heater installation procedures

before completing the following steps.

1. Open all electrical disconnects and install lockout tag before

beginning any installation or service work.

2. Remove Control Box Access Panel (see Fig. 1), check for

clearance on the inside of control box, and remove a 7/8--in

knockout hole on the Electrical Panel for second power line.

3. Attach warning and rating labels in the selected location

(see Fig. 1).

4. Mark the main unit nameplate with an “X” next to the

accessory heater “none”. Mark the dual point rating label

installed at step 3 with an “X” for the electrical heater size
being installed. Refer to the electrical data marked with an
“X” on each nameplate for wire and maximum over current

protection sizing.

5. Remove unit power wiring line connection from heater to

unit contactor and compressor leads a s shown in heater
wiring diagram. these are the stripped end wires black and
yellow, with opened ends.

Dual Point Electrical Connection
NOTE

: All electrical connections, wire sizes and type of conduit

shall meet the national Electric Code (NEC) and state and local
codes (or International Electric Code) as applicable.

NOTE

: Use a minimum 75

_

C copper wire only.

1. Make sure all disconnects are still open and tagged out as

required previously.

2. Connect low voltage wires as shown in unit schematic

diagrams found on base unit installation instructions. These
connections must be made in the 24v barrier section inside

the unit panel (see Fig. 12 or Fig. 13).

3. Insert first field power line through the Electrical Panel

bottom hole (see Fig. 12 or Fig. 13) and connect to electric

heater as shown in their respective wiring diagram found on
the heater accessory kit. Electrical heaters with factory

installed circuit breakers must have their field lines
connected to the breaker block lugs and electric heater

without factory installed circuit breakers must have their
field lines connected to the heater leads using wire nuts.
Ground electrical equipment in the appropriate locations.

IMPORTANT

: Heaters with factory installed circuit breakers may

be installed on a branch circuit protected by either a fuse or circuit
breaker. For all other heaters, the branch circuit must be protected
by a fuse or circuit breaker supplied by others.

CPHEA

T

ER

Содержание 50ZPB

Страница 1: ...erty damage NOTE is used to highlight suggestions which will result in enhanced installation reliability or operation Before proceeding with heater installation inspect thoroughly for shipping damage Notify shipper immediately if any damage is found Clean all dirt dust and moisture from heater package Check for proper clearances of live parts between phases and to ground Make sure that all require...

Страница 2: ... in heater wiring plug attachment plate installed in step 9 above See Fig 4 13 Rotate heater control panel into unit control box area and locate it into top left corner of control box secure heater control panel to unit control box with 4 screws provided See Fig 6 14 Open flexible fishpaper insulation cover provided with unit control box and route heater low voltage wires along the bottom of the u...

Страница 3: ...let Stage 1 Stage 2 125A03 110070151 3 75 5 208 230 1 60 18 20 8 x 1 x x 5kw 126A03 110070152 3 75 5 18 20 8 x 1 x x 5kw 127A03 110070153 5 6 7 5 27 31 3 x 1 x x 7 5kw 128A03 110070154 5 6 7 5 27 31 3 x 1 x x 7 5kw 129A03 110070155 7 5 10 36 1 41 7 x 1 x x 10kw 130A03 110070156 7 5 10 36 1 41 7 x 1 x x 10kw 131A03 110070157 11 3 15 54 1 62 5 x 2 x x x 5kw 10kw 132A03 110070158 15 20 72 1 83 3 x 2 ...

Страница 4: ...NG LABEL ELECTRICAL RATING LABEL LOCATION BLOWER ACCESS PANEL ELECTRICAL PANEL KNOCKOUT HOLE FOR DUAL POINT A11167 Fig 1 Access Panel and Label Location BLOWER MOTOR BLOWER SUPPORT BRACKET SPEED SELECTOR POWER PLUG A05382 Fig 2 Indoor Blower Compartment CPHEATER ...

Страница 5: ...5 HEATER MODULE BOLTS 3 A10111 Fig 3 Attach Heater Module HEATER WIRING PLUG ATTACHMENT PLATE WITH PLUG INSTALLED COVER PLATE A05384 Fig 4 Inside Blower Compartment CPHEATER ...

Страница 6: ...nection electric heater controls removed for clarity Electric Heat Control Box shown uninstalled A10031 Fig 5 Unit Control Box Compartment HEATER CONTROL PANEL MOUNTING SCREWS 4 A10119 Fig 6 Heater Control Panel Installation CPHEATER ...

Страница 7: ...d service HEATER RELAY LOW VOLTAGE WIRES A10120 Fig 7 Heater Low Voltage Connection GROUND LUG SINGLE POINT CONNECTION LOW VOLTAGE WIRING COMPARTMENT FISH PAPER POWER SUPPLY FOR CONTACTOR FIELD HIGH VOLTAGE SUPPLY A10121 Fig 8 Unit Power Connection CPHEATER ...

Страница 8: ...ctrical disconnects and install lockout tag before beginning any installation or service work 2 Remove Control Box Access Panel see Fig 1 check for clearance on the inside of control box and remove a 7 8 in knockout hole on the Electrical Panel for second power line 3 Attach warning and rating labels in the selected location see Fig 1 4 Mark the main unit nameplate with an X next to the accessory ...

Страница 9: ...uncut the time delay is approximately 5 sec after the initial first stage When jumper is cut at factory this provides an 8 sec delay 1 Refer to base unit installation instructions as required 2 Check for loose terminal connections 3 Check that all fuse and circuit breaker short circuit interrupting ratings are adequate 4 Turn on unit and heater power 5 Set thermostat to call for heat 6 Check opera...

Страница 10: ...IELD POWER LINE TO UNIT CONTACTOR FIRST FIELD POWER LINE TO HEATER 24V FIELD WIRING BOX A10379 Fig 12 Dual Point Connections For Heater With Circuit Breaker 24V FIELD WIRING BOX SECOND FIELD POWER LINE TO UNIT CONTACTOR FIRST FIELD POWER LINE TO HEATER A10382 Fig 13 Dual Point Connections For Heaters Without Circuit Breakers CPHEATER ...

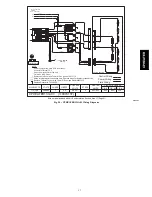
Страница 11: ...N TO UNIT POWER WIRING Wires for single point connection only Remove wires for dual point connection Replace Thermal Cut out with Therm O Disc type G8AM0402110C HR1 HK61EA033 W1 QC1 TP2 TP1 QC2 D2 QC2A QC1A D1 D4 D3 Pb SST B 1 e 24VDC 24VDC CEBD430344 06 RB US C HSCI CEPL130344 02 R 1 2 W1 TO UNIT CONTROL WIRING N E C Class 2 24V Replace Relay with T92 22VDC BLACK BLACK YELLOW L2 L1 3 75 5 0 CPHEA...

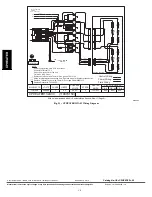
Страница 12: ...ING HR1 HK61EA033 W1 QC1 TP2 TP1 QC2 D2 QC2A QC1A D1 D4 D3 Pb SST B 1 e 24VDC 24VDC CEBD430344 06 RB US C HSCI CEPL130344 02 R 1 2 W1 TO UNIT CONTROL WIRING N E C Class 2 24V Replace Relay with T92 22VDC L2 L1 OFF OFF CB 1 CB 2 ON ON 50 A 30 A 3 75 5 0 CPHEATER126A03 110070152 208 240 1 60 24 AC 1 18 0 20 8 50A 30A BLACK BLACK YELLOW EL1 AUTO LIMIT Wires for single point connection only Remove wir...

Страница 13: ... HR1 HR2 HK61EA033 W1 QC1 TP2 TP1 QC2 D2 QC2A QC1A D1 D4 D3 Pb SST B 1 e 24VDC 24VDC CEBD430344 06 RB US C HSCI CEPL130344 02 R 1 2 W1 TO UNIT CONTROL WIRING N E C Class 2 24V Replace Relay with T92 22VDC L2 L1 BLACK BLACK BLACK CPHEATER127A03 110070153 5 6 7 5 208 240 1 60 24 AC 1 27 0 31 3 BROWN WHITE BLACK BLACK YELLOW YELLOW Wires for single point connection only Remove wires for dual point co...

Страница 14: ...D4 D3 Pb SST B 1 e 24VDC 24VDC CEBD430344 06 RB US C HSCI CEPL130344 02 R 1 2 W1 TO UNIT CONTROL WIRING N E C Class 2 24V Replace Relay with T92 22VDC L2 L1 OFF OFF CB 1 CB 2 ON ON 50 A 60 A 5 6 7 5 CPHEATER128A03 110070154 208 240 1 60 24 AC 2 27 0 31 3 50A 60A WHITE BROWN BLACK YELLOW BLACK BLACK YELLOW BLACK EL1 AUTO LIMIT Control Wiring Power Wiring Field Wiring Wires for single point connecti...

Страница 15: ...1 QC2 D2 QC2A QC1A D1 D4 D3 Pb SST B 1 e 24VDC 24VDC CEBD430344 06 RB US C HSCI CEPL130344 02 R 1 2 W1 TO UNIT CONTROL WIRING N E C Class 2 24V Replace Relay with T92 22VDC L2 L1 BLACK BLACK BLACK 7 5 10 0 208 240 1 60 24 AC 1 36 1 41 7 BLACK BLACK YELLOW YELLOW WHITE BROWN EL1 AUTO LIMIT Control Wiring Power Wiring Field Wiring Wires for single point connection only Remove wires for dual point co...

Страница 16: ...4 D3 Pb SST B 1 e 24VDC 24VDC CEBD430344 06 RB US C HSCI CEPL130344 02 R 1 2 W1 TO UNIT CONTROL WIRING N E C Class 2 24V Replace Relay with T92 22VDC L2 L1 OFF OFF CB 1 CB 2 ON ON 50 A 60 A 7 5 10 0 CPHEATER130A03 110070156 208 240 1 60 24 AC 1 36 1 41 7 50A 60A WHITE BROWN BLACK BLACK YELLOW YELLOW BLACK BLACK EL1 AUTO LIMIT Control Wiring Power Wiring Field Wiring Wires for single point connecti...

Страница 17: ...N E C Class 2 24V Replace Relay with T92 22VDC 11 3 15 0 CPHEATER131A03 110070157 208 240 1 60 24 AC 30A 2 54 1 62 5 50A 60A BLACK BLACK BLACK BLACK BLACK BLACK YELLOW YELLOW YELLOW YELLOW YELLOW YELLOW BROWN HK61EA034 W2 TP1 TP2 QC1 QC2 R2 D1 D3 D2 D4 D5 R1 R3 R4 C2 C1 Z1 Z2 Q1 QC1A QC2A Q2 Pb SST B 1 e 24VDC 24VDC CEBD430345 06 RB US C HSCI VIOLET EL1 AUTO LIMIT Control Wiring Power Wiring Field...

Страница 18: ... QC2A Q2 Pb SST B 1 e 24VDC 24VDC CEBD430345 06 RB US C HSCI 1 TO UNIT CONTROL WIRING N E C Class 2 24V Replace Relay with T92 22VDC BLACK BLACK YELLOW BLACK YELLOW YELLOW YELLOW BLACK BLACK BLACK BLACK WHITE BROWN BROWN VIOLET Control Wiring Power Wiring Field Wiring Wires for single point connection only Remove wires for dual point connection Replace Thermal Cut out with Therm O Disc type G8AM04...

Отзывы: