background image

Installation

CSX200 Family User’s Guide 31

Installing the CSX200

The CSX200 may be installed on a tabletop, shelf or in a 19-inch rack.

Refer to 

Tabletop and Shelf Installations

 for information concerning a tabletop or shelf 

installation. 

CSX200 Rackmount Installation

 describes the rackmount installation. 

Tabletop and Shelf Installations

The following two subsections provide guidelines for installation on a tabletop or shelf.

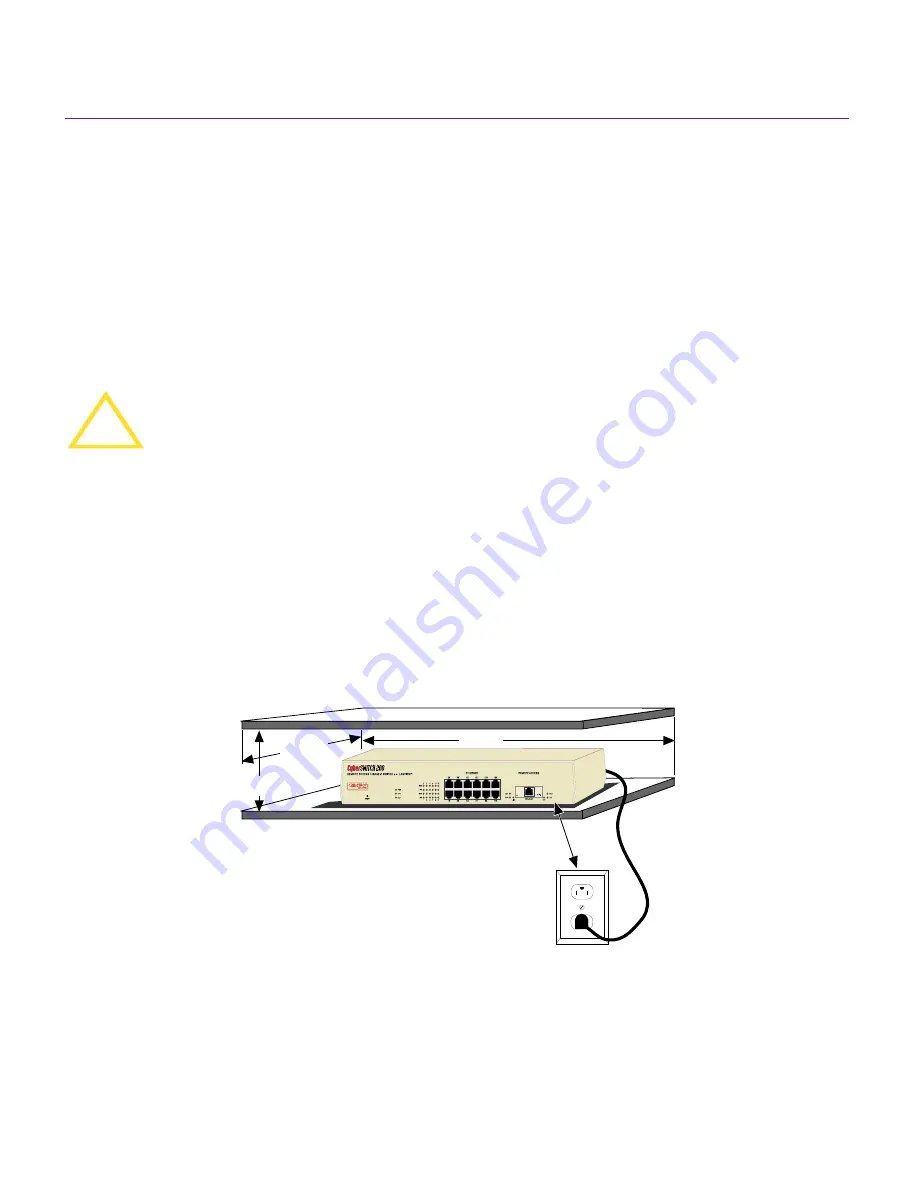
To install the CSX200 on a tabletop or shelf, locate the CSX200 within seven feet of its power 
source with an unrestricted free surface area as shown in 

Figure 7

, and complete the following 

steps:

1.

Locate the six round rubber feet included with your CSX200.

2.

Peel the paper backing off the round rubber feet, and adhere them to the bottom of the CSX200. 
Place one rubber foot near each of the four corners of the CSX200, and evenly space the 
remaining two near the center.

Figure 7


Tabletop or Shelf Installation

Continue the installation by connecting power as described in 

Connecting the CSX200 to the 

Power Source

.

!

CAUTION

Before performing tabletop or shelf installation procedures, ensure that the requirements 
outlined in the section, 

Guidelines for Installations

, on page 25, are met.

21 IN.

6 IN.

18 IN.

7 FT.

2012_07

Содержание CSX200 CyberSWITCH

Страница 1: ...CSX200 FAMILY USER S GUIDE 2012 01 ...

Страница 2: ......

Страница 3: ...the following two conditions 1 this device may not cause harmful interference and 2 this device must accept any interference received including interference that may cause undesired operation NOTE This equipment has been tested and found to comply with the limits for a Class A digital device pursuant to Part 15 of the FCC rules These limits are designed to provide reasonable protection against har...

Страница 4: ...NG THE ENCLOSED PRODUCT YOU ARE AGREEING TO BECOME BOUND BY THE TERMS OF THIS AGREEMENT WHICH INCLUDES THE LICENSE AND THE LIMITATION OF WARRANTY AND DISCLAIMER OF LIABILITY IF YOU DO NOT AGREE TO THE TERMS OF THIS AGREEMENT PROMPTLY RETURN THE UNUSED PRODUCT TO THE PLACE OF PURCHASE FOR A FULL REFUND Cabletron Software Program License 1 LICENSE You have the right to use only the one 1 copy of the...

Страница 5: ...UCT EVEN IF CABLETRON HAS BEEN ADVISED OF THE POSSIBILITY OF SUCH DAMAGES BECAUSE SOME STATES DO NOT ALLOW THE EXCLUSION OR LIMITATION OF LIABILITY FOR CONSEQUENTIAL OR INCIDENTAL DAMAGES OR ON THE DURATION OR LIMITATION OF IMPLIED WARRANTIES IN SOME INSTANCES THE ABOVE LIMITATIONS AND EXCLUSIONS MAY NOT APPLY TO YOU United States Government Restricted Rights The enclosed product a was developed s...

Страница 6: ...ive 91 263 EEC EN 55022 EN 50082 1 EN 60950 Equipment Type Environment Networking Equipment for use in a Commercial or Light Industrial Environment We the undersigned hereby declare under our sole responsibility that the equipment packaged with this notice conforms to the above directives Manufacturer Legal Representative in Europe Mr Ronald Fotino Mr J Solari ___________________________________ _...

Страница 7: ...AN Connection 7 Remote Management Capabilities 8 Optional Features 8 CSX200 Firmware Support 8 IEEE 802 3 Ethernet 9 WAN Protocols 9 Firmware Data Compression 10 HDLC 10 DHCP and NAT 10 Point to Point Protocol PPP 11 PAP and CHAP Security 11 LQM 12 HDSL 12 Bridging and Routing 13 Bridging and Routing Protocol Filtering 15 System Passwords 16 Simple Network Management Protocol SNMP 16 Software and ...

Страница 8: ... CSX200 Rackmount Installation 32 Attaching the Strain Relief Bracket 33 Attaching the Rackmount Brackets 34 Installing the CSX200 in a 19 Inch Rack 34 Connecting the CSX200 to the Power Source 35 CHAPTER 5 CSX200 CONFIGURATION WITH QuickSET Ethernet Configuration 40 Ethernet Configuration Window 40 Wide Area Configuration 44 Wide Area T1 Configuration Window 45 Wide Area E1 Configuration Window 4...

Страница 9: ...ion Congestion Window 87 CHAPTER 6 GENERAL CONFIGURATION USING LOCAL MANAGEMENT Chapter Organization 89 Local Management Overview 90 Management Agent 90 Local vs Remote Management 90 Local Management Screen Elements 91 Local Management Keyboard Conventions 93 Navigating Within Local Management Screens 94 Establishing a TELNET Connection 94 Hierarchy and Organization of Local Management Screens 95 ...

Страница 10: ...n Fields 108 Setting the SNMP Trap Destination 109 Flash Download Screen 110 Selecting a Flash Download Method 111 Bridge Setup Screen 113 Bridge Setup Screen Fields 114 Selecting a Spanning Tree Protocol 114 Selecting the Bridge Port Administrative Status 114 Selecting the Bridge Port Pair Administrative Status 115 Router Setup Screen 116 Router Setup Fields 116 IP Configuration Screen 117 IP Con...

Страница 11: ...T1 WAN Interface Configuration Screen Fields 140 Full T1 Configuration Using PPP 142 Fractional T1 Configuration Using PPP 145 Frame Relay Configuration 148 Synchronous Physical Configuration 151 WAN Physical Configuration Screen Fields 152 Synchronous Interface Configuration 153 WAN Interface Configuration Screen Fields 154 PPP Configuration 156 Frame Relay Configuration 158 DDS Physical Configur...

Страница 12: ...ng the LAN 204 Collision CLN LED is RED 204 Link LNK LED is OFF 204 Troubleshooting the WAN 205 Link LNK LED is OFF 205 Link LNK LED is RED 205 Link LNK LED is AMBER 205 Status 1 STS1 LED is OFF 205 Status 1 STS1 LED is RED 206 Status 1 STS1 LED is AMBER 207 Status 1 STS1 LED is GREEN 207 Status 2 STS2 LED is OFF 208 Status 2 STS 2 LED is RED WPIM HDSL Installed in CSX200 208 Status 2 STS2 LED is ...

Страница 13: ... EIA 530 A and EIA 530 A ALT A 221 WPIM DDS 223 WPIM E1 224 WPIM DI 226 WPIM HDSL 227 APPENDIX B SPECIFICATIONS AND STANDARDS COMPLIANCE CSX200 Regulatory Compliance 230 Individual WPIM Regulatory Compliance 230 WPIM TI 230 WPIM SY 231 WPIM DDS 231 WPIM E1 232 WPIM DI 232 WPIM HDSL 232 APPENDIX C FCC PART 68 USER S INFORMATION FOR CSX200 APPENDIX D GLOSSARY INDEX ...

Страница 14: ...Contents xii CSX200 Family User s Guide ...

Страница 15: ...f the QuickSET CD case to install the CSX200 Use the appropriate Cabletron Systems WPIM Local Management Guide to connect your CSX200 to a WAN using a TELNET connection How to Use This Guide This guide along with the READ ME FIRST document and the CSX200 QuickSTART Guide provide the necessary information to install and configure the CSX200 Read all of these documents before installing the CSX200 T...

Страница 16: ...T connection Chapter 7 WAN Configuration Using Local Management provides instructions for connecting the CSX200 to a Wide Area Network WAN using Local Management through a Telnet connection Chapter 8 MIB Navigator explains how to use the MIB Navigator utility Chapter 9 Troubleshooting provides detailed troubleshooting tips using the LANVIEW LEDs on the CSX200 Appendix A WPIM Cable Specifications p...

Страница 17: ...ion that may be of special importance TIP Tip symbol Conveys helpful hints concerning procedures or actions CAUTION Caution symbol Contains information essential to avoid damage to the equipment Warning symbol Warns against an action that could result in the presence of an electrical shock hazard WARNING Warning symbol Warns against an action that could result in personal injury or death ...

Страница 18: ... The serial and revision numbers of all involved Cabletron Systems products in the network A description of your network environment layout cable type etc Network load and frame size at the time of trouble if known The device history i e have you returned the device before is this a recurring problem etc Any previous Return Material Authorization RMA numbers Phone 603 332 9400 Internet mail suppor...

Страница 19: ...tion details CSX200 hardware capabilities WAN Connection The CSX200 supports Point to Point Protocol PPP including Link Control Protocol LCP BNCP IPCP IPXCP LQM Multilink Protocol MP and CHAP and PAP and Frame Relay protocols through one of the following WAN port interface modules WPIMs The WPIM T1 provides a T1 interface through a front panel RJ45 port and includes a built in Channel Service Unit...

Страница 20: ...nel RJ45 port and includes a built in CSU DSU for direct connection to an E1 line The WPIM E1 provides both Full E1 or Fractional E1 using 56 or 64 Kbps Time Slots with a total throughput of up to 2 048 Mbps The WPIM DI provides a T1 interface through a front panel RJ45 port and includes a built in CSU DSU for direct connection to a T1 line The WPIM DI provides both Full T1 or Fractional T1 using ...

Страница 21: ...rk Polarity Detection and Correction Each twisted pair port on the CSX200 incorporates a Polarity Detection and Correction feature that allows the CSX200 to pass data regardless of the polarity of the twisted pair segment s receive link Cabletron does not recommend operating in this condition When this condition is detected remove the segment from the network and wire it correctly to reduce the po...

Страница 22: ...ional hardware data compression module that accelerates data compression for the CSX200 over PPP and Frame Relay Depending on the packet type and size hardware data compression provides a minimum of 2 1 data compression giving 3 Mbps throughput on a T 1 WPIM interface To use the hardware data compression module compatible equipment such as the CSX200 CSX400 and HSIM W6 or other vendors equipment w...

Страница 23: ...P and Challenge Handshake Authentication Protocol CHAP under PPP as defined by RFC 1994 Point to Point Protocol Line Quality Monitoring LQM as defined by RFC 1333 Point to Point Protocol Multilink Protocol MP as defined by RFC 1717 Frame Relay Link Management Interface LMI as defined by ANSI T1 617 Annex D and ITU Q 933 Annex A Frame Relay Data Encapsulation as defined by RFC 1490 Frame Relay Data...

Страница 24: ...irect it to its destination This decreased packet overhead provides the HDSL functions with more bandwidth to transfer user data DHCP and NAT The Dynamic Host Configuration Protocol DHCP and Network Address Translation NAT method eliminates the expense of purchasing limited public IP addresses for each client on a local network and the need to re configure a client if it is moved to a different ne...

Страница 25: ...s as well as lower speed asynchronous dial up ports With this protocol options such as security and network protocols can be negotiated over the connection The STAC Electronics Stacker LZS Compression Protocol is supported over PPP providing up to 4 1 data compression PAP and CHAP Security The CSX200 supports the Password Authentication Protocol PAP and Challenge Handshake Authentication Protocol ...

Страница 26: ...he peer device then runs the same algorithm and compares the result with the expected value This authentication method depends upon a password or secret known only to both ends locally LQM Link Quality Monitoring LQM is a link control mechanism used with PPP to determine when and how often a link is dropping data in units of packets and octets Link Quality Monitoring accomplishes this by providing...

Страница 27: ...not indicate that the bridge forwards the broadcast frame across the bridge to the other network s Bridging allows frames to be sent to all destinations regardless of the network protocols used It also allows protocols that cannot be routed such as NETBIOS to be forwarded and optimizes internetwork capacity by localizing traffic on LAN segments A bridge extends the physical reach of networks beyon...

Страница 28: ...e uses transparent bridging When the CSX200 is configured as a bridge the unit bridges data packets to the destination regardless of the network protocols used The CSX200 uses the Spanning Tree Algorithm to provide bridging redundancy while preventing data loops and duplicate data This is a self learning bridge i e the bridge builds and updates an address table with each MAC source address and ass...

Страница 29: ...ranges and wild carding to match any IP address These Firewall filters can be defined to allow inbound only outbound only or bi directional IP communication up to the UDP and TCP application port level Firewall access filters provide a lot of flexibility to establish a powerful IP security barrier The CSX200 supports the IP Access Control from the ctip mib Internet Firewall Filter Bridge Filtering...

Страница 30: ...level allows editing of some device configuration parameters not including changing system passwords super user This access level allows full management privileges At this level you must access the CSX200 to run QuickSET Simple Network Management Protocol SNMP The CSX200 provides SNMP agent support for the following standard and Enterprise Specific Management Information Bases MIBs and support for...

Страница 31: ...rwarding MIB RFC1354 PPP LCP MIBRFC1471 Point to Point Protocol Link Control Protocol PPP IPCP MIBRFC1473 IP Control Protocol PPP BNCP MIBRFC1474 Bridge Network Control Protocol IPXCP MIBRFC1552 Frame Relay DTE MIBRFC1490 Security MIBRFC1472 CCP PAP and CHAP RS 232 MIBRFC1317 LQM MIBRFC1989 PPP MP MIBRFC1990 Cabletron Enterprise MIBs Cabletron Enterprise MIBs include the following CTWAN MIB CTMIB2...

Страница 32: ...03 rrev4 mib Port Link Down TrapType Code 260 0x106 rrev4 mib Environmental Temperature Hot TrapType Code 282 0x11A rrev4 mib Environmental Temperature Normal TrapType Code 284 0x11C rrev4 mib IP Event Log Change TrapType Code 1280 0x500 ctip mib The following is a list of IP Events that are logged and create the IP Event Log Change Trap IP Routing has been disabled on interface IP Routing has bee...

Страница 33: ...he IPX Event Log Change Trap IPX Routing has been disabled on interface IPX Routing has been enabled on interface IPX Forwarding has been enabled on interface IPX MTU size has been changed on interface IPX Framing Type has been changed on interface IPX has detected Link UP on interface IPX has detected Link DOWN on interface IPX Primary address has been changed on interface IPX Access Control List...

Страница 34: ...remotely through the Windows based QuickSET utility application Refer to Chapter 5 for QuickSET instructions QuickSET allows you to retrieve or upgrade the firmware software and configuration files from its Firmware Upgrade menu by selecting the TFTP BootP Services window to access a TFTP Trivial File Transfer Protocol server ...

Страница 35: ...nsure the network meets the following requirements Length The IEEE 802 3 standard for 10BASE T requires that 10BASE T devices transmit over a 100 meter 328 foot link on 22 24 AWG Unshielded Twisted Pair UTP wire However cable quality largely determines maximum link length Lengths of up to 200 meters may be achieved if high quality low attenuation cable is used Cable delay limits the maximum link l...

Страница 36: ...ains within specification Port Descriptions Table 1 defines the pinout for the Ethernet twisted pair ports 1 through 12 Table 1 Ethernet Twisted Pair Ports 1 12 10BASE T LAN Configuration This section contains the procedures for connecting a UTP segment from the 10BASE T network or other devices to the CSX200 Ports 1 through 12 on the CSX200 have RJ45 connectors for UTP connections Pin Number Sign...

Страница 37: ...erting the RJ45 connector on the twisted pair segment into the desired RJ45 port ports 1 through 12 Figure 2 CSX200 Twisted Pair Connection 3 Verify that a Link exists by checking that the receive port RCV LED is on flashing green or amber or on solid green If the RCV LED is off perform the following steps until it is on a Check that the 10BASE T device at the other end of the twisted pair segment...

Страница 38: ...isted pair connection meets the dB loss and cable specifications outlined in 10BASE T LAN Requirements If a link is not established contact Cabletron Systems Technical Support Refer to Document Conventions in Chapter 1 for details 4 Repeat step 2 above until all connections have been made TX TX RX RX 2 1 3 6 TO 10BASE T Device Port TX TX 2 1 3 6 NOTE RX RX and TX TX must share a common color pair ...

Страница 39: ...tion immediately 3 Read the CSX200 Release Notes included in the shipping box Guidelines for Installations 3 Installation sites must be within reach of the network cabling and meet the requirements listed below A properly grounded power receptacle must be within seven feet of the location In a shelf installation the shelf must be able to support 13 6 kg 30 lb of static weight for each device on th...

Страница 40: ...Module CAUTION The WPIM CSX200 COMP ENCR and the CSX200 are sensitive to static discharges Use a grounding strap and observe all static precautions during installation Failure to do so could result in damage to the WPIM CSX200 COMP ENCR and the CSX200 NOTE The CSX200 must have a WPIM installed before you can begin configuring the device CAUTION DO NOT REMOVE THE COVER FROM THE CSX200 WHILE POWER I...

Страница 41: ...ver to remove the cover screw attaching the cover to the CSX200 chassis refer to Figure 4 and save the screw 3 Remove the cover by sliding it back until it clears the front of the chassis and then lifting it straight up and off the chassis Figure 4 Removing the Plastic Chassis Cover TIP Before performing step b mark any cables connected to the CSX200 according to their associated port numbers This...

Страница 42: ...ing steps Figure 5 Installing WPIMs CAUTION Before performing installation procedures ensure that the requirements outlined in the section Tabletop and Shelf Installations on page 31 are met CAUTION When removing an existing WPIM make sure to pull the module straight out to avoid damaging the connector WPIM WPIM Screws Standoffs WPIM Connector Pins WPIM Connector ...

Страница 43: ...s section contains instructions on how to install the CSX200 COMP ENCR into the CSX200 chassis To help eliminate any potential problems during or after installation read and understand the following steps 1 Attach one end of the antistatic wrist strap to your wrist and the other end to an approved electrical ground 2 Unpack the CSX200 COMP ENCR by carefully removing it from the shipping box and th...

Страница 44: ... pins of the CSX200 COMP ENCR into the CSX200 connector 7 Press down firmly on the CSX200 COMP ENCR until the pins fit all the way into the connector 8 Secure the CSX200 COMP ENCR with the standoff screws supplied with the CSX200 COMP ENCR The CSX200 COMP ENCR installation is complete Figure 6 CSX200 COMP ENCR Installation NOTE Ensure that the CSX200 COMP ENCR is aligned such that its connector pi...

Страница 45: ...er source with an unrestricted free surface area as shown in Figure 7 and complete the following steps 1 Locate the six round rubber feet included with your CSX200 2 Peel the paper backing off the round rubber feet and adhere them to the bottom of the CSX200 Place one rubber foot near each of the four corners of the CSX200 and evenly space the remaining two near the center Figure 7 Tabletop or She...

Страница 46: ...ing the rackmount brackets Installing the CSX200 in a 19 inch rack Connecting the CSX200 to a power source Tools Required Phillips screwdriver Materials Required The following parts are included in the CSX200 ACCY KIT Strain relief bracket Figure 8 Left and right rackmount brackets Figure 8 8 32 x 1 4 inch pan head screws 4 8 32 x 3 8 inch pan head screws 4 WARNING Before installing the CSX200 int...

Страница 47: ...the CSX200 as follows 1 Locate the strain relief bracket and four 8 32 x 3 8 inch pan head screws provided in the CSX200 ACCY KIT 2 Using the four 8 32 x 3 8 inch pan head screws attach the strain relief bracket to the bottom of the CSX200 as shown in Figure 9 Figure 9 Attaching the Strain Relief Bracket Rackmount Brackets 2 2012_12 Strain Relief Bracket 2012_08 ...

Страница 48: ...1 4 inch screws attach the rackmount brackets to the bottom of the CSX200 as shown in Figure 10 Figure 10 Installing the Rackmount Brackets Installing the CSX200 in a 19 Inch Rack Install the CSX200 in a 19 inch rack as follows 1 Position the CSX200 between the vertical frame members of the 19 inch rack 2 Fasten the CSX200 with mounting screws as shown in Figure 11 Figure 11 Installing the CSX200 ...

Страница 49: ... panel of the CSX200 2 Plug the other end of the power cord into a grounded wall outlet 3 Verify that the PWR LED is on indicating that the CSX200 is receiving power After the CSX200 runs a self test the CPU LED blinks green indicating normal operation If the LED remains red the processor is faulty contact Cabletron Systems refer to Getting Help in Chapter 1 NOTE The CSX200 has a universal power s...

Страница 50: ...Installation 36 CSX200 Family User s Guide ...

Страница 51: ... the CSX200 in the appropriate field and the password if applicable the default password is public Click on the OK button and QuickSET locates the CSX200 on the network and displays the First Introductory window shown in Figure 13 NOTE Before configuring the device you must set up your computer based on the READ ME FIRST documentation included with the product and installed the CSX200 based on the...

Страница 52: ...guration with QuickSET 38 CSX200 Family User s Guide Figure 13 First Introductory Window Click on the Next button to continue the CSX200 configuration and the Second Introductory window shown in Figure 14 displays ...

Страница 53: ...200 Configuration with QuickSET CSX200 Family User s Guide 39 Figure 14 Second Introductory Window Click on the Next button and go to the Ethernet Configuration section to continue the CSX200 configuration ...

Страница 54: ...ow The Ethernet configuration window shown in Figure 15 displays after clicking on the Next button in the Second Introductory window The Local Ethernet IP address and Subnet Mask fields shown on the Ethernet Configuration window are used for setting an IP address and Subnet Mask Figure 15 Ethernet Configuration Window This section describes each of the fields on the Ethernet configuration window ...

Страница 55: ...ubnet Mask field displays a default Subnet Mask based on the IP address entered when it is clicked on If you wish to use a different Subnet Mask enter it at this time in DDN format Secondary IPs The Secondary IPs window shown in Figure 16 displays after clicking on the Secondary IPs button and shows the list of current Secondary IP addresses The CSX200 can support multiple IP Subnets therefore the...

Страница 56: ...t are used in Local Management through a Telnet application System passwords allow you to control management access by establishing three passwords Each password controls varying levels of access to the CSX200 management Once passwords are assigned you must use the SuperUser system password at the User Password prompt when initiating a QuickSET session If you are configuring the CSX200 for the fir...

Страница 57: ...em password in the Confirm Password field below the Read Write Access field QuickSET SuperUser This access level allows full management privileges Place the cursor in this field and type the new system password Retype the system password in the Confirm Password field below the QuickSET SuperUser field When finished configuring the CSX200 system passwords click on the OK button in the System Passwo...

Страница 58: ...ow Wide Area DI Configuration Window Wide Area Synchronous Configuration Window Wide Area DDS Configuration Window Wide Area HDSL Configuration Window Wide Area Frame Relay Time Slot Configuration Window Wide Area PPP Time Slot Configuration Window Wide Area HDSL Time Slot Configuration Window NOTE When configuring the WAN with QuickSET the Wide Area configuration window that displays corresponds ...

Страница 59: ...ys after clicking on the Next button in the Ethernet configuration window Figure 18 Wide Area T1 Configuration Window This section explains how to configure the CSX200 Wide Area T1 interface using QuickSET NOTE The service provider i e AT T Sprint MCI NYNEX etc determines the settings for the following fields Consult the service provider for the correct settings ...

Страница 60: ...etting 0 dB 7 5 dB 15 dB T1 Line Coding Displays the line coding for the physical T1 line The selections for this field are B8ZS and AMI The default setting for this field is B8ZS T1 Loop Back Network Loop Back is a testing procedure that segments the line and allows you to isolate faults The selection for this field are No Loop and Line Loop In Line Loop all 24 channels are looped back to the T1 ...

Страница 61: ...ions for this field are either Frame Relay or Point to Point PPP The default setting for this field is PPP Link Management Protocol If Frame Relay is the selected protocol this field displays Q 933 Annex A and T1 617 Annex D The default for Frame Relay is T1 617 Annex D This field is grayed out and not used for PPP Once the Wide Area T1 configuration is complete click on the Next button and go to ...

Страница 62: ...n in Figure 19 displays after clicking on the Next button in the Ethernet configuration window This section explains how to configure the CSX200 E1 WAN interface using QuickSET Figure 19 E1 WAN Configuration Window NOTE The service provider determines the settings for the following fields Consult the service provider for the correct settings ...

Страница 63: ...CSX200 must be in Loop Timing mode to use this option The default setting is No Loop E1 Transmit Clock Source Displays the E1 Transmit Clock Source Click on the radio button to select either the Loop Timing Extracted Line Data or Local Timing Internal Clock option The default setting for this field is Loop Timing Protocol Displays the active protocol for the E1 WAN port The selections for this fie...

Страница 64: ...or Wide Area PPP Time Slot Configuration Window section depending on which protocol you are using Wide Area DI Configuration Window The Wide Area DI configuration window shown in Figure 20 displays after clicking on the Next button in the Ethernet configuration window This section explains how to configure the CSX200 Wide Area DI interface using QuickSET Figure 20 Wide Area DI Configuration Window...

Страница 65: ...enable the Drop and Insert function that allows any Time Slots set to 0 in the Wide Area Frame Relay Time Slot and PPP configuration windows to be used by the Drop and Insert port interface T1 Frame Type Displays the DI frame type Click on the radio button to select either the ESF or D4 option The default setting for this field is ESF NOTE The service provider i e AT T Sprint MCI etc determines th...

Страница 66: ...t be in Loop Timing mode to use this option The default setting is No Loop T1 Transmit Clock Source Displays the DI Transmit Clock Source Click on the radio button to select either the Loop Timing Extracted Line Data or Local Timing Internal Clock option The default setting for this field is Loop Timing Protocol Displays the active protocol for the Wide Area DI interface The selections for this fi...

Страница 67: ...fter clicking on the Next button in the Ethernet configuration window This section explains how to configure the CSX200 Wide Area Synchronous interface using QuickSET Figure 21 Wide Area Synchronous Configuration Window NOTE The service provider i e AT T Sprint MCI NYNEX etc determines the settings for many of the following fields Consult the service provider for the correct settings ...

Страница 68: ...r this field is V 35 Table 6 explains the options for the Sync Port Type Table 5 Telco Configuration Information Configuration Information Required by User Configuration Information Supplied by Service Provider Sync Port Type V 35 RS422 RS232 or X 21 Sync Flow Control Force CTS on or off Force DSR on or off Sync Clock Speed 64000 Table 6 Sync Port Types Sync Port Type Interface Type Cable Type Cab...

Страница 69: ...om an external DCE Data Communications Equipment and forces the signal high The off setting indicates that the CTS signal is received from an external DCE The default setting is off The DSR signal is an input to the CyberSWITCH Clicking on the box indicates that DSR signal is internally forced high The off setting indicates that the DSR signal is received from an external DCE The default setting i...

Страница 70: ...er clicking on the Next button in the Ethernet configuration window This section explains how to configure the CSX200 Wide Area DDS interface using QuickSET Figure 22 Wide Area DDS Configuration Window NOTE The service provider i e AT T Sprint MCI NYNEX etc determines the settings for Table 7 and the following fields Consult the service provider for the correct settings ...

Страница 71: ... Mode then this field must be set to Loop Timing The default setting for this field is Loop Timing DDS Loop Back Displays the internal loopback as either Line Loop or No Loop Line Loop is reserved for network diagnostics only The default setting is No Loop Protocol Displays the active protocol for the Wide Area DDS interface The selections for this field are either Frame Relay or PPP The default s...

Страница 72: ...after clicking on the Next button in the Ethernet configuration window This section explains how to configure the CSX200 Wide Area HDSL interface using QuickSET Figure 23 Wide Area HDSL Configuration Window NOTE The wiring provider i e Internet Service Provider ISP contractor etc determines the settings for Table 8 Consult the service provider for the correct settings ...

Страница 73: ...tton to select either the Slave or Master option The default setting is Slave Protocol Displays the active protocol for the HDSL WAN port The selections for this field are either HDLC or Point to Point PPP The default setting for this field is PPP Once the Wide Area HDSL configuration is complete click on the Next button and go to the Wide Area HDSL Time Slot Configuration Window section Table 8 T...

Страница 74: ...Time Slot Configuration Window The following section defines the fields in the Wide Area Frame Relay Time Slot configuration window Time Slots A full T1 line consists of 24 Time Slots each capable of up to 64 Kbps throughput If you are leasing an entire line from your service provider you may select all the Time Slots by clicking on the Select All button A check mark displays in the selected box I...

Страница 75: ...and go to the Bridging and Routing Configuration section Wide Area PPP Time Slot Configuration Window The Wide Area PPP Time Slot configuration window shown in Figure 25 displays when you click on the Next button in the Wide Area T1 E1 and DI configuration windows when PPP is chosen as the WAN Protocol Figure 25 Wide Area PPP Time Slot Configuration Window ...

Страница 76: ...Slot Once the Wide Area PPP Time Slot configuration is complete click on the Next button and go to the Bridging and Routing Configuration window NOTE If you are configuring a WPIM DI Time Slot table any available Time Slots that are set to 00 are mapped to the DI Interface In other words If you lease an entire T1 line any Time Slots that are not used in the Wide Area PPP Time Slot configuration wi...

Страница 77: ...e Area HDSL Time Slot Configuration Window The following section defines the Time Slots in the Wide Area HDSL Time Slot configuration window Time Slots A full line consists of 24 Time Slots each capable of up to 64 Kbps throughput If you are leasing two pair from your wiring provider you may select all the Time Slots by clicking the Full button A check mark displays in the selected box If you have...

Страница 78: ...ry network information is collected for the WAN the CSX200 can be configured for bridging and or routing using QuickSET Bridging and Routing Configuration Window The first Bridging and Routing configuration window shown in Figure 27 displays after clicking on the Next button at the bottom of the Wide Area Frame Relay PPP or HDSL Time Slot configuration window or the Wide Area Sync or DDS configura...

Страница 79: ...mber assigned to the external Ethernet network on the Ethernet port It is grayed out until IPX Routing is turned on Frame Type This field is grayed out until IPX Routing is turned on It allows you to select the type of IPX frame in which packets are encapsulated for transmission Select one of the four available frame types The Firewall Configuration Window The Firewall configuration window shown i...

Страница 80: ...ch the address es in the first filter in the list the packet is permitted or denied as specified by that filter If there is no match the packet is checked against the second filter and so on until a match is found or until the packet has been checked against all of the filters in the list If the packet does not match any of the filters then the packet is permitted to pass through the port Figure 2...

Страница 81: ...e Mask field and type the mask The default Mask for both the source and destination addresses is 0 0 0 0 which masks the entire address causing all addresses to match the filter In other words the default access control list allows all traffic to pass Entering a mask of 255 255 255 255 causes only packets matching the exact address you have entered to match the filter For a Class C address enterin...

Страница 82: ... destination Port Enter the port number in this field to create an access control filter that applies only to traffic for a specific TCP or UDP service Table 9 and Table 10 supply a list of the standardized TCP and UDP port numbers Table 9 TCP Services Port Numbers TCP Services Port TCP Services Port FTP File Transfer Protocol data 20 Host Name NIC Host Name Server 101 FTP 21 X 400 Mail Service 10...

Страница 83: ...ging and Routing configuration window Once the first part of the Bridging and Routing configuration is complete click on the Next button and go to the next Bridging and Routing WAN Frame Type configuration window Domain Name Server 53 Sunrpc NIS 111 TACACS Database Service 65 NETBIOS Name Server 137 Bootstrap Protocol Server 67 NETBIOS Datagram Server 138 Table 10 UDP Services Port Numbers UDP Ser...

Страница 84: ...e Window The Bridging and Routing WAN Frame Type window displays fields for each interface number and its associated WAN Frame Type Select the WAN Native frame type for router to router communication Select the Encapsulated Ethernet or Encapsulated Ethernet SNAP frame types for router to bridge or bridge to bridge communication To change the WAN Frame Type information scroll through the list of in...

Страница 85: ...capsulated Ethernet SNAP Select the WAN Frame Type that you wish to enable by clicking the appropriate radio button When you are done click on the OK button The OK button returns you to the Bridging and Routing WAN Frame Type configuration window Figure 30 WAN Frame Type Configuration Window Once the Bridging and Routing WAN Frame Type configuration is complete click on the Next button and go to t...

Страница 86: ...g on the Next button in the second Bridging and Routing WAN Frame Type configuration window Figure 31 Routing Configuration Window This section describes the fields in the IP IPX Routing configuration window Refer to the section IP Routing Configuration to configure the CSX200 for IP routing Otherwise refer to IPX Routing Configuration to configure the CSX200 for IPX routing ...

Страница 87: ...w in unnumbered routing only To set up a default route in Numbered Mode communication click the Add Route button and enter IP Subnet 000 000 000 000 and Subnet Mask 255 255 255 255 Then use the NEXT HOP window to enter the IP Address of the router you wish to designate as the default route Add Route This button allows you to add a route and to configure the CSX200 to forward only those packets fro...

Страница 88: ...g using Frame Relay Protocol only The IPX Host Map is a database of remote IPX hosts defined generally by the WAN Network number and MAC Address and more specifically by the Interface Number and Data Link Connection Identifier DLCI The DLCI and Interface Number define the switched connection to the Telco central office Enter the remote WAN MAC address and the remote Router s WAN Network number Fig...

Страница 89: ...ce on the other end of the WAN link Apply Changes Use this button to add the configured Host Map entry to the IPX Host Map list Add Host Delete Host These buttons allow you to add or delete a host and to configure the CSX200 to forward only those packets from the specified host Use these buttons to add or delete an entry in the Host Map When you have finished making changes click on the Apply Chan...

Страница 90: ...ting configuration window Use this window to enable RIP routing configure a Dynamic Host Configuration Protocol DHCP server on the CSX200 set an IP address for a remote DHCP server or set up Network Address Translation If you wish to run your WAN connection in Numbered Mode enter the Local WAN IP Address Subnet Mask for Numbered Mode or leave these fields blank for Unnumbered Mode Figure 33 Advanc...

Страница 91: ...l WAN IP address Modify Use this button to change an entry in the Advanced IP Routing Settings box Advanced IP Routing Options This section describes the fields for the Advanced IP Routing Options of the Advanced Routing configuration window Enable RIP Selecting this function enables the sending and receiving of Routing Information Protocol packets Routing Information Protocol is used in IP for br...

Страница 92: ...n window is used to configure the DHCP settings for the CSX200 Figure 35 DHCP Settings Configuration Window The following definitions explain the fields in the DHCP Settings configuration window DHCP Server is Enabled Check this box to allow the CSX200 to act as a DHCP server DHCP IP Address Pool A set of contiguous IP addresses that can be assigned by the CSX200 to devices requesting an IP addres...

Страница 93: ...valid Click on the pull down menu to view a list of available leased timeout intervals DNS Settings Allows you to set up an IP address and a domain name for a Domain Name server WINS Servers Windows Internet Name Service WINS resolves NETBIOS computer names to IP addresses Server IP Address Used to enter the IP address of your WINS server NOTE Selecting Never allows you to keep your DHCP assigned ...

Страница 94: ...hernet port Figure 36 NAT Settings Configuration Window The following definitions explain the fields in the NAT Settings configuration window Ethernet address translation to Interface This pull down menu is used to disable OFF or enable NAT for an interface number To enable NAT click the pull down menu button and select an interface number to run NAT through Add Proxy Allows you to add NAT proxy s...

Страница 95: ...ou to delete NAT proxy servers Figure 37 Add NAT Proxy Server Window Once your CSX200 Advanced Routing configuration is complete be sure to save any changes you make Click on the Next button in the Advanced Routing configuration window to return to the IP IPX Routing configuration window ...

Страница 96: ...e and Advanced Configuration QuickSET pull down menus allow you to store and restore configurations initiate TFTP BootP Services and configure Compression and Congestion settings for your CSX200 File Menu This section describes the pull down menu options from the File menu as shown in Figure 38 Figure 38 File Menu ...

Страница 97: ... stores the entire CSX200 configuration to a file name and drive that you specify Figure 39 Store Configuration Window Restore Configuration The Restore Configuration window shown in Figure 40 displays after clicking on the File pull down menu and selecting Restore Configuration at the top of any QuickSET configuration window This window allows you to load your stored configuration from a drive in...

Страница 98: ...figuration with QuickSET 84 CSX200 Family User s Guide Firmware Upgrade Menu This section describes the pull down menu options from the Firmware Upgrade menu as shown in Figure 41 Figure 41 Firmware Upgrade Menu ...

Страница 99: ...ss a TFTP Trivial File Transfer Protocol Server or BootP Server to download the latest version of CSX200 firmware Figure 42 TFTP BootP Window This section describes the modifiable fields of the TFTP BootP window IP Address The IP Address field shows the IP Address of the CSX200 to which you are upgrading the firmware Community The Community field requests the password of your CSX200 Gateway IP Add...

Страница 100: ...ile Name The File Name field indicates the location and name of the firmware image you are putting on your CSX200 DownLoad The DownLoad button starts the firmware download to your CSX200 Advanced Configuration Menu This section describes the pull down menu options available from the Advanced Configuration menu as shown in Figure 43 Figure 43 Advanced Configuration Menu ...

Страница 101: ...each interface Data compression allows the size of the data being sent on a WAN link to be minimized making the WAN link more efficient To use data compression the CSX200 must first be fully configured and connected to a live WAN link and compression must be configured on any remote WAN device s Using software compression the CSX200 supports up to four DS0s 256 Kbps per WPIM With the optional hard...

Страница 102: ...ed time interval Guarantees this data is not discarded by the network Excess Burst Displays the Excess Burst size which is the maximum amount of data by which a user can exceed the Committed Burst size This data is not guaranteed to be passed by the network Throughput Displays the maximum bandwidth of your WAN connection To turn data compression on or off for a specific interface click on the inte...

Страница 103: ...mmarizes the organization of this chapter Local Management Overview outlines the contents of this chapter provides an overview of Local Management and explains how to use the management screens Accessing Local Management describes how to access the Main Menu screen and navigate the Local Management screens System Level Screen describes how to use the System Level screen its functions and operation...

Страница 104: ...ut the managed network s operational performance Local Management communicates with the management agent for the purpose of issuing management commands to network devices Local vs Remote Management Network management applications are usually described as either local or remote management applications A Local Management application resides within the circuits of the CSX200 management agent and is a...

Страница 105: ... was executed correctly or incorrectly that changes were saved or not saved to Non Volatile Random Access Memory NVRAM or that a user did not have access privileges to an application COM 1 Application SYSTEM LEVEL System Date Host IP Address 000 000 000 000 Subnet Mask 255 255 0 0 Phys Address 00 00 1D 16 26 F8 COM 2 Application UNASSIGNED LM 01 23 96 System Time SAVE RETURN 090836 Out of Band IP ...

Страница 106: ...ystem Time are examples of Input fields Selection Fields Selection fields provide a series of possible values Only applicable values appear in Selection fields Command Fields Command fields are located at the bottom of Local Management screens Command fields are used to exit Local Management screens and to save Local Management entries Command fields perform a management action simply by being sel...

Страница 107: ...you must quickly press the ESCAPE key two times to exit the Local Management screen SPACEBAR and BACKSPACE These keys cycle through selections in some Local Management fields Press the SPACEBAR to cycle forward through selections and press BACKSPACE to cycle backward through selections Arrows These are navigation keys Use the UP ARROW DOWN ARROW LEFT ARROW and RIGHT ARROW keys to move the screen c...

Страница 108: ... in the direction of that edge wraps around to the outermost selectable item on the opposite side of the screen which is on the same line or column Establishing a TELNET Connection The CSX200 is shipped with a temporary IP address of 192 168 254 254 so that your computer can communicate with it over your Local Area Network LAN through a TELNET connection However to establish a TELNET connection yo...

Страница 109: ...teps 1 Use the arrow keys to highlight a menu item 2 Press ENTER The selected Local Management menu screen displays Exiting Local Management Screens To exit any of the Local Management screens perform the following steps 1 Use the arrow keys to highlight the RETURN command at the bottom of the Local Management screen 2 Press ENTER The previous screen in the Local Management hierarchy displays NOTE...

Страница 110: ...Press ENTER The previous screen in the Local Management hierarchy displays 3 Repeat steps 1 and 2 until the Main Menu screen displays 4 Use the arrow keys to highlight the EXIT command at the bottom of the Main Menu screen 5 Press ENTER The CSX200 Local Management Password screen displays and the Local Management session ends NOTE From a TELNET connection the password screen does not display Inste...

Страница 111: ... the default super user access password is preset to public If you enter an invalid password the cursor returns to the beginning of the password entry field NOTE Your password is one of the community names specified in the SNMP Community Names screen Access to certain Local Management capabilities depends on the degree of access accorded that community name See the SNMP Community Names section CSX...

Страница 112: ...h all the Local Management screens are accessed Figure 48 shows the Main Menu screen Figure 48 Main Menu Screen The Main Menu screen displays the following menu items Setup Menu Screen The Setup Menu provides access to Local Management screens that are used to configure the CSX200 MIB Navigator The MIB Navigator is a Local Management utility that allows you to access monitor and set specific Manag...

Страница 113: ...ms System Level The System Level screen allows you to configure basic operating parameters for the CSX200 SNMP Community Names The SNMP Community Names screen allows you to change or review the community names used as access passwords for local management operation SNMP Traps The SNMP Traps screen provides display and configuration access to the table of IP addresses used for trap destinations and...

Страница 114: ...mation Protocol feature WAN Setup The WAN Setup menu item accesses two other screens that provide WAN physical configuration and WAN Interface configuration access to enable a WAN link to be set up Refer to Chapter 7 for information on how to configure the CSX200 and the CSX200 family of products for the WPIM T1 WPIM SY WPIM DDS and WPIM HDSL through Local Management NOTE Information for configuri...

Страница 115: ... Mask Physical Address MAC Address Default Gateway Default Interface Figure 50 shows the CSX200 System Level screen Figure 50 System Level Screen COM 1 Application LM SYSTEM LEVEL System Date Host IP Address 0 0 0 0 Subnet Mask 255 255 0 0 Phys Address 00 00 1D 16 26 F8 14 23 00 System Time SAVE RETURN 12 30 97 2012_04 Default Gateway NONE DEFINED Default Interface NONE DEFINED CSX200 Local Manage...

Страница 116: ...n the management workstations designated to receive SNMP traps reside on a different subnet for example across a gateway or router To set a Subnet Mask refer to the Setting the Subnet Mask section Phys Address This field displays the physical address also known as the MAC Address of the CSX200 You cannot modify the physical address Default Gateway Use this field to enter the Default Gateway for th...

Страница 117: ...ng steps 1 Use the arrow keys to highlight the System Time field 2 Enter the time in a 24 hour format HH MM SS 3 Press ENTER to set the system time 4 Use the arrow keys to highlight the SAVE command field at the bottom of the screen and press ENTER If the time entered was a valid format the Event Message field at the top of the screen displays SAVED OK If the entry was not valid Local Management d...

Страница 118: ...e arrow keys to highlight the SAVE command field 5 Press ENTER The Event Message field at the top of the screen displays SAVED OK Setting the Default Gateway To set the Default Gateway perform the following steps 1 Use the arrow keys to highlight the Default Gateway field 2 Enter the IP address of the Default Gateway using DDN format For example 134 141 79 121 3 Press ENTER If the Default Gateway ...

Страница 119: ... value and refreshes the Subnet Mask field with the previous value 4 Use the arrow keys to highlight the SAVE command field 5 Press ENTER The Event Message field at the top of the screen displays SAVED OK Setting the Default Interface To set the default interface perform the following steps 1 Use the arrow keys to highlight the Default Interface field 2 Enter the interface number for the Default G...

Страница 120: ...ou must have used the super user community name at the User Password prompt when initiating the Local Management session The default community name for each access level is public or press ENTER The following defines each of the SNMP Community Names screen fields Community Name Displays the user defined names through which a user accesses the CSX200 Local Management Any community name entered here...

Страница 121: ... highlight the community name you want to change 2 Type the new community name and press ENTER The old community name text disappears and is replaced by the new community name 3 Use the arrow keys to highlight the SAVE command field 4 Press ENTER The Event Message field at the top of the screen displays SAVED OK CAUTION If you edit the super user community name be certain not to forget it If you d...

Страница 122: ...e Screen Fields The following definitions explain each of the SNMP Traps screen fields Trap Destination Use this field to enter the IP address of the management workstation designated to receive SNMP traps from the CSX200 Trap Community Name Use this field to enter the community name of the management workstation with the associated IP address The community name indicates the access level of traps...

Страница 123: ...s from the CSX200 This address must be entered in DDN format For example 134 141 25 17 3 Press ENTER 4 Use the arrow keys to highlight the Trap Community Name field on the same row as the Trap Destination field 5 Type the community name of the management workstation The community name indicates the access level of traps that will be forwarded to the Trap destination 6 Press ENTER 7 Use the arrow k...

Страница 124: ...ing ENTER The Flash Download screen shown in Figure 53 displays Figure 53 Flash Download Screen NOTE Flash download operations require a properly named download file and a properly configured download server FLASH DOWNLOAD Download Method Reboot After Download Last Image File Name Last Image Server IP Download Server IP Download File Name YES 134 141 17 12 c tftpboot csx200 hex 134 141 17 12 c tft...

Страница 125: ...X200 to reboot and use the new firmware image immediately TFTP Gateway Server IP This field displays when the BOOTPROM Download Method is chosen Use this field to enter the IP address of the TFTP Gateway Server Last Image Server IP Displays the IP address of the last server used to download a firmware image to the CSX200 Last Image File Name Displays the file name of the last firmware image downlo...

Страница 126: ...rectories and subdirectories involved in accessing the file Type the new entry over the previous entry For example c images cyberswitch 11011 hex 7 Press ENTER 8 Use the arrow keys to highlight the EXECUTE command located at the bottom of the Flash Download screen Press ENTER to begin the download The CSX200 attempts to download the file using the IP address filename and path provided This file is...

Страница 127: ...erver 10 Use the arrow keys to highlight the EXECUTE command located at the bottom of the Flash Download screen The CSX200 attempts to download the file using the IP address filename and path provided This file is assigned to the Flash memory of the CSX200 Bridge Setup Screen This section explains how to use the Bridge Setup screen to select a Spanning Tree protocol and enable disable bridge ports...

Страница 128: ...dge port you want to configure Selecting a Spanning Tree Protocol To select the Spanning Tree protocol to be used by the CSX200 perform the following steps 1 Use the arrow keys to highlight the SPANNING TREE PROTOCOL field 2 Press the SPACEBAR or BACKSPACE to select IEEE 802 1 DEC or NONE 3 Use the arrow keys to highlight the SAVE command field 4 Press ENTER The Event Message field at the top of t...

Страница 129: ...m of the Bridge Setup screen 2 Press the SPACEBAR or BACKSPACE to select the bridge port you want to configure The selected bridge port displays in the Bridge Port Pair Admin Status field 3 Use the arrow keys to highlight the BRIDGE PORT PAIR ADMIN STATUS PORT X PORT Y field 4 Press the SPACEBAR or BACKSPACE to select the port you want to enable or disable bridge traffic 5 Use the arrow keys to hi...

Страница 130: ...u item in the Setup Menu and pressing ENTER The Router Setup screen displays Figure 55 Router Setup Screen Router Setup Fields The following list describes the Router Setup screen fields IP Use this field to access the IP Configuration screen to configure the CSX200 for IP routing IPX Use this field to access the IPX Configuration screen to configure the CSX200 for IPX routing RETURN 2012_03 IP IP...

Страница 131: ...u item on the Router Setup screen and pressing ENTER The IP Configuration screen displays Figure 56 IP Configuration Screen IP Configuration Screen Fields The following list describes each of the Router Setup Screen fields IP General Config Use this field to access the IP General Config screen and configure the CSX200 for IP routing IP RIP Use this field to access the IP RIP screen and enable Rout...

Страница 132: ...ting used Status Displays the status of IP Routing UpTime Displays the amount of time elapsed since the last time the CSX200 was rebooted Version Displays the IP Routing version number used on the CSX200 IP General Config Router Name IP IP Routing ENABLED Redirector FORWARD UpTime 0 days 0 hours 39 min SAVE RETURN 2012_11 Version XX XX XX Status Enabled AdminStatusTime 0 days 0 hours 39 min System...

Страница 133: ...ollowing list describes each of the IP General Config Screen fields PORT Use this field to select the routing port you wish to configure REDIRECTOR Use this field to toggle through a list of commonly used UDP port numbers UDP port numbers are associated with the relay agent functionality of the router Framing Use this field to select the format of the frame in which IP packets are encapsulated for...

Страница 134: ...ER To enter the Subnet Mask for a router port complete the following steps 1 Use the arrow keys to highlight the MASK option 2 Type in the Subnet Mask for the IP address that you have assigned Selecting the Frame Type for a Port On each port Frame Type specifies the format of the frame in which IP packets are encapsulated for transmission The Frame Type options available for each router port are d...

Страница 135: ...ridging it As you are in transition from a bridged network to a routed network this flexibility allows you to implement IP routing and test your routing configuration on a port by port basis If necessary you can temporarily disable the IP routing on any port without losing your configuration or you can temporarily switch from IP routing back to bridging To enable IP Routing Services on a router po...

Страница 136: ...P packets that it receives as LAN broadcasts directly to the appropriate server UDP service requests that are sent as LAN broadcasts by clients of applications such as Host Name Domain Name and Bootstrap servers can be redirected to any server on any network segment To configure the UDP Broadcast Redirector complete the following steps 1 Use the arrow keys to highlight the UDP Port option under Sy...

Страница 137: ...es not work beyond a host s local network or subnetwork One of the primary purposes of a router is to confine LAN broadcast traffic to each local network or subnetwork A proxy ARP response is generated when the following occurs Proxy ARP is enabled on a router port An ARP request is received as a LAN broadcast looking for the MAC layer address of an IP host on another network segment An entry exis...

Страница 138: ...s the RIP routing protocol to send and gather information about the internetwork topology This information is used to construct and maintain a database called RIP Route Table which contains the addresses of the available routes to all the networks and hosts that RIP has learned Enabling the RIP routing protocol allows IP Routing Services to build and maintain a dynamic database of route informatio...

Страница 139: ...row keys to highlight the SAVE command field at the bottom of the screen and then press ENTER The message SAVED OK displays Figure 58 IP RIP Configuration Screen IP RIP CONFIGURATION System Level RIP 1 Port Level RIP 1 RETURN SAVE PORT DISABLED DISABLED IP Address xxx xxx xxx xxx Port 1 CSX 200 Local Management Flash Image Version XX XX XX ...

Страница 140: ... keys to highlight the IPX menu item on the Router Setup screen and pressing ENTER The IPX Configuration screen displays Figure 59 IPX Configuration Screen IPX Configuration Fields The following list describes each of the IPX Configuration screen fields IPX General Config Use this field to access the IPX General Config screen and configure the CSX200 for IP routing IPX SAP Use this field to access...

Страница 141: ...wing list describes each of the IPX General Configuration screen status fields The status fields are for informational purposes only and cannot be modified Router Name Displays the type of routing used Status Displays the status of IP Routing UpTime Displays the amount of time elapsed since the last time the CSX200 was rebooted Router Name IPX IPX Routing ENABLED UpTime 0 days 0 hours 39 min SAVE ...

Страница 142: ...ect the format of the Frame in which IPX packets are encapsulated for transmission MTU Use this field to set the Maximum Transmission Unit MTU IPX Routing Use this field to enable IP Routing Services IPX Forwarding Use this field to enable IP Forwarding IPX Address Use this field to assign an IP Address to the port that you wish to configure Selecting a Port for Configuration Routing Services allo...

Страница 143: ...n The Frame Type options available for each router port are dependent on the type of media supported by that router port To select the Frame Type for a port complete the following steps 1 Use the arrow keys to highlight the Framing option 2 Use the ENTER key to toggle the entry to the correct Frame Type for the port 3 Use the arrow keys to highlight the SAVE command field at the bottom of the scre...

Страница 144: ...le IPX Routing Services on a router port complete the following steps 1 Use the arrow keys to highlight the IPX Routing option under Port Level Setup 2 Use the ENTER key to toggle the entry to ENABLED 3 Use the arrow keys to highlight the SAVE command field at the bottom of the screen and then press ENTER The message SAVED OK displays Enabling IPX Forwarding on a Port By default IPX Forwarding is ...

Страница 145: ...p command Figure 61 Circuitmap Command The circuitmap command contains the following fields Interface An entry must be created for each remote Router connected via the Frame Relay interface Network The Network is the IPX Network number associated with the Frame Relay network Node The Node is the MAC address of the remote router on the other end of the WAN link Circuit ID The Circuit ID is the DLCI...

Страница 146: ...e IPX Configuration screen highlight IPX SAP and then press ENTER The IPX SAP Configuration screen shown in Figure 62 displays 2 Use the arrow keys to highlight the Port option 3 Type in the number of the port that you wish to enable SAP routing then press ENTER 4 Use the arrow keys to highlight the Port Level SAP option 5 Use the ENTER key to toggle the entry to ENABLED 6 Use the arrow keys to hi...

Страница 147: ...ility On the same device some router ports can be running RIP while other router ports are not If necessary you can temporarily disable RIP on any port without affecting the rest of your configuration To enable RIP perform the following steps 1 From the IPX Configuration screen highlight IPX RIP and then press ENTER The IPX RIP Configuration screen shown in Figure 63 displays 2 Use the arrow keys ...

Страница 148: ...134 CSX200 Family User s Guide Figure 63 IPX RIP Configuration Screen System Level RIP Port Level RIP RETURN SAVE PORT DISABLED DISABLED IPX Address xxx xxx xxx xxx Port 1 CSX 200 Local Management Flash Image Version XX XX XX IPX RIP CONFIGURATION ...

Страница 149: ...guration DDS Physical Configuration DDS Interface Configuration HDSL Physical Configuration HDSL Interface Configuration NOTE The WAN Interface must be configured and the device reset before configuring router information into local management NOTE The CSX200 has the flexibility to use a variety of WPIMs with the exception of the WPIM S T This chapter shows how to configure the CSX200 and the CSX2...

Страница 150: ...uration screen lets you configure the Physical Interface The WAN Physical Configuration screen displays the following information WPIM 1 Displays configuration information for the WAN port Type Displays the port type T1 BRIM Displays the slot in which the T1 port resides in this case the slot is always 1 SAVE WAN INT CONFIG RETURN Type T1 BRIM 1 Mode Primary Active Yes Interfaces 002 025 WAN PHYSI...

Страница 151: ...on table is all Time Slots not assigned 000 T1 Line Coding Displays the line coding for the physical T1 line The selections toggle between B8ZS and AMI The default setting for this field is B8ZS T1 Frame Type Displays the T1 Frame type The selections toggle between ESF and D4 The default setting for this field is ESF T1 Tx Clock Source Displays the T1 Transmit Clock Source The selections for this ...

Страница 152: ...ime Slots You must assign each Time Slot an Interface number for example 002 for an active Interface number or 000 if the Time Slot is not used When you lease an entire T1 line you can use all 24 Time Slots the full T1 bandwidth If you lease only a fraction of the T1 the service provider tells you which Time Slots to use You can utilize Time Slots any way you choose The CSX200 supports Time Divisi...

Страница 153: ... Interface assignment Site 2 and Site 3 use only a fraction of the T1 but the total quantity of Time Slots must match those of Site 1 Unused Time Slots receive an Interface number of 000 NOTE The Interface numbers of Site 1 Site 2 and Site 3 do not have to match Only the quantity of Time Slots must match the service provider assigns the Time Slots SITE 2 01 08 09 16 17 24 SITE 3 01 08 09 16 17 24 ...

Страница 154: ...ce Number Displays the active Interface Numbers Use this field to configure the Interface Numbers you assigned to the Time Slots on the WAN Physical Configuration screen Max Xmit Unit User configured field that displays the maximum packet size that can be transmitted on the selected interface The default settings for this field are 8191 for PPP and 4095 for Frame Relay Line Coding Displays the Lin...

Страница 155: ...en Active Inactive and Invalid DLCI Address This field can be set to values from 0 1023 The values 0 15 and 1008 1022 are reserved DLCI addresses CKT_DCP Enable This field indicates whether data compression will take place Toggles between ON and OFF CKT_DCP Status This status field displays whether data compression was successful or not Comp Ratio This field displays the ratio of uncompressed to c...

Страница 156: ...displays the status as Active Inactive or Disabled for no LMI If the active protocol is PPP this field displays UP for active or DOWN for inactive Full T1 Configuration Using PPP This section provides step by step instructions for configuring the CSX200 to use a full T1 circuit in a PPP environment This simplified example assumes the setup shown in Figure 68 using a MicroMMAC hub with a CSX200 con...

Страница 157: ...ess ENTER 4 Use the arrow keys to highlight T1 Frame Type Press the SPACEBAR to select ESF or D4 then press ENTER 5 Use the arrow keys to highlight T1 TX Clock Source Press the SPACEBAR to select Local no clock source provided by telephone company or Loop clock source provided by telephone company then press ENTER 6 Use the arrow keys to highlight T1 Line Buildout LBO Press the SPACEBAR to select ...

Страница 158: ...e NOTE on the previous page 2 Unless the user sets the Max Xmit Unit the CSX200 automatically sets the Max Xmit Unit to 8191 default after the active protocol PPP is selected 3 If the T1 Line Coding is B8ZS on the previous screen follow the steps below a Use the arrow keys to highlight Line Coding Press the SPACEBAR to select None then press ENTER b Use the arrow keys to highlight Active Protocol ...

Страница 159: ...sing PPP This section provides step by step instructions for configuring the CSX200 to use a fractional T1 circuit in a PPP environment This example assumes the setup shown in Figure 69 using two CSX200s Configurations may vary depending on the devices used In a fractional T1 setup only a portion of the 24 Time Slots or DS 0s are used Figure 69 Fractional T1 Configuration NOTE Upon saving this scr...

Страница 160: ...he arrow keys to highlight T1 Line Coding Use the SPACEBAR to select B8ZS or AMI then press ENTER 4 Use the arrow keys to highlight T1 Frame Type Use the SPACEBAR to select ESF or D4 then press ENTER Table 15 Telco Configuration Information Configuration Information Required by User Information Supplied by Service Provider Line Coding B8ZS or AMI Frame Type ESF or D4 Clock Source Loop Timing or Lo...

Страница 161: ...al T1 Interface Configuration This screen is accessed through the WAN Physical Configuration screen Proceed with the following steps to configure the WAN Interface through Local Management 1 Set the WAN connection Interface Number by typing the same number into the Interface Number field that was input into the Time Slots in the WAN Physical Configuration screen then press ENTER see NOTE on previo...

Страница 162: ...ant data compression enabled or OFF if you do not then press ENTER 5 Use the arrow keys to highlight the SAVE command then press ENTER The message Save Done displays and Local Management saves the changes to memory The WAN configuration is complete It takes up to 60 seconds for the WAN Interface to come out of standby and for communications to begin Frame Relay Configuration This section provides ...

Страница 163: ...ally moves to the T1 Line Coding field 3 Use the arrow keys to highlight T1 Line Coding Press the SPACEBAR to select B8ZS or AMI then press ENTER Table 16 Telco Configuration Information Configuration Information Required by Customer Information Supplied by Service Provider Line Coding B8ZS or AMI Frame Type ESF or D4 Clock Source Loop Timing or Local Timing DS 0s Time Slots Time Slots being used ...

Страница 164: ...hrough the WAN Physical Configuration screen Proceed with the following steps to configure the WAN Interface through Local Management 1 Set the Interface Number that is being used for the WAN connection by typing the same number into the Interface Number field that was input into the Time Slots in the WAN Physical Configuration screen then press ENTER refer to the NOTE above 2 Use the arrow keys t...

Страница 165: ...sing the arrow keys to highlight the WAN SETUP menu item on Setup Menu screen refer to Chapter 6 and pressing ENTER The WAN Physical Configuration screen displays Figure 71 WAN Physical Configuration Screen NOTE Upon saving this screen the interface just configured is assigned to an application port PT in the table on the right hand side of the screen once the device starts communicating with the ...

Страница 166: ...following configuration fields are displayed on the WAN Physical Configuration screen shown in Figure 71 Sync Port Type Displays the Synchronous port electrical interface type The selections toggle between V 35 RS422 RS232 X 21 and None The default setting for this field is V 35 Appendix A lists Cabletron Interface Cable part numbers and connector pinouts Force CTS True Displays the source of the ...

Страница 167: ...setting for this field is 64000 bps The information for this field is normally supplied by the Service Provider Synchronous Interface Configuration Access the WAN Interface Configuration screen from the WAN Physical Configuration screen by using the arrow keys to highlight the WAN Int Config option pressing ENTER The WAN Interface Configuration screen shown in Figure 72 displays Figure 72 Synchron...

Страница 168: ...face The default settings for this field are 8191 for PPP and 4095 for Frame Relay Line Coding Displays the Line Coding for Time Slots associated with this interface This field displays JBZS INV HDLC or None The default setting for this field is NONE Active Protocol Displays the active OSI Layer protocol This field displays NONE FR Frame Relay or PPP Point to Point The default setting is NONE If y...

Страница 169: ...plication ports bridge ports available from the host platform to the WAN If the active protocol is PPP Local Management assigns only one application port per interface number IF If the active protocol is Frame Relay Local Management assigns the available WAN bridge ports from the host platform one per DLCI The quantity of application ports for a Frame Relay network is determined by the quantity of...

Страница 170: ...ight the WAN SETUP option on Setup Menu screen refer to Chapter 6 and pressing ENTER The WAN Physical Configuration screen shown in Figure 71 displays 1 Use the arrow keys to highlight Sync Port Type Press the SPACEBAR to set the Sync Port Type to V 35 RS422 RS232 or X 21 then press ENTER 2 Use the arrow keys to highlight Force CTS Press the SPACEBAR to set to NO then press ENTER 3 Use the arrow k...

Страница 171: ...s ENTER In this example the Physical Configuration screen uses Interface 002 for the WAN connection 2 Use the arrow keys to highlight Line Coding Press the SPACEBAR to select NONE then press ENTER 3 Use the arrow keys to highlight Active Protocol Press the SPACEBAR to select PPP then press ENTER 4 Use the arrow keys to highlight PPP Type Press the SPACEBAR to select BNCP then press ENTER 5 Use the...

Страница 172: ... to highlight the WAN SETUP option on Setup Menu screen refer to Chapter 6 and pressing ENTER The WAN Physical Configuration screen shown in Figure 71 displays 1 Use the arrow keys to highlight Sync Port Type Press the SPACEBAR to set the Sync Port Type to V 35 RS422 RS232 or X 21 then press ENTER 2 Use the arrow keys to highlight Force CTS Press the SPACEBAR to set to NO then press ENTER 3 Use th...

Страница 173: ...ection 2 Use the arrow keys to highlight Line Coding Press the SPACEBAR to select None then press ENTER 3 Use the arrow keys to highlightActive Protocol Press the SPACEBAR to select FR then press ENTER 4 Use the arrow keys to highlight FR LMP Press the SPACEBAR to select T1 617 D then press ENTER 5 Use the arrow keys to highlight CKT_DCP Enable Press the SPACEBAR to select ON if you want data comp...

Страница 174: ...ns describe WAN Physical Configuration screen fields and instructions for setting them The WAN Physical Configuration screen lets you configure the Physical Interface The WAN Physical Configuration screen displays the following information WPIM 1 Displays configuration information for as many as four WPIMs Type Displays the WPIM type BRIM Displays the BRIM slot in which the WPIM resides SAVE WAN I...

Страница 175: ...cording to the instruction of your service provider The default setting for this field is DDS PRI DDS Tx Clock Source Displays the clock source as either Loop or Local The Loop setting allows the WPIM DDS to receive its timing information from the service provider and the Local setting allows the WPIM DDS to receive its timing information internally If DDS CC is chosen for the DDS Line Mode then t...

Страница 176: ...e WAN INT CONFIG command field at the bottom of the Physical Configuration screen then press ENTER The WAN Interface Configuration screen shown in Figure 76 displays Figure 76 WAN Interface Configuration Screen WAN INTERFACE CONFIGURATION RETURN SAVE Interface Number 002 Max Xmit Unit 0 Line Coding NONE Active Protocol NONE 148204 CSX200 Local Management Flash Image Version xx xx xx 001 002 PT IF ...

Страница 177: ...ace The default settings for this field are 8191 for PPP and 4095 for Frame Relay Line Coding Displays the Line Coding for Time Slots associated with this interface This field displays JBZS INV HDLC or NONE The default setting for this field is NONE Active Protocol Displays the active OSI Layer protocol This field displays NONE FR Frame Relay or PPP Point to Point The default setting is NONE If yo...

Страница 178: ...PT Displays the application ports bridge ports available from the host platform to the WAN If the active protocol is PPP Local Management assigns only one application port per interface number IF If the active protocol is Frame Relay Local Management assigns the available WAN bridge ports from the host platform one per DLCI The quantity of application ports for a Frame Relay network is determined ...

Страница 179: ... CSX200s Figure 77 WPIM DDS Interface Configuration for PPP The line configuration information shown in Table 19 must be supplied by the service provider Table 19 Telco Configuration Information Configuration Information Required by User Configuration Information Supplied by Service Provider Clock Source Telco provided or no clock source Line Mode Primary or Clear Channel FR LMP Frame Relay Only T...

Страница 180: ... highlight the WAN INT CONFIG option then press ENTER DDS Interface Configuration This screen is accessed through the WAN Physical Configuration screen Refer to Figure 76 and proceed with the following steps to configure the WAN Interface through Local Management 1 Use the arrow keys to highlight Interface Number Set the WAN connection Interface Number by typing the same number found in the Interf...

Страница 181: ...KT_DCP Enable Press the SPACEBAR to select ON if you want data compression enabled or OFF if you do not then press ENTER If you selected NO LMI Use the arrow keys to highlight Circuit State Press the SPACEBAR to select Active then press ENTER 4 Use the arrow keys to highlight the SAVE command Press ENTER The message SAVE DONE displays and Local Management saves the changes to memory The interface ...

Страница 182: ... item on Setup Menu screen refer to Chapter 6 and pressing ENTER The WAN Physical Configuration screen displays Figure 78 WAN Physical Configuration Screen WAN PHYSICAL CONFIGURATION RETURN Local Management Flash Image Version XX XX XX SAVE WPIM 1 WAN INT CONFIG WPIM 1 Type HDSL BRIM 1 Mode Primary Active Yes Ifaces 003 026 WPIM 1 Line Configuration HDSL Tx Clock Source Loop Timing HDSL Timeslot C...

Страница 183: ...Fields HDSL Tx Clock Source Displays the HDSL Transmit Clock Source The selections for this field toggle between Loop Timing Extracted Line Data and Local Timing Internal Clock The default setting for this field is Loop Timing HDSL Timeslot Configuration Displays the timeslot configuration for the WPIM The selections for this field toggle between Full and Fractional The default setting for this fi...

Страница 184: ...ace Numbers assigned on the WAN Physical Configuration screen Max Xmit Unit User configured field that displays the maximum packet size that can be transmitted on the selected Interface The default values are 8191 for PPP and 4095 for Frame Relay Line Coding Displays the Line Coding for Timeslots associated with this interface This field displays JBZS INV HDLC or None The default setting is None W...

Страница 185: ...ts your needs In a Frame Relay configuration you can assign all WAN application ports to one interface In this example the remaining 30 interfaces would not have WAN application ports available The quantity of application ports for a Frame Relay network is determined by the quantity of DLCIs Data Link Connection Identifiers assigned to that Interface This is determined either manually or by the LM...

Страница 186: ...WAN Configuration Using Local Management 172 CSX200 Family User s Guide ...

Страница 187: ...vigator Screen describes the MIB Navigator screen and explains how to access it MIB Navigator Command Set Overview describes the types of commands available to the MIB Navigator Navigation Commands explains the commands used to navigate through the MIB Navigator Other Commands explains other commands that allow you to access and manage network devices connected to the device running the MIB Naviga...

Страница 188: ...Bs are databases of objects used for managing the device and determining the CSX200 configuration The commands within the MIB Navigator allow you to view and modify a device s objects For help with a specific command type help command MIBNav 090829 MIBNav help Navigation Commands Other Commands snmpget secondIP snmpset snmpnext snmptree traceroute dhcp ppp nat arp bridge circuitmap Welcome to MIB ...

Страница 189: ...ding you use the OID 1 3 6 1 2 1 4 1 or its ASCII name iso org dod internet mgmt mib 2 ip ipForwarding MIB Navigator Command Set Overview The MIB Navigator command set provides the following commands Navigation Commands Navigation commands allow you to access and manage the MIB for the device running the MIB Navigator Some of these commands also provide user community string information The comman...

Страница 190: ...nclosed by optional arguments are enclosed by MIB Navigator command conventions are as follows To abort the output or interrupt a process the escape character is C where indicates the Control key A slash preceding an OID issues that command from the root directory regardless of where you are in the MIB If no slash precedes the OID the command issues from your current MIB location Dot notation 1 1 ...

Страница 191: ... entry shows an example of the command Navigation Commands The following MIB Navigation commands allow you to move from MIB object to MIB object within the MIB tree branch Syntax branch path Description The branch command displays all of the leaves in the MIB tree below a specified path The information displayed includes the pathname the object ASCII name the type of object i e integer counter tim...

Страница 192: ...e valid or the MIB Navigator will not perform the cd operation Options Moves you one subtree above the current one Moves you to the root Example ctron Syntax ctron Description The ctron command allows you to change directories to the Cabletron MIB 1 3 6 1 4 1 52 without keying in the entire path Options Not Applicable Example MIBNav cd iso org dod internet mgmt 051457 MIBNav ctron 051458 ...

Страница 193: ...ommand Options A particular MIB Navigator command Example mib2 Syntax mib2 Description The mib2 command allows you to move directly to the MIB II subtree 1 3 6 1 2 1 without entering the entire path Options Not Applicable Example MIBNav help su Command Format su su Community Name Allows user to change his her community name in order to allow different access to the MIB 051459 MIBNav mib2 051460 ...

Страница 194: ...ged device s MIB Options Not Applicable Example pwd Syntax pwd Description The pwd command displays the full pathname for the directory in which you are currently working The directory is displayed in ASCII format Options Not Applicable Example MIBNav next 1 3 6 1 2 1 1 3 6 1 2 1 1 1 sysDescr String CtronRev X XX XX 051461 MIBNav pwd iso org dod internet mgmt mib 2 051462 ...

Страница 195: ...objects in the MIB If the leaf specified does not exist for the given path MIB Navigator asks for a value The following lists possible value types i nteger number c ounter number g auge number t ime ticks number o p aque value with quotation marks s tring value with quotation marks o id OID number with dotted punctuation a ddress IP address in DDN format m ac MAC address in hexadecimal format n ul...

Страница 196: ...you either read only read write or super user access to that device s MIBs depending on the level of security access assigned the password through the SNMP Community Names screen Refer to the SNMP Community Names Screen section in Chapter 6 for more information about community names Options Not Applicable Example MIBNav set 1 3 6 1 4 1 52 1 6 4 7 122 1 1 1 Type i nteger a ddress c ounter g auge o ...

Страница 197: ...nd displays your community string and access privileges to the MIB When using the whoami command one of these three access levels displays read only read write and super user Options Not Applicable Example MIBNav tree 1 3 6 1 2 1 1 1 1 3 6 1 2 1 1 2 1 3 6 1 2 1 1 3 1 3 6 1 2 1 1 4 sysDescr sysObjectId sysUpTime sysContact STRING OBJECT ID TIME TICKS STRING EMRev X X X X 1 3 6 1 4 1 52 8098654 AlZw...

Страница 198: ... to search the MIB tree for a specific character string All leafs in the MIB tree are searched Options m Displays on the terminal one screenful at a time i Ignores case when searching for string Example MIBNav grep i cabletron 1 3 6 1 2 1 1 1 sysDescr String Cabletron MMAC Plus Revision 01_01_01 051457 ...

Страница 199: ... p Lists all the entries along with the path name of the leaf object d Lists only the directory entries in the tree m Displays one screenful at a time Options Not Applicable Example get Syntax get PATH Description Returns the value of a managed object This is only valid for leaf entries in the MIB tree or managed objects in the MIB Options Not Applicable Example MIBNav cd iso org dod internet dir ...

Страница 200: ...played The display options are 1 Displays the OID value along with the ASCII name of the leaf object p Lists all the entries along with the path name of the leaf object d Lists only the directory entries in the tree m Displays one screenful at a time Options Not Applicable Example MIBNav cd iso org dod internet ls lp mgmt private 1 3 6 1 2 iso org dod internet mgmt ls lp 1 3 6 1 4 iso org dod inte...

Страница 201: ...a static route Each ARP cache entry lists the network interface that the device is connected to the device s network address or IP address the device s physical address or MAC address and the media type of connection to the device Media types are displayed as numbers which stand for the following states 1 Other 2 Invalid entry cannot ping device timed out etc 3 Dynamic route entry 4 Static route e...

Страница 202: ...face Options Not Applicable Example MIBNav arp a Interface SonicInt SonicInt SonicInt SonicInt Network Address 122 144 40 111 122 144 48 109 122 144 52 68 122 144 21 43 Physical Address 00 00 0e 12 3c 04 00 00 0e f3 3d 14 00 00 0e 12 3c 04 00 00 0e 03 1d 3c Media Type 3 dynamic 3 dynamic 3 dynamic 3 dynamic MIBNav arp d 1 122 144 52 68 MIBNav arp s 1 22 44 2 3 00 00 0e 03 1d 3c 051467 MIBNav defro...

Страница 203: ...use it dhcp IFNUM GATEWAY DNSADDRESS WINSADDRESS DOMAINNAME The IFNUM is the Ethernet port number The four configuration parameters can be passed to the hosts clients These are the IP address of their default gateway the IP address of their domain name server the IP address of their WINS server and their domain name dhcp IFNUM NETADDRESS NETMASK LOWADDRESS HIGHADDRESS LEASE Allows the user to spec...

Страница 204: ...dmin Oper ServerIP Active Free 1 Enabled Enabled 192 168 254 254 2 250 IF Default Gateway DNS Address WINS Address Domain Name 1 192 168 254 254 134 141 72 219 134 141 70 34 ctron com IF Net Address Net Mask Low Address High Address Lease 1 192 168 254 0 255 255 255 0 192 168 254 2 192 168 254 253 2880 DHCP Client Status IF MAC Address Net Address Time Left Name 1 1 00 a0 c9 39 5e 40 192 168 254 2...

Страница 205: ...e disable Enables or disables the NAT feature nat config PRIVATEIFNUM PUBLICIFNUM Selects the local and public interfaces nat proxy add ENTRY_NUMBER PRIVATEIP PUBLICPORT LOCALPORT PROTOCOL Adds a proxy server nat proxy delete ENTRY_NUMBER Deletes a proxy server Example nat Admin Enabled Oper Enabled Local Interface 1 Internet Interface 2 MIBNav nat NAT Status Local IP Local mask Internet IP Intern...

Страница 206: ...g request to check the status alive not alive of a device at a specified IP address Options Not Applicable Example MIBNav netstat i Interface Description 1 ethernet csmacd 2 ethernet csmacd 3 ethernet csmacd 4 ethernet csmacd MTU 1514 1514 1514 1514 MAC Addr 0x00 0x00 0x1d 0x07 0x50 0x0e 0x00 0x00 0x1d 0x07 0x50 0x0f 0x00 0x00 0x1d 0x07 0x50 0x10 0x00 0x00 0x1d 0x07 0x50 0x11 Admin up up up up MIB...

Страница 207: ...mmunity name OID Description The snmpget command enables you to query another SNMP device to obtain a value for a specified object This command requires the appropriate community string and object id Options Not Applicable Example MIBNav snmpbranch 2 4 8 1 public 1 3 6 2 1 1 1 3 6 1 2 1 1 1 1 3 6 1 2 1 1 2 1 3 6 1 2 1 1 3 1 3 6 1 2 1 1 4 sysDescr sysObjectId sysUpTime sysContact STRING OBJECT ID T...

Страница 208: ... defining a new leaf set MIB Navigator asks for a value The following lists possible value types i nteger number c ounter number g auge number t ime ticks number o p aque value with quotation marks s tring value with quotation marks o id OID number with dotted punctuation a ddress IP address in DDN format m ac MAC address in hexadecimal format n ull no type Options Not Applicable Example MIBNav sn...

Страница 209: ...to a specified IP address and provides a display of all next hop routers in the path to the device If the device is not reached the command displays all next hop routers to the point of failure Options Not Applicable Example MIBNav snmptree 122 144 89 10 public 1 3 6 1 2 1 1 1 1 3 6 1 2 1 1 2 1 3 6 1 2 1 1 3 1 3 6 1 2 1 1 4 sysDescr sysObjectId sysUpTime sysContact STRING OBJECT ID TIME TICKS STRI...

Страница 210: ...mple circuitmap Syntax circuitmap a PROTOCOL circuitmap f PROTOCOL circuitmap d PROTOCOL INTERFACENUM NETADDRESS MACADDRESS circuitmap s PROTOCOL INTERFACENUM NETADDRESS MACADDRESS CIRCUIT Description Allows the user to view and or modify a Protocol s Circuit Map i e address to circuit table for the device The a option shows the user the current HostMap information for the device The d option allo...

Страница 211: ...ows you to perform a soft reset of the device The user is queried to confirm the reset command to insure against unwanted resets Note The MIB Navigator s connection to the device is terminated upon execution of this command Options Not Applicable Node 00 00 1d 23 a1 5b 00 00 1d 23 a1 5b Circuit ID 203 102 Interface 2 2 Network 5A4C212B 00000172 MIBNav circuitmap s IPX 2 00000172 00 00 1d 02 d1 7a ...

Страница 212: ...the destination secondIP Syntax secondIP add IPADDRESS INTERFACENUM secondIP delete IPADDRESS INTERFACENUM Description Allows you to add or delete secondary IP addresses on the interface Options Not Applicable show Syntax show PROTOCOL TABLE Description The show command displays information concerning various components of the device Protocols currently supported are IP and IPX Components of those...

Страница 213: ...that device by supplying an appropriate community string and the values of the object identifier Options Not Applicable Example Special Commands done quit exit Syntax done Description These commands enable you to exit from the MIB Navigator and return to the Main Menu screen Options Not Applicable Example MIBNav snmpnext 132 111 22 33 public 1 3 6 1 2 1 1 2 1 3 6 1 2 1 1 1 3 sysUpTime Time Ticks 5...

Страница 214: ...MIB Navigator 200 CSX200 Family User s Guide ...

Страница 215: ...difficulty installing and configuring the CSX200 take the following steps Review your CSX200 QuickSTART Guide to insure proper installation Check that all cables and connectors have been attached properly Verify that power has been attached Figure 82 CSX200 Front Panel LEDs Table 20 CSX200 Hardware LED States LED Color State Power PWR OFF Power Off GREEN Power is on Processor CPU OFF Power Off RED...

Страница 216: ...RMAL link exists Table 22 CSX200 WAN LED States LED Color State Transmit XMT OFF Not transmitting traffic GREEN flashing Transmitting traffic Receive RCV OFF Not receiving traffic AMBER flashing Receiving traffic Link LNK OFF WPIM not configured GREEN NORMAL link exists AMBER Link exists in STANDBY RED WPIM configured link does not exist Test OFF NORMAL AMBER flashing Power up diagnostics Loopback...

Страница 217: ...S HDSL OFF Port disabled or in loopback mode RED Loop 1 not synchronized in T1 and Fractional T1 mode GREEN Loop 1 synchronized Table 24 CSX200 WAN LED States for STS 2 WPIM Color State T1 DI and E1 OFF Normal or port disabled AMBER Yellow alarm DDS OFF Normal or port disabled SYNC OFF Inactive or disabled GREEN Clear to send CTS HDSL OFF Port disabled in Loopback mode or Fractional T1 mode RED Lo...

Страница 218: ...Processor CPU LED is RED The processor has detected a fault condition Contact Cabletron Systems Technical Support refer to Getting Help in Chapter 1 Troubleshooting the LAN Collision CLN LED is RED Collisions are normal in an Ethernet network however increased collisions may indicate that the network is out of specification the propagation delay between two nodes on the network exceeds 25 6 µs Lin...

Страница 219: ...o ensure that the correct cable is being used Check to ensure that the cable has continuity and is fully installed Check with the WAN Service Provider to ensure that the circuit has been configured by them and is active Link LNK LED is AMBER The port is in Standby mode Check with the Network Administrator to see if management placed the port in Standby mode Ensure that the protocol that you want t...

Страница 220: ... Use QuickSET or Local Management to make sure that the WAN interface on the Local device is configured correctly Use QuickSET or Local Management to make sure that the WAN interface on the Remote device is configured correctly Status 1 STS1 LED is RED WPIM T1 WPIM E1 or WPIM DI Installed in CSX200 is in RED Alarm Mode A RED alarm indicates that the WAN connection is not receiving proper framing o...

Страница 221: ...y reduce the maximum distance usable between the Remote and Local devices Wire gauge has an impact on the distance which can be supported as well The maximum distance is 12 000 feet using 24 AWG wiring Verify the gauge and condition of the wire A trained line technician may be necessary to determine this Verify that the distance between the Remote and Local units is less than 12 000 Feet Status 1 ...

Страница 222: ...ocal Management to make sure that the WAN interface on the Local device is configured correctly WPIM HDSL Installed in CSX200 The port is in Fractional T1 mode and is operating normally If it is not the port is disabled or has been placed into Loopback Test mode Use QuickSET or Local Management to make sure that the WAN interface on the Local device is configured correctly Use QuickSET or Local Ma...

Страница 223: ... less than 12 000 Feet Status 2 STS2 LED is AMBER WPIM T1 WPIM E1 or WPIM DI Installed in CSX200 The device is in Yellow alarm mode A Yellow alarm indicates that the CSX200 is receiving proper framing from the Telco but the Telco is not receiving proper framing Check for faulty or incorrect cabling between Telco and CSX200 Request that the Telco verify the configuration and operation of the circui...

Страница 224: ...et the Ethernet LAN IP address and Subnet Mask enabled IP routing saved the Ethernet configuration changes and rebooted the router for the new IP address to take effect Check that your LAN cable is wired correctly and each end securely plugged in Make sure that an IP route exists between your local PC and the CSX200 The PC and CSX200 must be on the same IP subnetwork or the CSX200 must be reachabl...

Страница 225: ...as well as the associated Subnet Mask If the remote router WAN IP address and Subnet Mask are required check that they have been specified correctly Check that if required the source and remote WAN IP addresses are on the subnetwork Check that you have seeded the routing table if RIP is not allowed to flow on the WAN link Be sure to reboot if you have made any IP address control or protocol option...

Страница 226: ...Troubleshooting 212 CSX200 Family User s Guide ...

Страница 227: ...tion for ordering a standard 20 foot cable or a specified length of cable The number 20 followed by the part number denotes the standard 20 foot cable The letter L denotes the specified length required in feet or meters For example 9372095 3 denotes a 3 foot cable 9372095 3M denotes a 3 meter cable Table 25 T 1 Interface Cable Part Numbers Connector Type Part Number RJ48C 9372094 Table 26 T 1 Conn...

Страница 228: ...network pin assignments Table 27 DTE Pin Assignments Pin Signal 1 Receive Ring 2 Receive Tip 3 Not Used 4 Transmit Ring 5 Transmit Tip 6 Not Used 7 Shield Ground 8 Shield Ground Table 28 Network Pin Assignments Pin Signal 1 Receive Ring 2 Receive Tip 3 Not Used 4 Transmit Ring 5 Transmit Tip 6 Not Used 7 Not Used 8 Not Used ...

Страница 229: ...terface cables Table 29 provides the cable and interface types electrical types and part numbers for the WPIM SY Table 29 WPIM SY Interface Cables Cable and Interface Type Electrical Type Part Number RS449 RS422 9380120 V 35 V 35 9380121 RS232 RS232 9380122 X 21 X 21 9380123 RS530 RS422 9380124 RS530 ALT A RS422 9380125 RS530A RS422 9380126 RS530A ALT A RS422 9380127 ...

Страница 230: ...NAME PIN PIN NAME DIRECT TO MNEMONIC BA DCE Transmit Data A 2 A 4 Send Data A DCE SD Transmit Data B 14 22 Send Data B BB DTE Receive Data A 3 B 6 Receive Data A DTE RD Receive Data B 16 24 Receive Data B CB Clear to Send A 5 C 9 Clear to Send A CS Clear to Send B 13 27 Clear to Send B CA DCE Request to Send A 4 D 7 Request to Send A DCE RS Request to Send B 19 25 Request to Send B DB DTE Transmit...

Страница 231: ... Connector Number Cable Assembly Description Connector Type 1 EIA 530A ALT A to V 35 Sub DB 26 pin male 2 M Series 34 pin male Table 33 V 35 Interface Cable Pin Assignment Connector 1 EIA 530A ALT A PAIR Connector 2 V 35 MNEMONIC DIRECT TO NAME PIN PIN NAME DIRECT TO MNEMONIC BA DCE Transmit Data A 2 A P Transmit Data A DCE 103 Transmit Data B 14 S Transmit Data B BB DTE Receive Data A 3 B R Recei...

Страница 232: ...3 Transmit Signal Timing B 11 W Transmitter Signal Timing B CE DTE Ring Indicator 22 J Calling Indicator DTE 125 TM Test Mode 25 NN Test Indicator 142 CC DCE Ready 6 E Data Set Ready 107 CD DCE DTE Ready 20 H Data Terminal Ready DCE 108 RL Remote Loopback 21 N Loopback Maintenance 140 LL Local Loopback 18 L Local Loopback 141 SHIELD 1 DRAIN AC Signal Common 23 B Signal Common 102 AB Signal Common ...

Страница 233: ...DCE Transmit Data 2 2 Transmit Data DCE BA BB DTE Receive Data 3 3 Receive Data DTE BB CB Clear to Send 5 5 Clear to Send CB CA DCE Request to Send 4 4 Request to Send DCE CA DB DTE Transmit Signal Timing 15 15 Transmitter Signal Timing DTE DB DD Receive Signal Timing 17 17 Receiver Signal Timing DD DA DCE Transmit Signal Timing 24 24 Transmitter Signal Timing DCE DA CE DTE Ring Indicator 22 22 Ri...

Страница 234: ...onnector 2 X 21 MNEMONIC DIRECT TO NAME PIN PIN NAME DIRECT TO MNEMONIC BA DCE Transmit Data A 2 A 2 Transmit A DCE T Transmit Data B 14 9 Transmit B BB DTE Receive Data A 3 B 4 Receive A DTE R Receive Data B 16 11 Receive B CB DTE Clear to Send A 5 C 5 Indication A DTE I Clear to Send B 13 12 Indication B CA DCE Request to Send A 4 D 3 Control A DCE C Request to Send B 19 10 Control B DB DTE Tran...

Страница 235: ... male 1 EIA 530A ALT A to EIA 530 ALT A Sub DB 26 pin male 2 Sub DB26 pin male 1 EIA 530A ALT A to EIA 530A Sub DB 26 pin male 2 DB 25 pin male 1 EIA 530A ALT A to EIA 530A ALT A Sub DB 26 pin male 2 Sub DB 26 pin male Table 39 EIA 530 EIA 530 ALT A EIA 530A and EIA 530A ALT A Interface Cable Pin Assignments Connector 1 EIA 530A ALT A PAIR Connector 2 EIA 530 MNEMONIC DIRECT TO NAME PIN PIN NAME D...

Страница 236: ...Timing A 24 G 24 Transmit Signal Timing A DCE DA Transmit Signal Timing B 11 11 Transmit Signal Timing B RL Remote Loopback 21 21 Remote Loopback RL LL Local Loopback 18 18 Local Loopback LL TM DTE Test Mode 25 25 Test Mode DTE TM CC DCE Ready 6 6 DCE Ready CC CD DCE DTE Ready 20 20 DTE Ready DCE CD SHIELD 1 DRAIN AC Signal Common 23 7 Signal Common AC aAC Signal Common 23 23 Signal Common AC AB S...

Страница 237: ... Data Service DDS circuit Table 40 provides cable and interface type and part number information for the WPIM DDS interface cable and Table 41 provides network Pin Assignment information for the DDS interface cable Table 40 DDS Interface Cable Part Number Cable and Interface Type Part Number DDS 9360119 Table 41 Network Pinout Assignments PIN SIGNAL 1 Transmit Ring 2 Transmit Tip 3 Not Used 4 Not ...

Страница 238: ...number cable and interface type connector type and part number information Table 43 provides WPIM E1 network interface cable pin assignments Table 42 WPIM E1 Connector Information Connector Number Cable and Interface Type Connector Type Part Number 1 E1 RJ45 9372095 2 Table 43 Network Interface Pin Signal 1 Receive Ring 2 Receive Tip 3 Shield Ground 4 Transmit Ring 5 Transmit Tip 6 Shield Ground 7...

Страница 239: ...IM E1 RJ45 network interface cable pin assignments Table 44 DTE Interface Pin Signal 1 Receive Ring 2 Receive Tip 3 Shield Ground 4 Transmit Ring 5 Transmit Tip 6 Shield Ground 7 Not Used 8 Not Used Table 45 Network Interface Pin Signal 1 Receive Ring 2 Receive Tip 3 Not Used 4 Transmit Ring 5 Transmit Tip 6 Not Used 7 Not Used 8 Not Used ...

Страница 240: ...pe and part number information for the WPIM DI interface Table 47 provides the WPIM DI network interface cable pin assignments Table 46 WPIM DI Connector Information Connector Number Cable Assembly Description Cable and Interface Type Connector Type Part Number 1 Network DI RJ48 9372094 2 Drop and Insert Table 47 WPIM DI Network Pin Signal 1 Receive Ring 2 Receive Tip 3 AC Coupled Ground 4 Transmi...

Страница 241: ...des pin assignments for the RJ 45 network interface connector Table 48 WPIM DI Drop and Insert Pin Signal 1 Transmit Ring 2 Transmit Tip 3 AC Coupled Ground 4 Receive Ring 5 Receive Tip 6 AC Coupled Ground 7 AC Coupled Ground 8 AC Coupled Ground Table 49 WPIM HDSL Network Interface Cable Pin Assignments Pin Signal 1 HDSL Loop 1 Ring1 2 HDSL Loop 1 Tip1 3 Not Used 4 HDSL Loop 2 Ring2 5 HDSL Loop 2 ...

Страница 242: ...WPIM Cable Specifications 228 CSX200 Family User s Guide ...

Страница 243: ...CSX201 One T 1 Interface CSX202 One Synchronous Interface CSX203 One DDS Interface LAN Interface 12 Ethernet ports 10BASE T Type RJ45 Other Interfaces AC Power Connector Processor Intel i960 Width 17 in 43 6 cm Height 2 8 in 7 2 cm Depth 8 5 in 21 6 cm Weight 4 8 lbs 10 56 kg Power Supply Built in power supply Voltage 100 125 Vac 1 0 A 200 240 Vac 0 5 A Frequency 50 60 Hz Power Consumption 70 Watt...

Страница 244: ...de regulatory compliance standards for the WPIM TI WPIM SY WPIM DDS WPIM E1 WPIM DI WPIM S T and the WPIM HDSL Cabletron Systems reserves the right to change these specifications at any time without notice WPIM T1 This section describes the environmental specifications and safety and approval requirements for the WPIM T1 Safety This unit meets the safety requirements of UL 1950 and CSA C22 2 No 95...

Страница 245: ...I requirements of FCC Part 15 EN 55022 EN 50082 1 AS NZS 3548 89 336 EEC CSA108 8 and VCCI V 3 TELECOM 91 263 EEC and NET 2 WPIM DDS This section describes the environmental specifications and safety and approval requirements for the WPIM DDS Safety This unit meets the safety requirements of UL1950 and CSA C22 2 No 950 EMC This unit meets the EMC requirements of FCC Part 15 CSA108 8 and VCCI V 3 N...

Страница 246: ...oval requirements for the WPIM DI Safety This unit meets the safety requirements of UL1950 and CSA C22 2 No 950 Electromagnetic Compatibility EMC This unit meets the EMI requirements of FCC Part 15 VCCI V 3 and CSA108 8 TELECOM The WPIM DI meets FCC Part 68 and CS 03 WPIM HDSL This section describes the environmental specifications and safety and approval requirements for the WPIM HDSL Safety This...

Страница 247: ...f your equipment or the telephone line is the source of the trouble If your equipment needs repair it should not be reconnected until it is repaired 4 The CSU DSU has been designed to prevent harm to the T1 and DDS network If the telephone company finds that the equipment is exceeding tolerable parameters the telephone company can temporarily disconnect service although they will attempt to give a...

Страница 248: ...our right to file a complaint with the FCC 7 See the attached Affidavit on the following page The Affidavit must be completed by the installer 8 In the event of equipment malfunction all repairs should be performed by our Company or an authorized agent It is the responsibility of the users requiring service to report the need for service to our Company or to one of our authorized agents Refer to t...

Страница 249: ...equipment to be connected complies with Part 68 of the Commission s rules except for the encoded analog content and billing protection specifications With respect to encoded analog content and billing protection I attest that all operations associated with the establishment maintenance and adjustment of the digital CPE with respect to encoded analog content and encoded billing information continuo...

Страница 250: ...thorized representative using training materials and instructions provided by the manufacturer grantee of the equipment used to encode analog signals or c An independent training course e g trade school or technical institution recognized by the manufacturer grantee of the equipment used to encode analog signals or d In lieu of the proceeding training requirements the operator s maintainer s is ar...

Страница 251: ... on the adjacent segment is passed across the bridge A bridge operates at Layer 2 of the OSI reference model B Channel In ISDN a full duplex 64 Kbps channel used for sending user data BRI Basic Rate Interface The ISDN interface providing two 64 Kbps B channels for voice data and video transmission and one 16 Kbps D channel for signaling and data transmission CHAP Challenge Handshake Authentication...

Страница 252: ...l A combination of techniques used to protect one network from unknown networks and users on the outside Firewalls can filter or block traffic and act as a management and network security point where all traffic can be scrutinized Frame A group of data generated by Data Link Layer operation HDSL High bit rate Digital Subscriber Line A technology to put two way T1 on a normal unshielded bridged but...

Страница 253: ...ased on considerations such as time delay cost etc Modem Modulator Demodulator A device that converts digital signals to from analog signals for transmission over analog communications lines Multi Link Protocol A protocol defined in RFC 1717 that defines a way to perform inverse multiplexing on the TCP IP point to point protocol PPP i e the ability to use multiple serial WAN channels for transferr...

Страница 254: ...rface Q 931 ISDN specification for call set up and signaling on ISDN connections RFC Request for Comment Documentation describing Internet communications specifications e g Telnet TFTP Often these RFCs are used to achieve multi vendor interoperability during implementation RJ11 Standard 4 wire connectors for telephone lines RJ45 Standard 8 wire connectors used for ISDN lines and 10 BASE T connecti...

Страница 255: ...network TCP IP Transmission Control Protocol Internet Protocol Refers to a set of internetworking protocols developed by the U S Department of Defense that define a two level layered approach for interoperability TCP provides a connection oriented Transport layer ensuring end to end reliability in data transmission IP provides for Network layer connectivity using connectionless datagrams Telco Clo...

Страница 256: ...rvers to clients under IPX to verify that clients are still logged on Wide Area Network A communications network that is geographically dispersed thus requiring links provided by communications carriers Workstation Computer or terminal used by the systems administration or user ...

Страница 257: ...e Network Broadcast Type on a Port 124 Configuring the UDP Broadcast Redirector 122 D Daughter Board 8 Default Gateway 102 104 Default Interface 102 105 Domain Name Server 122 Dynamic Host Configuration Protocol DHCP 10 E EMC 230 231 232 EMI 231 232 Enabling Forwarding on a Port IP 121 130 Enabling Proxy ARP on a Port 123 Enabling Routing Services on a Port IP 121 130 Enabling the RIP Routing Prot...

Страница 258: ...lity Monitoring LQM 12 Local Management exiting screens 95 navigating menu screens 95 selecting menu screen items 95 WAN Interface Configuration screen 140 154 162 163 WAN Physical Configuration screen 136 151 152 153 156 158 160 166 Local Management Screen Fields command fields 92 display fields 92 event message field 91 input fields 92 selection fields 92 M Management Agent 90 MIB description 17...

Страница 259: ...3 Telnet 94 Time 122 Trivial File Transfer 122 Troubleshooting 201 bridging 210 power 204 software 210 TCP IP routing 211 U UDP Bootstrap Protocol Client 122 Bootstrap Protocol Server 122 Configuring the Broadcast Redirector 122 Domain Name Server 122 Host Name Server 122 Netbios Datagram Server 122 Netbios Name Server 122 Sunrpc NIS 122 TACACS Database Service 122 Time 122 Trivial File Transfer 1...

Страница 260: ...Index 246 CSX200 Family User s Guide ...

Страница 261: ... Anwendung des Geraetes geeignet und der zum Benuetzen im Lande der Anwendung anerkannt ist SPANISH El cable principal de la red eléctrica utilizado con este equipo debe tener 2 conductores y 1 toma de tierra con un mínimo de 0 75 mm2 cada uno y necesita tener un aparato de acoplamiento standard IEC en un extremo y un enchufe para el cable principal de la red eléctrica en el otro extremo lo cual s...

Отзывы: