background image

www.cablematters.com 

5


Dual-Input USB-

C™ Docking Station with Dual Video


3.3 Connecting the Docking Station


1) Connect the Dock to an AC power outlet or the Dock will not operate 
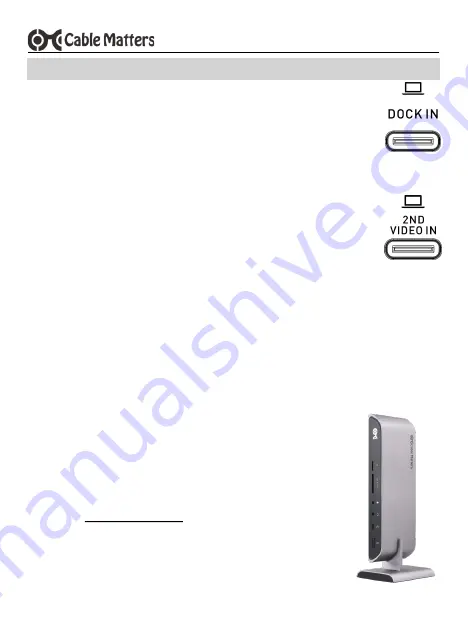
2) Connect one of the USB-C cables from the package to the 

DOCK IN

 host port and a USB-C 

port on your computer. (Note: The DOCK IN USB-C host port must be connected to support 
HDMI Video 1, data, charging, and Ethernet.) 

3) Depress the On/Off button to turn on the Dock 
4) Wait while any additional drivers are automatically installed 
5) Connect one of the USB-C cables from the package to the 

2ND VIDEO IN

 host port and 

a USB-C port on your computer. This USB-C port must be connected to support a 2nd 
display with HDMI. 


Important Notes 

• 

Place the Dock in the stand for a vertical orientation. The stand is optional. 

• 

DOCK IN

 USB-C host port will charge a laptop up to 80 watts while in use for a laptop with a 

power delivery equipped USB-C port  

• 

Laptops requiring more than 80 watts will charge at a slower rate. Some laptop models may 
not charge over USB-C and require an AC power adapter. 


Troubleshooting Tips 

• 

Unplug and re-plug the USB-C host cables to the Dock (use only the USB-C 
cables that came with the Dock) 

• 

Reboot the computer and check that the Dock has AC power 

• 

Check that the power status LED is lit on the front of the Dock 

• 

Check with the computer maker for updated BIOS and Thunderbolt 3 drivers


• 

Test the USB-C cables with different equipment


• 

Locate troubleshooting information at:  
 

kb.cablematters.com

 (search for 201073)


This Dual-Input Docking Station is designed to connect two displays with 
HDMI. 

BOTH

 USB-C ports must be connected to your computer to support 

two displays. The Dock supports a single display and all the other ports 
(except Video 2) over a single USB-C cable. 

Содержание 201073

Страница 1: ...SB C Docking Station with Dual Video and 80W Power Delivery Model 201073 User Manual Locate instructions and driver information at www cablematters com dl 201073 Locate troubleshooting information at...

Страница 2: ...NS 3 3 1 Installation Checklist 3 2 Panel Diagrams 4 3 3 Connecting the Docking Station 5 3 4 Dynamic Bandwidth Switch 6 3 5 Connecting Displays with HDMI 7 3 6 Connecting to an Ethernet Network 8 3 7...

Страница 3: ...property of their respective owners Chrome OS is a trademark of Google LLC macOS is a trademark of Apple Inc registered in the U S and other countries Windows is a registered trademark of Microsoft Co...

Страница 4: ...speaker Heat dissipating metallic housing with a power saving On Off switch Optional stand to place the Dock in a vertical orientation Computer Two USB C or Thunderbolt 3 equipped ports for 2 displays...

Страница 5: ...our laptop must support power delivery over USB C for charging up to 80 watts External Display Requirements Check if your computer supports DP Alternate Mode over USB C Switch the bandwidth configurat...

Страница 6: ...to 10 Gbps data transfer and charging port up to 5V 2 1A 8 Power in port 24VDC 5A 9 2ND VIDEO IN USB C host port to add an HDMI display connected to the Video 2 port 10 HDMI Video 2 port controlled by...

Страница 7: ...ional DOCK IN USB C host port will charge a laptop up to 80 watts while in use for a laptop with a power delivery equipped USB C port Laptops requiring more than 80 watts will charge at a slower rate...

Страница 8: ...rted USB 3 1 Gen 2 10 Gbps data transfer rate is supported on the front panel USB C and USB A ports USB 3 0 5 Gbps data transfer rate is supported on the rear panel ports UHS II SD card data transfer...

Страница 9: ...Adjust Resolution AUDIO Search Sound Click on the display name Set Default OK macOS Duplicate or Extend your screen VIDEO Apple menu System Preferences click Displays select Arrangement tab AUDIO Appl...

Страница 10: ...are lit Test the patch cable with a different device or try another Ethernet port 3 7 Connecting a USB A Peripheral Device FRONT PANEL 2 1A charging 10Gbps REAR PANEL data only 1 Connect a USB 2 0 or...

Страница 11: ...B C video adapters or Thunderbolt 3 devices 3 9 Connecting an SD Memory Card microSD Card slot supports UHS I microSD SDHC SDXC cards SD Card slot supports UHS I and UHS II SD SDHC SDXC cards A microS...

Страница 12: ...port This port also supports a headset mic combo Note Configure the audio settings from your computer Windows Search Sound Click on the display name Set Default OK macOS Apple menu System Preferences...

Страница 13: ...t port must be connected to a USB C port on the computer to support a 2nd display Select the HDMI input from the display menu Adjust the audio level from the computer and the connected display menu So...

Страница 14: ...up to 104 Mbps SD Memory Card Slot SD SDHC SDXC UHS I UHS II data transfer rate up to 312 Mbps USB A 3 0 rear panel 2x USB A 3 0 with data transfer up to 5 Gbps no charging USB A 2 0 USB A 2 0 with d...

Страница 15: ...rectors employees or agents be liable for any damages whether direct or indirect special punitive incidental consequential or otherwise loss of profits loss of data loss of business or any pecuniary l...

Страница 16: ...Input USB C Docking Station with Dual Video View compatible products at www cablematters com Certified USB C Gen 2 Video Data 100W Charging Cable Model 201025 100W HDMI to DVI Cable Model 303002 HDMI...

Отзывы: